

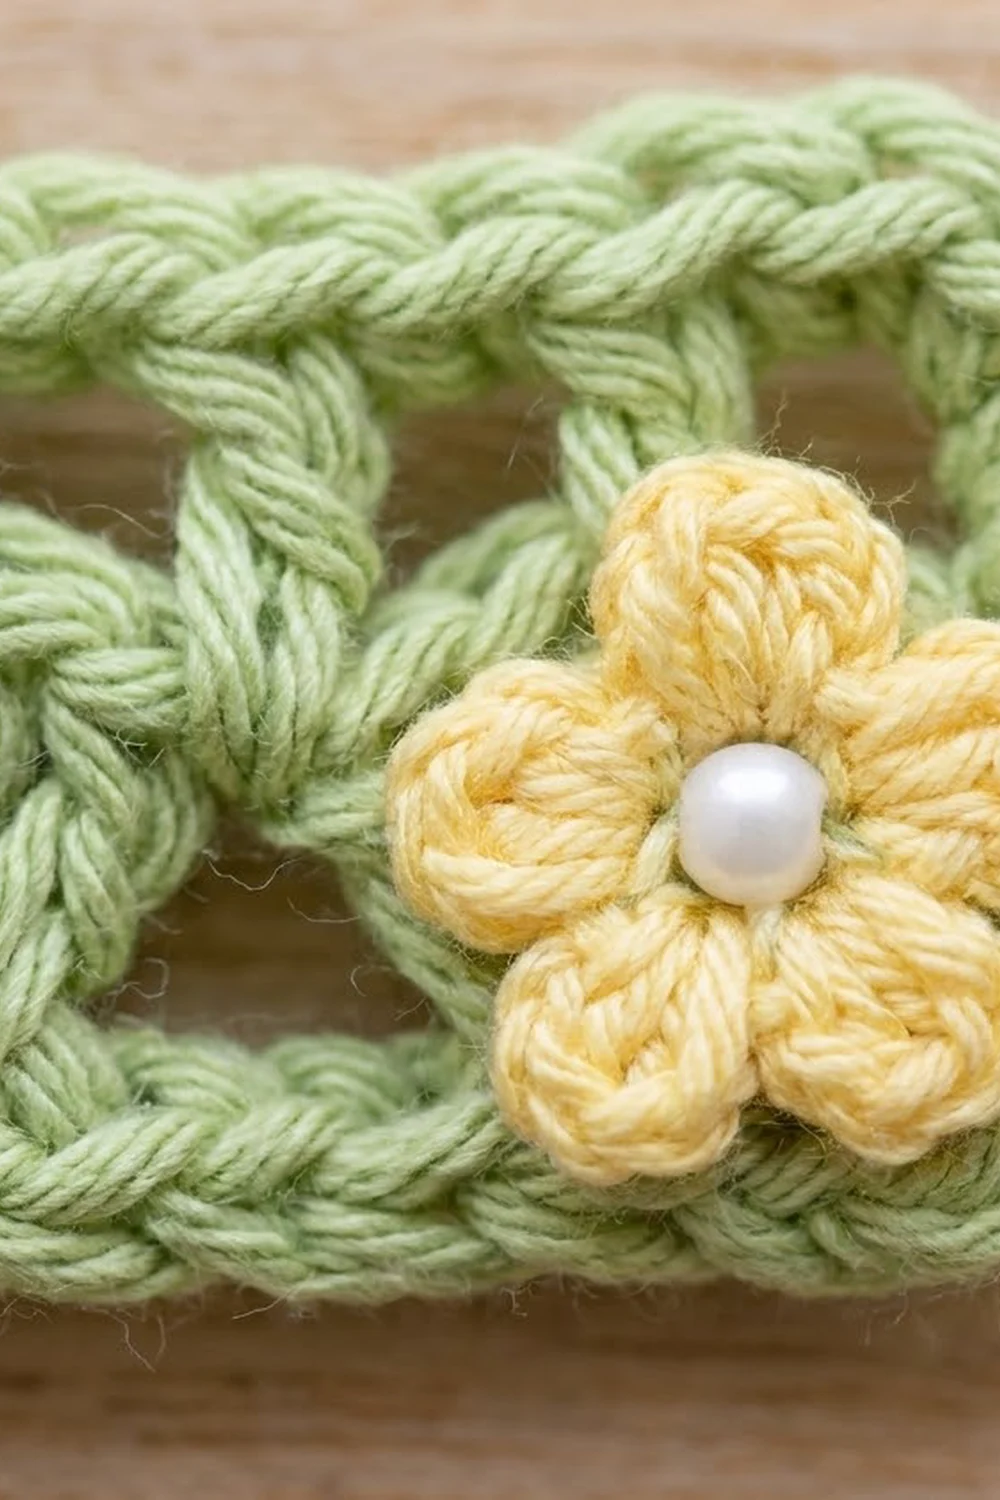
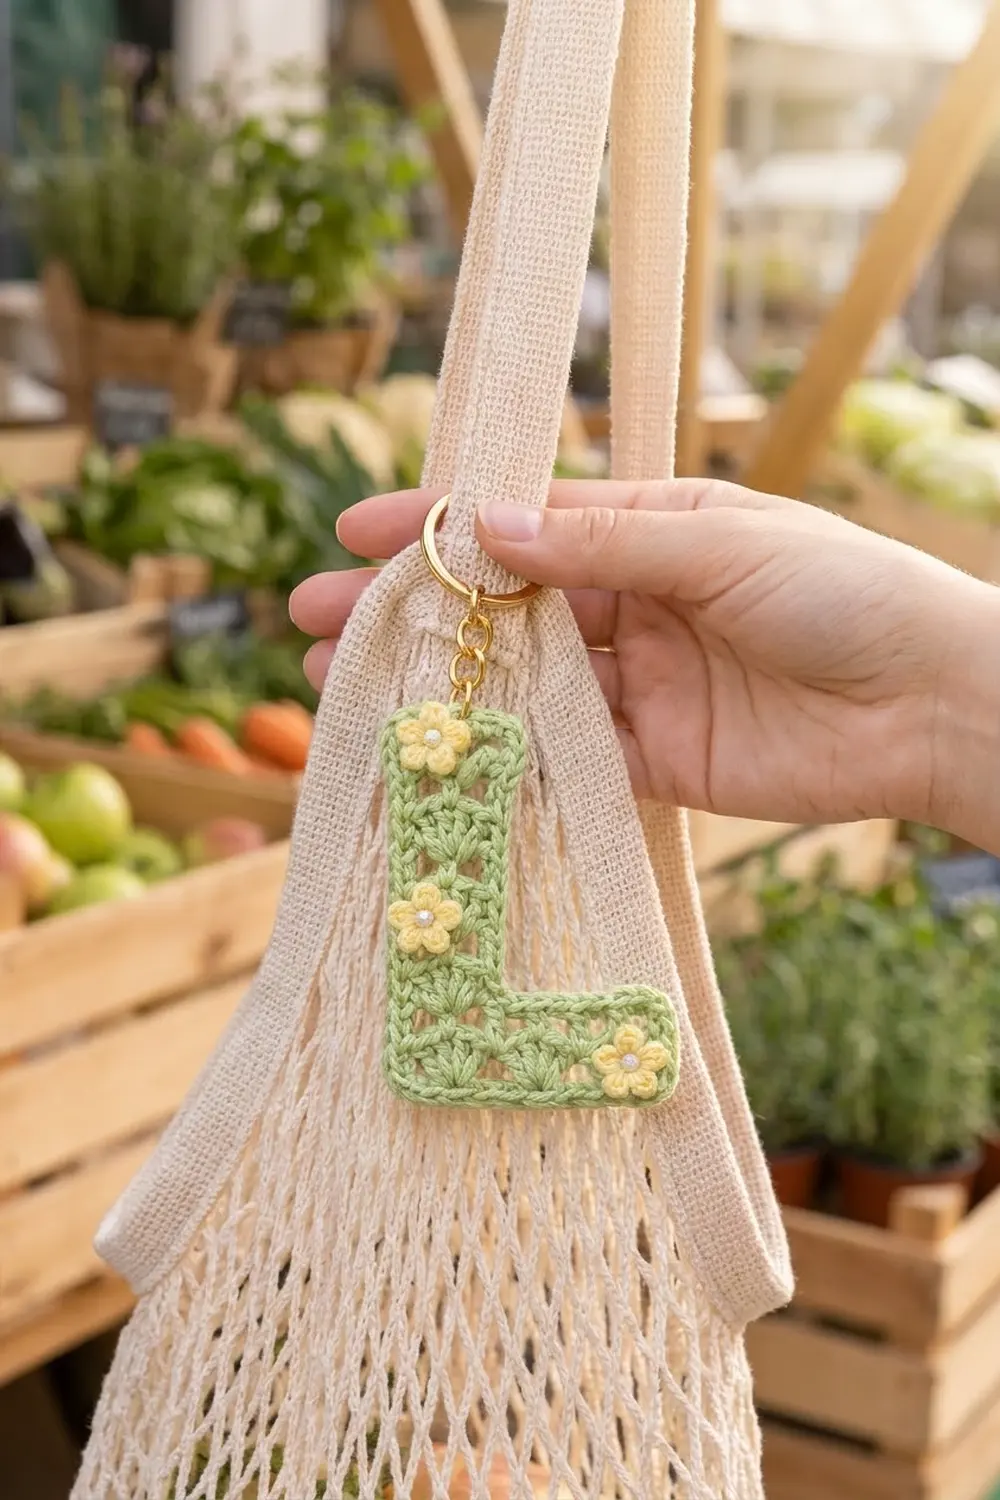
This little letter L is a quick, pretty keychain with a lacy look. Fan-shaped shells stack up the stem and run along the foot. Chain arcs above each fan leave tiny triangular windows. The result is light and airy, but the letter shape stays crisp.
The main piece is soft sage green, with a neat single crochet edge and a slip stitch rim. Three small butter-yellow flowers with white bead centers add a cottage-garden touch. A gold split ring and short chain turn it into a bag charm or key fob.
This pattern uses US crochet terms. The finished letter measures about 3.4 in (8.6 cm) wide and 4.6 in (11.7 cm) tall, not counting the hardware.
You work the foot first in rows. Then you keep going straight up the stem from the end of the foot without cutting the yarn. A two-round border goes all the way around in one pass. Last, you make three flowers, sew them on, and attach the hardware.
Finished Size and Construction
- Finished size: 3.4 in (8.6 cm) wide x 4.6 in (11.7 cm) tall
- Skill level: Easy / advanced beginner
- Terminology: US crochet terms
- Yarn weight: Sport weight (#2) cotton
- Hook: 2.5 mm (US B/1 or C/2)
- Number of pieces: 1 letter piece plus 3 small flower appliqués
- Layout: One letter L, stem on the left, foot pointing right
- Piece size before border: 3.0 in (7.6 cm) wide x 4.2 in (10.7 cm) tall
- Stem width: 1.1 in (2.8 cm); foot height: 0.8 in (2.0 cm)
- Border depth: 0.2 in (0.5 cm) on every side
Materials
Choose a smooth, tightly plied mercerized cotton or cotton blend. It shows the stitches clearly, keeps the shells crisp, and holds up to handling on a keyring. Avoid fuzzy or very stretchy yarns.
- Sage green (main color): 8 g, about 24 m
- Pale butter yellow (flowers): 2 g, about 6 m
- White (optional, for French knot centers): 1 m, if you are not using beads
These amounts include a comfortable margin for gauge checks and weaving in ends.
Tools and notions:
- 2.5 mm crochet hook
- Tapestry needle
- Sewing needle and matching thread
- 3 white pearl beads, 3 to 4 mm
- 1 gold split key ring, 1 in (2.5 cm)
- 1 gold jump ring, 6 to 8 mm
- About 0.8 in (2.0 cm) of small gold chain (3 to 4 links)
- 2 pairs of jewelry pliers
- Stitch marker, scissors, rustproof pins, and a blocking surface
Abbreviations (US Terms)
- ch – chain
- sl st – slip stitch
- sc – single crochet
- dc – double crochet
- sc2tog – single crochet 2 together
- sk – skip
- sp – space
- st(s) – stitch(es)
- tch – turning chain
- RS – right side
Special stitch – Shell: Work 5 dc in the same stitch. The center (3rd) dc of the shell is where the chain arcs attach in the next row.
Gauge and Checkpoints
Gauge: 19 sc = 3.0 in (7.6 cm) wide. One sc row is about 0.16 in (0.4 cm) tall, and one dc row is about 0.32 in (0.8 cm) tall.
The letter is small, so the letter itself is your gauge test. Work Rows 1 to 4 and measure before you go further.
Checkpoints:
- After Row 1: 3.0 in (7.6 cm) wide.
- After Row 4: the foot is 3.0 in (7.6 cm) wide and 0.8 in (2.0 cm) tall.
- After Row 5: total height is about 1.0 in (2.5 cm).
- Each stem repeat (Rows 6 to 8): adds 0.64 in (1.6 cm).
- After Row 20: 3.0 in (7.6 cm) wide x 4.2 in (10.7 cm) tall.
- After the border: 3.4 in (8.6 cm) wide x 4.6 in (11.7 cm) tall.
If your foot is too wide: go down to a 2.25 mm hook. If it is too narrow: go up to a 2.75 mm hook. Don’t change the stitch counts, because the border math depends on them.
Letter L Pattern
Foot (Rows 1–4)
With sage green, ch 20.
Row 1: Sc in 2nd ch from hook and in each ch across, turn. (19 sc)
Row 2: Ch 3 (counts as dc), sk next 2 sc, shell in next sc, sk next 2 sc, *dc in next sc, sk next 2 sc, shell in next sc, sk next 2 sc; repeat from * once more, dc in last sc, turn. (3 shells and 4 single dc = 19 sts)
The shells sit in stitches 4, 10, and 16. The single dc sit in stitches 1, 7, 13, and 19.
Row 3: Ch 1, sc in first dc, *ch 2, sc in center dc of next shell, ch 2, sc in next single dc; repeat from * 2 more times, working the last sc in the top of the tch, turn. (7 sc and 6 ch-2 sps)
These arcs make the small triangular windows above each fan.
Row 4: Ch 1, sc in first sc, *2 sc in next ch-2 sp, sc in next sc; repeat from * 5 more times, turn. (1 + 6 x 3 = 19 sc)
Checkpoint: 3.0 in (7.6 cm) wide x 0.8 in (2.0 cm) tall.
Stem (Rows 5–20)
The stem grows from the last 7 stitches of Row 4, at the end where your hook already is. This end becomes the outer left edge of the L.
Row 5: Ch 1, sc in first 7 sc, turn. Leave the remaining 12 sc unworked. (7 sc)
Row 6: Ch 3 (counts as dc), sk next 2 sc, shell in next sc, sk next 2 sc, dc in last sc, turn. (1 shell and 2 single dc = 7 sts)
This shell sits directly above the third foot shell, so the fans line up in a neat column.
Row 7: Ch 1, sc in first dc, ch 2, sc in center dc of shell, ch 2, sc in top of tch, turn. (3 sc and 2 ch-2 sps)
Row 8: Ch 1, sc in first sc, 2 sc in ch-2 sp, sc in next sc, 2 sc in ch-2 sp, sc in last sc, turn. (3 + 4 = 7 sc)
Rows 9–20: Repeat Rows 6 to 8 four more times. (5 stem shells in total; Row 20 ends with 7 sc)
Do not fasten off. Your hook is now at the top outer corner of the stem.
Checkpoint: 3.0 in (7.6 cm) wide x 4.2 in (10.7 cm) tall. The stem is 1.1 in (2.8 cm) wide.
Choosing the front: Both faces look almost the same. Lay the piece so the stem is on the left and the foot points right. Treat that face as the RS for the border and flowers.
Border
Border gauge: Along the edges, work 1 sc in each sc row end and 2 sc in each dc row end. Each sc is about 0.16 in (0.4 cm) wide, which matches the height of one sc row. Two sc match the height of one dc row.
Round 1 (single crochet edge)
Ch 1 and turn the piece to work down the outer side. The corners are ch-1 spaces and are not part of the side counts below.
- Outer side (top to bottom): Over Rows 20 to 6, work 4 sc for each stem repeat (2 in the dc row end and 1 in each sc row end), for 20 sc. Then work 1 sc in the Row 5 end. Then work 1 sc in the Row 4 end, 1 sc in the Row 3 end, 2 sc in the Row 2 end, and 1 sc in the Row 1 end. (26 sc)
- Ch 1 for the corner.
- Bottom edge: Sc in each of the 19 foundation chains. (19 sc)
- Ch 1 for the corner.
- Foot end: 1 sc in the Row 1 end, 2 sc in the Row 2 end, and 1 sc in each of the Row 3 and Row 4 ends. (5 sc)
- Ch 1 for the corner.
- Foot top: Sc in each of the first 11 unworked sc of Row 4. (11 sc)
- Inner corner: Sc2tog over the 12th unworked sc of Row 4 and the Row 5 end. (1 st)
- Inner stem side (bottom to top): Work 4 sc for each repeat over Rows 6 to 20. (20 sc)
- Ch 1 for the corner.
- Top edge: Sc in each of the 7 sc of Row 20. (7 sc)
- Ch 1 for the corner, then sl st to the first sc.
Round 1 total: 26 + 19 + 5 + 11 + 1 + 20 + 7 = 89 sts, plus 5 ch-1 corner sps.
Round 2 (slip stitch rim)
Work loosely. Sl st in each st and in each ch-1 corner sp around, then join to the first sl st. (89 + 5 = 94 sl sts)
Fasten off and weave in the ends.
Why the Math Works
The outer side has 26 sc. At 0.16 in (0.4 cm) per sc, that comes to 4.16 in, which matches the 4.2 in (10.7 cm) height before the border. The bottom edge has 19 sc, which matches the 3.0 in (7.6 cm) width.
The 5 sc on the foot end match the 0.8 in (2.0 cm) foot height. The 7 sc on the top edge match the 1.1 in (2.8 cm) stem width.
The sc2tog at the inner corner takes out extra fullness, so the inside angle stays square instead of rippling. The ch-1 spaces give the 5 outer corners just enough room to turn without flaring.
Each border round adds about 0.1 in (0.3 cm) per side. Together they add 0.2 in (0.5 cm) on every side, for a finished size of 3.4 in (8.6 cm) x 4.6 in (11.7 cm).
Flowers (Make 3)
With pale butter yellow, make a magic ring.
Round 1: Ch 1, 5 sc in ring, sl st to first sc. Pull the ring closed. (5 sc)
Round 2: *Ch 2, 2 dc in same st, ch 2, sl st in same st, sl st in next st; repeat from * 4 more times. (5 petals)
Fasten off, leaving a 6 in (15.2 cm) tail. Each flower is about 0.6 in (1.5 cm) across.
Use sewing thread to sew a white bead into the center of each flower. If you prefer, make a white French knot instead.
Final Blocking
- Block the letter before you sew on the flowers.
- Pin the letter, RS up, to a blocking surface at 3.4 in (8.6 cm) x 4.6 in (11.7 cm).
- Check that the stem is 1.5 in (3.8 cm) wide including the border.
- Pin the 5 outer corners and the inner corner square.
- Gently open each shell into a fan and open up the triangular windows.
- Mist with water until damp, not soaked.
- Let it dry completely, for at least 2 hours.
- Sew the flowers in place: one centered near the top of the stem, one on the middle stem shell, and one at the right end of the foot.
- Attach the jump ring through the top center sc of Round 1 on the stem. Add the chain, then the split ring.
Final Quality-Control Checklist
- Foot Row 1 has 19 sc, and Row 2 has exactly 3 shells.
- The stem has 5 shells stacked in one straight column.
- Each Row 7 arc is attached to the center dc of its shell.
- Border Round 1 has 89 sts plus 5 corner ch-1 sps.
- Border Round 2 has 94 sl sts.
- Finished size is 3.4 in (8.6 cm) x 4.6 in (11.7 cm).
- The inner corner lies flat and square.
- All three flowers are sewn on securely, with no thread showing on the front.
- The jump ring is closed tightly with no gap.
Troubleshooting
The foot is wider than 3.0 in (7.6 cm): Your tension is loose. Switch to a smaller hook and start again.
The shells cup or ruffle: Check that you skipped exactly 2 sts on each side of every shell.
The stem leans or twists: Count 7 sts on every stem row. An extra stitch at the turning chain is a common cause.
The border ripples along the sides: You worked too many sc into the row ends. Use 2 in each dc row end and 1 in each sc row end.
The border pulls tight: Work Round 2 more loosely, or use a hook 0.25 mm larger for the slip stitches only.
The inner corner bunches: Make sure you worked the sc2tog at that corner.
The petals look uneven: Pull each sl st between petals snug so the petals stay separate.
Care
Hand wash in cool water with mild soap, press the water out in a towel, and dry flat. Take off the metal hardware first if it is not tarnish-resistant.
Final Notes
The measurements build on each other. Your 19-stitch foot sets the 3.0 in (7.6 cm) width. The four foot rows give 0.8 in (2.0 cm), and Row 5 plus five stem repeats bring the height to 4.2 in (10.7 cm). The two-round border adds 0.2 in (0.5 cm) all around, for a finished letter of 3.4 in (8.6 cm) x 4.6 in (11.7 cm).
Check the foot first and keep your counts steady, and the rest falls into place. Once you’ve made one letter, try your own initials as matching gift charms.
Happy crocheting!