

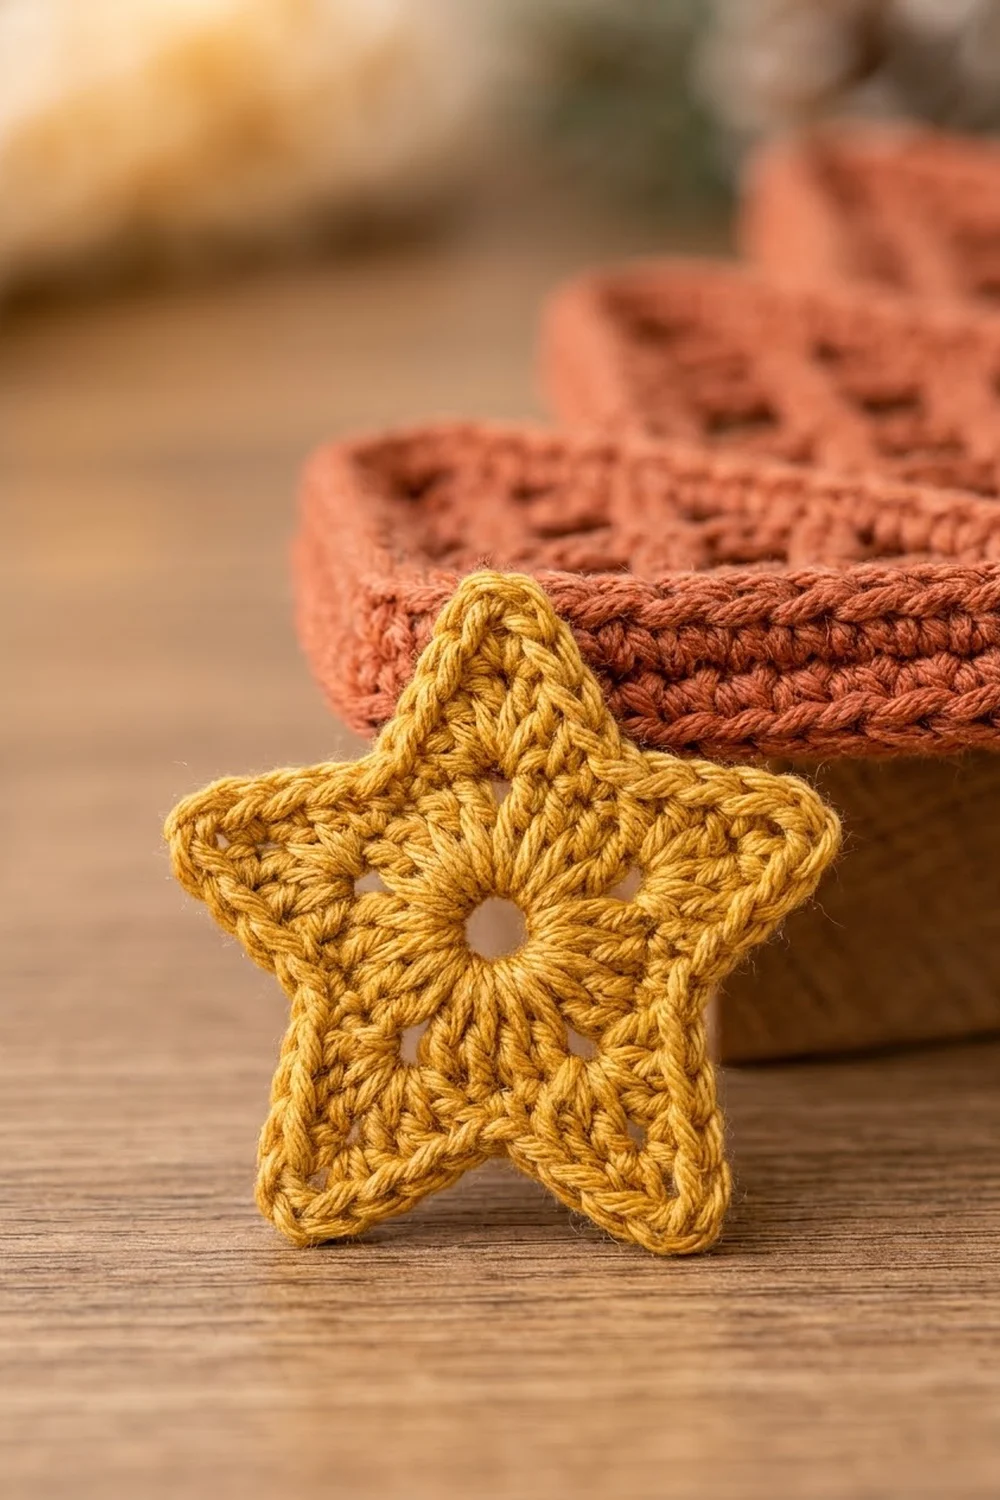
The Ember Lattice Christmas Tree is a flat, open-work tree that stands up on its own. It has three stepped tiers, each filled with a diamond lattice of chain loops. A solid band runs across the top of each tier, and a raised rope edge frames the whole outline. A small golden star sits at the top.
The tree is worked in warm rust, and the star is golden mustard. The style is Scandinavian-minimal: one tree color, one accent, and a lot of negative space, so it looks good on a mantel, a shelf, or a small wooden stand.
This pattern uses US crochet terms. The finished tree measures 7.75 in (19.7 cm) wide by 8 in (20.3 cm) tall. With the star in place, it is about 9.25 in (23.5 cm) tall.
You work the tree in one piece from the bottom up, in turned rows. Rows of net loops get shorter by one loop each row, which shapes the sloped sides of each tier. A single crochet band row closes each tier, and a widening row starts the next tier. Two border rounds finish the edge, and then you sew on the star.
Finished Size and Construction
- Finished size: 7.75 in (19.7 cm) wide x 8 in (20.3 cm) tall; 9.25 in (23.5 cm) tall with the star
- Skill level: Easy-intermediate
- Terminology: US
- Yarn weight: Worsted (medium #4)
- Hook: 5.0 mm (H-8)
- Number of pieces: 1 tree panel + 1 star appliqué
- Layout: Single panel, three stacked tiers, star on top
- Tree size before border: 7.25 in (18.4 cm) wide x 7.5 in (19.1 cm) tall
- Border depth: 0.25 in (0.6 cm) on every edge
- Star size: 1.75 in (4.4 cm) from point to point
Materials
Use a smooth, tightly plied worsted cotton or cotton blend. The lattice shows clearly in a yarn with good stitch definition, and cotton holds its shape well enough for the tree to stand. Fuzzy or very soft acrylic will blur the diamonds.
- Color A, Rust: 30 g, approx. 55 m (60 yd)
- Color B, Golden Mustard: 5 g, approx. 9 m (10 yd)
Tools:
- 5.0 mm (H-8) crochet hook
- Tapestry needle
- Scissors
- Rustproof pins and a foam blocking mat
- Spray bottle, plus spray starch or fabric stiffener (optional)
- Small wooden block stand with a short dowel (optional, for display)
All yarn amounts include a margin of about 20% for your gauge swatch and small differences in tension.
Abbreviations (US Terms)
- ch: chain
- sc: single crochet
- hdc: half double crochet
- dc: double crochet
- sl st: slip stitch
- sk: skip
- sp: space
- sc2tog: single crochet 2 together
- sc3tog: single crochet 3 together
- BLO: back loop only
- RS / WS: right side / wrong side
Special stitch, net loop: ch 5, then sc in the stitch or loop given. On a sc base, each net loop skips 3 sc, so one loop plus its anchoring sc uses 4 base stitches. A row of sc with a stitch count of 1 + (4 x k) gives exactly k net loops.
Gauge and Checkpoints
- Sc gauge: 16 sc x 16 rows = 4 in (10.2 cm)
- Net gauge: 1 net loop = 1 in (2.5 cm) wide, and 1 net row = 0.5 in (1.3 cm) tall
Swatch first by working Rows 1–5 of the pattern below as a test tier. Measurement checkpoints:
- After Row 1: 7.25 in (18.4 cm) wide
- After Row 5 (tier 1): 2 in (5.1 cm) tall
- After Row 11 (tier 2): 4.25 in (10.8 cm) tall
- After Row 19 (tier 3): 7.5 in (19.1 cm) tall
If Row 1 measures more than 7.5 in (19.1 cm), go down a hook size. If it measures less than 7 in (17.8 cm), go up a hook size. If only the net rows are off, change how tight your chains are, not your hook. Loose ch-5 loops make the tiers too tall and floppy, and tight loops pull the diamonds into narrow slits.
Tree Panel
Use Color A. Keep the yarn attached at the end, because the border is worked straight from Row 19.
Tier 1 (Bottom)
Foundation: Ch 30.
Row 1 (RS): Sc in the 2nd ch from the hook and in each ch across. Turn. (29 sc)
Row 2: Ch 1, sc in the first sc, *ch 5, sk 3 sc, sc in the next sc; repeat from * 6 more times. Turn. (7 net loops, 8 sc)
Row 3: Sl st in each of the first 3 ch of the first loop. Ch 1, then sc in the same loop. *Ch 5, sc in the next loop; repeat from * across, ending with a sc in the last loop. Turn. (6 net loops, 7 sc)
The sl sts move you to the center of the first loop, and you finish in the center of the last loop. That moves each edge in by half a loop and makes the tier’s sloped sides.
Row 4: Repeat Row 3. (5 net loops, 6 sc)
Row 5 (top band): Ch 1, sc in the first sc, *3 sc in the next ch-5 sp, sc in the next sc; repeat from * 4 more times. Turn. (21 sc)
Count check: 1 + (5 x 4) = 21 sc.
Checkpoint: The tier is 7.25 in (18.4 cm) wide at the base, 5.25 in (13.3 cm) wide at the band, and 2 in (5.1 cm) tall.
Tier 2 (Middle)
Row 6 (widening row): Ch 1, 3 sc in the first sc, sc in the next 19 sc, 3 sc in the last sc. Turn. (25 sc)
Count check: this is a conversion row, so count it as 21 sc worked one in each stitch plus 4 extra sc from the two corner increases = 25 sc. The corner groups push out past the band below and make the step at the bottom of the tier. The row is 6.25 in (15.9 cm) wide.
Row 7: Ch 1, sc in the first sc, *ch 5, sk 3 sc, sc in the next sc; repeat from * 5 more times. Turn. (6 net loops, 7 sc)
Row 8: Repeat Row 3. (5 net loops, 6 sc)
Row 9: Repeat Row 3. (4 net loops, 5 sc)
Row 10 (top band): Ch 1, sc in the first sc, *3 sc in the next ch-5 sp, sc in the next sc; repeat from * 3 more times. Turn. (17 sc)
Checkpoint: The tree is 4.25 in (10.8 cm) tall. The band is 4.25 in (10.8 cm) wide.
Tier 3 (Top)
Row 11 (widening row): Ch 1, 3 sc in the first sc, sc in the next 15 sc, 3 sc in the last sc. Turn. (21 sc)
Count check: 17 sc worked one in each stitch plus 4 extra sc = 21 sc. The row is 5.25 in (13.3 cm) wide.
Row 12: Ch 1, sc in the first sc, *ch 5, sk 3 sc, sc in the next sc; repeat from * 4 more times. Turn. (5 net loops, 6 sc)
Row 13: Repeat Row 3. (4 net loops, 5 sc)
Row 14: Repeat Row 3. (3 net loops, 4 sc)
Row 15: Repeat Row 3. (2 net loops, 3 sc)
Row 16: Repeat Row 3. (1 net loop, 2 sc)
Row 17: Ch 1, sc in the first sc, 4 sc in the ch-5 sp, sc in the last sc. Turn. (6 sc)
Row 18: Ch 1, sc2tog 3 times. Turn. (3 sc)
Row 19: Ch 1, sc3tog. (1 sc) Do not fasten off.
Checkpoint: Before the border, the tree is 7.25 in (18.4 cm) wide x 7.5 in (19.1 cm) tall.
Height check:
- 8 sc rows (Rows 1, 5, 6, 10, 11, 17, 18 and 19) x 0.25 in = 2 in (5.1 cm)
- 11 net rows x 0.5 in = 5.5 in (14 cm)
- Total: 7.5 in (19.1 cm)
Star Appliqué
Use Color B.
Round 1: Make a magic ring. Ch 1, then work 10 sc in the ring. Pull the ring closed until only a small hole is left in the center, then sl st to the first sc. (10 sc)
Round 2: Ch 1, 2 sc in each sc around, sl st to the first sc. (20 sc)
Round 3 (points): *Ch 4, sc in the 2nd ch from the hook, hdc in the next ch, dc in the next ch, sk the next 3 sc of Round 2, sl st in the next sc; repeat from * 4 more times. (5 points)
Count check: each repeat uses 4 Round 2 stitches, and 5 x 4 = 20.
Fasten off and leave a 12 in (30.5 cm) tail. The star measures 1.75 in (4.4 cm) from point to point.
Border
Use Color A. Work the border straight from Row 19 without cutting the yarn.
Border gauge: 4 sc per 1 in (2.5 cm) along straight edges. On the sloped edges, work 3 sc into the edge of each net row. A net row rises 0.5 in (1.3 cm) but also moves in, so the slanted edge is about 0.75 in (1.9 cm) long, and 3 sc at 4 sc per inch match that length.
Round 1: Ch 1, then work 3 sc in the Row 19 stitch for the tip. Then work down the first side as follows:
- 1 sc in the end of each of Rows 18 and 17 (2 sc)
- 3 sc in the end of each of Rows 16–12 (15 sc)
- 3 sc in the end of Row 11 for the step corner
- 1 sc in the end of Row 10
- 3 sc in the end of each of Rows 9–7 (9 sc)
- 3 sc in the end of Row 6 for the step corner
- 1 sc in the end of Row 5
- 3 sc in the end of each of Rows 4–2 (9 sc)
That is 43 sc on the side, not counting the tip and the bottom corner.
Work 3 sc in the first free loop of the foundation chain for the corner. Sc in each of the next 27 foundation ch, then work 3 sc in the last foundation ch for the corner.
Work up the second side as a mirror of the first side (43 sc). Sl st to the first sc.
Count check:
- Tip: 3 sc
- Each side: 43 sc
- Each bottom corner: 3 sc
- Bottom edge between the corners: 27 sc
- Total: 3 + 43 + 3 + 27 + 3 + 43 = 122 sc
The bottom uses all 29 foundation loops, 1 + 27 + 1, so no stitches are added or skipped. The full bottom edge, counting both corner groups, is 33 sc.
Round 2: Sl st in the BLO of each sc around, keeping the slip stitches loose enough to lie flat. Join with a sl st to the first st and fasten off. (122 sl st)
Round 2 sits on top of the sc round and gives the braided rope edge. Each border round adds about 0.125 in (0.3 cm), so the border adds 0.25 in (0.6 cm) to every edge:
- Width: 7.25 in (18.4 cm) + 0.5 in (1.3 cm) = 7.75 in (19.7 cm)
- Height: 7.5 in (19.1 cm) + 0.5 in (1.3 cm) = 8 in (20.3 cm)
Attach the star: Center the star over the top point so that its lower two points overlap the tip by about 0.5 in (1.3 cm). Whipstitch around the back of the star’s center with the Color B tail, catching only the back loops of the tree so the stitches stay hidden.
Final Blocking
- Weave in all ends except the star tail before blocking. If you haven’t sewn the star on yet, pin it to the mat separately.
- Spritz the tree with water until it is damp, not soaking.
- Pin it face up to 7.75 in (19.7 cm) wide x 8 in (20.3 cm) tall.
- Put a pin in each step corner and at the tip so the points stay sharp.
- Gently open each diamond with your fingertip so they are all about the same size.
- If you want the tree to stand, spray it evenly with starch or brush on diluted fabric stiffener.
- Let it dry completely, for at least 12 hours, before you unpin it.
- Sew on the star if you haven’t already. If you’re using a stand, slip the dowel behind the center of the bottom edge and secure it with a few stitches.
Final Quality-Control Checklist
- Each tier has the right number of net loops: 7-6-5, 6-5-4 and 5-4-3-2-1.
- The band rows are 21 sc and 17 sc, and the widening rows are 25 sc and 21 sc.
- Both step corners stick out evenly on each side.
- Border Round 1 has 122 sc: 43 sc on each side, 27 sc on the bottom between the corners, and four 3-sc corner groups (the tip and the two bottom corners).
- The finished tree measures 7.75 in (19.7 cm) x 8 in (20.3 cm).
- The star is centered, and its center hole lines up with the tree’s midline.
- All ends are woven in on the WS.
Troubleshooting
- The tiers lean to one side: You probably missed the 3 sl sts at the start of a decrease row. Recount the loops in each row.
- The edges ripple: Too many border stitches went into the net rows. Use exactly 3 sc per row edge.
- The edges cup or pull in: Your border tension is tight. Loosen the Round 2 slip stitches.
- The steps don’t show: Make sure the widening rows have 3 sc in their first and last stitches, and put 3 sc in the Row 6 and Row 11 row ends.
- The diamonds look like slits: Your chains are too tight. Loosen the ch-5 loops, or use a hook one size larger just for the chains.
- The star curls: Block it flat, and check that you skipped exactly 3 sc between points.
Care
Hand wash in cool water, press out the water with a towel, and dry flat. If you used stiffener, the tree will need re-stiffening after it is washed.

Final Notes
Here is the measurement chain from start to finish:
- 29 foundation sc = 7.25 in (18.4 cm) wide
- Tier 1 = 2 in (5.1 cm) tall
- Tiers 1–2 = 4.25 in (10.8 cm) tall
- Full panel = 7.5 in (19.1 cm) tall
- A 122-stitch, two-round border brings it to 7.75 in (19.7 cm) x 8 in (20.3 cm)
- The 1.75 in (4.4 cm) star brings the total height to 9.25 in (23.5 cm)
Check your gauge, count each row, and the lattice will come out even. Happy crocheting!