

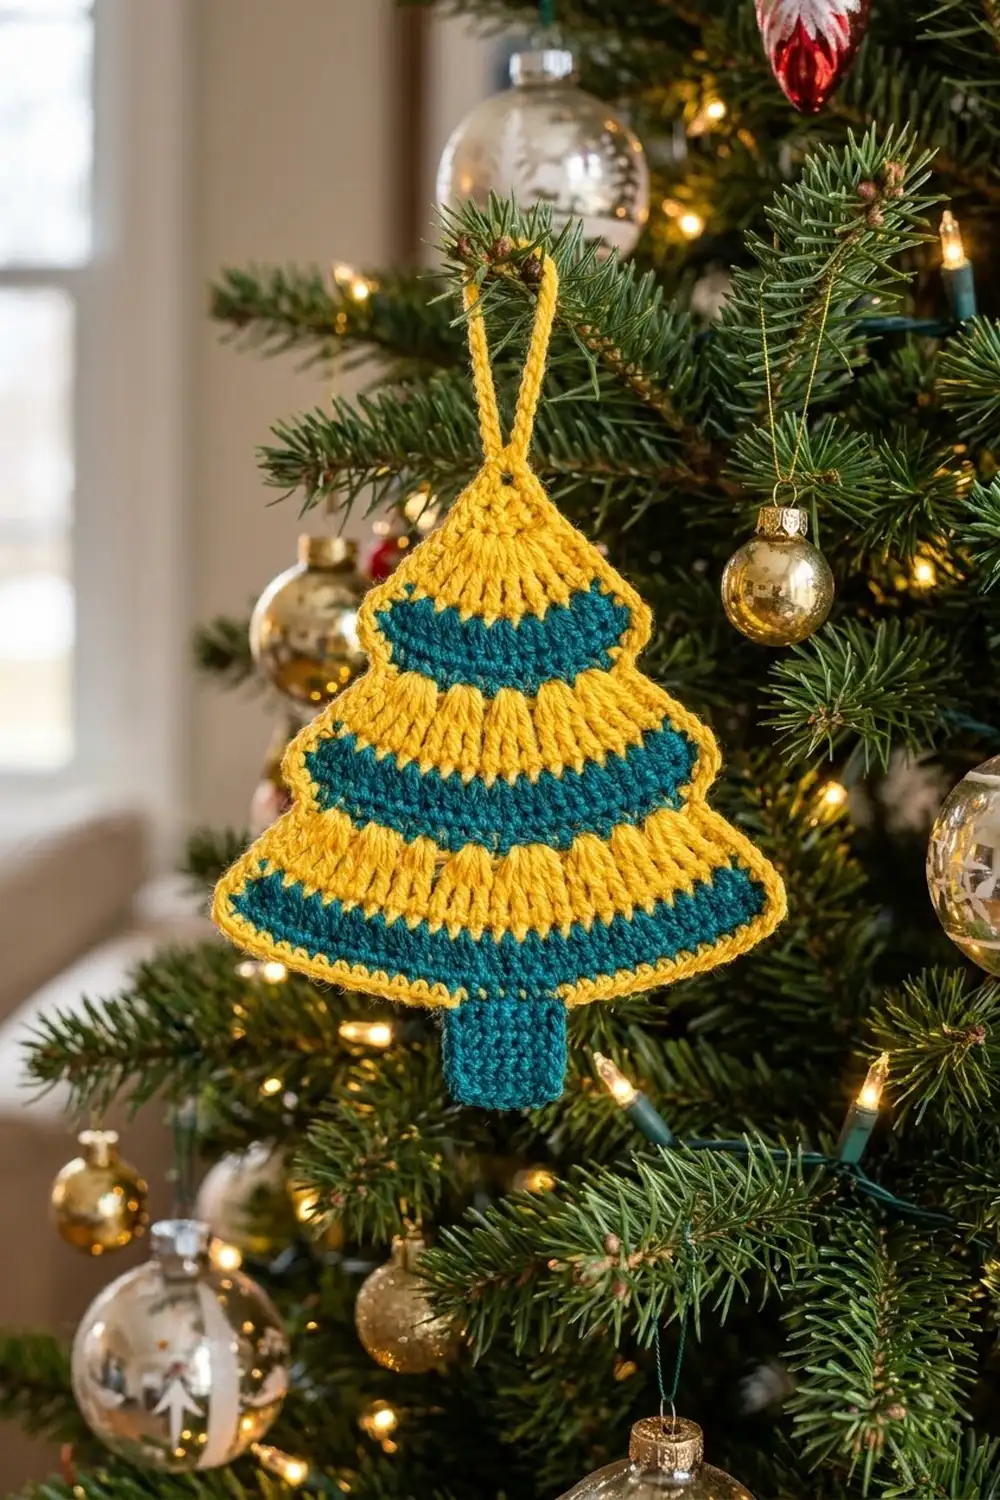
The Golden Spruce is a flat Christmas tree ornament built from three stacked tiers of tall stitches. Each tier fans out from a narrow top into a wider band, so the tree steps outward from point to base, just like a real spruce.
It uses just two bold colors, sunny yellow and deep teal. The top tier is a teal fan under a yellow band. The middle tier is a yellow fan with teal along its sides. The bottom tier is a teal fan with yellow sides and a deeper yellow band. A small teal trunk sits underneath, and a yellow chain loop sits at the top.
This pattern uses US crochet terms. The finished ornament is about 4.8 in (12.2 cm) wide and 4.6 in (11.7 cm) tall from apex to trunk. With the hanging loop it is about 6.2 in (15.7 cm) tall.
You make the whole tree in one piece, from the top down, in short rows. Start with a fan of treble crochet in a magic ring, add a single crochet band, then work each new tier into the band above it. The trunk is worked off the bottom band. A simple single crochet outline finishes the sides of each tier. There is no sewing and no joining.
Finished Size and Construction
- Finished size: 4.8 in (12.2 cm) wide x 4.6 in (11.7 cm) tall, plus a 1.6 in (4.1 cm) loop
- Skill level: Easy
- Terminology: US crochet terms
- Yarn weight: DK / light (#3), cotton or cotton blend
- Hook: 3.5 mm (US E-4)
- Number of pieces: 1
- Layout: one ornament with three tiers, a trunk and a loop
- Piece size: 4.8 in (12.2 cm) x 4.6 in (11.7 cm)
- Size before outline: 4.6 in (11.7 cm) wide x 4.4 in (11.2 cm) tall, trunk included
- Outline depth: about 0.1 in (0.3 cm) on each tier side and 0.2 in (0.5 cm) at the apex
Materials
Choose a smooth cotton in DK weight, either mercerized or matte. Cotton shows the long treble posts clearly and stays flat after blocking. Avoid fuzzy or very splitty yarns, because the open fans look best when every stitch is easy to see.
- Yellow (Color A): 6 g, about 14 m
- Teal (Color B): 5 g, about 12 m
These amounts assume a DK cotton of about 115 m per 50 g. They include extra yarn for a gauge test, for the tails at each color change and for the hanging loop.
Tools:
- 3.5 mm (US E-4) crochet hook
- Tapestry needle
- Scissors
- Stitch markers (2)
- Ruler or tape measure
- Blocking mat and rust-proof pins
- Spray bottle with water
Abbreviations (US Terms)
- ch – chain
- sl st – slip stitch
- sc – single crochet
- tr – treble crochet
- st(s) – stitch(es)
- sp – space
- sk – skip
- rep – repeat
- RS / WS – right side / wrong side
- MR – magic ring
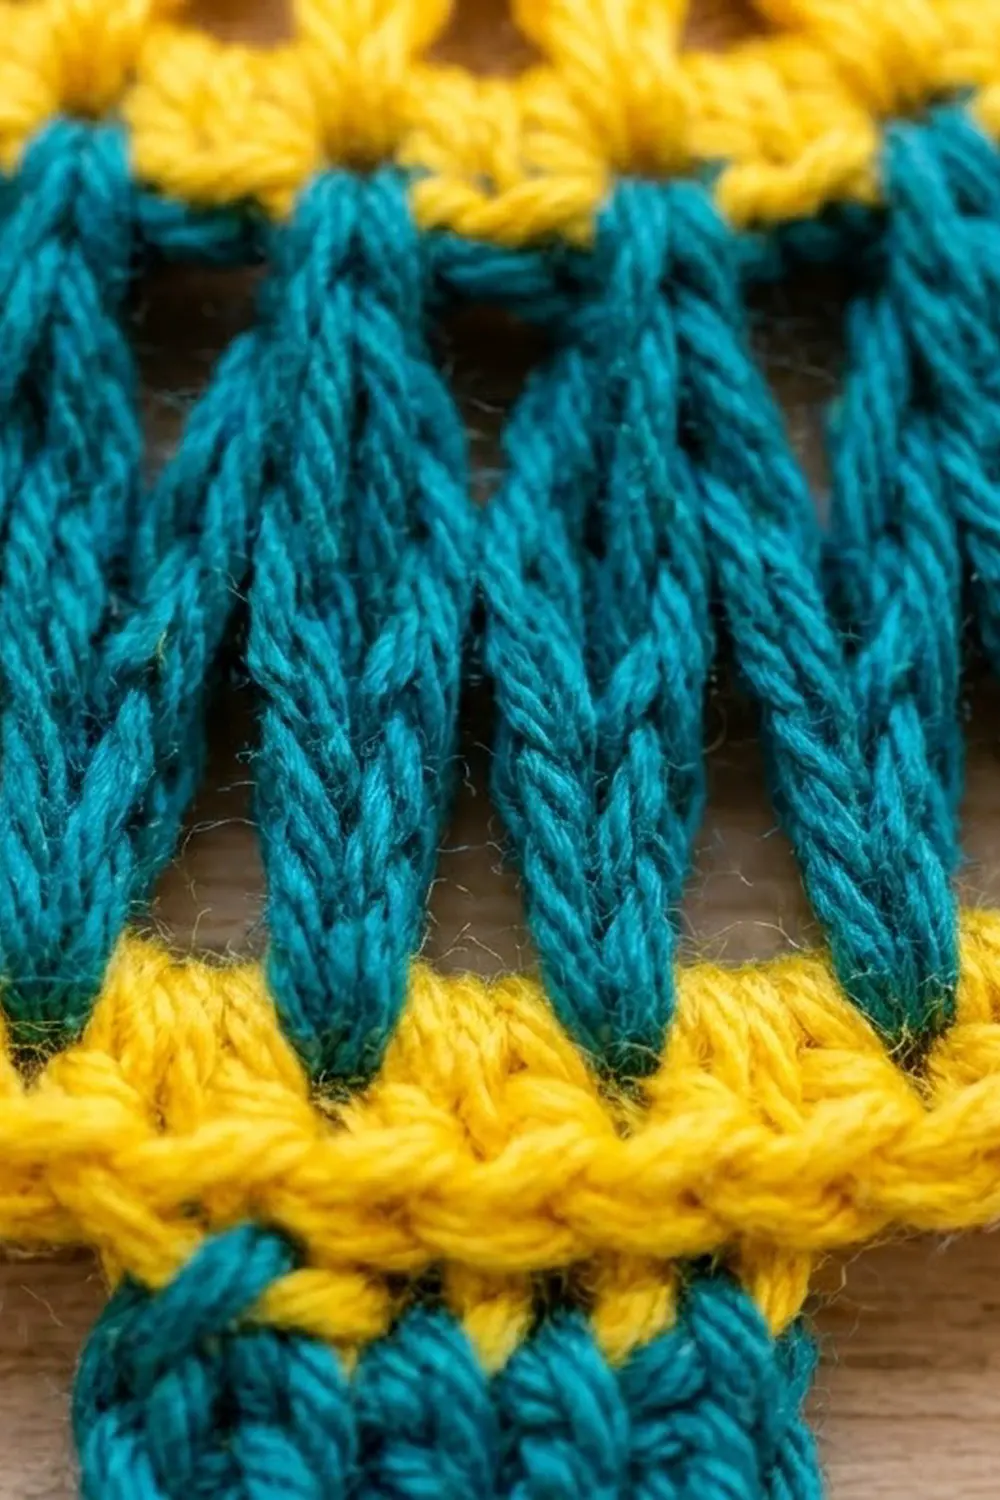
Special stitch – tr group: Work 2 tr into the same stitch. The two posts start together and spread apart. This gives each tier its narrow top and wide bottom.
Gap between groups: This is the small space between the last tr of one group and the first tr of the next group. On the band rows, you work 1 sc into each gap.
Gauge and Checkpoints
Gauge: 20 sc and 24 rows = 4 in (10.2 cm) in sc. One tr row is 0.8 in (2.0 cm) tall.
Because the ornament is small, the best gauge test is the tree itself. Work Tier 1 (Rows 1–3) and measure it before you go on.
Checkpoints:
- After Row 1: The fan measures about 0.8 in (2.0 cm) from the ring to the tops of the tr.
- After Row 3: The band has 13 sc and is 2.6 in (6.6 cm) wide. The tier is 1.1 in (2.8 cm) tall.
- After Row 6: The band has 17 sc and is 3.4 in (8.6 cm) wide. The piece is 2.3 in (5.8 cm) tall.
- After Row 10: The band has 23 sc and is 4.6 in (11.7 cm) wide. The piece is 3.6 in (9.1 cm) tall.
- After the trunk: The trunk is 5 sc, 1.0 in (2.5 cm) wide and 0.8 in (2.0 cm) tall. The piece is 4.4 in (11.2 cm) tall.
If your piece is too big: Switch to a 3.25 mm (US D-3) hook, or check that your tr aren’t too loose. Tall stitches grow quickly if you wrap loosely.
If your piece is too small: Switch to a 3.75 mm (US F-5) hook. If the bands are the right width but the fans are short, pull each tr loop up a little taller instead of changing hooks.
Pattern
Pattern notes: The ornament is worked flat in turned rows. Fasten off at every color change and leave 4 in (10.2 cm) tails, so you can weave each tail into a band of the same color. The ch-4 at the start of a tr row always counts as a stitch.
Tier 1 (Top Fan)
Row 1 (RS): With Color B (teal), make a MR. Ch 4 (counts as first tr), then work 8 tr in the ring. Pull the ring tightly closed. (9 tr) Fasten off teal.
The 9 tr spread out from the closed ring and form the teal fan under the apex.
Row 2 (WS): Turn. Join Color A (yellow) in the last tr made. Ch 1. Work 2 sc in the same tr, sc in the next tr, 2 sc in the next tr, sc in the next 3 tr, 2 sc in the next tr, sc in the next tr, and 2 sc in the last tr (top of the ch-4). (9 sc worked 1 per tr + 4 extra sc = 13 sc)
The 4 increases spread the fan tops so the tier opens into a triangle.
Row 3 (RS): Ch 1, turn, sc in each sc across. (13 sc)
Check: the band is 2.6 in (6.6 cm) wide.
Tier 2 (Middle Fan)
Keep working with Color A, because the middle fan is yellow.
Row 4 (WS): Turn. Sl st in the first sc and in the next sc. Ch 4 (counts as tr), then tr in the same sc as the last sl st (first tr group made). Sk the next sc, work a tr group in the next sc; rep from * 4 more times. (6 tr groups = 12 tr)* Leave the last sc unworked.
The groups sit in sc 2, 4, 6, 8, 10 and 12. Sc 1 and sc 13 stay free, so the Tier 1 band sticks out one stitch past the middle fan on each side. This is what gives the tree its stepped shape.
Row 5 (RS): Ch 1, turn. Sc in the first 2 tr, sc in the gap before the next group, sc in the next 2 tr; rep from * 4 more times. (12 sc worked 1 per tr + 5 gap sc = 17 sc)*
Row 6 (WS): Ch 1, turn, sc in each sc across. (17 sc) Fasten off yellow.
Check: the band is 3.4 in (8.6 cm) wide and the piece is 2.3 in (5.8 cm) tall.
Tier 3 (Bottom Fan)
Row 7 (RS): Turn so the RS faces you. Join Color B (teal) with a sl st in the 2nd sc. Ch 4 (counts as tr), then tr in the same sc (first group). Sk the next sc, work a tr group in the next sc; rep from * 6 more times. (8 tr groups = 16 tr)* Leave the last sc unworked. Fasten off teal.
The groups sit in sc 2, 4, 6, 8, 10, 12, 14 and 16. Sc 1 and sc 17 stay free to make the second step.
Row 8 (WS): Turn. Join Color A (yellow) in the last tr made. Ch 1, sc in the same tr and the next tr, sc in the gap before the next group, sc in the next 2 tr; rep from * 6 more times. (16 sc worked 1 per tr + 7 gap sc = 23 sc)*
Row 9 (RS): Ch 1, turn, sc in each sc across. (23 sc)
Row 10 (WS): Ch 1, turn, sc in each sc across. (23 sc) Fasten off yellow.
These three sc rows make the deeper yellow band at the base of the tree.
Check: the band is 4.6 in (11.7 cm) wide and the piece is 3.6 in (9.1 cm) tall.
Trunk
The trunk is centered under the bottom band. Count to sc 10 from either end of Row 10 and place a marker. Sc 10 through sc 14 are the 5 center stitches, and sc 12 is the exact center.
Row 1: With the RS facing, join Color B (teal) in the marked sc 10. Ch 1, sc in the same sc and the next 4 sc. (5 sc)
Rows 2–5: Ch 1, turn, sc in each sc across. (5 sc)
Fasten off. The trunk is a solid teal rectangle, 1.0 in (2.5 cm) wide and 0.8 in (2.0 cm) tall.
Hanging Loop
Step 1: With Color A (yellow), join with a sl st into the top of the closed magic ring at the apex.
Step 2: Ch 20. Sl st into the same spot at the apex to form the loop.
Step 3: Sl st into each of the 20 ch around the loop, then sl st into the apex again. Fasten off.
The second pass of sl sts makes the chain firmer and gives the loop a raised, cord-like look. The loop folds to about 1.6 in (4.1 cm) tall.
Border (Tier Outlines)
The outline adds the colored edge along the slanted sides of each tier. You work it in sc into the row ends and along the outer tr posts.
Border gauge: Each tr post edge is 0.8 in (2.0 cm) long, so it takes 4 sc at 5 sc per inch. Each sc row end takes exactly 1 sc.
Outline 1 – Tier 1, Yellow
With the RS facing, join Color A in the row end of Row 3 at the lower right corner of Tier 1.
- Right side: 1 sc in the row end of Row 3, 1 sc in the row end of Row 2, then 4 sc along the post of the last tr of Row 1. (6 sc)
- Apex: 3 sc around the closed ring, working around the base of the loop. (3 sc)
- Left side: 4 sc along the post of the ch-4 of Row 1, 1 sc in the row end of Row 2, then 1 sc in the row end of Row 3. (6 sc)
Total: 6 + 3 + 6 = 15 sc. Fasten off.
Outline 2 – Tier 2, Teal
Work each side separately, from top to bottom, with the RS facing.
- Each side: Join Color B at the top of the outer tr group, just under the Tier 1 band. Work 4 sc along the outer tr post of Row 4, 1 sc in the row end of Row 5 and 1 sc in the row end of Row 6. (6 sc) Fasten off.
Total: 6 sc per side x 2 sides = 12 sc.
Outline 3 – Tier 3, Yellow
- Each side: Join Color A at the top of the outer tr group, just under the Tier 2 band. Work 4 sc along the outer tr post of Row 7, then 1 sc in each row end of Rows 8, 9 and 10. (7 sc) Fasten off.
Total: 7 sc per side x 2 sides = 14 sc.
Why the Math Works
Each tier side is one tr post plus its band rows. At 5 sc per inch, a 0.8 in (2.0 cm) post takes 4 sc. At 6 rows per inch, each sc row end takes 1 sc. Fewer sc would pull the slanted edge tight and make the tier curl. More sc would make it ruffle.
The outline adds about 0.1 in (0.3 cm) on each side, so the width goes from 4.6 in (11.7 cm) to 4.8 in (12.2 cm). The apex outline adds about 0.2 in (0.5 cm), so the height goes from 4.4 in (11.2 cm) to 4.6 in (11.7 cm), not counting the loop.
Final Blocking
- Weave in all ends before you block. Hide each tail in a band of the same color.
- Mist the ornament evenly with water until it is damp but not soaking.
- Lay it flat with the RS up on the blocking mat.
- Pin the bottom band straight. It should be 4.6 in (11.7 cm) across the sc, or 4.8 in (12.2 cm) with the outline.
- Pin each band tip outward so the steps are crisp and the same on both sides.
- Spread each fan gently so the tr posts are evenly spaced and the slanted sides are straight.
- Pin the trunk square at 1.0 in (2.5 cm) wide and 0.8 in (2.0 cm) tall.
- Shape the loop into a smooth teardrop. Let everything dry completely before you remove the pins.
For a stiffer ornament, brush on a light coat of fabric stiffener while it is still pinned.
Final Quality-Control Checklist
- The Tier 1 fan has 9 teal tr coming out of a tightly closed ring.
- The bands have 13, 17 and 23 sc, from top to bottom.
- Each band sticks out one sc past the fan below it on each side.
- Tier 2 has 6 yellow tr groups, and Tier 3 has 8 teal tr groups.
- The bottom yellow band is 3 rows deep, and the upper bands are 2 rows deep.
- The trunk is 5 sc wide, 5 rows tall and centered on sc 12.
- The outlines are yellow on Tier 1 (15 sc), teal on Tier 2 (6 per side) and yellow on Tier 3 (7 per side).
- The finished size is about 4.8 in (12.2 cm) x 4.6 in (11.7 cm), plus the loop.
- All ends are woven in and can’t be seen from either side.
Troubleshooting
The top fan cups or ruffles. Your tr are too tall for 9 stitches. Pull the ring tighter and make the tr shorter, or work Row 2 with firmer tension.
A band row won’t lie flat. Count again: you should have 13, 17 or 23 sc. A missed gap sc pulls the tier in, and an extra one makes it wavy.
You can’t see the steps between tiers. Make sure you started each fan in sc 2 and left the last sc unworked. Pin the band tips outward when you block.
The tree leans to one side. Check that the tr groups are in every other sc and that you skipped exactly one sc between groups.
The trunk is off-center. Pull it out and rejoin in sc 10, counting from either end.
The slanted sides curl. The outline is too tight. Work it again with looser sc, keeping 4 sc per tr post.
The loop twists. Work the sl st pass loosely and block the loop flat.
The color changes look messy. Join new colors in the exact stitch given, and weave each tail along its own color band.
Care
Hand wash in cool water with mild soap. Press out the water in a towel and dry flat. Reshape and re-pin if the tiers lose their crisp steps.
Final Notes
Here is how the measurements build on each other. A gauge of 5 sc per inch and a 0.8 in (2.0 cm) tr row give bands of 2.6 in (6.6 cm), 3.4 in (8.6 cm) and 4.6 in (11.7 cm), and the piece is 3.6 in (9.1 cm) tall after Row 10. The trunk adds 0.8 in (2.0 cm), for 4.4 in (11.2 cm). The sc outline then brings the tree to 4.8 in (12.2 cm) wide by 4.6 in (11.7 cm) tall, and the loop brings it to 6.2 in (15.7 cm). Check each band width as you go, and your finished tree will match.
Happy crocheting!