
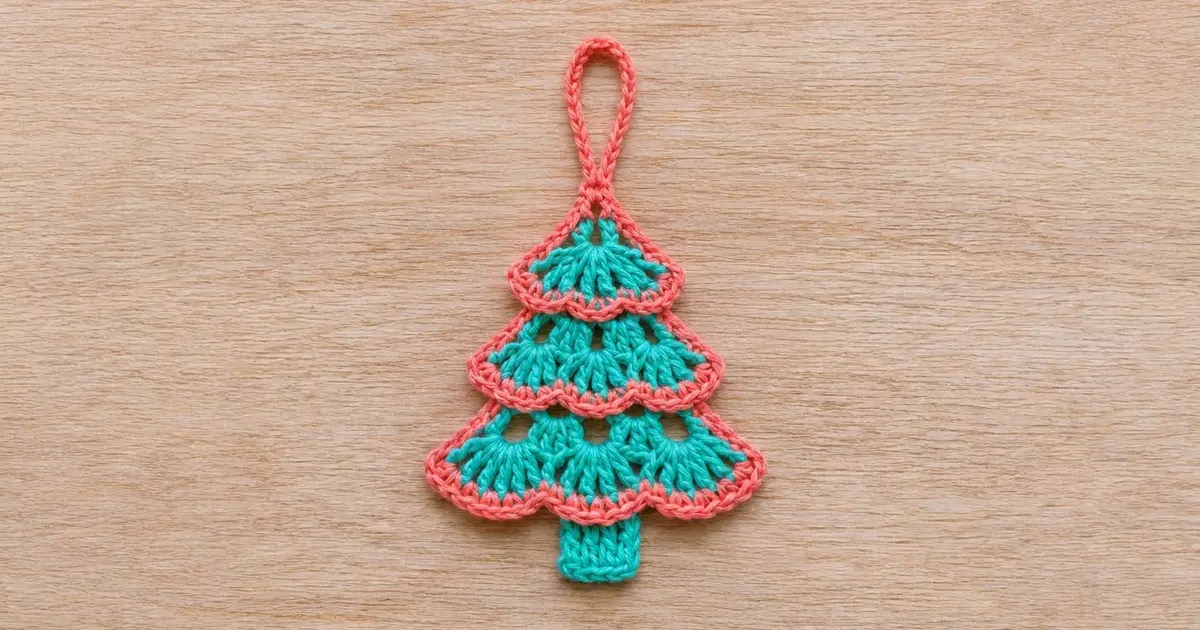
This little tree is built from fans. One fan makes the top tier, two fans make the middle tier and three fans make the bottom tier. Small open arches above the lower fans give the tree a light, lacy look, and it stays firm enough to hang.
The body is bright turquoise. Coral lines run between the tiers and a coral crab-stitch edge outlines the whole shape, so each tier gets a scalloped coral rim. A short turquoise trunk and a coral hanging loop finish it off. The style is cheerful and a little retro, and a batch of matching ornaments looks great on a real tree.
All instructions use US crochet terms. The finished ornament is about 5 in (12.7 cm) wide and 4.4 in (11.2 cm) tall from the top point to the bottom of the trunk. The loop adds about 1.75 in (4.4 cm) more.
Construction is simple. You crochet the tree from the top down in seven flat rows, switching to coral for the two tier lines. Then you work one round of single crochet around the edge, add the trunk, and finish with a round of reverse single crochet and the hanging loop. It is one single piece, so there is no joining.
Finished Size and Construction
- Finished size: 5 in (12.7 cm) wide x 4.4 in (11.2 cm) tall, not counting the loop
- Skill level: Easy / advanced beginner
- Terminology: US crochet terms
- Yarn weight: DK (light, #3) cotton
- Hook: 3.5 mm (E-4)
- Number of pieces: 1
- Layout: One stand-alone triangular tree, crocheted from the top down in rows
- Body size after Row 7 (before the border): 4.5 in (11.4 cm) wide x 3 in (7.6 cm) tall
- Border depth: About 0.25 in (0.6 cm) on every edge
- Size after the border: 5 in (12.7 cm) wide x 3.5 in (8.9 cm) tall
- Trunk: 0.9 in (2.3 cm) wide x 0.9 in (2.3 cm) tall
Materials
Choose a smooth cotton in DK weight, either mercerized or combed. Cotton shows the fan stitches clearly, holds its shape after blocking and doesn’t fuzz on a tree. Acrylic also works, but it looks softer and may need a little starch.
- Color A, turquoise: 6 g (about 14 m), for the tiers and trunk
- Color B, coral: 5 g (about 12 m), for the tier lines, border and loop
These amounts include a margin of about 25% for tails and small mistakes. One 50 g ball of each color is enough for a whole set of ornaments.
Tools:
- 3.5 mm (E-4) crochet hook
- Tapestry needle
- Scissors
- Stitch marker or safety pin
- Rust-proof pins and a foam blocking mat
- Spray bottle or steamer
- Ruler or tape measure
Abbreviations (US Terms)
- ch – chain
- sl st – slip stitch
- sc – single crochet
- dc – double crochet
- tr – treble crochet
- rev sc – reverse single crochet (crab stitch)
- sk – skip
- sp – space
- st(s) – stitch(es)
- BLO – back loop only
- FLO – front loop only
- A / B – turquoise / coral
Special stitches:
Fan: 7 tr worked into the same chain space.
Reverse single crochet (rev sc): Work from left to right if you are right-handed. Put the hook into the next stitch to the right, yarn over and pull up a loop. Then yarn over and pull through both loops. This makes a twisted, rope-like edge.
Color change: Work the last stitch of the row until 2 loops are left on the hook. Yarn over with the new color and pull through. Cut the old color, leaving a 4 in (10.2 cm) tail. Every color change falls on a side edge, so the border hides it.
Gauge and Checkpoints
Gauge: 22 sc and 20 rows = 4 in (10.2 cm) square. One tr row is about 0.65 in (1.7 cm) tall, and one dc row is about 0.45 in (1.1 cm) tall.
The ornament is small, so the best gauge swatch is the ornament itself. Make one tree, measure it at each checkpoint below, and adjust before you make a batch.
| Stage | Width | Height |
|---|---|---|
| After Row 1 | 1.4 in (3.6 cm) | 0.65 in (1.7 cm) |
| After Row 2 | 1.75 in (4.4 cm) | 0.9 in (2.3 cm) |
| After Row 4 | 3.1 in (7.9 cm) | 1.8 in (4.6 cm) |
| After Row 5 | 3.5 in (8.9 cm) | 2 in (5.1 cm) |
| After Row 7 | 4.5 in (11.4 cm) | 3 in (7.6 cm) |
| After the border | 5 in (12.7 cm) | 3.5 in (8.9 cm) |
Lay the piece flat without stretching it. Measure the width across the widest point of the last row, and measure the height straight down from the top point.
- If your tree is too big (more than about 0.25 in or 0.6 cm over at Row 7), go down to a 3.25 mm or 3 mm hook.
- If it is too small, go up to a 3.75 mm or 4 mm hook.
- If the width is right but the height is short, your tr stitches are too tight. Pull up the first loop of each tr a little taller.
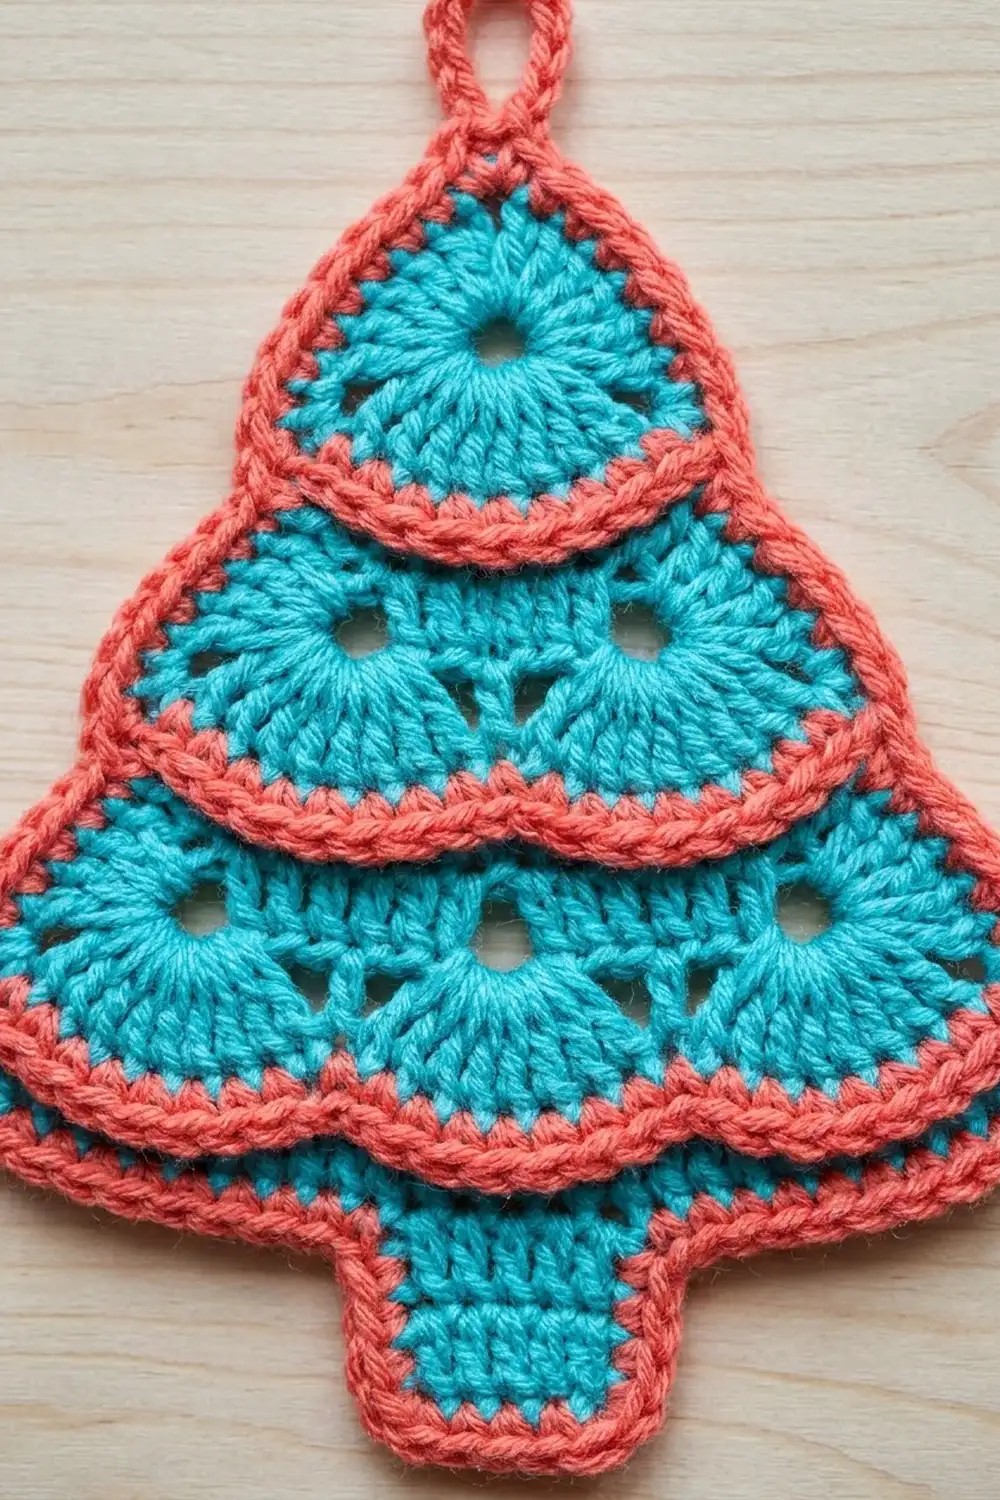
Pattern: Tree Body
You crochet the body from the top down, turning at the end of each row. Row 1 is the top tier’s fan. In every tr row, the turning chain counts as the first stitch.
Tier 1 (Top)
Row 1 (A): Ch 5, then work 6 tr in the 5th ch from the hook. (7 tr, counting the skipped chains as the first tr.) Change to B in the last stitch.
The fan opens downward, and the foundation chain becomes the top point of the tree.
Row 2 (B), tier line: Ch 1, turn. Work 2 sc in the first tr, 1 sc in each of the next 5 tr, and 2 sc in the top of the turning chain. (9 sc = 7 worked one per stitch + 2 extra.) Change to A in the last sc.
This coral row follows the curve of the fan and forms the scalloped rim of Tier 1. The extra stitch at each end makes the small outward step at the tier’s corners.
Tier 2 (Middle)
Row 3 (A), arch row: Ch 1, turn. Sc in the first sc, ch 4, sk 3 sc, sc in the next sc, ch 4, sk 3 sc, sc in the last sc. (3 sc and 2 ch-4 spaces.)
Check: 1 + 3 + 1 + 3 + 1 = 9 stitches used, which matches Row 2.
Row 4 (A), fan row: Ch 4 (counts as a tr in the first sc), turn. Work a fan in the next ch-4 space, a tr in the center sc, a fan in the next ch-4 space and a tr in the last sc. (17 tr: 1 + 7 + 1 + 7 + 1.) Change to B in the last stitch.
The arches from Row 3 now leave small open holes above each fan.
Row 5 (B), tier line: Ch 1, turn. Work 2 sc in the first tr, 1 sc in each of the next 15 tr, and 2 sc in the top of the turning chain. (19 sc = 17 worked one per stitch + 2 extra.) Change to A in the last sc.
Tier 3 (Bottom)
Row 6 (A), arch row: Ch 1, turn. Sc in the first sc, ch 5, sk 5 sc, sc in the next sc; repeat from * 2 more times. (4 sc and 3 ch-5 spaces.)*
Check: 1 + 5 + 1 + 5 + 1 + 5 + 1 = 19 stitches used, which matches Row 5.
Row 7 (A), fan row: Ch 4 (counts as a tr in the first sc), turn. Work a fan in the next ch-5 space, then a tr in the next sc; repeat from * 2 more times. (25 tr: 1 + 3 x 8.)* Fasten off.
Checkpoint: The body should measure 4.5 in (11.4 cm) wide x 3 in (7.6 cm) tall. For now, weave in only the tails that sit away from the edges. Leave the side-edge tails lying along the edge so the first border round can cover them.
Border and Trunk
Border Gauge
The border uses the same gauge as the body: 22 sc per 4 in (10.2 cm). The two border rounds together add about 0.25 in (0.6 cm) on every side.
Border Round 1 (B)
With the right side facing you, join B with a sl st in the foundation chain at the top point.
Ch 1, then work 3 sc in the same place. (This is the top corner.)
First slanted side: Work 18 sc evenly down the row ends to the bottom corner, placed like this:
- Row 1 (tr): 4 sc
- Row 2 (sc): 1 sc
- Row 3 (arch): 2 sc
- Row 4 (tr): 4 sc
- Row 5 (sc): 1 sc
- Row 6 (arch): 2 sc
- Row 7 (tr): 4 sc
Bottom edge: Work 3 sc in the first tr of Row 7 (corner), 1 sc in each of the next 23 tr, and 3 sc in the last tr (corner).
Second slanted side: Work 18 sc up the row ends, in the mirror image of the first side. From the bottom, that is 4, 2, 1, 4, 2, 1, 4.
Sl st to the first sc. Total: 68 sc.
Count by section: top corner 3 + side 18 + corner 3 + bottom 23 + corner 3 + side 18 = 68.
Why the math works: Each slanted side, including its small tier steps, measures about 3.3 in (8.4 cm) along the edge. At 5.5 sc per inch (2.2 sc per cm), 18 sc cover that length without ruffling or cupping. A tr row end is about as tall as 4 sc are wide, so it gets 4 sc. The bottom edge gets 1 sc per stitch, plus 3 sc at each corner so the corners turn cleanly. Do not fasten off.
Trunk (A)
The trunk is worked into the back loops of the center 5 sc on the bottom edge. The front loops stay free for Border Round 2.
Count the 23 bottom sc between the corners. The center 5 are sc 10 through 14, which leaves 9 sc on each side (9 + 5 + 9 = 23).
Take B off the hook and keep its loop safe on a stitch marker or safety pin.
Trunk Row 1: With the right side facing you, join A with a sl st in the BLO of sc 10. Ch 3 (counts as a dc), then dc in the BLO of each of the next 4 sc. (5 dc.)
Trunk Row 2: Ch 3 (counts as a dc), turn, then dc in each of the next 4 dc. (5 dc.) Fasten off.
Checkpoint: The trunk measures 0.9 in (2.3 cm) wide x 0.9 in (2.3 cm) tall.
Border Round 2 (B)
Put the B loop back on your hook. Ch 1 and do not turn. Work 1 rev sc in each sc around. Behind the trunk, work into the FLO of those 5 sc; everywhere else, work through both loops. Sl st to the first rev sc. Total: 68 rev sc.
The coral crab stitch runs across the front of the trunk’s base, so the trunk seems to hang just below the coral edge.
Checkpoint: The tree measures 5 in (12.7 cm) wide x 3.5 in (8.9 cm) tall, or 4.4 in (11.2 cm) tall including the trunk.
Hanging Loop (B)
Sl st across to the middle one of the 3 sc at the top point. Ch 22, then sl st in the same stitch. Work 30 sc into the ch-22 loop, then sl st in the same top stitch again. Fasten off.
Packing 30 sc onto a 22-chain loop makes a firm, rope-like cord that stands up on its own. The loop rises about 1.75 in (4.4 cm) above the top point.
Weave in all remaining ends under the border and along the back of the coral tier lines.
Final Blocking
- Spray the ornament lightly until it is damp. You can also soak it briefly in cool water and press it between towels.
- Lay it right side up on the blocking mat.
- Pin the top point, the two bottom corners and the four small tier corners first.
- Shape it to 5 in (12.7 cm) wide x 3.5 in (8.9 cm) tall, not counting the trunk.
- Ease each fan into an even curve. Pin lightly at the center of each scallop so the coral rims stay rounded.
- Pin the trunk straight down, centered under the middle fan.
- Shape the loop into a tall, upright oval.
- Let it dry completely, then unpin. For extra stiffness, mist it with spray starch before it dries.
Final Quality-Control Checklist
- The tiers have 1, 2 and 3 fans from top to bottom.
- Each fan has 7 tr.
- Row 4 has 17 tr and Row 7 has 25 tr.
- Rows 2 and 5 are fully coral, with 9 sc and 19 sc.
- Open holes show above every fan in Tiers 2 and 3.
- Border Rounds 1 and 2 each have 68 stitches.
- Both slanted sides are the same length and have matching steps.
- The trunk is centered, with 9 border stitches on each side.
- The loop is centered over the top point and stands upright.
- The finished size is 5 in (12.7 cm) x 4.4 in (11.2 cm), within 0.25 in (0.6 cm).
- No color tails show on the front.
Troubleshooting
The fans curl or cup. Your tr stitches are tighter than the chain spaces. Go up half a hook size, or add 1 chain to each arch in Rows 3 and 6.
The fans ruffle. Your arches are too loose. Chain more firmly, or go down half a hook size.
The sides wave after Border Round 1. There are too many stitches on the sides. Work 3 sc in each tr row end instead of 4. That gives 15 sc per side and 62 sc in total, so Round 2 will also have 62 stitches.
The sides pull in or pucker. There are too few stitches on the sides. Check that each tr row end got 4 sc.
The trunk is off-center. Recount the bottom sc. There must be 9 sc on each side of the trunk.
The crab stitch looks messy. Keep your loops relaxed, and tilt the hook down a little before each yarn over.
The loop flops over. Add 2 to 4 more sc into the loop, or starch it.
Care
Hand wash in cool water with a mild soap, press the water out in a towel and dry flat, reshaping it while damp. Store the ornament flat or hang it by its loop so the tiers keep their shape.
Final Notes
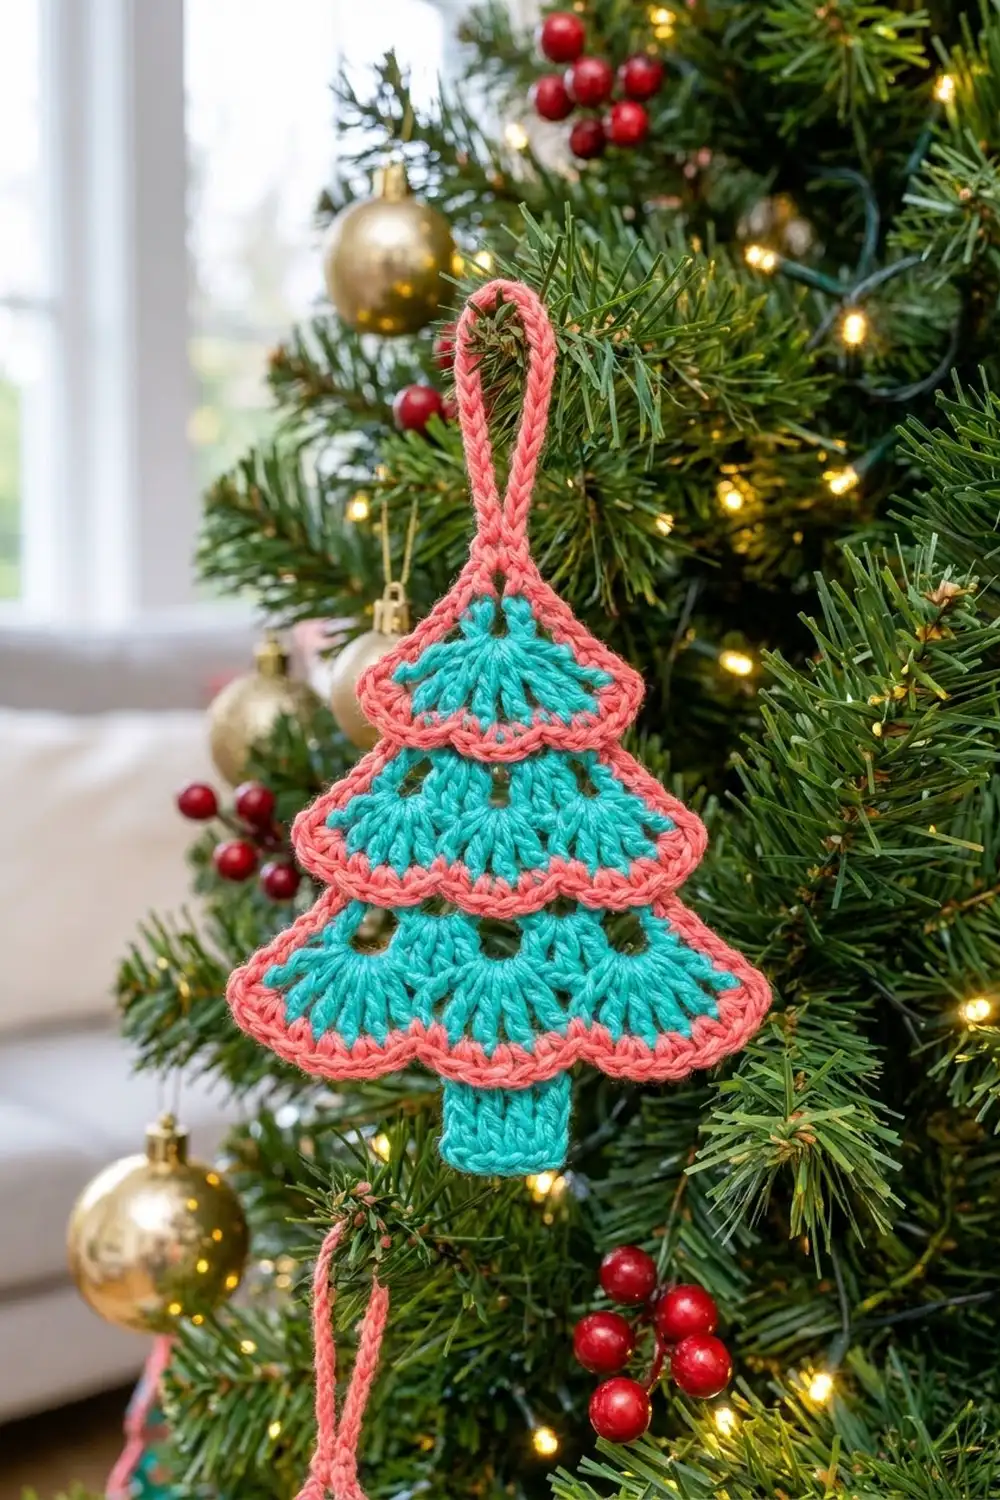
The whole ornament comes down to one simple chain of measurements. Tier 1’s 7-tr fan becomes 9 coral sc. Those split into 2 arches that carry 17 tr, which become 19 coral sc. Those split into 3 arches that carry 25 tr, for a body 4.5 in (11.4 cm) wide x 3 in (7.6 cm) tall. The 68-stitch border brings it to 5 in (12.7 cm) x 3.5 in (8.9 cm), and the 5-dc trunk adds 0.9 in (2.3 cm).
If each checkpoint matches, the next one will too. Make one tree, check it against the table, and then make a whole forest for your tree.
Happy crocheting!