

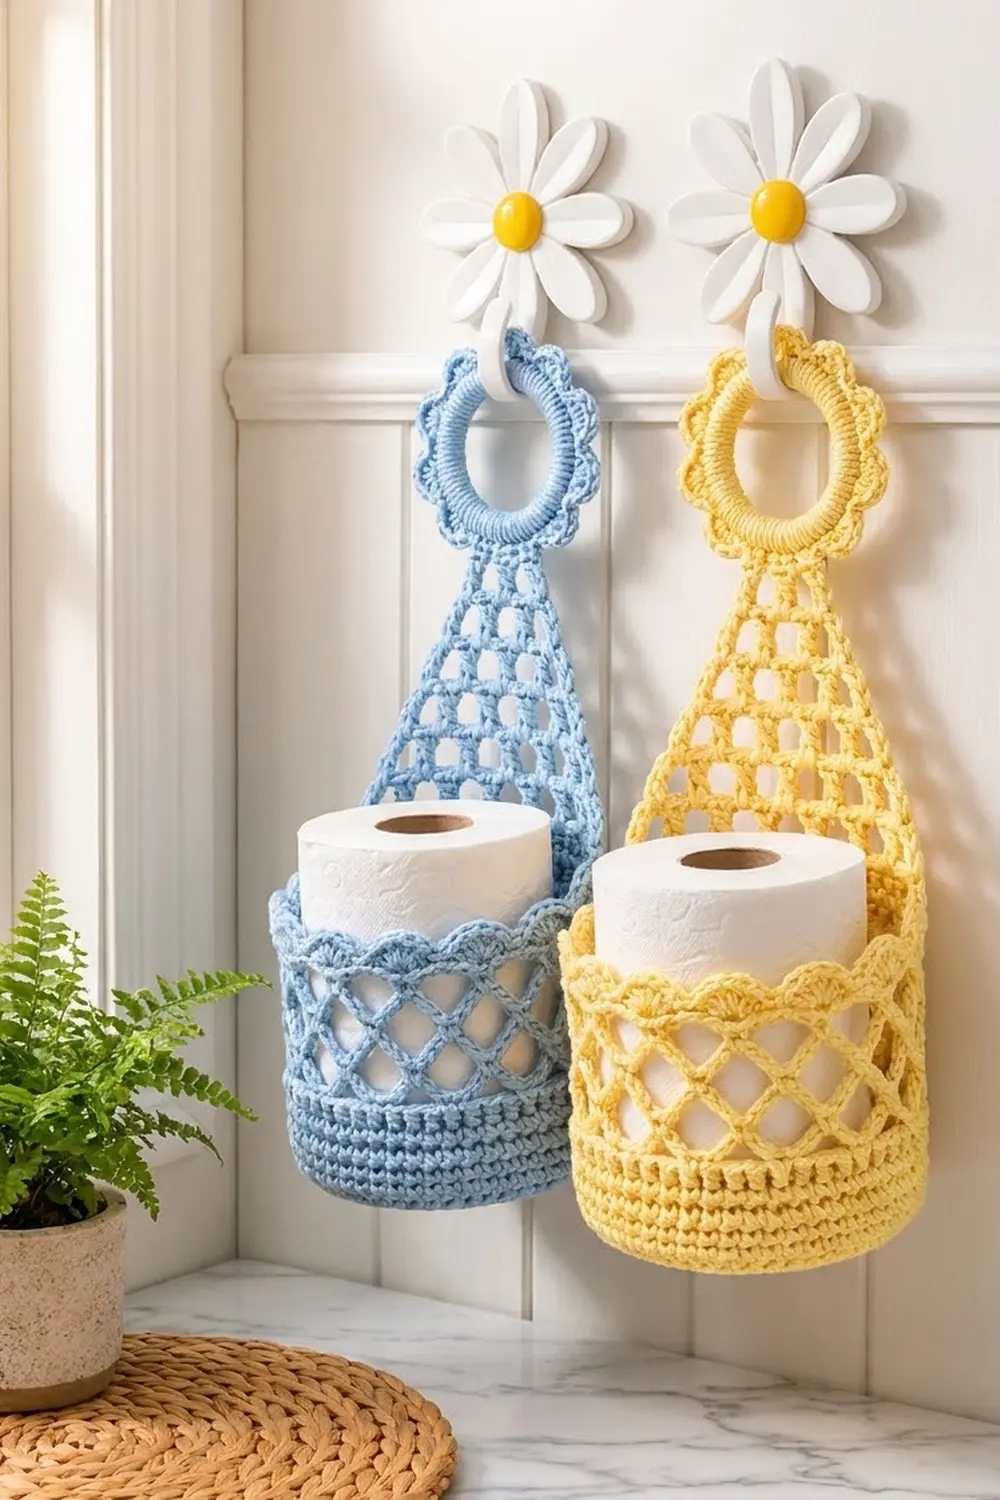
The Lattice Bloom holder is a hanging basket for a spare toilet paper roll. A round basket with an open diamond lattice holds the roll. Behind it, a triangular filet-mesh panel rises to a covered ring trimmed with flower petals, so the holder hangs neatly from a hook or knob.
The sample is shown in soft sky blue and butter yellow. Each holder uses one color from base to ring, so it’s an easy project for using up a single ball of cotton. It has a fresh, cottage-bathroom look that suits pastel tiles and white beadboard.
This pattern uses US crochet terms. The finished basket measures 5.7 in (14.5 cm) across and 4.5 in (11.4 cm) tall. The whole holder hangs about 13 in (33.0 cm) long.
You’ll make three parts: the basket (worked in the round from the base up), the back panel (worked flat in filet mesh from the wide edge to the narrow top), and the ring cover. All three are then stitched together into one holder.
Finished Size and Construction
- Finished size: about 13 in (33.0 cm) long overall
- Basket: 5.7 in (14.5 cm) diameter × 4.5 in (11.4 cm) tall
- Back panel: 5.25 in (13.3 cm) wide at the base after edging, 5 in (12.7 cm) tall before the strap
- Ring: 3 in (7.6 cm) ring; 4.5 in (11.4 cm) across with petals
- Skill level: Intermediate
- Terminology: US
- Yarn weight: worsted (#4) cotton
- Hook: 4.5 mm (US 7)
- Number of pieces: 3 parts joined into one holder
- Layout: ring at the top, panel in the middle, basket at the bottom
- Basket before scallop rim: 4 in (10.2 cm) tall
- Scallop rim depth: 0.5 in (1.3 cm)
Materials
Use 100% cotton or a cotton blend in worsted weight. Cotton holds its shape and doesn’t stretch much, which keeps the basket firm and the lattice crisp. Avoid fuzzy or very soft acrylics, because they make the mesh look blurry.
- Main color (sky blue OR butter yellow): 100 g, about 170 m per holder
- 3 in (7.6 cm) wooden or metal ring
- 4.5 mm (US 7) crochet hook
- Stitch markers
- Tapestry needle
- Scissors
- Optional: a 5.5 in (14.0 cm) plastic canvas circle to stiffen the base
One holder uses about 85 g (about 145 m). The amounts above include a margin for your gauge swatch and for weaving in ends.
Abbreviations (US Terms)
- ch – chain
- sl st – slip stitch
- sc – single crochet
- dc – double crochet
- st(s) – stitch(es)
- sk – skip
- sp – space
- BLO / FLO – back loop only / front loop only
- MR – magic ring
- rep – repeat
Scallop: 7 dc in one stitch. In the scallop rounds, each scallop sits between 2 skipped stitches on each side, so one repeat (sc, sk 2, scallop, sk 2) uses exactly 6 stitches.
Gauge and Checkpoints
Single crochet gauge: 16 sc × 18 rounds = 4 in (10.2 cm).
Filet mesh gauge: 19 sts (9 squares) = 4.75 in (12.1 cm); 4 rows = 2 in (5.1 cm).
Make the basket base first, because it doubles as your gauge test.
- After Rnd 6 (36 sts): 2.9 in (7.4 cm) across
- After Rnd 12 (72 sts): 5.7 in (14.5 cm) across
- After Rnd 17: the wall is 1.1 in (2.8 cm) tall
- Basket after Rnd 26: 4 in (10.2 cm) tall
- Panel Row 1: 4.75 in (12.1 cm) wide
If the base is too large, go down a hook size (to 4.0 mm). If it’s too small or cups upward, go up a hook size (to 5.0 mm). A standard roll is about 4.5 in (11.4 cm) wide, so the base needs to come out between 5.5 and 6 in (14.0 and 15.2 cm) for the roll to slide in easily.
Part 1: Basket
Work in joined rounds. Join each round with a sl st to the first sc, and ch 1 at the start of each round (the ch 1 doesn’t count as a stitch).
Base
Rnd 1: In a MR, work 6 sc. (6)
Rnd 2: 2 sc in each st. (12)
Rnd 3: Sc in next st, 2 sc in next; rep from * around. (18)
Rnd 4: Sc in next 2 sts, 2 sc in next; rep from * around. (24)
Rnd 5: Sc in next 3 sts, 2 sc in next; rep from * around. (30)
Rnd 6: Sc in next 4 sts, 2 sc in next; rep from * around. (36)
Rnd 7: Sc in next 5 sts, 2 sc in next; rep from * around. (42)
Rnd 8: Sc in next 6 sts, 2 sc in next; rep from * around. (48)
Rnd 9: Sc in next 7 sts, 2 sc in next; rep from * around. (54)
Rnd 10: Sc in next 8 sts, 2 sc in next; rep from * around. (60)
Rnd 11: Sc in next 9 sts, 2 sc in next; rep from * around. (66)
Rnd 12: Sc in next 10 sts, 2 sc in next; rep from * around. (72)
Check: the base should measure 5.7 in (14.5 cm) across.
Solid Wall
Rnd 13: Sc in the BLO of each st. (72) This makes a sharp turning ridge where the base meets the wall.
Rnds 14–17: Sc in each st. (72)
Check: the wall is 1.1 in (2.8 cm) tall.
Lower Lattice
Rnd 18: Ch 1, sc in first st, ch 5, sk 3, sc in next st; rep from * 16 more times, ch 5, sk 3, sl st to first sc. (18 ch-5 loops)
Rnd 19: Sl st in next 3 ch to reach the center of the loop. Ch 1, sc in the same loop, ch 5, sc in next loop; rep from * 16 more times, ch 5, sl st to first sc. (18 loops)
Rnds 20–21: Rep Rnd 19. (18 loops)
Because each new sc sits in the center of a loop below, the loops stagger into diamonds.
Frill Band
Rnd 22: Sl st into the first ch-5 loop. Ch 1, work 4 sc in the same loop, then 4 sc in each loop around. (72: 18 loops × 4 sc)
Rnd 23: Sc in the BLO of each st. (72) The front loops of Rnd 22 are left free for the frill.
Upper Lattice
Rnds 24–25: Rep Rnds 18–19. (18 loops)
Rnd 26: Rep Rnd 22. (72)
Fasten off. The basket now measures 4 in (10.2 cm) tall.
Part 2: Back Panel
The panel is worked flat in filet mesh. Each open square is made of 1 dc, 1 ch, and 1 dc, with neighboring squares sharing their dc. A row of N squares therefore has N + 1 dc and N ch-1 sps, for 2N + 1 sts.
Row 1: Ch 22. Dc in 6th ch from hook, ch 1, sk 1, dc in next ch; rep from * across. Turn. (9 squares; 10 dc + 9 ch-1 sps = 19 sts)
Row 2 (even row): Ch 4 (counts as dc + ch 1), dc in next dc, ch 1; rep from * 7 more times, dc in 3rd ch of turning ch. Turn. (9 squares, 19 sts)
Row 3 (decrease row): Sl st in first dc, ch-1 sp, and next dc. Ch 4 (counts as dc + ch 1), dc in next dc, ch 1; rep from * 5 more times, dc in next dc. Leave the last square unworked. Turn. (7 squares, 15 sts)
Row 4: Work as an even row over 7 squares. (7 squares, 15 sts)
Row 5: Work as a decrease row. (5 squares, 11 sts)
Row 6: Even row. (5 squares, 11 sts)
Row 7: Decrease row. (3 squares, 7 sts)
Row 8: Even row. (3 squares, 7 sts)
Row 9: Decrease row. (1 square, 3 sts)
Row 10:* Even row. (1 square, 3 sts)
The decreases step in by one square at each end on every second row, which gives the panel its triangle shape. Check: the panel is 5 in (12.7 cm) tall. Don’t fasten off yet.
Part 3: Ring Cover
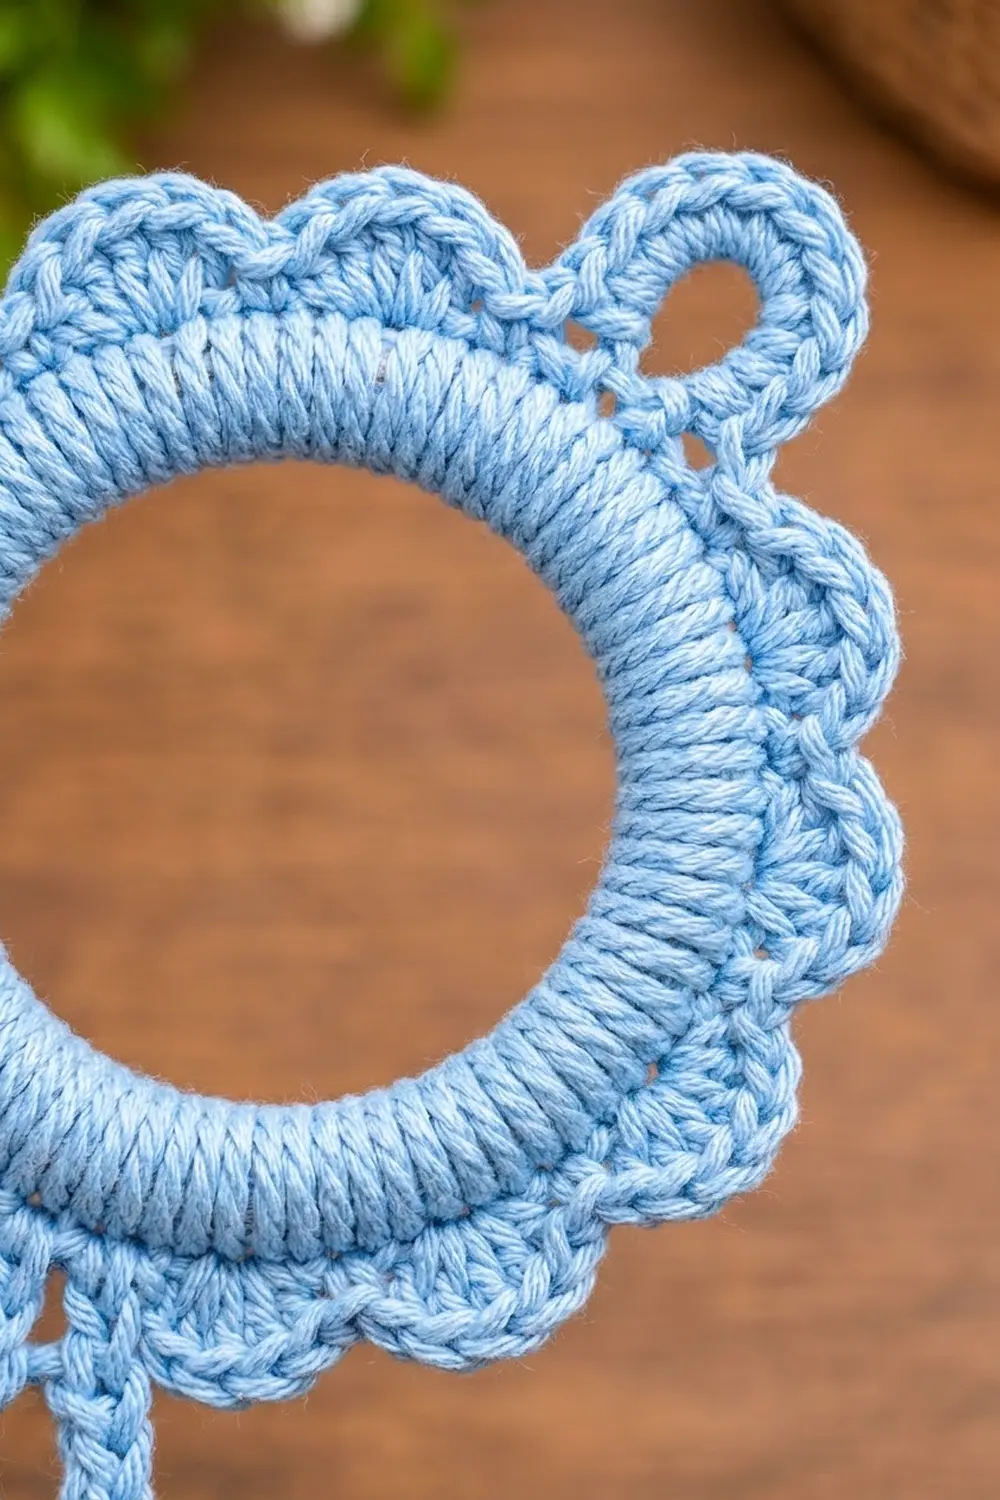
Rnd 1: Join yarn to the ring with a sc, then work 59 more sc around it, packing them tightly. Sl st to the first sc. (60)
Push the stitches together as you work so the ring doesn’t show through. Leave the yarn attached for the petals, which are worked in the Border section.
Make All Pieces
For each holder, make 1 basket, 1 back panel, and 1 ring cover, all in the same color. For a matching pair, make one set in sky blue and one in butter yellow.
Layout, top to bottom:
[ hanging loop ]
[   ring + petals   ]
[ strap  ]
[ triangle panel ]
[ basket (panel inside back wall) ]
Border
The edging gauge is the same as the basket: 4 sc = 1 in (2.5 cm). Each scallop repeat uses 6 sts, which equals 1.5 in (3.8 cm).
Basket Rim (Rnd 27): Ch 1, sc in first st, *sk 2, 7 dc in next st, sk 2, sc in next st; rep from * 10 more times, sk 2, 7 dc in next st, sk 2, sl st to first sc. (12 scallops)
Why the math works: 12 repeats × 6 sts = 72 sts, so the scallops land exactly on the 18 in (45.7 cm) rim with no leftover stitches.
Basket Frill: Turn the basket upside down. Join yarn in any free front loop of Rnd 22 and work the same 12-scallop round into those front loops. Fasten off. The frill rests over the upper lattice like a petal band.
Panel Edging: Continue from Row 10 without turning, working 1 round of sc evenly around the panel:
- Top: 3 sc across the top of Row 10
- Side: 20 sc down the side (2 sc per row end × 10 rows)
- Bottom: 21 sc along the bottom (1 sc in each of the 19 foundation sts, plus 1 extra sc in the first and last st, which are the corners)
- Other side: 20 sc up the second side
Sl st to the first sc. (64 sc: 3 + 20 + 21 + 20)
Each stepped row end gets 2 sc, so the stair-step edge becomes a smooth, straight diagonal. After edging, the panel base measures 5.25 in (13.3 cm), which is 21 sc at 4 sc per inch.
Panel Strap: Ch 1, then sc in the 3 top sc only. Turn. Work 4 more rows of 3 sc each. (5 rows, 1.1 in / 2.8 cm) Fasten off, leaving a 10 in (25.4 cm) tail.
Ring Petals (Rnd 2): Ch 1, sc in first st, *sk 2, 7 dc in next st, sk 2, sc in next st; rep from * 8 more times, sk 2, 7 dc in next st, sk 2, sl st to first sc. (10 petals; 10 × 6 = 60 sts)
Hanging Loop: Sl st to the center (4th) dc of the top petal, ch 10, and sl st in the same st. Fasten off.
Joining
- Panel to basket: Put the panel inside the basket, with its bottom edge against the back wall at the level of Rnd 23. With a tapestry needle, whipstitch the 21 bottom sc of the panel to 21 consecutive sts of Rnd 23, one stitch to one stitch. Then tack each side of the panel to Rnd 26.
- Strap to ring: Place the ring so that the sc between the two bottom petals sits above the panel. Wrap the strap from front to back around the ring at that sc and whipstitch the strap’s end to the back of Row 10.
- Tension: Pull each whipstitch just snug. If you pull too hard, the basket wall puckers. If you sew too loosely, the panel tips forward.
Size check: Hang the holder by the loop. It should measure about 13 in (33.0 cm) from the loop to the bottom of the base.
Final Blocking
- Spritz the whole holder lightly with water.
- Put a toilet paper roll in the basket to shape it.
- Lay the holder flat with the panel straightened.
- Pin the panel’s diagonal edges straight and open each mesh square.
- Shape the scallops and petals with your fingers so they fan out evenly.
- Let it dry completely, at least 12 hours, before taking out the roll.
Final Quality-Control Checklist
- Base is 5.7 in (14.5 cm) across and lies flat.
- Each lattice round has 18 loops.
- Rnds 22 and 26 each have 72 sc.
- The basket rim and the frill each have 12 scallops.
- The panel steps 9-7-5-3-1 squares, and the edging has 64 sc.
- The ring has 60 sc and 10 petals.
- No part of the ring shows through the stitches.
- The holder hangs straight, about 13 in (33.0 cm) long.
Troubleshooting
- Base ruffles: Your tension is too loose or you’re on too big a hook. Go down a hook size.
- Base cups upward: Go up a hook size, or check that each increase round has the right count.
- Lattice loops are crooked: Make sure every sc goes into the center of a loop, not the side.
- Scallops don’t fit the round: Your count before the scallop round isn’t 72. Recount Rnd 26.
- Panel leans or curls: Block it pinned flat, and check that each decrease row skips exactly one square at each end.
- Ring shows through: Add 2–4 more sc in Rnd 1, then adjust Rnd 2 by working 1 sk instead of 2 near the join so the petals still fit.
Care
Hand wash in cool water with mild soap. Reshape the holder with a roll inside and dry it flat.
Final Notes
The measurement chain is simple: 16 sc = 4 in (10.2 cm) gives a 72-stitch base 5.7 in (14.5 cm) wide. That base carries 18 lattice loops and 12 six-stitch scallops. The 19-stitch panel base becomes 21 edging sc, which match 21 basket stitches. The 60-stitch ring cover carries 10 petals. If you check each stage against these numbers, every part fits the next.
Happy crocheting!