
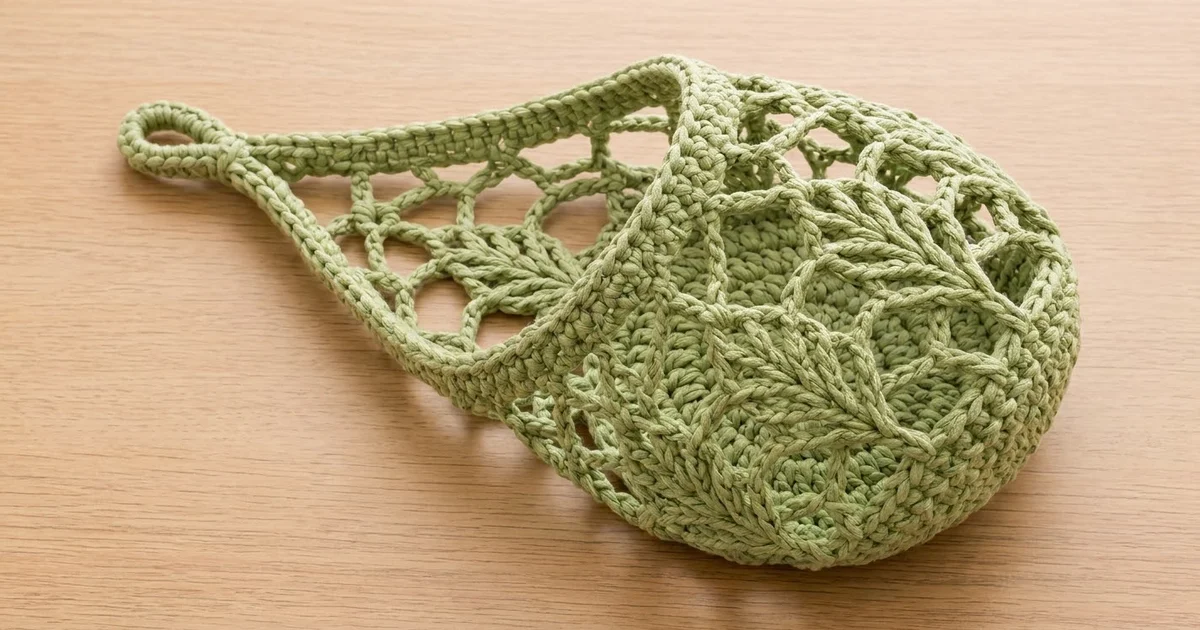
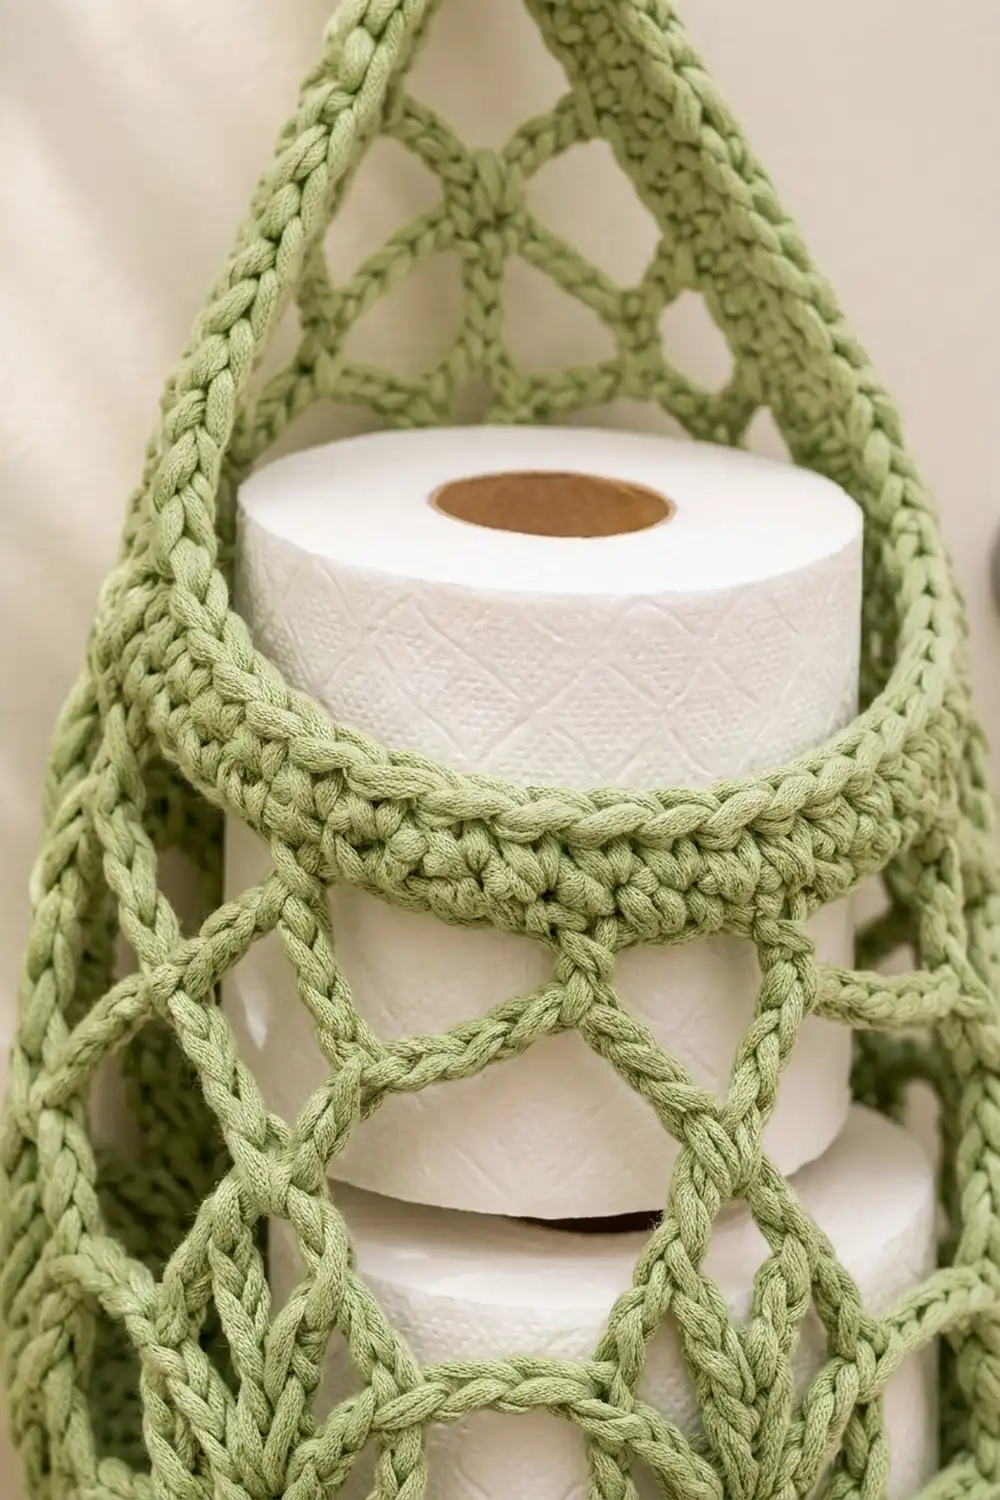
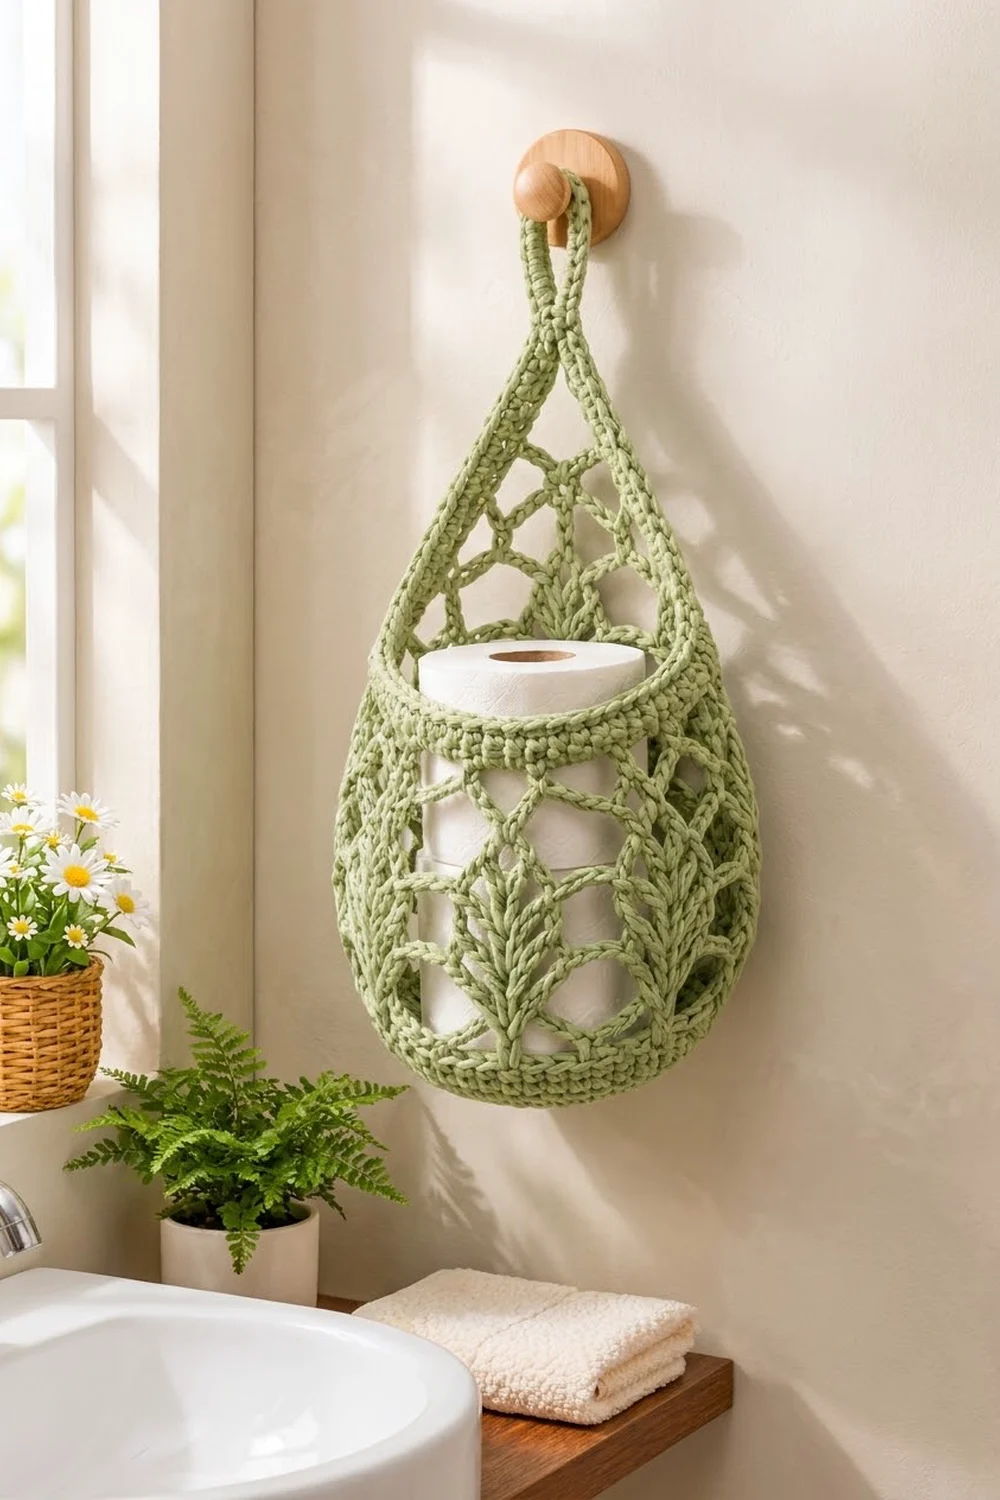
This hanging toilet paper holder has a teardrop shape: a solid round base, a lacy body with fern-leaf columns, a firm rim, and a pointed back panel that ends in a hanging loop. It holds two standard rolls and hangs from a single wall knob or hook.
The sample is in soft sage green cotton. The leaf columns are stacked double crochet shells, and the chain-loop diamond net between them keeps the basket light and open. The rolls show through, so you can see at a glance when it’s time to restock.
The pattern uses US crochet terms. The finished holder measures about 15 in (38.1 cm) from base to the top of the loop. The rim is about 6.7 in (17.0 cm) across, the widest part of the body about 8 in (20.3 cm), and the base 5.5 in (14.0 cm) across.
You work the whole holder in one piece. First you make a flat base in rounds, then a single crochet ridge round turns the base up into the walls. Eleven lace rounds form the body, four rounds of single crochet form the rim band, and you then work the back panel in rows above the rim. An edging round outlines the opening and creates the strap edges and the hanging loop.
Finished Size and Construction
- Finished size: 15 in (38.1 cm) total length; rim diameter 6.7 in (17.0 cm); widest point about 8 in (20.3 cm)
- Skill level: Intermediate
- Terminology: US
- Yarn weight: Worsted (#4) cotton or cotton blend
- Hook: 5.0 mm (H-8)
- Number of pieces: 1 (seamless)
- Layout: Single standalone basket; no joining
- Base size: 5.5 in (14.0 cm) diameter
- Size before rim band: Lace body 7.7 in (19.6 cm) tall from base edge
- Rim band depth: 1 in (2.5 cm)
Materials
Cotton or a cotton blend works best because it holds its shape, resists stretching under the weight of the rolls, and handles bathroom humidity well. Avoid very drapey yarns such as bamboo or superwash acrylic, because the basket will sag.
- Sage green worsted cotton: 160 g, about 290 m (317 yd)
Tools:
- 5.0 mm (H-8) crochet hook
- Tapestry needle
- 2 stitch markers
- Scissors
- Measuring tape
- Spray bottle and pins for blocking
The quantity includes a margin of about 15 percent for your gauge swatch and any small tension differences.
Abbreviations (US Terms)
- ch – chain
- sl st – slip stitch
- sc – single crochet
- dc – double crochet
- BLO – back loop only
- sk – skip
- sp – space
- st(s) – stitch(es)
- RS / WS – right side / wrong side
Special stitches
- V-st: (dc, ch 2, dc) in the same stitch or space.
- Shell: (3 dc, ch 2, 3 dc) in the same stitch or space. Stacked shells form the fern columns, and their ch-2 spaces line up to make the leaf’s center spine.
Gauge and Checkpoints
Gauge: 16 sc and 16 rows = 4 in (10.2 cm).
Make a 20-stitch sc swatch before you start. If you count more stitches than 16 per 4 in (10.2 cm), go up a hook size. If you count fewer, go down a hook size.
The base works as your test piece. Finish Round 5 and measure it before you continue.
Checkpoints:
- After base Round 2: 2.2 in (5.6 cm) diameter
- After base Round 5: 5.5 in (14.0 cm) diameter
- After lace Round 12: 4.2 in (10.7 cm) of wall height
- After lace Round 17: 7.7 in (19.6 cm) of wall height
- After rim Round 21: 8.7 in (22.1 cm) of wall height; rim 21 in (53.3 cm) around
If your base is too big, it will ripple, so go down a hook size. If it is too small, it will cup, so go up a hook size. A standard roll is about 4.5 in (11.4 cm) wide, so the base must measure at least that much.
Base
The base is worked in joined rounds. Do not turn.
Round 1: Make a magic ring. Ch 3 (counts as dc), then work 11 dc in the ring. Join with a sl st to the top of the ch-3. (12 dc)
Round 2: Ch 3 (counts as dc). Work 1 dc in the same st, then 2 dc in each st around. Join. (24 dc)
Round 3: Ch 3, 1 dc in the same st, 1 dc in the next st. Then work 2 dc in the next st, 1 dc in the next st around. Join. (36 dc)
Round 4: Ch 3, 1 dc in the same st, 1 dc in each of the next 2 sts. Then work 2 dc in the next st, 1 dc in each of the next 2 sts around. Join. (48 dc)
Round 5: Ch 3, 1 dc in the same st, 1 dc in each of the next 3 sts. Then work 2 dc in the next st, 1 dc in each of the next 3 sts around. Join. (60 dc)
Checkpoint: the base should measure 5.5 in (14.0 cm) across.
Round 6 (turning ridge): Ch 1. Work sc in BLO in each st around. Join to the first sc. (60 sc)
The unworked front loops make a ridge, and the walls start to stand up from here.
Lace Body
The body uses two kinds of round that alternate:
- Type A rounds: Each section between shells has 2 ch-loops with 1 sc in the middle.
- Type B rounds: Each section has 3 ch-loops and 2 sc. Work 1 sc into each loop of the Type A round below.
The next Type A round places its single sc in the middle loop of the Type B round below. This alternation builds the diamond net. Making the loops longer or shorter shapes the teardrop curve.
Round 7 (Type A setup, loops of 3): Ch 5 (counts as dc + ch 2), then dc in the same st to finish the first V-st. Ch 3, sk 4 sts, sc in the next st, ch 3, sk 4 sts. Then repeat V-st in the next st, ch 3, sk 4, sc in the next st, ch 3, sk 4 5 times. Join to the 3rd ch of the ch-5.
(6 V-sts, 6 sc, 12 ch-3 loops; each repeat uses 10 sts, and 6 × 10 = 60)
Round 8 (Type B, loops of 4): Sl st into the first ch-2 sp. Ch 3 (counts as dc), then work (2 dc, ch 2, 3 dc) in the same sp to make the first shell.
Then work [ch 4, sc in the next ch-3 loop, ch 4, sc in the next ch-3 loop, ch 4, shell in the next V-st sp] 5 times. Finish with ch 4, sc in the next loop, ch 4, sc in the next loop, ch 4, and join to the top of the ch-3.
(6 shells = 36 dc, 12 sc, 18 ch-4 loops)
Round 9 (Type A, loops of 5): Sl st in the next 2 dc and into the ch-2 sp. Ch 3, then work (2 dc, ch 2, 3 dc) in the same sp.
Then work [ch 5, sk the next loop, sc in the middle loop, ch 5, sk the next loop, shell in the next shell sp] 5 times. Finish with ch 5, sk the next loop, sc in the middle loop, ch 5, and join.
(6 shells, 6 sc, 12 ch-5 loops)
Begin every remaining lace round the same way: sl st in the next 2 dc and into the ch-2 sp, ch 3, then (2 dc, ch 2, 3 dc) in the same sp.
Each Type B round has 6 shells, 12 sc, and 18 loops. Each Type A round has 6 shells, 6 sc, and 12 loops.
| Round | Type | Loop length | Count |
|---|---|---|---|
| 10 | B | ch 5 | 6 shells, 12 sc, 18 ch-5 loops |
| 11 | A | ch 6 | 6 shells, 6 sc, 12 ch-6 loops |
| 12 | B | ch 6 | 6 shells, 12 sc, 18 ch-6 loops (widest) |
| 13 | A | ch 6 | 6 shells, 6 sc, 12 ch-6 loops |
| 14 | B | ch 5 | 6 shells, 12 sc, 18 ch-5 loops |
| 15 | A | ch 5 | 6 shells, 6 sc, 12 ch-5 loops |
| 16 | B | ch 4 | 6 shells, 12 sc, 18 ch-4 loops |
| 17 | A | ch 4 | 6 shells, 6 sc, 12 ch-4 loops |
Checkpoint: after Round 17, the wall measures 7.7 in (19.6 cm) from the turning ridge.
Each round of shells stacks directly over the one below, which makes six vertical fern columns with a center spine.
Rim Band
Round 18 (conversion round): Ch 1. In each shell, sc in each of the 3 dc, 2 sc in the ch-2 sp, and sc in each of the 3 dc. In each ch-4 loop, work 3 sc. Do not work into the sc between the loops. Join.
Count: 36 sc worked 1 per dc, plus 12 sc in the ch-2 spaces, plus 36 sc in the 12 loops, for 84 sc.
Rounds 19–21: Ch 1, sc in each st around, join. (84 sc)
Fasten off.
Back Panel and Hanging Loop
Flatten the basket so that one fern column sits centered at the back. The rim sc directly above that column’s spine is st 21 of the back panel.
Count 20 sts to the right of it and place a marker there for st 1. Count 20 sts to the left for st 41. The back panel uses these 41 sts, and the other 43 sts remain as the front rim.
Row 1 (RS): Join yarn in st 1 with a sc. Work [ch 5, sk 3, sc in the next st] 4 times. Ch 3, sk 3, then work a shell in st 21. Ch 3, sk 3, sc in st 25. Work [ch 5, sk 3, sc in the next st] 4 times, ending in st 41.
(10 sc, 8 ch-5 loops, 2 ch-3 sps, 1 shell)
Row 2: Turn. Sl st into the first ch-5 loop, ch 1, and sc in the same loop. Work [ch 5, sc in the next loop] 3 times. Ch 3, shell in the shell sp, ch 3. Sc in the next ch-5 loop, then work [ch 5, sc in the next loop] 3 times.
(8 sc, 6 ch-5 loops, 1 shell)
Row 3: Repeat Row 2, but work the bracketed repeat 2 times instead of 3. (6 sc, 4 loops, 1 shell)
Row 4: Repeat Row 2, but work the bracketed repeat once. (4 sc, 2 loops, 1 shell)
Row 5: Turn. Sl st into the first loop, ch 1, sc in the same loop. Ch 3, shell in the shell sp, ch 3, sc in the last loop. (2 sc, 1 shell)
Row 6 (apex): Turn. Sl st into the ch-3 sp, then sl st in each of the next 3 dc and into the shell sp. Ch 1, sc in the sp. (1 sc)
The back panel measures about 4 in (10.2 cm) tall.
Hanging loop: Ch 18 and sl st in the apex sc to close the loop. Work 26 sc into the loop and sl st in the apex sc. The finished loop is about 2 in (5.1 cm) long.
Do not fasten off.
Edging (Strap Edges)
Edging gauge: 16 sc = 4 in (10.2 cm), the same as the rim.
Round 1: Ch 1 and work 1 sc in the apex.
- Down the first slope: Work 4 sc in each row-end from Row 5 to Row 1. (20 sc)
- Front rim: Sc in each of the 43 front sts. (43 sc)
- Up the second slope: Work 4 sc in each row-end from Row 1 to Row 5. (20 sc)
Join to the first sc. Total: 1 + 20 + 43 + 20 = 84 sc
Round 2: Ch 1, sc in each st around, and join. (84 sc) Fasten off and weave in the ends.
Why the math works:
- The rim follows the 6-repeat structure: 14 sc per repeat × 6 = 84. At 4 sc per inch, that gives a circumference of 21 in (53.3 cm), or 6.7 in (17.0 cm) across, which leaves room for a 4.5 in (11.4 cm) roll.
- The back panel uses 41 sts, which is 1 sc + 10 four-stitch units. That keeps the loops even and the shell centered.
- The edging uses 4 sc per row-end, which matches the rim gauge, so the strap edges stay flat without flaring.
Final Blocking
- Weave in all ends securely along the dc posts.
- Lightly mist the whole basket with water until it is damp but not soaked.
- Stuff the body with a rolled towel or two toilet paper rolls wrapped in plastic.
- Open each ch-loop diamond with your fingers so the net looks even.
- Pin the back panel flat, with the apex point centered over the middle fern column.
- Pin the hanging loop into a neat oval.
- Let it dry completely, which takes 12–24 hours.
Final Quality-Control Checklist
- Base is 5.5 in (14.0 cm) across and sits flat
- Six fern columns stand straight, with the spines lined up vertically
- Each diamond section has the correct number of loops for its round type
- Rim has exactly 84 sc and measures 21 in (53.3 cm) around
- Back panel shell is centered over a fern column
- Both strap edges have 20 sc and look symmetrical
- Hanging loop is firm and about 2 in (5.1 cm) long
- Two rolls slide in easily
Troubleshooting
- Columns spiral sideways: You started the round in the wrong place. Always slip stitch into the shell’s ch-2 sp before you begin a round.
- Basket is too narrow for the rolls: Your tension is tight. Go up to a 5.5 mm hook and check the base checkpoint again.
- Mesh sags: Your chains are loose. Chain more firmly, or shorten every loop by 1 ch.
- Rim flares: Work 2 sc instead of 3 in two of the loops per repeat, then recheck the count against your gauge.
- Strap edges ruffle: Work 3 sc per row-end instead of 4.
Care
Hand wash in cool water and reshape while damp. Lay flat or stuff with a towel to dry.
Final Notes
Each stage depends on the measurement before it. A 5.5 in (14.0 cm) base leads to 60 stitches and 6 lace repeats. That gives a wall of 7.7 in (19.6 cm), an 84-stitch rim that is 21 in (53.3 cm) around, a 4 in (10.2 cm) back panel, and a 2 in (5.1 cm) loop, for about 15 in (38.1 cm) in total. If you check each checkpoint as you go, the finished holder will fit two rolls neatly.
Happy crocheting!