

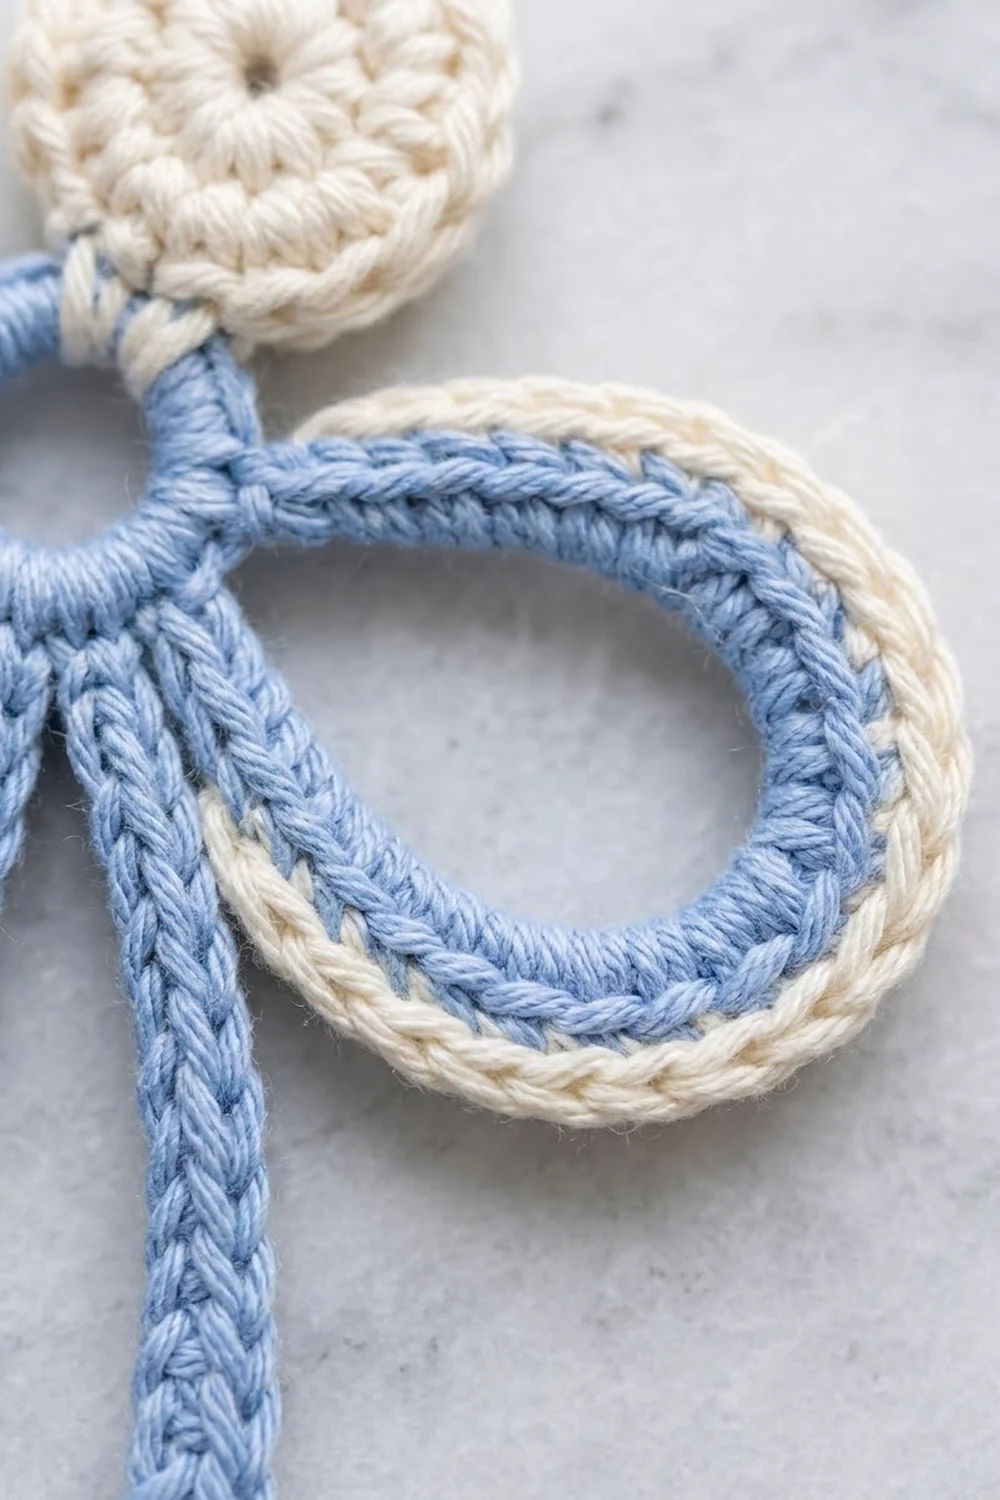
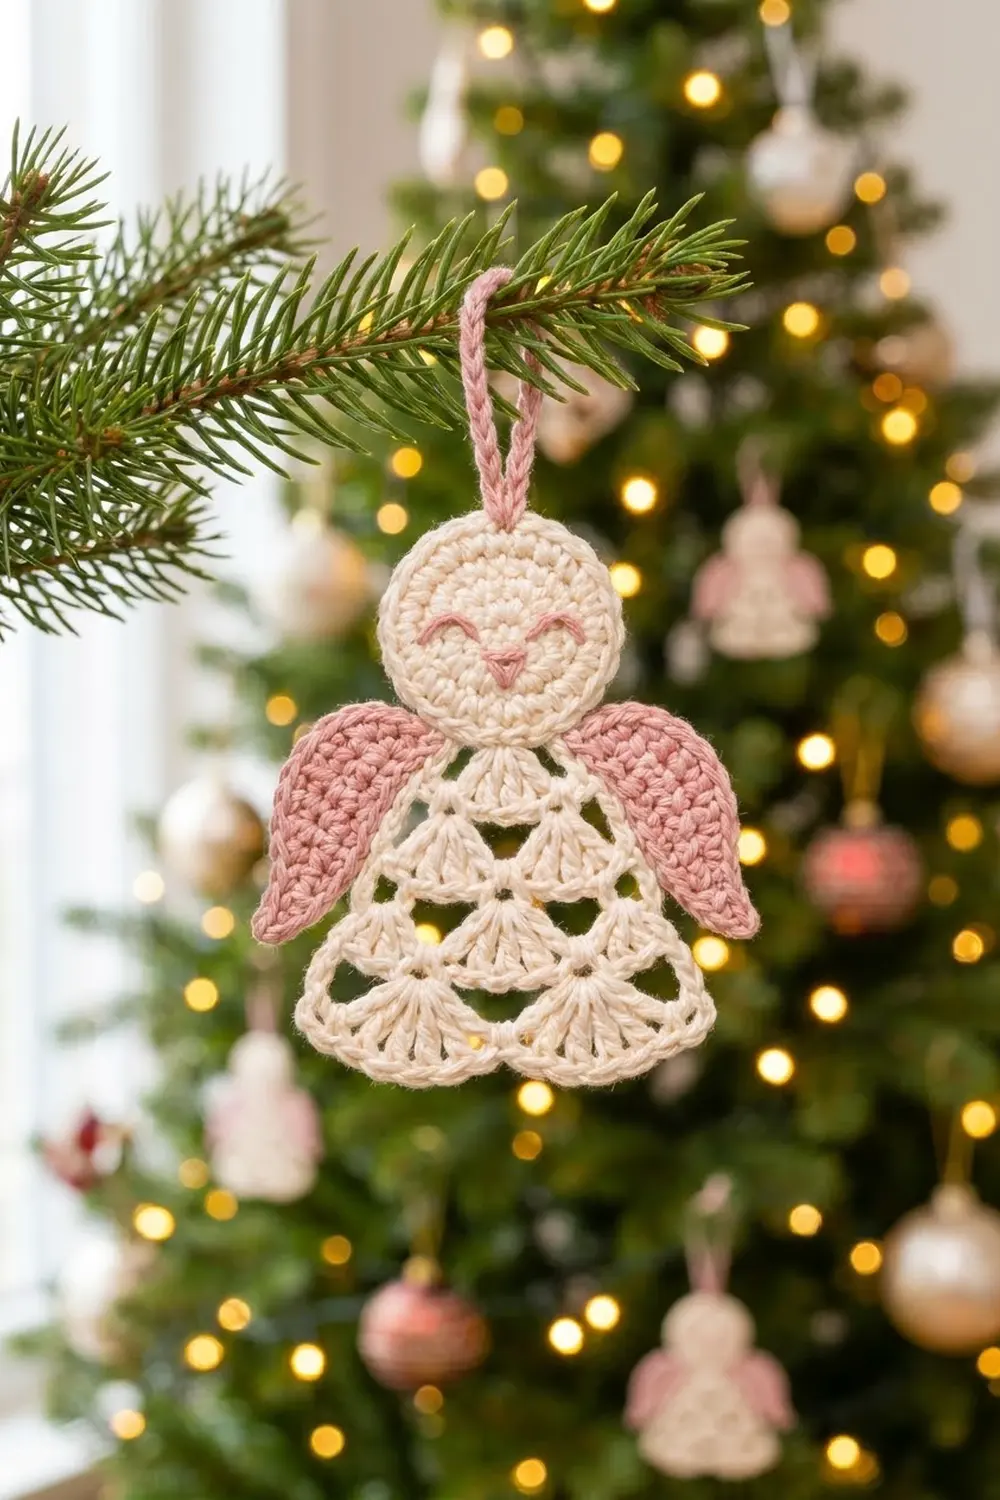
The Bluebell Loop Angel is a light, open ornament made from cords of soft blue cotton. Two wing loops reach out to the sides and four long skirt loops fan downward. A round cream head, a cream edge along each wing and a row of four cream shells along the hem complete the angel.
The palette is calm and wintry: powder blue for the body and warm cream for the trim. The style is simple and graphic, so the angel looks good on a tree, tied to a gift or hung in a window.
This pattern uses US crochet terms. The finished angel measures 4.5 in (11.4 cm) wide and 5 in (12.7 cm) tall, plus a 2 in (5.1 cm) hanging loop, for a total height of 7 in (17.8 cm).
You’ll crochet a small blue ring and work six chain loops off it. Then you cover each chain loop with single crochet to make the thick cords. After that you add the cream trim, make the head, sew it on and finish with the hanging loop.
Finished Size and Construction
- Finished size: 4.5 in (11.4 cm) wide × 5 in (12.7 cm) tall; 7 in (17.8 cm) tall including the hanging loop
- Skill level: Easy-intermediate
- Terminology: US
- Yarn weight: DK / light worsted (#3) cotton
- Hook: 3.5 mm (E-4)
- Number of pieces: 1 ornament (body plus a head disc sewn on)
- Layout: Head on top, ring in the center, one wing loop on each side, four skirt loops below
- Head size: 1.25 in (3.2 cm) across
- Size before trim: 4.25 in (10.8 cm) wide; 3.4 in (8.6 cm) from the top of the ring to the bottom of the skirt loops
- Trim depth: about 1/8 in (0.3 cm) on the wings; shells hang about 0.35 in (0.9 cm) below the skirt
Materials
Use a smooth mercerized or soft-twist cotton in DK weight, about 110 m per 50 g. Cotton holds the loop shapes well and blocks crisply. Acrylic also works but makes a softer, less defined cord.
- Powder blue: 8 g / 18 m
- Cream: 5 g / 11 m
These quantities include a margin of about 40% for swatching and tails.
Tools:
– 3.5 mm (E-4) crochet hook
– Tapestry needle
– Scissors
– Rust-proof pins and a foam blocking mat
– Spray bottle with water
– Ruler or tape measure
– Locking stitch markers (4–6)
Abbreviations (US Terms)
- ch – chain
- sl st – slip stitch
- sc – single crochet
- dc – double crochet
- st(s) – stitch(es)
- sk – skip
- sp – space
- RS – right side
Special stitch – Covered loop: Work single crochet into a chain loop space (not into the chains themselves), wrapping each sc around the whole chain. Push the stitches together as you go so they sit snugly. This makes a firm round cord with a V-texture along the outer edge.
Shell: 7 dc in the same st.
Gauge and Checkpoints
Gauge: 5 sc and 6 rows = 1 in (2.5 cm) in sc worked in rows; 5 ch = 1 in (2.5 cm).
Make the head first as your test piece. It is small, quick and shows your tension right away.
Checkpoints:
– Head, Round 1: 0.8 in (2.0 cm) across
– Head, Round 2: 1.25 in (3.2 cm) across
– Body ring, Round 1: 0.9 in (2.3 cm) outer diameter
– A ch-24 laid straight: about 4.8 in (12.2 cm)
– A ch-28 laid straight: about 5.6 in (14.2 cm)
– Covered wing loop: about 1.7 in (4.3 cm) long from the ring
– Covered skirt loop: about 2.5 in (6.4 cm) long from the ring
If the pieces come out too big, go down to a 3.25 mm hook or tighten your chains. If they come out too small or the loops curl, go up to a 3.75 mm hook. Loose chains are the most common reason loops end up too long, so check your chain length before covering.
Head (Cream)
Round 1: Make a magic ring. Ch 3 (counts as first dc), work 11 dc in the ring, then pull the ring almost closed, leaving a tiny center hole. Sl st to the top of the beginning ch-3. (12 dc)
Round 2: Ch 1, work 2 sc in each st around, then sl st to the first sc. (24 sc)
Fasten off and leave a 12 in (30.5 cm) tail for sewing. The head should measure 1.25 in (3.2 cm) across.
Body Ring (Blue)
Round 1: Ch 6 and sl st to the first ch to form a ring. Ch 1, work 18 sc in the ring and sl st to the first sc. (18 sc)
Don’t fasten off. Number the sts 1 to 18, with st 1 being the first sc of the round. St 1 is the top center of the angel and st 10 is the bottom center.
Stitch map:
– Head attaches to sts 18, 1 and 2
– Right wing: sts 4 to 6
– Skirt: sts 8 to 12
– Left wing: sts 14 to 16
– Sts 3, 7, 13 and 17 are spacers
Mark sts 4, 8, 12 and 16. The ring should measure 0.9 in (2.3 cm) across.
Round 2: Chain Loops (Blue)
Sl st in sts 2 and 3.
- Right wing: Sc in st 4, ch 24, sk st 5, sc in st 6.
- Spacer: Sl st in st 7.
- Skirt loop 1: Sc in st 8, ch 28, sc in st 9.
- Skirt loop 2: Ch 28, sc in st 10.
- Skirt loop 3: Ch 28, sc in st 11.
- Skirt loop 4: Ch 28, sc in st 12.
- Spacer: Sl st in st 13.
- Left wing: Sc in st 14, ch 24, sk st 15, sc in st 16.
Count: 2 ch-24 wing loops, 4 ch-28 skirt loops, 9 anchor sc and 2 spacer sl sts.
Each wing chain closes 2 sts apart, which pinches the base and makes the teardrop shape. The skirt loops share their anchor sts, so they fan out side by side from the bottom of the ring.
Round 3: Covering the Loops (Blue)
Turn. You’ll now work back along the ring, covering each loop in turn.
- Left wing: Work 32 sc in the ch-24 sp, then sl st in the sc at st 14.
- Sl st in st 13, then sl st in the sc at st 12.
- Skirt loop 4: Work 37 sc in the ch-28 sp, then sl st in the sc at st 11.
- Skirt loop 3: Work 37 sc in the ch-28 sp, then sl st in the sc at st 10.
- Skirt loop 2: Work 37 sc in the ch-28 sp, then sl st in the sc at st 9.
- Skirt loop 1: Work 37 sc in the ch-28 sp, then sl st in the sc at st 8.
- Sl st in st 7, then sl st in the sc at st 6.
- Right wing: Work 32 sc in the ch-24 sp, then sl st in the sc at st 4.
Fasten off and weave in the ends.
Round 3 count: 32 + 32 = 64 sc on the wings and 4 × 37 = 148 sc on the skirt, for 212 sc in total.
The covering ratio is the same on every loop: 32 sc over 24 ch and 37 sc over 28 ch, both about 1.3 sc per ch. That’s why the cords lie flat without rippling or cupping.
In each loop, number the covering sc from 1, starting with the first sc you worked into that loop. Each skirt loop has 37 sc, so sc 19 sits exactly at the bottom center.
Checkpoint: The piece should measure 4.25 in (10.8 cm) across the wings and 3.4 in (8.6 cm) from the top of the ring to the bottom of the skirt. Choose the neater face as the RS. The piece is reversible.
Head Joining
Lay the head above the ring. Choose a group of 3 sc on the head’s outer edge and treat the middle one as the head’s bottom center. Use the cream tail to whipstitch those 3 head sts to ring sts 18, 1 and 2. Go through each pair twice so the neck stays firm. Weave in the tail.
Count 12 sts around the head from its bottom center to find the top center, and mark it for the hanging loop.
Border: Cream Trim
The trim is worked as separate short sections, in sc and dc at the same gauge as the body: 5 sc = 1 in (2.5 cm). Work with the RS facing.
Section 1 – Right wing edge
Sk the first 4 covering sc on the right wing. Join cream with sc in sc 5, then sc in the next 23 sc. (24 sc) Fasten off. This leaves 4 blue sc uncovered at each end of the wing, next to the ring, just like the photo.
Section 2 – Left wing edge
Work as Section 1. (24 sc) Fasten off.
Section 3 – Skirt shells
Hold the angel upside down. Start with the outermost skirt loop on the right.
- Join cream with sc in sc 16. Sk sc 17 and 18, work a shell (7 dc) in sc 19, sk sc 20 and 21, sc in sc 22.
- Sc in sc 16 of the next skirt loop. Repeat the sc, shell, sc sequence from step 1 on this loop.
- Repeat step 2 on the remaining 2 skirt loops.
Fasten off. (8 sc and 28 dc = 36 sts)
Total trim: 24 + 24 + 36 = 84 sts.
Why the math works:
– Shells: Each shell sits on sc 19, which is the exact middle of 37 sc. There are 18 sc on each side of it, so every scallop centers on the bottom of its loop. Skipping 2 sc before and after the shell gives 7 dc enough room to fan out without ruffling.
– Joins between loops: The last sc on one loop is followed directly by the first sc on the next loop. That ties the four skirt loops together at the hem, so they don’t spread apart or overlap.
– Wings: Each wing edge covers 24 of the 32 covering sc, about 4.8 in (12.2 cm) of the outer curve, and adds about 1/8 in (0.3 cm) on each side. That takes the wingspan from 4.25 in (10.8 cm) to 4.5 in (11.4 cm).
Hanging Loop (Cream)
- Join cream with sl st in the marked top-center st of the head.
- Ch 20, then sl st in the same st.
- Work 26 sc in the ch-20 sp and sl st in the first sc.
Fasten off and weave the tail down into the head. The loop should stand about 2 in (5.1 cm) tall.
Final Blocking
- Weave in all remaining ends along the cords so they don’t show.
- Mist the angel until it is damp but not dripping.
- Lay it RS up on the blocking mat.
- Pin the head round, 1.25 in (3.2 cm) across.
- Pin the ring open into a circle, 0.9 in (2.3 cm) across.
- Shape each wing into a teardrop. Pin its tip 2.25 in (5.7 cm) out from the center of the ring, for a total wingspan of 4.5 in (11.4 cm).
- Fan the skirt loops so the hem measures 4 in (10.2 cm) across. Pin each shell open.
- Check the overall height: 5 in (12.7 cm) from the top of the head to the bottom of the shells.
- Let it dry completely before unpinning. For a crisper ornament, use a light spray starch before drying.
Final Quality-Control Checklist
- [ ] Head: 12 dc in Round 1 and 24 sc in Round 2; 1.25 in (3.2 cm) across
- [ ] Ring: 18 sc; 0.9 in (2.3 cm) across
- [ ] Wing loops: 32 sc each
- [ ] Skirt loops: 37 sc each
- [ ] Chain completely hidden inside every loop
- [ ] Wing trim: 24 sc per wing, with 4 blue sc left at each end
- [ ] Four shells, each centered on sc 19 of its loop
- [ ] Head sewn securely and centered over st 1
- [ ] Hanging loop at the head’s top center, 2 in (5.1 cm) tall
- [ ] Finished size: 4.5 × 5 in (11.4 × 12.7 cm)
- [ ] All ends woven in and blocked flat
Troubleshooting
Loops ripple or wave: You’ve packed in too many sc. Rework the loop with 1 or 2 fewer sc, or use a looser hook for the chain.
Loops cup or the chain shows through: There are too few sc, or they’re spread out. Push the stitches together and add 1 or 2 sc.
Skirt loops are uneven lengths: Count every ch-28 before you cover it. Chains that are too tight or too loose matter most here.
Shells sit off-center: Recount the covering sc from the start of that loop. Sc 19 must be the bottom center.
Head tilts: Unpick the seam and center it again on sts 18, 1 and 2.
Ring stretches open: Pull the beginning ring tighter, or work Round 1 with a hook 0.25 mm smaller.
Ornament won’t stay flat: Block it again with starch and pin every loop tip.
Care
Hand wash in cool water with mild soap, press out the water in a towel and dry flat, pinned back into shape. Store flat or hang it from its loop, away from direct sunlight.
Final Notes
Each stage depends on the one before it. The 18-sc ring sets where the loops go. The ch-24 and ch-28 loops, covered at about 1.3 sc per chain, give 1.7 in (4.3 cm) wings and 2.5 in (6.4 cm) skirt loops. Together they make a body 4.25 in (10.8 cm) wide and 3.4 in (8.6 cm) tall before trim. The cream trim brings the wingspan to 4.5 in (11.4 cm). The 1.25 in (3.2 cm) head and the shells bring the height to 5 in (12.7 cm), and the 2 in (5.1 cm) hanging loop takes the total to 7 in (17.8 cm). If you hit each checkpoint, the angel will finish true to size.
Happy crocheting!