
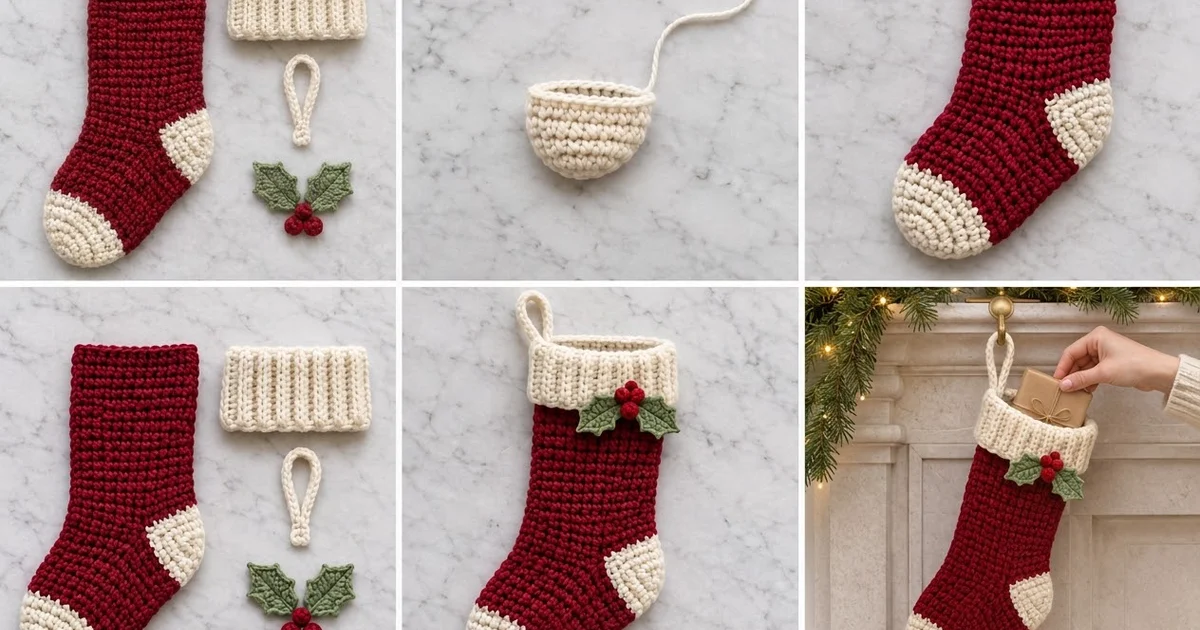
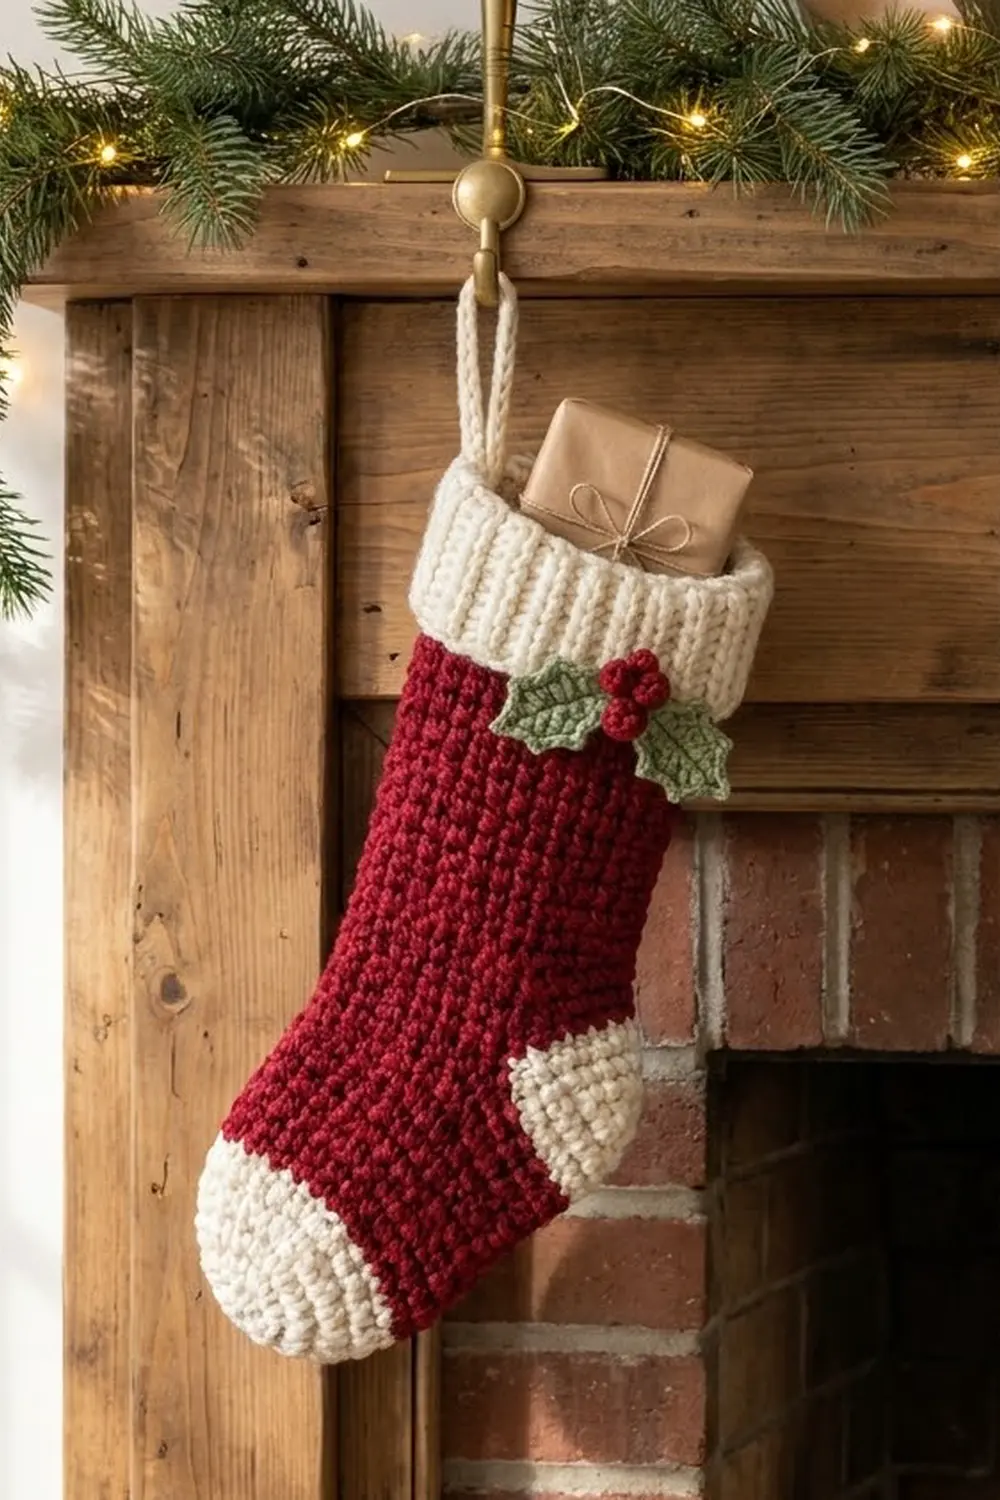
The Hearthside Holly Stocking is a small, traditional Christmas stocking with a cream toe, heel and ribbed cuff, a cranberry-red body, and a holly sprig on the front. It is sized to hold a small wrapped gift, gift cards or treats, and it looks good hanging from a mantel hook or a tree branch.
The colors are a rich cranberry red, a warm cream and a soft sage green. The body is worked in plain single crochet, which gives a firm, pebbly texture that holds its shape. The ribbed cuff adds contrast, and the holly sprig gives the stocking its focal point.
This pattern uses US crochet terms. The finished stocking measures about 9.75 in (24.8 cm) tall without the loop, 4 in (10.2 cm) wide across the leg when laid flat, and about 6 in (15.2 cm) long across the foot.
Construction is simple and seamless where possible. You work the body toe-up in continuous rounds, leaving an opening for the heel. Then you add a cream heel into that opening, attach a ribbed cuff worked sideways in rows, and finish with a hanging loop and the holly sprig.
Finished Size and Construction
- Finished size: 9.75 in (24.8 cm) tall without the loop; 4 in (10.2 cm) wide across the leg; about 6 in (15.2 cm) foot length
- Skill level: Easy to intermediate
- Terminology: US
- Yarn weight: Worsted (#4)
- Hook: 5 mm (H-8) for the body, heel, cuff and loop; 4 mm (G-6) for the holly
- Number of pieces: 1 finished stocking, made from 8 parts: body, heel, cuff, loop, 2 leaves and 3 berries (the heel is worked directly into the body)
- Layout: Single stocking with the toe pointing forward; loop at the back edge; holly on the front, below the cuff, toward the toe side
- Size of the body tube: 32 stitches around, 4 in (10.2 cm) wide when laid flat
- Size before the border (cuff): 7.75 in (19.7 cm) tall
- Border (cuff) depth: 2 in (5.1 cm)
Materials
Use a smooth worsted-weight yarn in wool, a wool blend or acrylic, at about 200 m per 100 g. A slightly twisted, plied yarn shows the single crochet texture best. Avoid fuzzy yarns, because they hide the ribbing on the cuff.
- Cranberry red: 30 g / 60 m (body and berries)
- Cream: 20 g / 40 m (toe, heel, cuff and loop)
- Sage green: 5 g / 10 m (holly leaves)
These amounts include a safety margin of about 30%.
Tools:
- 5 mm (H-8) and 4 mm (G-6) crochet hooks
- 2 locking stitch markers
- Tapestry needle
- Scissors
- Measuring tape
- Pins and a blocking mat
Abbreviations (US Terms)
- ch: chain
- sl st: slip stitch
- sc: single crochet
- hdc: half double crochet
- dc: double crochet
- inc: 2 sc in the same stitch
- sc2tog: single crochet 2 together
- BLO: back loop only
- MR: magic ring
- st(s): stitch(es)
- rnd(s): round(s)
Special stitch – picot: ch 2, then sl st in the 2nd ch from the hook.
Gauge and Checkpoints
Body gauge: 16 sc and 18 rnds = 4 in (10.2 cm), using the 5 mm hook and working in continuous rounds.
Cuff gauge: 16 rows and 8 sts = 4 in by 2 in (10.2 cm by 5.1 cm), worked in BLO sc rows and measured unstretched.
Your toe is a good test piece. Work Rnds 1–8, then flatten the toe.
- After Rnd 8: the toe should be 4 in (10.2 cm) wide and about 1.75 in (4.4 cm) deep.
- After Rnd 20: the body should measure about 4.5 in (11.4 cm) from the toe tip.
- After Rnd 48: the leg above the heel opening should measure 6 in (15.2 cm).
- After the heel: the heel should stand out about 1.5 in (3.8 cm), and the stocking should be 7.75 in (19.7 cm) tall.
If your toe is wider than 4 in (10.2 cm), go down a hook size. If it is narrower, go up a hook size. Change the hook, not the stitch counts, because every later piece depends on the body having 32 stitches around.
Body (Toe, Foot and Leg)
Work in continuous rounds without joining. Place a marker in the first stitch of each round and move it up as you go.
Toe (Cream)
- Rnd 1: Make a MR and work 8 sc into it. (8)
- Rnd 2: Inc in each st around. (16)
- Rnd 3: (Sc 1, inc) 8 times. (24)
- Rnd 4: (Sc 2, inc) 8 times. (32)
- Rnds 5–8: Sc in each st around. (32)
On the last stitch of Rnd 8, change to red in the final yarn-over. Cut the cream yarn and weave in the end later.
Foot (Red)
- Rnds 9–20: Sc in each st around. (32)
Flatten the tube so the beginning-of-round marker lies along one fold. That fold is the top of the foot (the instep). The opposite fold, at stitches 16 and 17, will become the back of the heel.
Heel Opening
- Rnd 21: Sc 8, ch 16, skip the next 16 sts, sc 8. (16 sc + 16 ch)
- Rnd 22: Sc 8, sc 16 into the 16 chains (working into the back bump of each chain), sc 8. (32)
Leg
- Rnds 23–48: Sc in each st around. (32)
At the end, sl st into the next st and fasten off. The leg (Rnds 22–48) is 27 rounds and measures 6 in (15.2 cm).
Heel (Cream)
Join cream with a sl st at one corner of the heel opening.
- Rnd 1: Sc 16 into the 16 skipped sts of Rnd 20, then sc 16 into the free underside of the 16 chains. (32) Place markers in the 1st and 17th sts. These are the two corners, and each half of the round has 16 sts.
- Rnd 2: Sc in each st around. (32)
- Rnd 3: Sc2tog, sc 12, sc2tog 2 times. (28: 14 per half)
- Rnd 4: Sc2tog, sc 10, sc2tog 2 times. (24: 12 per half)
- Rnd 5: Sc2tog, sc 8, sc2tog 2 times. (20: 10 per half)
- Rnd 6: Sc2tog, sc 6, sc2tog 2 times. (16: 8 per half)
- Rnd 7: Sc2tog, sc 4, sc2tog 2 times. (12: 6 per half)
Fasten off, leaving a 10 in (25.4 cm) tail. Flatten the heel so the two halves of 6 sts line up, and whipstitch them together. Use the starting tail to close any small gaps at the corners of the opening.
The decreases at the corners shape the heel into the wedge you see on the back of the stocking. The heel stands out about 1.5 in (3.8 cm).
Hanging Loop (Cream)
- Row 1: Ch 21. Sc in the 2nd ch from the hook and in each ch across. (20)
Fasten off and leave a long tail for sewing. The strip measures 5 in (12.7 cm). You will sew it on after you attach the cuff.
Holly Leaves (Sage Green, 4 mm hook) – Make 2
Each leaf is worked around both sides of a foundation chain.
Ch 11.
Side A: Working into the back bumps and starting in the 2nd ch from the hook:
– Sl st 1
– Sc 1
– Hdc 1
– Picot
– Dc 2
– Picot
– Dc 2
– Picot
– Hdc 1
– Sc 1
This uses 9 chains.
Tip: In the last chain, work (sc, picot, sc).
Side B: Rotate the leaf and work into the free loops on the other side of the chain:
– Sc 1
– Hdc 1
– Picot
– Dc 2
– Picot
– Dc 2
– Picot
– Hdc 1
– Sc 1
– Sl st 1 into the first ch
Total: 20 sts and 7 picots.
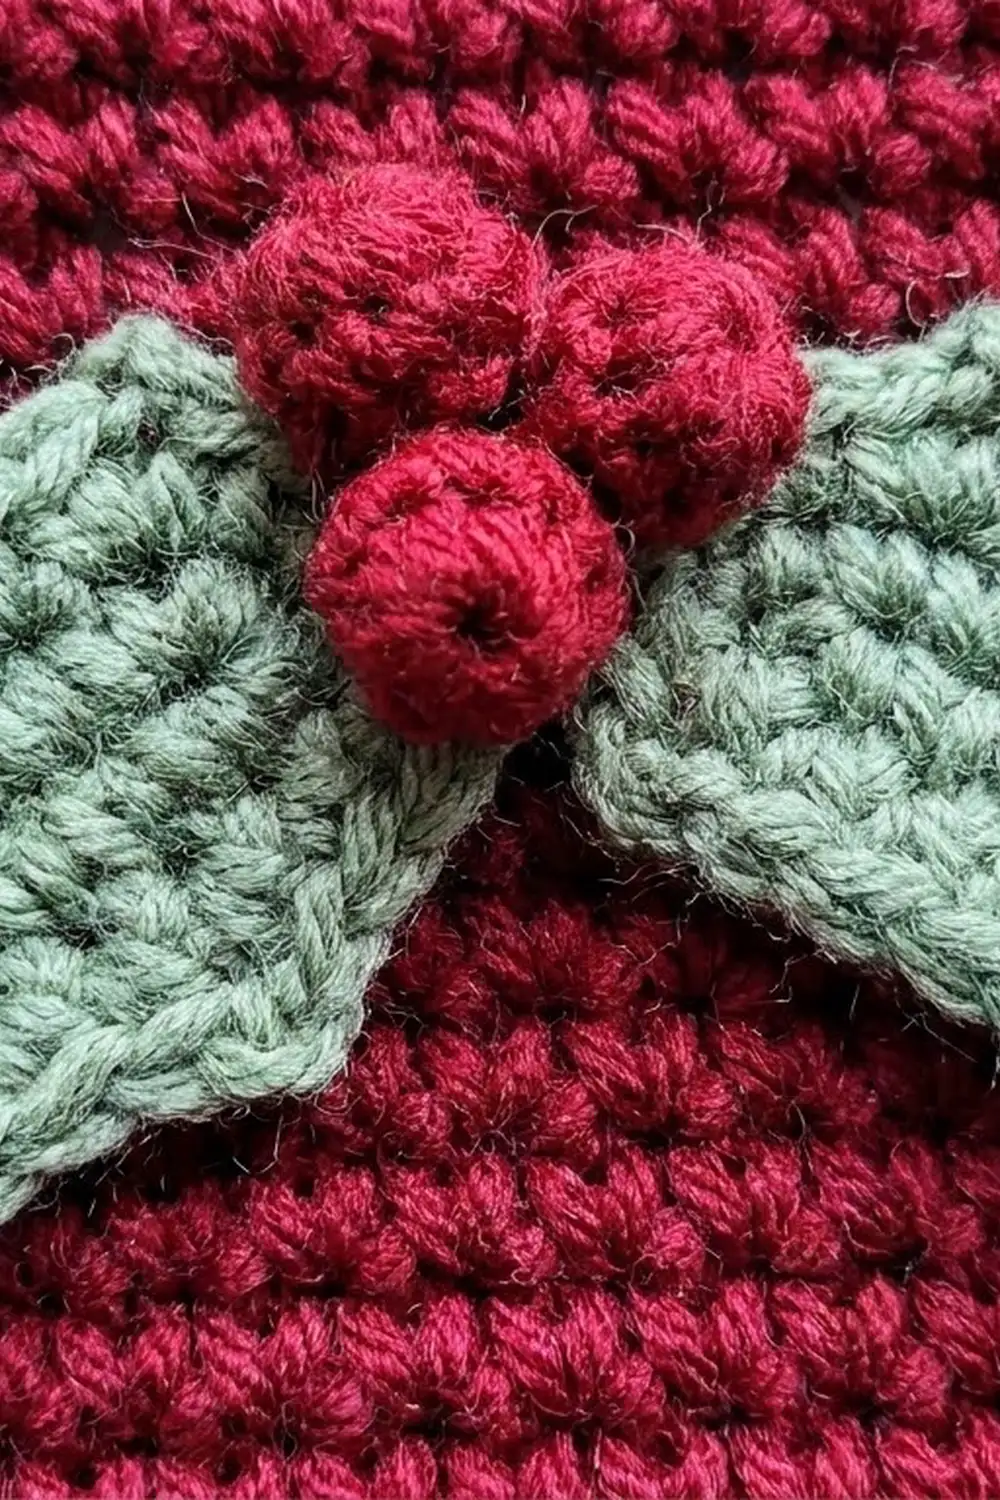
The picots between the pairs of taller stitches form the pointed edges of the leaf, and the chain down the middle forms a natural center vein. Each leaf measures about 2 in (5.1 cm) long and 1.25 in (3.2 cm) wide. Fasten off and leave a tail for sewing.
Berries (Red, 4 mm hook) – Make 3
- Rnd 1: Make a MR and work 6 sc into it. (6)
- Rnd 2: Sc in each st around. (6)
- Rnd 3: Sc2tog 3 times. (3)
Stuff the berry with its starting tail. Thread the end through the 3 remaining sts and pull tight. Each berry is about 0.6 in (1.5 cm) across.
Border: Ribbed Cuff (Cream)
The cuff is the border of this stocking. You work it sideways in rows, so the BLO ridges run up and down when it is attached.
Border gauge: 16 rows = 4 in (10.2 cm) along the ridges, and 8 sts = 2 in (5.1 cm) deep.
- Ch 9.
- Row 1: Sc in the 2nd ch from the hook and in each ch across. (8)
- Rows 2–32: Ch 1 and turn. Sc BLO in each st across. (8)
You now have 32 rows, which form 16 ridges. The band measures 8 in (20.3 cm) long and 2 in (5.1 cm) deep.
To make the cuff into a tube, fold the band so Row 32 meets the foundation chain. Sl st through both layers across the 8 sts. (8)
Joining round: Place the cuff on top of the leg, with the cuff seam lined up with the back fold of the leg (stitches 16 and 17). Join cream there. Sc through one cuff row-end and the next stitch of the leg at the same time, all the way around. (32: 16 across the front, 16 across the back)
Why the math works: The leg has 32 stitches at 16 sts per 4 in (10.2 cm), so it is 8 in (20.3 cm) around. The cuff has 32 row-ends at 16 rows per 4 in (10.2 cm), which is also 8 in (20.3 cm). Each row-end meets one stitch, so the cuff stays flat without easing or ruffling.
Once the cuff is attached, the stocking is 7.75 in + 2 in = 9.75 in (24.8 cm) tall.
Attaching the loop: Fold the loop strip in half. Sew both ends 0.5 in (1.3 cm) down inside the cuff, at the back seam. About 2 in (5.1 cm) of loop shows above the cuff.
Attaching the holly: Sew the two leaves onto the front of the stocking in a shallow V, 0.5 in (1.3 cm) below the cuff and 0.75 in (1.9 cm) in from the toe-side edge. Sew the three berries in a cluster over the point where the leaves meet. Sew through the front layer only, so the stocking stays open.
Final Blocking
- Weave in all ends inside the stocking.
- Lightly spray the stocking with water, or steam it from about 1 in (2.5 cm) above. Keep steam away from acrylic.
- Lay the stocking flat. Pin the leg to 4 in (10.2 cm) wide and the overall height to 9.75 in (24.8 cm).
- Shape the heel and toe by hand into smooth curves.
- Pin the cuff to 2 in (5.1 cm) deep without stretching the ribbing.
- Gently flatten the holly leaves and open out each picot point.
- Let the stocking dry completely before you unpin it.
Final Quality-Control Checklist
- The body has 32 sts in every round, from Rnd 4 of the toe to Rnd 48.
- The heel opening was exactly 16 sts, and the heel decreases down to 12 sts.
- There are no gaps at the corners of the heel.
- The cuff has 32 rows, and the joining round has 32 sc.
- The cuff seam and the hanging loop are both on the back (heel-side) edge.
- The stocking is 9.75 in (24.8 cm) tall and 4 in (10.2 cm) wide.
- The holly is securely sewn on, and the stocking opening is not stitched shut.
- All ends are woven in on the inside.
Troubleshooting
- The tube slants or spirals: This is normal in continuous single crochet. Block it straight, or use slightly firmer tension.
- There are holes at the heel corners: Close them with the tail yarn, or pick up 1 extra stitch at each corner and sc2tog it away in Rnd 2.
- The cuff ruffles: You have more than 32 rows. Unravel the extra rows.
- The cuff pulls the top in: You have fewer than 32 rows. Add rows until you have 32.
- The leaves curl: Use the 4 mm hook, then block them flat with steam.
- The berries are lumpy: Pull the closing tail tighter, and roll each berry between your palms.
Care
Hand wash in cool water and lay flat to dry. Reshape the cuff and holly while the stocking is damp.
Final Notes
The size of this stocking depends on a short chain of measurements. Each step builds on the one before:
- The gauge is 16 sc = 4 in (10.2 cm).
- That gives a body of 32 stitches, 4 in (10.2 cm) wide, with a heel opening of 16 stitches.
- The leg is 6 in (15.2 cm), so the stocking is 7.75 in (19.7 cm) tall before the cuff.
- The 32-row cuff matches the 32 stitches at the top, one to one.
- The finished height is 9.75 in (24.8 cm).
Check your toe once, and the rest of the stocking follows. Happy crocheting!