

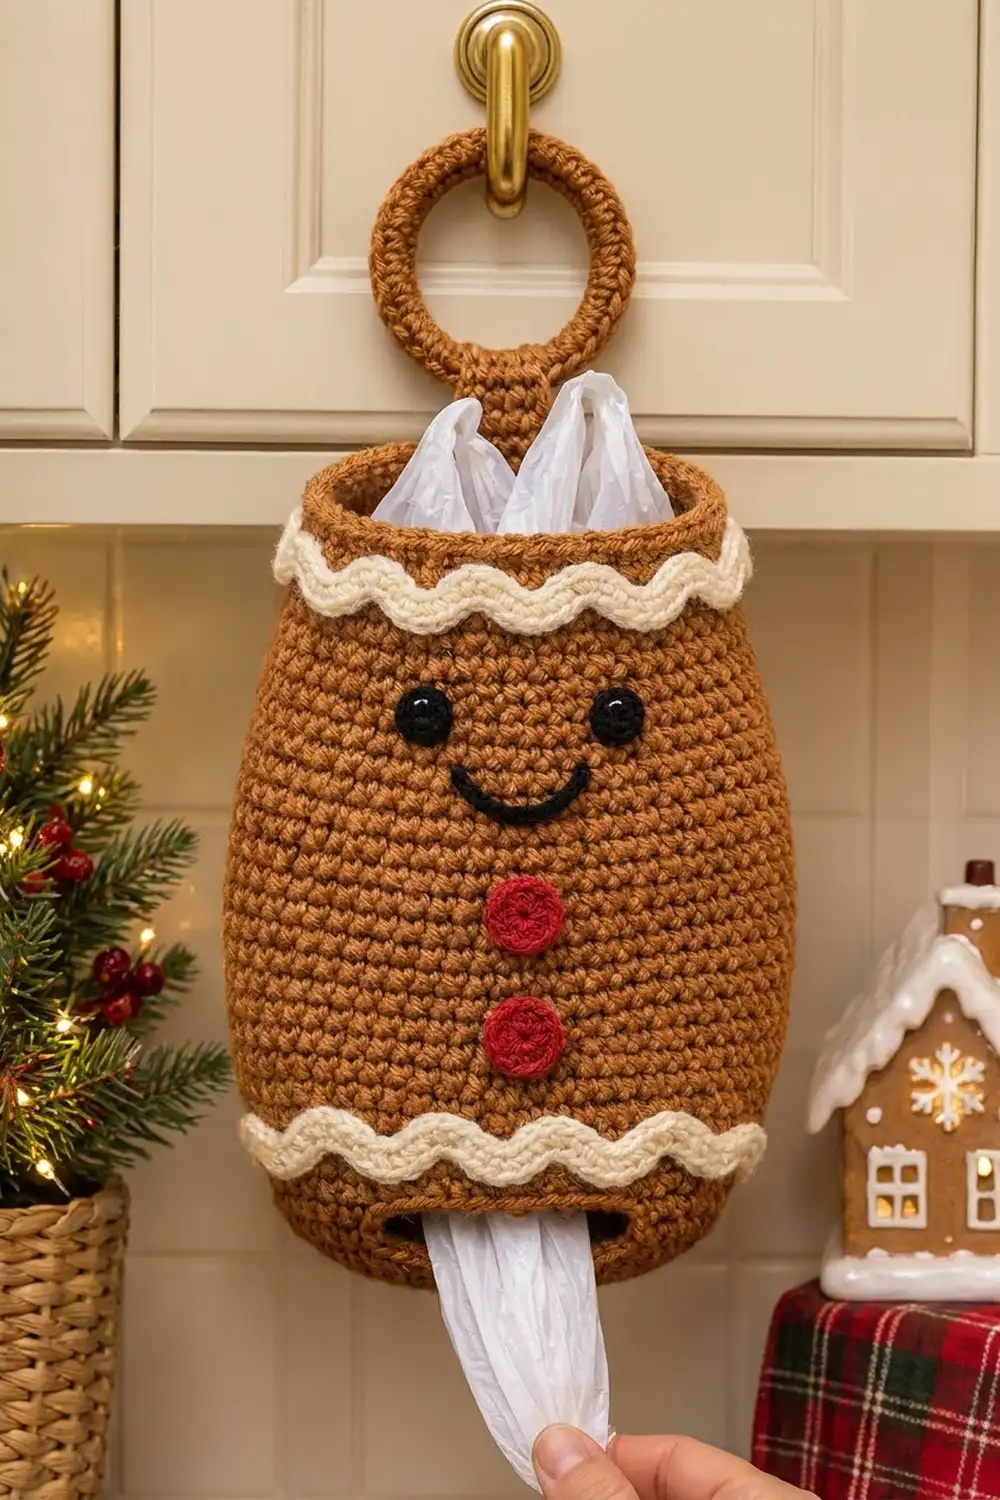
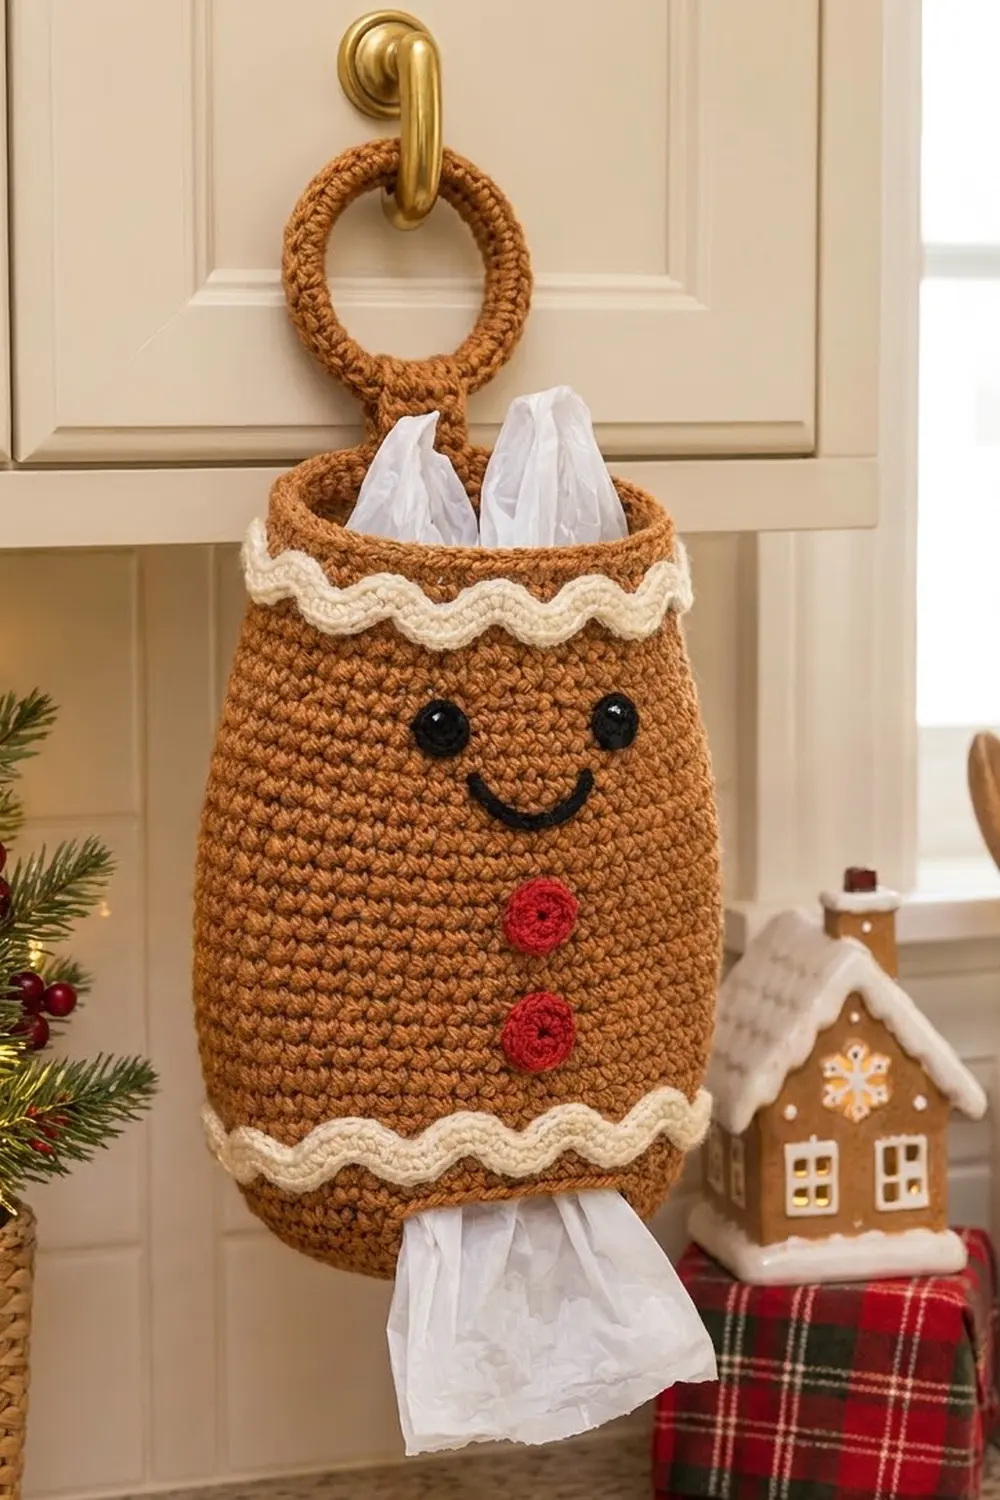
This gingerbread bag holder brings some holiday cheer to your kitchen. The body is a warm cookie-brown barrel with a smiling face, two red gumdrop buttons and two cream “icing” trims. You stuff plastic bags in at the top and pull them out one at a time through a slot near the bottom.
The palette is simple: cookie brown for the body and hanger, cream for the icing, black for the face and red for the buttons. The fabric is dense single crochet, so the holder keeps its shape even when it’s nearly empty.
This pattern uses US crochet terms. The finished body is about 7 in (17.8 cm) wide and 8.5 in (21.6 cm) tall. With the strap and ring, the whole holder is about 13 in (33.0 cm) long.
You start with a flat oval base, then work the walls upward in joined rounds. You build the slot into the wall with a chain gap and shape the belly with a few increases and decreases. The ring, strap, trims and face pieces are made separately and sewn on. A two-round border finishes the top rim.
Finished Size and Construction
- Finished size: 7 in (17.8 cm) wide x 8.5 in (21.6 cm) tall (body); 13 in (33.0 cm) long overall with hanger
- Skill level: Easy-intermediate
- Terminology: US crochet terms
- Yarn weight: Worsted (#4)
- Hook: 4.0 mm (G-6)
- Number of pieces: 1 body, 1 covered ring, 1 strap, 2 trim strips, 2 eyes, 1 smile, 2 buttons (one assembled holder)
- Layout: Single standing holder. The face, buttons and trims sit on the front; the strap and ring are centered on the back
- Base size: 6.25 in (15.9 cm) x about 3 in (7.6 cm) oval
- Size before border: walls 8 in (20.3 cm) tall, rim circumference 16 in (40.6 cm)
- Border depth: 2 rounds, about 0.5 in (1.3 cm)
Materials
Pick a smooth worsted-weight acrylic or cotton-acrylic blend. Acrylic stays a bit stiffer, which helps the holder stand up. Avoid fuzzy or very splitty yarns, because the stitches need to be tight and well defined.
- Cookie brown: 90 g (about 165 m)
- Cream: 15 g (about 27 m)
- Black: 5 g (about 9 m)
- Red: 5 g (about 9 m)
All yarn amounts include a margin of about 30 percent for your gauge swatch and for tension differences.
Tools
- 4.0 mm (G-6) crochet hook
- One plastic or metal ring, 3 in (7.6 cm) inside diameter
- Stitch markers (at least 4)
- Tapestry needle
- Scissors
- Straight pins for placing the appliqués
- Measuring tape
Abbreviations (US Terms)
- ch: chain
- sl st: slip stitch
- sc: single crochet
- inc: 2 sc in the same stitch
- sc2tog: single crochet 2 together (one decrease)
- sc3tog: single crochet 3 together (insert into each of the next 3 sts, pull up a loop each time, yarn over and draw through all 4 loops on the hook)
- BLO: back loop only
- MR: magic ring
- st(s): stitch(es)
- rnd(s): round(s)
Special stitch: reverse single crochet (crab stitch). Work from left to right (right-handed). Insert the hook into the next stitch to the right, yarn over, pull up a loop, yarn over and draw through both loops. This makes a twisted, cord-like edge.
Gauge and Checkpoints
Gauge: 16 sc x 18 rnds = 4 in (10.2 cm) in sc worked in joined rounds.
Before starting the body, check your gauge with the base. If you make the base first and measure it at round 6, you’ll know before you’ve used much yarn whether your gauge is right.
Checkpoints:
- After Rnd 6 (base): 6.25 in (15.9 cm) long and about 3 in (7.6 cm) wide, lying flat
- After Rnd 19: circumference 18 in (45.7 cm)
- After Rnd 24: walls 4 in (10.2 cm) tall, measured from the base fold
- After Rnd 42: walls 8 in (20.3 cm) tall, rim circumference 16 in (40.6 cm)
If your work is too big, try a 3.75 mm (F-5) hook. If it’s too small or too stiff to work, try a 4.5 mm (7) hook. Your stitch counts must stay the same, because the trims, face spacing and border all depend on them.
Body
Every round is joined with a sl st to the first sc. Then ch 1, which does not count as a stitch, and work the first sc into the same stitch as the join. Joined rounds keep the slot, face and strap lined up in straight columns.
Oval Base
With brown, ch 17.
Rnd 1: Sc in 2nd ch from hook, sc in next 14 ch, 3 sc in last ch. Working along the other side of the chain, sc in next 14 ch, 2 sc in last ch (the same ch as the first sc). Join. (34 sts)
Rnd 2: Inc, sc in next 14, inc 3 times, sc in next 14, inc 2 times. Join. (40 sts)
Rnd 3: Sc 1, inc, sc in next 14, [sc 1, inc] 3 times, sc in next 14, [sc 1, inc] 2 times. Join. (46 sts)
Rnd 4: Sc 2, inc, sc in next 14, [sc 2, inc] 3 times, sc in next 14, [sc 2, inc] 2 times. Join. (52 sts)
Rnd 5: Sc 3, inc, sc in next 14, [sc 3, inc] 3 times, sc in next 14, [sc 3, inc] 2 times. Join. (58 sts)
Rnd 6: Sc 4, inc, sc in next 14, [sc 4, inc] 3 times, sc in next 14, [sc 4, inc] 2 times. Join. (64 sts)
Each round adds 6 stitches, 3 at each curved end. The two straight sides stay at 14 stitches each. Checkpoint: 6.25 in x 3 in (15.9 x 7.6 cm).
In Rnd 6, stitches 7-20 form the first straight side. That side becomes the front of the holder. Mark stitch 13 as the front center, and move this marker up as you work.
Walls and Slot
Rnd 7: Working in BLO, sc in each st around. Join. (64 sts) The unused front loops make a crisp fold between the base and the walls.
Rnds 8-10: Sc in each st around. Join. (64 sts)
Rnd 11 (slot): Sc in next 7, ch 12, skip next 12 sts, sc in next 45. Join. (64 sts: 52 sc + 12 ch)
Rnd 12: Sc in next 7, sc in each of the 12 ch (work into the chains, not around them), sc in next 45. Join. (64 sts)
The slot is 12 stitches, or 3 in (7.6 cm), wide. It’s centered on the front, with 1 stitch of straight side on each end.
Rnds 13-14: Sc in each st around. Join. (64 sts)
Belly Shaping
Rnd 15: [Sc 15, inc] 4 times. Join. (68 sts)
Rnds 16-18: Sc in each st around. Join. (68 sts)
Rnd 19: Sc 8, inc, [sc 16, inc] 3 times, sc 8. Join. (72 sts)
Offsetting the increases by half a repeat stops corners from forming. Checkpoint: circumference 18 in (45.7 cm).
Rnds 20-31: Sc in each st around. Join. (72 sts) At Rnd 24, check that the walls are 4 in (10.2 cm) tall.
Rnd 32: [Sc 16, sc2tog] 4 times. Join. (68 sts)
Rnds 33-36: Sc in each st around. Join. (68 sts)
Rnd 37: Sc 7, sc2tog, [sc 15, sc2tog] 3 times, sc 8. Join. (64 sts)
Rnds 38-42: Sc in each st around. Join. (64 sts)
Fasten off. Checkpoint: The walls (Rnds 7-42, 36 rounds) are 8 in (20.3 cm) tall, and the rim is 16 in (40.6 cm) around.
Hanging Ring and Strap
Covered ring: With brown, attach the yarn to the 3 in (7.6 cm) ring with a sl st. Work 60 sc over the ring, pushing the stitches together so no ring shows. Join with a sl st and fasten off, leaving a 6 in (15.2 cm) tail. The covered ring measures about 3.5 in (8.9 cm) across.
Strap: With brown, ch 7.
Row 1: Sc in 2nd ch from hook and in each ch across. (6 sts)
Rows 2-14: Ch 1, turn, sc in each st across. (6 sts)
Fasten off, leaving a 12 in (30.5 cm) tail. The strap is 1.5 in (3.8 cm) wide and about 3 in (7.6 cm) long.
Icing Trims (make 2)
With cream, ch 44.
Row 1: Sc2tog over 2nd and 3rd ch from hook, sc in next ch, 3 sc in next ch, sc in next ch, [sc3tog, sc in next ch, 3 sc in next ch, sc in next ch] 6 times, sc2tog over the last 2 ch. (43 sts)
Rows 2-3: Ch 1, turn. Sc2tog, sc 1, 3 sc in next st, sc 1, [sc3tog, sc 1, 3 sc in next st, sc 1] 6 times, sc2tog. (43 sts)
Always put the 3 sc into the center stitch of the previous 3-sc group, and center each sc3tog on the previous sc3tog. This stacks the peaks and valleys, so both long edges wave together and the strip stays the same width all along. The math: sc3tog takes 3 sts and makes 1, and the 3-sc group takes 1 st and makes 3, so each 6-stitch repeat stays at 6 stitches. The sc2tog at each end works as half a valley.
Fasten off, leaving a 16 in (40.6 cm) tail. Each strip has 7 waves and is about 8 in (20.3 cm) long and 0.75 in (1.9 cm) tall.
Face and Buttons
Eyes (make 2, black): MR, 6 sc in ring. Rnd 2: [Sc 1, inc] 3 times. (9 sts) Join and fasten off with a tail. Each eye is about 0.6 in (1.5 cm) across.
Smile (black): Ch 11, sl st in 2nd ch from hook and in each ch across. (10 sl st) Fasten off with a tail. When you curve it into a U, it is about 2 in (5.1 cm) wide.
Buttons (make 2, red): MR, 6 sc in ring, pull it closed but not fully. Rnd 2: Inc in each st around. (12 sts) Join and fasten off with a tail. Each button is about 1 in (2.5 cm) across. The small dimple in the center gives it a stitched-button look.
Assembly
- Strap: Find the back center column, opposite the front marker. Pin the bottom 1 in (2.5 cm) of the strap to the inside of the back wall so it covers Rnds 39-42. Whipstitch all around that overlap. About 1 in (2.5 cm) of strap stands above the rim.
- Ring: Fold the top 1 in (2.5 cm) of the strap through the covered ring and back down, then sew it flat.
- Upper trim: Pin it across the front over Rnds 39-40. Center it on the front marker so the ends reach the side curves. Sew it along both wavy edges.
- Lower trim: Pin it over Rnds 14-16, just above the slot, centered the same way. Sew it on.
- Eyes: Center them on Rnd 34, 8 sts apart (2 in, 5.1 cm) center to center.
- Smile: Curve it into a U between Rnds 30 and 32, centered under the eyes. Tack it down every 2-3 sts.
- Buttons: Center them on the front marker column at Rnd 26 and Rnd 21.
Weave in all ends inside the holder.
Border (Top Rim)
Border gauge is the same as body gauge: 4 sts per in (2.5 cm).
Rnd 43: With brown, join with a sl st in any st at one side curve of the rim. Ch 1, sc in each st around (where the strap is, work through both the strap and the wall). Join. (64 sts)
Rnd 44: Ch 1. Do not turn. Reverse sc in each st around. Join and fasten off. (64 sts)
Why the math works: The rim holds 64 sts, or 16 in (40.6 cm) at 4 sts per in. Both border rounds work exactly 1 stitch into each existing stitch, with no increases or decreases. The edge stays 16 in (40.6 cm) around without flaring or pulling in. Crab stitch is slightly shorter than sc, so it rolls the edge into a neat cord. The border adds about 0.5 in (1.3 cm), bringing the body to 8.5 in (21.6 cm) tall.
Final Blocking
- Lightly mist the holder with water, or steam it gently from 1 in (2.5 cm) away. Never press acrylic with an iron.
- Stuff it firmly with plastic bags or a rolled towel until the belly is round and the base sits flat.
- Shape the slot into a straight opening 3 in (7.6 cm) wide.
- Pat the trims flat so the waves look even.
- Let it dry completely while stuffed, then check the measurements again: 7 in (17.8 cm) wide and 8.5 in (21.6 cm) tall.
Final Quality-Control Checklist
- Base sits flat and measures 6.25 in x 3 in (15.9 x 7.6 cm)
- Stitch counts: 64 / 68 / 72 / 68 / 64 at each shaping stage
- Slot is centered on the front with no loose chains
- Rim measures 16 in (40.6 cm) around and doesn’t flare
- Strap is centered on the back and sewn through several rounds
- Trims are level and centered, waving evenly
- Face and buttons line up on the front center column
- All ends are woven in securely on the inside
Troubleshooting
- Base cups or ruffles: Your tension changed partway through. Redo the last base round with steady tension, or go down a hook size.
- Columns twist: Make sure you join every round and put the first sc in the same stitch as the join.
- Slot is lopsided: Recount the 7 sts before the chain. The slot has to start at the same point you marked.
- Belly looks pointed: Stagger the increases as written in Rnd 19.
- Trim curls: Work the sc3tog more loosely, or block it pinned flat before sewing.
- Holder sags when full: Tighten your gauge, or add a cardboard oval inside the base.
Care
Hand wash in cool water, press out the water in a towel, and reshape. Let it dry stuffed so it keeps its barrel shape.
Final Notes
The size of this holder follows from a short chain of measurements. A gauge of 16 sc x 18 rnds = 4 in (10.2 cm) gives a 64-stitch base 6.25 in (15.9 cm) long. The belly grows to 72 sts, or 18 in (45.7 cm) around, and narrows back to a 64-stitch rim of 16 in (40.6 cm). Thirty-six wall rounds make the walls 8 in (20.3 cm) tall, and the two-round border brings the body to 8.5 in (21.6 cm). With the strap and ring, the holder hangs 13 in (33.0 cm) long. If each checkpoint matches, your gingerbread buddy will come out the right size.
Happy crocheting!