

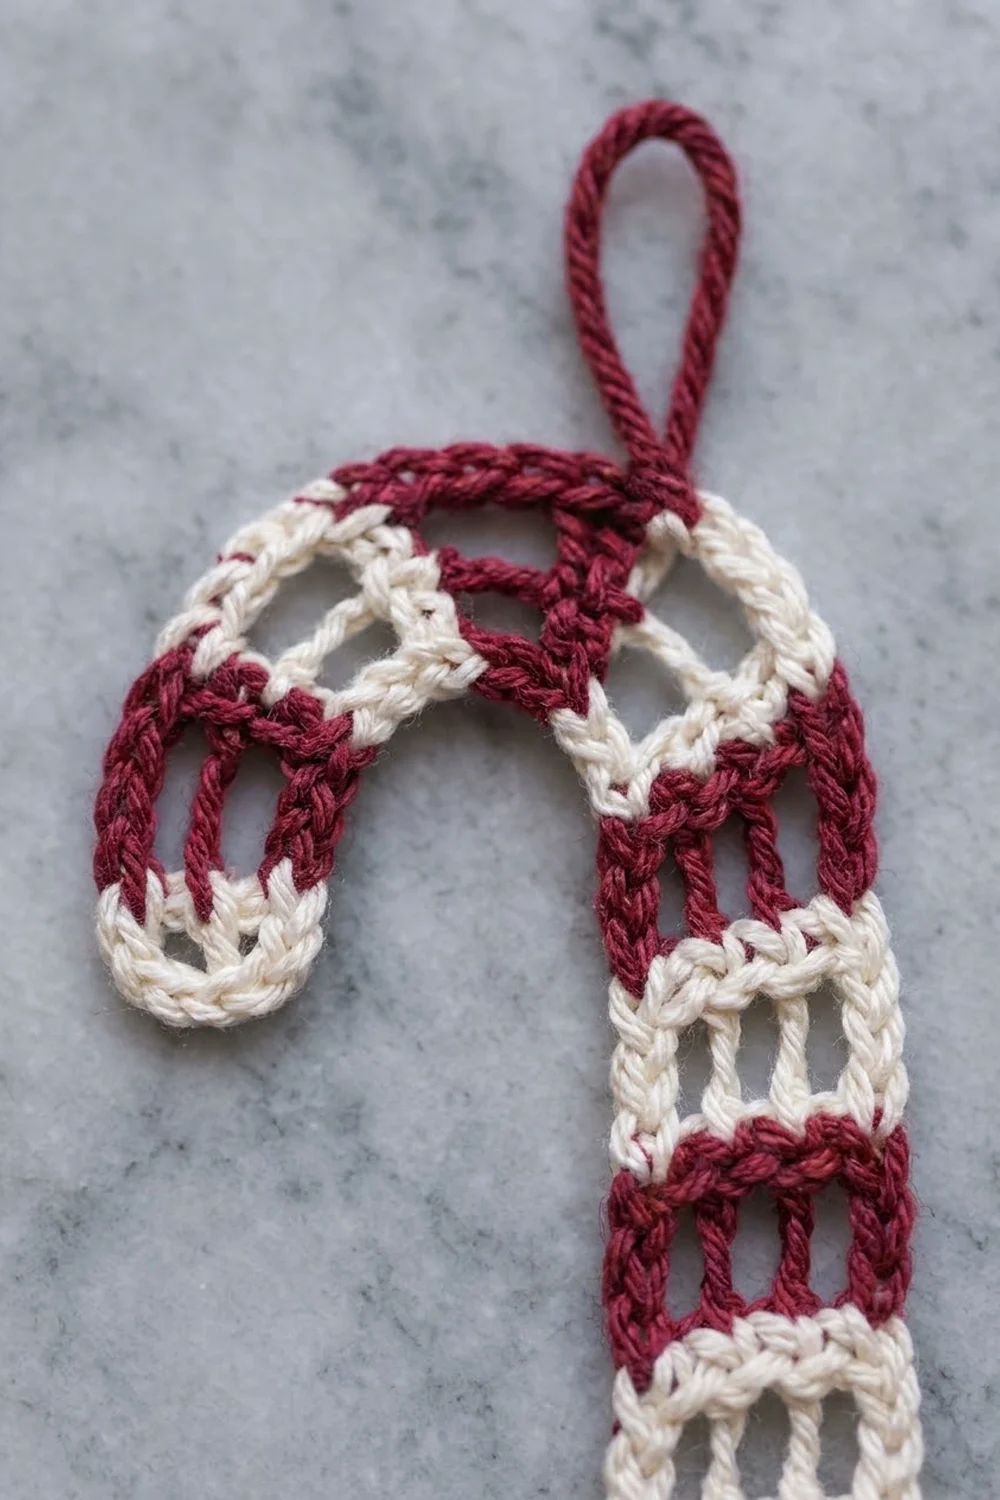
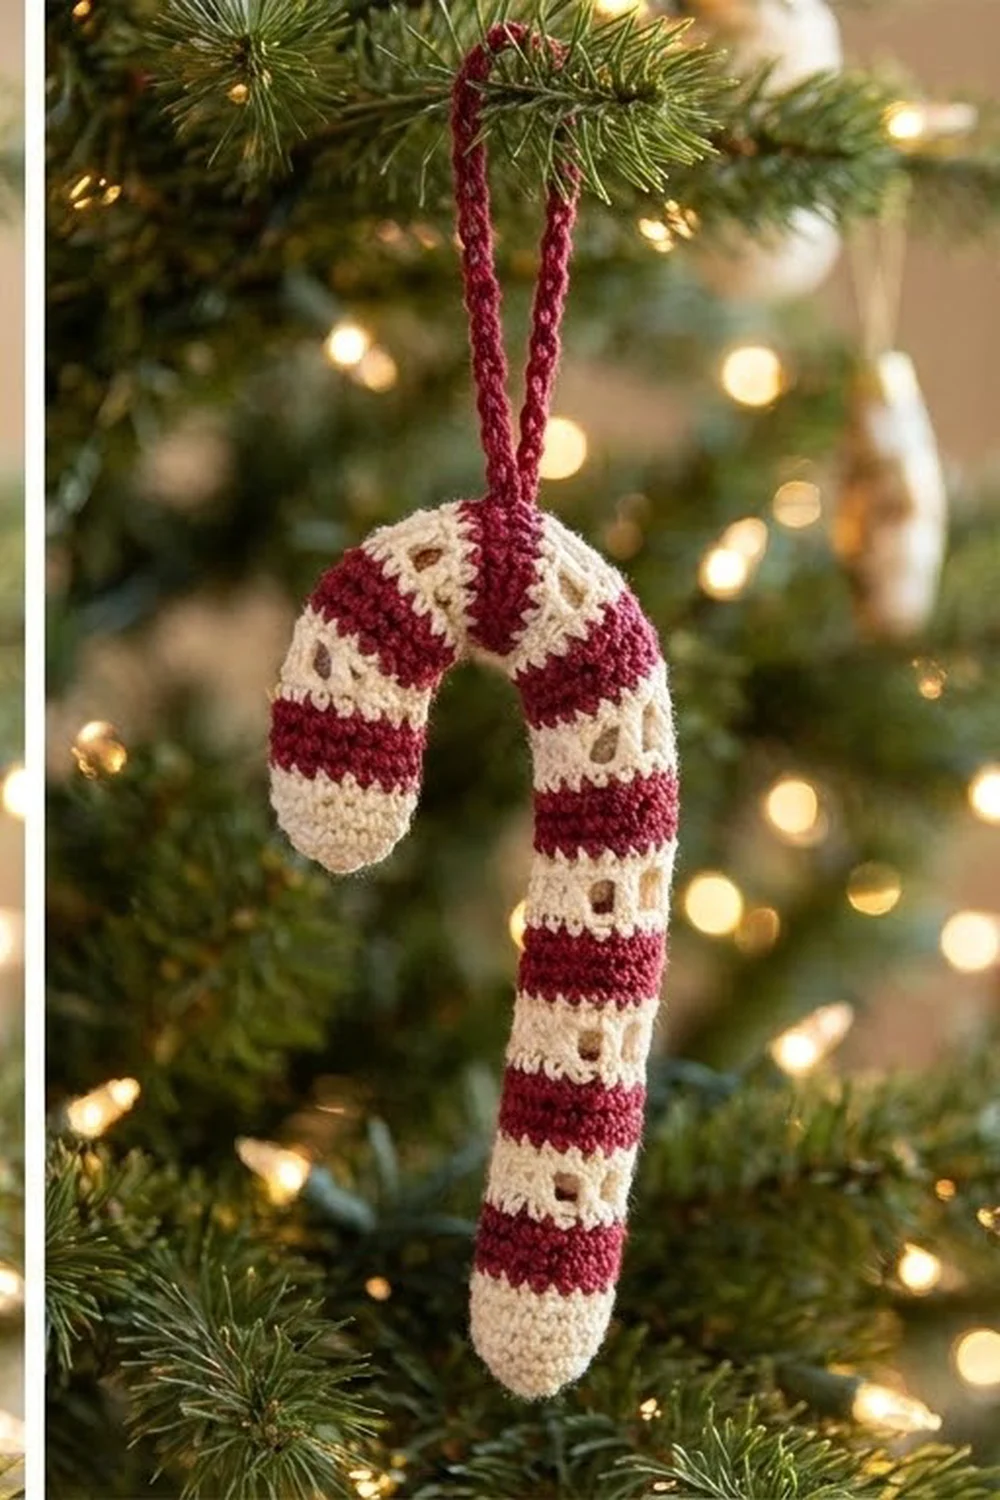
This little candy cane is a flat, open-work ornament with crisp cranberry and cream stripes. Every stripe has a solid bar of single crochet on top of a row of short “ladder” posts, so light shows through each band and the stripes stay clean.
The palette is classic peppermint: deep cranberry red and soft cream. The stem is straight and even. The crook curves smoothly to the left because its posts get taller toward the outer edge, then finishes in a rounded cream tip. A cranberry chain loop at the top of the crook is used for hanging.
The pattern uses US crochet terms. The finished ornament is about 7.5 in (19.1 cm) tall and 3.5 in (8.9 cm) wide across the crook, not counting the loop. The stem is 1.25 in (3.2 cm) wide.
It’s made in one piece, worked flat in rows from the bottom of the stem up through the crook. There’s no sewing and no separate appliqué. You only add a hanging loop at the end. The unused color is carried up one edge, so you’ll have very few ends to weave in.
Finished Size and Construction
- Finished size: about 7.5 in (19.1 cm) tall x 3.5 in (8.9 cm) wide
- Skill level: Easy to Intermediate
- Terminology: US crochet terms
- Yarn weight: DK (#3), cotton or cotton blend
- Hook: 3.5 mm (E-4)
- Number of pieces: 1 single piece
- Layout: one candy cane shape, worked flat in 33 rows
- Stem size: 1.25 in (3.2 cm) wide x 6 in (15.2 cm) long, 10 stripes
- Size before border: the shape is complete at 7.5 in (19.1 cm) x 3.5 in (8.9 cm) once Row 33 is done
- Border depth: 0 in (0 cm). The edges are finished by the built-in closing bars, and nothing is added to the outline.
Materials
Use a smooth, tightly plied DK cotton. Cotton keeps the ladder posts straight and holds the crook’s curve after blocking. Fuzzy or very soft acrylic will blur the open windows, and the stripes will look muddy.
- Cranberry (Color A): 10 g, about 22 m (24 yd)
- Cream (Color B): 8 g, about 18 m (20 yd)
These quantities include a margin for the gauge swatch, the hanging loop, and tails. One ornament uses a little less than this, so a standard 50 g ball of each color is enough for a whole set.
Tools:
– 3.5 mm (E-4) crochet hook
– Tapestry needle
– Scissors
– 2 removable stitch markers
– Blocking mat and rust-proof pins
– Spray bottle with water
– Ruler or tape measure
Abbreviations (US Terms)
- ch – chain
- sl st – slip stitch
- sc – single crochet
- hdc – half double crochet
- dc – double crochet
- tr – treble crochet
- sk – skip
- sp – space
- st(s) – stitch(es)
- RS / WS – right side / wrong side
Special stitch – Ladder Row: ch 3 (counts as first dc), ch 1, sk next st, dc in next st, [ch 1, sk next st, dc in next st] 2 times. That’s 4 dc posts and 3 ch-1 sps = 7 sts.
Special stitch – Wedge Row: ch 1 (does not count), sl st in first st, ch 1, sk next st, hdc in next st, ch 1, sk next st, dc in next st, ch 1, sk next st, tr in last st. That’s 4 posts and 3 ch-1 sps = 7 sts. The posts get taller from the first edge to the last, which bends the strip.
Color change: work the last st of a row until 2 loops remain on the hook. Drop the old color, yarn over with the new color, and pull through.
Gauge and Checkpoints
Gauge matters more for the crook than the stem. If your posts are too tall or too short, the curve opens up or closes in.
Test first: work Rows 1–4 of the stem (2 stripes) as your swatch. If it measures right, keep going and use it as the start of the real ornament.
- Width: 7 sc = 1.25 in (3.2 cm)
- Stripe height: 1 stripe (1 sc row + 1 Ladder Row) = 0.6 in (1.5 cm)
Checkpoints:
– After Row 4 (2 stripes): 1.25 in (3.2 cm) wide x 1.2 in (3.0 cm) tall
– After Row 10 (5 stripes): 3 in (7.6 cm) tall
– After Row 20 (10 stripes, stem done): 6 in (15.2 cm) tall
– After Row 33 (crook done): 7.5 in (19.1 cm) tall x 3.5 in (8.9 cm) wide
Too big? Go down to a 3.25 mm hook, or pull the yarn snug on the ch-1 sps. Too small? Go up to a 3.75 mm hook. If the width is right but the stripes are too short, make your dc posts a bit taller by pulling up the first loop slightly.
Stem
Every stem row has 7 sts. Odd rows are solid sc bars, and even rows are Ladder Rows. One stripe = 1 odd row + 1 even row in the same color.
Each even row ends at the same edge, so all color changes happen on that side. This is the outer edge, and the carried yarn travels up it. The edge where even rows start is the inner edge. The crook will curve toward it.
Row 1 (Color A): ch 8, sc in 2nd ch from hook and in each ch across, turn. (7 sc)
Row 2 (Color A): Ladder Row. (4 dc + 3 ch-1 sps = 7 sts) At the end of this row, change to Color B on the last dc, then turn. Don’t cut Color A.
Row 3 (Color B): ch 1, sc in first dc, sc in next ch-1 sp, [sc in next dc, sc in next ch-1 sp] 2 times, sc in top of turning ch-3, turn. (7 sc)
Work the first sc over the carried strand of Color A so it’s hidden in the edge.
Row 4 (Color B): Ladder Row, changing to Color A on the last dc, then turn. (7 sts)
Rows 5–20: repeat Rows 3–4 eight more times. Alternate colors every 2 rows, so odd-numbered stripes are Color A and even-numbered stripes are Color B. Always catch the carried strand in the first sc of each odd row.
Stripe 10 (Rows 19–20) is Color B. Change to Color A at the end of Row 20.
Tension tip: keep each ch-1 the same size as the dc posts are wide. This makes the three windows in each stripe look like matching rectangles.
Stem check: 10 stripes, 20 rows, 7 sts per row, 1.25 in (3.2 cm) x 6 in (15.2 cm). Place a marker in the inner edge of Row 20.
Crook
The crook has 6 wedge stripes plus one closing bar. Its odd rows are still 7-sc bars. Its even rows are Wedge Rows, which always start at the inner edge with the short sl st and end at the outer edge with the tall tr.
Each wedge stripe turns the strip about 30 degrees. Six of them make the 180-degree hook.
Row 21 (Color A): ch 1, sc in each st across, working into dc tops, ch-1 sps, and the top of the turning ch-3 as in Row 3, turn. (7 sc)
Row 22 (Color A): Wedge Row. (sl st + hdc + dc + tr + 3 ch-1 sps = 7 sts) Change to Color B on the last tr, then turn.
Row 23 (Color B): ch 1, sc in tr, sc in next ch-1 sp, sc in dc, sc in next ch-1 sp, sc in hdc, sc in next ch-1 sp, sc in sl st, turn. (7 sc)
Row 24 (Color B): Wedge Row, changing to Color A on the last tr, then turn. (7 sts)
Rows 25–32: repeat Rows 23–24 four more times, alternating colors as before. (7 sts per row)
Crook stripes 11, 13, and 15 are Color A. Stripes 12, 14, and 16 are Color B. Row 32 is Color B. Do not change color at the end of Row 32. Cut Color A, leaving an 8 in (20.3 cm) tail.
Row 33 (Color B, closing bar): ch 1, 7 sc as in Row 23. (7 sc) Fasten off with a 6 in (15.2 cm) tail.
Counting tip: the sl st at the start of each Wedge Row is easy to lose. Mark it with a removable marker so you can find it when you work the last sc of the next row.
Crook check: the tip should be cream and point straight down, parallel to the stem, with an open gap of about 1 in (2.5 cm) between the tip and the stem. The short sl st posts sit along the inside of the curve, and the tall tr posts fan around the outside.
Border
This design doesn’t get an extra outline round. A full sc round would cover the stripe colors at the side edges and fill in the scalloped look of the crook. Instead, the “border” is built into the rows:
- Bottom edge: Row 1 is a closed bar of 7 sc in Color A.
- Tip edge: Row 33 is a closed bar of 7 sc in Color B.
- Inner edge: 33 row ends, each in its own stripe color.
- Outer edge: 33 row ends plus the carried strand, covered by the first sc of every odd row.
Border gauge: 7 sc = 1.25 in (3.2 cm) across each end, and 2 row ends = 0.6 in (1.5 cm) along each side of the stem.
Why the math works: every row has exactly 7 sts. Both end bars match the 7-ch foundation, so the stem is a true 1.25 in (3.2 cm) all the way along. That gives 10 stripes x 0.6 in (1.5 cm) = 6 in (15.2 cm) of stem. The crook adds height without adding stitches. The extra length on the outer edge comes only from post height, so the width stays at 7 sts while the strip turns.
Hanging loop (Color A): with the RS facing, join Color A with a sl st at the outer edge between stripes 12 and 13. That’s the highest point of the crook. Ch 20, then sl st in the same spot. Fasten off.
The loop stands about 2 in (5.1 cm) tall. Weave the tail through the loop chain to reinforce it.
Final Blocking
- Weave in all ends along the edges of matching-color stripes. Don’t trim them yet.
- Spritz the ornament with water until it’s evenly damp.
- Lay it flat on the blocking mat with the RS up.
- Pin the stem straight at 1.25 in (3.2 cm) wide and 6 in (15.2 cm) long, with a pin at each corner of the bottom bar.
- Shape the crook into an even semicircle. Pin the outer edge at every tr post, and keep the inner sl st edge in a smooth curve.
- Check the overall size: 7.5 in (19.1 cm) tall and 3.5 in (8.9 cm) wide.
- Use a pin tip to open each ch-1 sp so the ladder windows are even.
- Let it dry completely, then unpin it and trim the ends.
Final Quality-Control Checklist
- 33 rows in total: 10 stem stripes, 6 crook stripes, and 1 closing bar
- 7 sts in every row
- Every Ladder Row has 4 posts and 3 windows
- Every Wedge Row starts with a sl st on the inner edge and ends with a tr on the outer edge
- The bottom bar is cranberry, and the tip bar is cream
- The colors alternate cleanly with no stray loops at the stripe changes
- The carried strand is hidden on the outer edge
- The stem is 1.25 in (3.2 cm) wide and 6 in (15.2 cm) long
- The whole piece is 7.5 in (19.1 cm) x 3.5 in (8.9 cm)
- The hanging loop is centered on top of the crook and secure
Troubleshooting
The stem slants or narrows. You probably missed the last st, which is the top of the turning ch-3. Count 7 sts on every row.
The crook curves the wrong way. The Wedge Rows were started at the outer edge. Every Wedge Row must start where the stem’s Ladder Rows started.
The crook doesn’t close into a hook. Your tr posts are too short compared with the sl st edge. Pull up the tr loops a bit taller, or add one more wedge stripe in the next color, then close with a bar.
The crook overlaps the stem. The posts are too tall. Make the tr snugger, or block the curve open.
Windows look uneven. Keep the ch-1 sps a consistent size, then open them with pins during blocking.
The carried strand shows. Make sure you’re working the first sc of each odd row over it, and keep it relaxed rather than tight.
The outer edge puckers. The carried yarn is pulled too tight. Loosen it before the next stripe.
Care
Hand wash in cool water and lay flat to dry, reshaping the crook while it’s damp. Store flat or hang it by the loop so the curve keeps its shape.
Final Notes
The measurements build on each other like this: 7 sc = 1.25 in (3.2 cm) wide, and 1 stripe = 0.6 in (1.5 cm) tall. Ten stripes give a 6 in (15.2 cm) stem. Six wedge stripes turn the strip 180 degrees without changing the stitch count, and the cream closing bar brings the ornament to 7.5 in (19.1 cm) x 3.5 in (8.9 cm).
If your swatch matches gauge, the rest of the ornament will come out to these sizes. Make one, check it against the checklist, and then make a few more in the same colors for the tree.
Happy crocheting!