

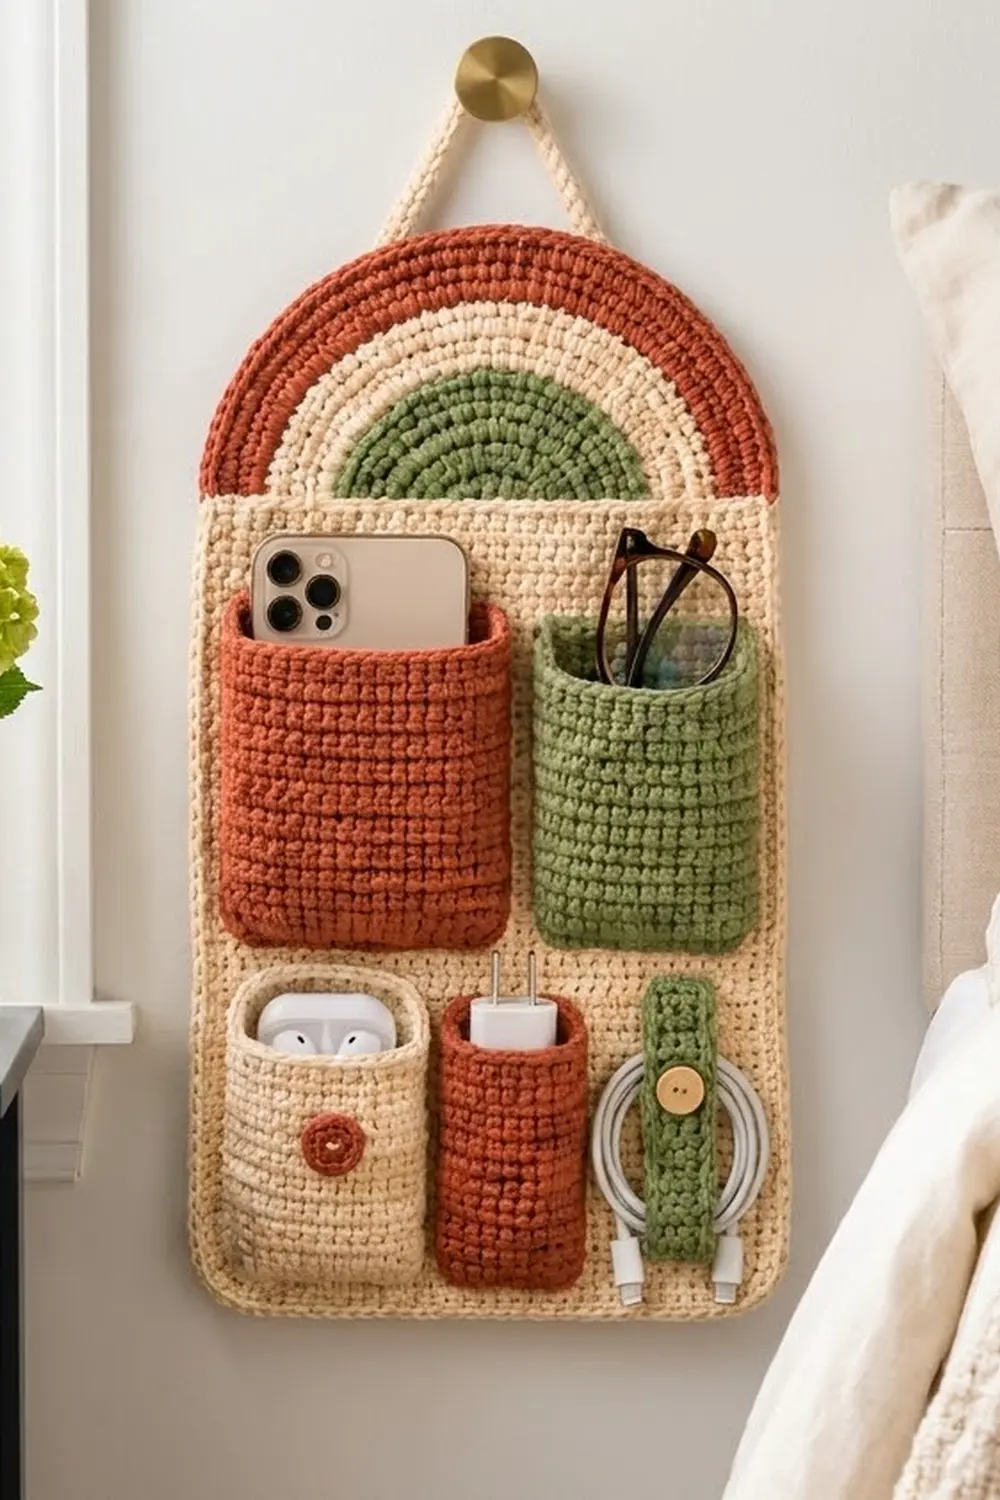
This bedside wall organizer keeps your phone, glasses, earbuds, and charger off the nightstand and within easy reach. A cream back panel has a rainbow arch at the top in sage green, cream, and terracotta. Below the arch are five storage spots: two tall pockets, two short pockets, and a buttoned tab that holds a coiled cable.
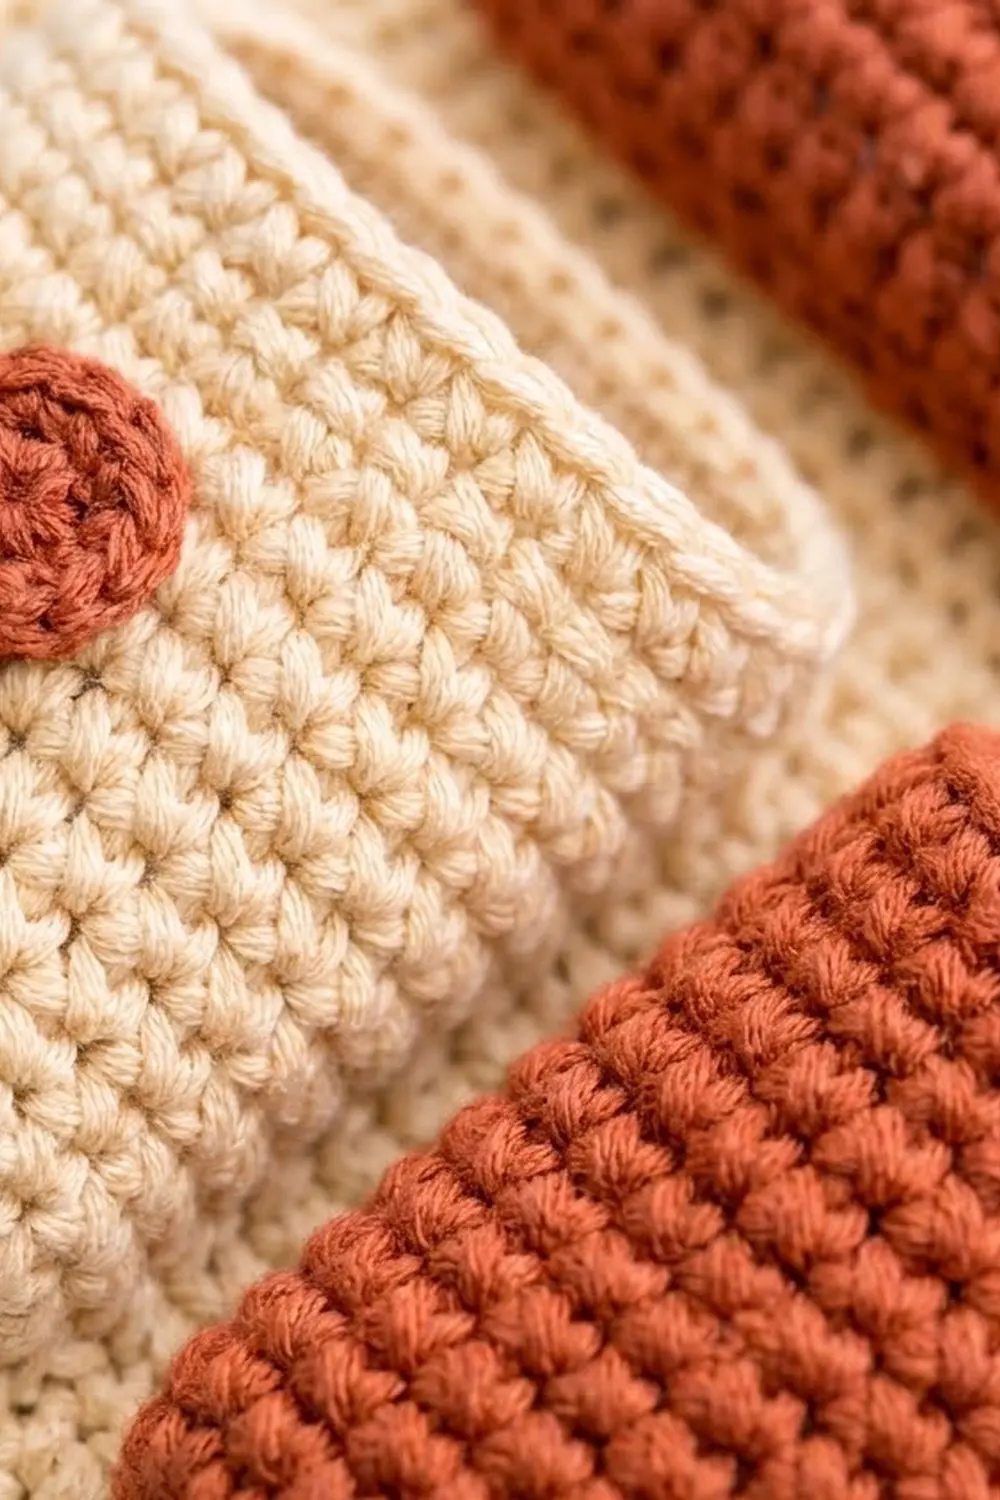
The style is calm and earthy, with a warm boho feel. Every piece is worked in dense single crochet so the organizer holds its shape on the wall. Corded crab-stitch edges on the panel and the pockets give it a neat, finished outline.
This pattern uses US crochet terms. The finished organizer is 10.5 in (26.7 cm) wide and about 17.75 in (45.1 cm) tall, not counting the hanging loop. The loop adds about 4.5 in (11.4 cm).
Construction overview: first you work a flat rectangular back panel in rows and add a two-round border. Next you make a half-circle arch in turned rows, changing color from green to cream to terracotta. Then you make four pockets as flat tubes worked in the round, plus a tab, a dot, and a strap. Finally, you sew everything together and block it.
Finished Size and Construction
- Finished size: 10.5 in (26.7 cm) wide × 17.75 in (45.1 cm) tall, plus the loop
- Skill level: Advanced beginner
- Terminology: US
- Yarn weight: Worsted (#4) cotton
- Hook: 5.0 mm (H-8)
- Number of pieces: 9 crocheted pieces (panel, arch, strap, 4 pockets, tab, dot) plus 1 button
- Layout: arch behind the top of the panel; 2 tall pockets in the upper row; 2 short pockets and a tab in the lower row
- Panel size before border: 9.5 in × 12 in (24.1 cm × 30.5 cm)
- Border depth: 0.5 in (1.3 cm) per side
- Panel size after border: 10.5 in × 13 in (26.7 cm × 33.0 cm)
- Arch size: 10.5 in (26.7 cm) across × 5.25 in (13.3 cm) tall
Materials
Use a smooth, firm worsted-weight cotton or cotton blend. Cotton keeps the pockets stiff and the stitches crisp. Avoid fluffy acrylic, which stretches when the pockets are loaded.
The amounts below assume about 170 m per 100 g:
- Cream: 85 g, about 145 m (panel, border, arch band, strap, short cream pocket)
- Terracotta: 50 g, about 85 m (arch outer band, tall pocket, short pocket, dot)
- Sage green: 30 g, about 51 m (arch center, tall pocket, tab)
These quantities include a safety margin of about 25–35%.
Tools:
- 5.0 mm (H-8) crochet hook
- 1 wooden button, 5/8 in (1.6 cm)
- Tapestry needle
- 4–6 locking stitch markers
- Straight pins or clips
- Measuring tape
- Blocking mat and rust-proof pins
- Spray bottle
Abbreviations (US Terms)
- ch: chain
- sc: single crochet
- sl st: slip stitch
- sk: skip
- st(s): stitch(es)
- sp: space
- RS / WS: right side / wrong side
- rev sc: reverse single crochet (crab stitch)
Special stitch: reverse single crochet (rev sc). Work from left to right (left-handers work from right to left). Insert your hook into the next stitch to the right, yarn over, and pull up a loop. Yarn over again and pull through both loops. This makes the corded edge on the panel and the pocket rims.
Gauge and Checkpoints
Gauge: 16 sc and 18 rows = 4 in (10.2 cm) in sc worked in rows, which is 4 sts and 4.5 rows per inch.
Test your gauge on one piece first. Make Pocket D before anything else, because it’s small and uses most of the techniques. When it’s finished, it should lie flat at 3 in (7.6 cm) wide and 4 in (10.2 cm) tall.
Checkpoints:
- Panel after Row 10: 9.5 in (24.1 cm) wide
- Panel after Row 54: 12 in (30.5 cm) tall
- Panel after border: 10.5 in × 13 in (26.7 cm × 33.0 cm)
- Arch after Row 10: about 4.5 in (11.4 cm) across the straight edge
- Arch after Row 14: about 6.25 in (15.9 cm) across
- Arch after Row 24: 10.5 in (26.7 cm) across
If your pieces come out too big, use a hook 0.5 mm smaller. If they’re too small, use a hook 0.5 mm larger. Match the stitch gauge first.
Back Panel (Cream)
Ch 39.
Row 1 (RS): sc in the 2nd ch from the hook and in each ch across, turn. (38 sc)
Rows 2–54: ch 1 (doesn’t count as a st), sc in each st across, turn. (38 sc)
Don’t fasten off. The panel should now measure 9.5 in × 12 in (24.1 cm × 30.5 cm). Go straight on to the border.
Border (Back Panel)
Border gauge: the border uses the same gauge as the body, 4 sts per inch.
Rnd 1 (cream): with the RS facing, ch 1.
- Top: 3 sc in the first st (corner), sc in the next 36 sts, 3 sc in the last st (corner).
- First side: work 48 sc across the 54 row ends, as [sc in each of the next 8 row ends, sk 1 row end] 6 times.
- Bottom: working into the free loops of the foundation chain, 3 sc in the first ch (corner), sc in the next 36 ch, 3 sc in the last ch (corner).
- Second side: 48 sc across the row ends, as for the first side.
Sl st to the first sc.
Rnd 1 total: 36 + 36 + 48 + 48 + 4 corner groups of 3 (12) = 180 sc.
Rnd 2: ch 1, rev sc in each st around, sl st to the first st. (180) Fasten off.
Why the math works:
- The panel’s 38 stitches per row become 36 edge stitches plus 2 corner stitches, so no corner stitch is counted twice.
- On the sides, 48 sc over 12 in (30.5 cm) is 4 sts per inch, which matches the stitch gauge, so the sides don’t ruffle.
- The two rounds add 0.5 in (1.3 cm) per side, which brings the panel to 10.5 in × 13 in (26.7 cm × 33.0 cm).
Rainbow Arch
The arch is a half circle worked in turned rows from the center out. Each row adds 3 stitches, so every row’s total is 3 times its row number.
With sage green, make a magic ring.
Row 1: ch 1, 3 sc in the ring, pull the ring closed, turn. (3)
Row 2: ch 1, 2 sc in each st, turn. (6)
Row 3: ch 1, [sc in next st, 2 sc in next st] 3 times, turn. (9)
Rows 4–24: ch 1, [sc in each of the next (row number minus 2) sts, 2 sc in next st] 3 times, turn. For example, Row 4 is [sc in next 2, 2 sc in next] 3 times. (12)
Each row’s own total and color:
- Row 10: 30 sc. This is the last green row. Change to cream on the final yarn over.
- Rows 11–14 (cream): Row 14 has 42 sc. Change to terracotta.
- Rows 15–24 (terracotta): Row 20 has 60 sc, and Row 24 has 72 sc.
Fasten off. The straight edge, made of row ends, measures 10.5 in (26.7 cm).
Hanging Strap (Cream)
Ch 49.
Row 1: sc in the back bump of the 2nd ch from the hook and in each ch across. (48 sc)
Rotate the work without turning, and sl st in each of the 48 free loops on the other side of the chain. This makes a firm cord about 0.4 in (1.0 cm) wide and 12 in (30.5 cm) long. Fasten off and leave a 10 in (25.4 cm) tail.
Pockets
Each pocket is a flat tube. Work both sides of a foundation chain, then work spiral rounds, then finish with a rev sc rim. Mark the first st of each round.
Pocket A, tall terracotta: 4.5 in × 5 in (11.4 cm × 12.7 cm)
Ch 19.
Rnd 1: sc in the 2nd ch from the hook and in each ch across (18). Rotate the work and sc in the free loop of each of the same 18 ch (18). (36 sc)
Rnds 2–22: sc in each st around. (36)
Sl st in the next st to smooth the end of the spiral.
Rnd 23: ch 1, rev sc in each st around, sl st to the first st. (36) Fasten off.
Pocket B, tall sage green: 3.75 in × 5 in (9.5 cm × 12.7 cm)
Ch 16 and work as for Pocket A, with 15 sts on each side of the chain.
- Rnd 1: (30)
- Rnds 2–22: (30)
- Rnd 23: rev sc (30)
Pocket C, short cream: 3.5 in × 4 in (8.9 cm × 10.2 cm)
Ch 15.
- Rnd 1: 14 + 14 = (28)
- Rnds 2–17: (28)
- Rnd 18: rev sc (28)
Pocket D, short terracotta: 3 in × 4 in (7.6 cm × 10.2 cm)
Ch 13.
- Rnd 1: 12 + 12 = (24)
- Rnds 2–17: (24)
- Rnd 18: rev sc (24)
Cable Tab (Sage Green)
Ch 5.
Row 1: sc in the 2nd ch from the hook and in each ch across, turn. (4)
Rows 2–14: ch 1, sc in each st, turn. (4)
Row 15 (buttonhole): ch 1, sc in the first st, ch 2, sk 2 sts, sc in the last st, turn. (2 sc + ch-2 sp)
Row 16: ch 1, sc in the first st, 2 sc in the ch-2 sp, sc in the last st, turn. (4)
Rows 17–18: ch 1, sc in each st, turn. (4)
Fasten off. The tab is 1 in × 4 in (2.5 cm × 10.2 cm).
Dot (Terracotta)
Make a magic ring.
Rnd 1: ch 1, 6 sc in the ring, sl st to the first sc. (6)
Rnd 2: ch 1, 2 sc in each st, sl st to the first sc. (12)
Fasten off and leave a long tail. The dot is about 0.9 in (2.3 cm) across.
Make All Pieces
| Piece | Color | Qty |
|---|---|---|
| Back panel | Cream | 1 |
| Arch | Green / cream / terracotta | 1 |
| Strap | Cream | 1 |
| Pockets A and D | Terracotta | 1 each |
| Pocket B | Sage green | 1 |
| Pocket C | Cream | 1 |
| Tab | Sage green | 1 |
| Dot | Terracotta | 1 |
The layout is measured inside the border, on the 9.5 in × 12 in (24.1 cm × 30.5 cm) panel:
        [ ARCH behind top edge ]
+-------------------------------------+
|  1.5 in margin                      |
| [ POCKET A ]   [ POCKET B ]         |
| [ 4.5 x 5  ]   [ 3.75 x 5 ]         |
|  0.75 in gap                        |
| [ POCKET C ] [ POCKET D ] [TAB]     |
| [ 3.5 x 4  ] [  3 x 4   ] [1x4]     |
|  0.75 in margin                     |
+-------------------------------------+
The spacing adds up to the panel size:
- Upper row: 0.5 + 4.5 + 0.25 + 3.75 + 0.5 = 9.5 in (24.1 cm)
- Lower row: 0.5 + 3.5 + 0.5 + 3 + 0.5 + 1 + 0.5 = 9.5 in (24.1 cm)
- Vertical: 1.5 + 5 + 0.75 + 4 + 0.75 = 12 in (30.5 cm)
Joining
Method: whipstitch with matching yarn. Pin each piece in place before you sew it.
Arch: lay the panel RS up. Slide the arch behind it so the arch’s straight edge sits 0.5 in (1.3 cm) below the panel’s top edge, centered. From the back, whipstitch the straight edge to the panel. The arch has 4.5 row ends per inch and the panel has 4 sts per inch, so sew 9 arch row ends for every 8 panel sts. Then tack the panel’s top border to the arch from the front with hidden stitches.
Pockets: flatten each pocket so that Rnd 1 forms the bottom fold. Sew the sides and bottom through the back layer only.
- Sides: sew 1 stitch per pocket round. This matches the panel 1:1, because both have 4.5 rows per inch.
- Bottom: sew 1 stitch per base st. This also matches 1:1, because both have 4 sts per inch.
Tab: sew down Rows 1–2 only. Sew the button to the panel under the buttonhole, about 3.4 in (8.6 cm) above the bottom of the tab.
Dot: sew it to the front layer of Pocket C, centered, 1.5 in (3.8 cm) below the rim.
Strap: sew the ends to the back of the arch. Place them 1.5 in (3.8 cm) below the arch top and 2.5 in (6.4 cm) apart, with each end overlapping 0.75 in (1.9 cm).
Tension: keep each stitch snug but not tight. If you pull too tight, the panel puckers. If you sew too loosely, the pockets sag when they’re full.
Size checkpoint: the organizer should be 10.5 in (26.7 cm) wide. It should be about 17.75 in (45.1 cm) tall: 13 in (33.0 cm) of panel plus 4.75 in (12.1 cm) of visible arch.
Final Blocking
- Weave in all ends on the back.
- Lay the organizer face up on a blocking mat.
- Spritz it until it’s damp, not soaked.
- Pin the panel to 10.5 in × 13 in (26.7 cm × 33.0 cm), keeping the corners square.
- Ease the arch into a smooth curve.
- Put a folded cloth into each pocket so the rims stay open while it dries.
- Let it dry completely, then unpin it.
Final Quality-Control Checklist
- The panel measures 10.5 in × 13 in (26.7 cm × 33.0 cm).
- The border has 180 sts and doesn’t ruffle or cup.
- The arch is centered and measures 10.5 in (26.7 cm) across.
- The pocket rows are level, and the openings are free.
- The button passes easily through the buttonhole.
- The strap is secure and the loop is centered.
- No yarn ends show on the front.
Troubleshooting
- The arch ruffles: go up 0.5 mm for the arch only, or block it firmly.
- The arch cups: loosen your tension on the increase stitches.
- The panel sides wave: recount the border. Each side should have exactly 48 sc.
- The pockets lean: re-pin them against a ruler and re-sew.
- The crab stitch looks twisted: work that round with a larger hook.
- The organizer tilts on the wall: move the strap ends so they sit evenly on each side of the center.
Care
Take out any electronics before you wash it. Hand wash in cool water, roll it in a towel to remove the water, and dry it flat, re-blocking if needed.
Final Notes
Each measurement depends on the one before it. A gauge of 16 stitches per 4 in gives a 9.5 in × 12 in (24.1 cm × 30.5 cm) panel. The 180-stitch border brings it to 10.5 in × 13 in (26.7 cm × 33.0 cm). The 10.5 in (26.7 cm) arch matches that width, and pockets of 18, 15, 14, and 12 stitches per side fill each row exactly. If you check your gauge early, every later step will fit.
Happy crocheting!