

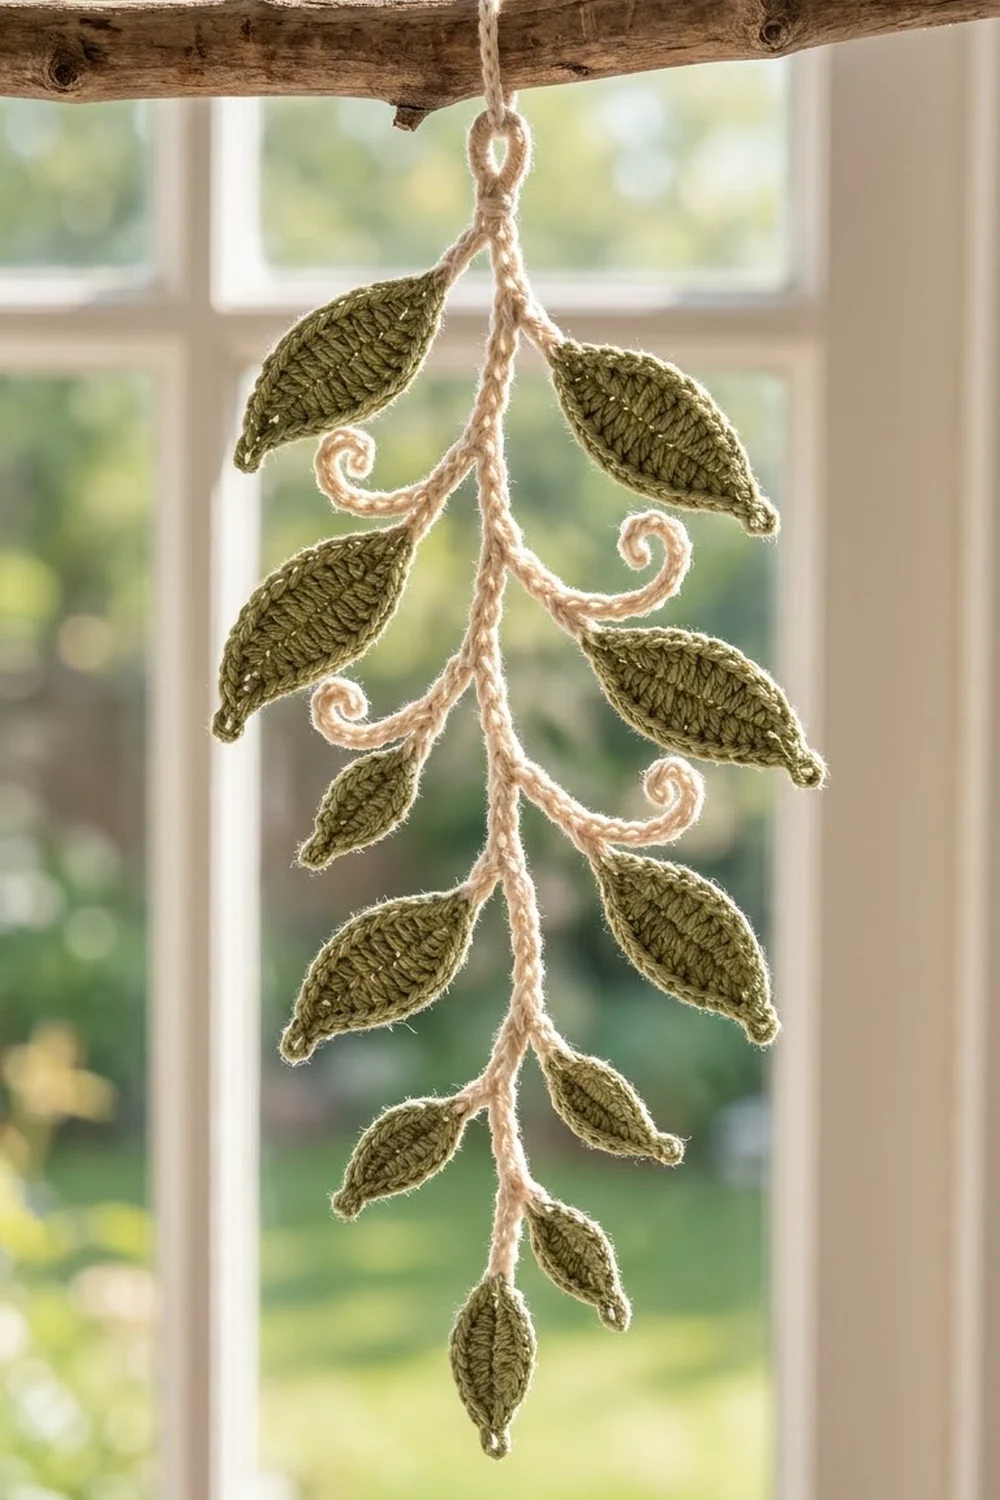
The Sage Sprig is one leafy branch motif: a slim cream stem with sage-green leaves. The leaves are pointed and ridged, they are graded from large at the bottom to small at the top, and four thin curled tendrils sit between them. It lies flat and looks a little like a botanical pressing in yarn.
Only two colors are used: soft cream for the stem and muted sage green for the leaves. The motif suits wall hangings, bag fronts, journal covers, or a sewn-on detail for a cushion.
This pattern uses US crochet terms. The finished branch is about 10 in (25.4 cm) tall and 7 in (17.8 cm) wide at its widest point.
Here is the construction. First you make 11 separate leaves in three sizes. Then you crochet the stem from the bottom loop upward as a chain, and on the way back down you work slip stitches that build the side branches and tendrils. To finish, you sew each leaf to a branch tip and block the sprig flat.
Finished Size and Construction
- Finished size: about 10 in (25.4 cm) tall x 7 in (17.8 cm) wide
- Skill level: Easy to Intermediate
- Terminology: US crochet terms
- Yarn weight: DK (#3), cotton or cotton blend
- Hook: 3.5 mm (E-4)
- Number of pieces: one finished motif, made from 1 stem and 11 sewn-on leaves
- Layout: one vertical main stem with 10 side branches (5 per side) and 1 tip leaf, plus 4 tendrils
- Leaf sizes (finished): Large 2.5 x 1 in (6.4 x 2.5 cm); Medium 2 x 0.75 in (5.1 x 1.9 cm); Small 1.5 x 0.625 in (3.8 x 1.6 cm)
- Leaf size before edging: Large 2.25 x 0.75 in (5.7 x 1.9 cm); Medium 1.75 x 0.5 in (4.4 x 1.3 cm); Small 1.25 x 0.375 in (3.2 x 1.0 cm)
- Edging depth: about 0.125 in (0.3 cm) added on each long side
Materials
Use a smooth, tightly plied DK cotton. With cotton the leaf ridges stay crisp and the slip-stitch stem stays firm. Fuzzy or loosely spun yarn hides the cord look of the stem.
- Color A, Cream (stem and tendrils): 8 g, about 18 m
- Color B, Sage Green (leaves): 12 g, about 26 m
These amounts assume about 2.2 m per gram, a typical figure for DK cotton. They already include a margin for your gauge swatch and sewing tails.
Tools:
- 3.5 mm (E-4) crochet hook
- Tapestry needle
- Scissors
- Rust-proof pins
- Blocking mat or folded towel
- Spray bottle
- Ruler or tape measure
Abbreviations (US Terms)
- ch – chain
- sl st – slip stitch
- sc – single crochet
- hdc – half double crochet
- dc – double crochet
- BLO – back loop only
- st(s) – stitch(es)
Special technique – back-bump slip stitch: Turn the chain so you see its back. Each chain has a small bump there. Insert the hook under that bump only, yarn over, and pull through both the bump and the loop on your hook. This leaves the neat V of the chain on top, and the stem ends up looking like a smooth double cord.
Tip picot: Ch 3, then sl st in the 3rd ch from the hook.
Gauge and Checkpoints
Chain gauge: 6 ch = 1 in (2.5 cm). To check it, chain 24 and measure. It should be 4 in (10.2 cm) long.
Leaf gauge: One finished Large Leaf is 2.5 in (6.4 cm) long and 1 in (2.5 cm) wide.
Before you make the rest, crochet one Large Leaf and check it at each stage:
- After Round 1: 2.25 x 0.75 in (5.7 x 1.9 cm)
- After Round 2 (edging and picot): 2.5 x 1 in (6.4 x 2.5 cm)
- Stem chain before working back: 48 stem ch = 8 in (20.3 cm)
If your work is too big: Change to a 3.25 mm hook, or pull each chain a little snugger.
If your work is too small: Change to a 3.75 mm hook.
The leaves and the stem must both be on gauge. If the stem comes out too long, the branches will look sparse. If it is too short, the leaves will crowd and overlap.
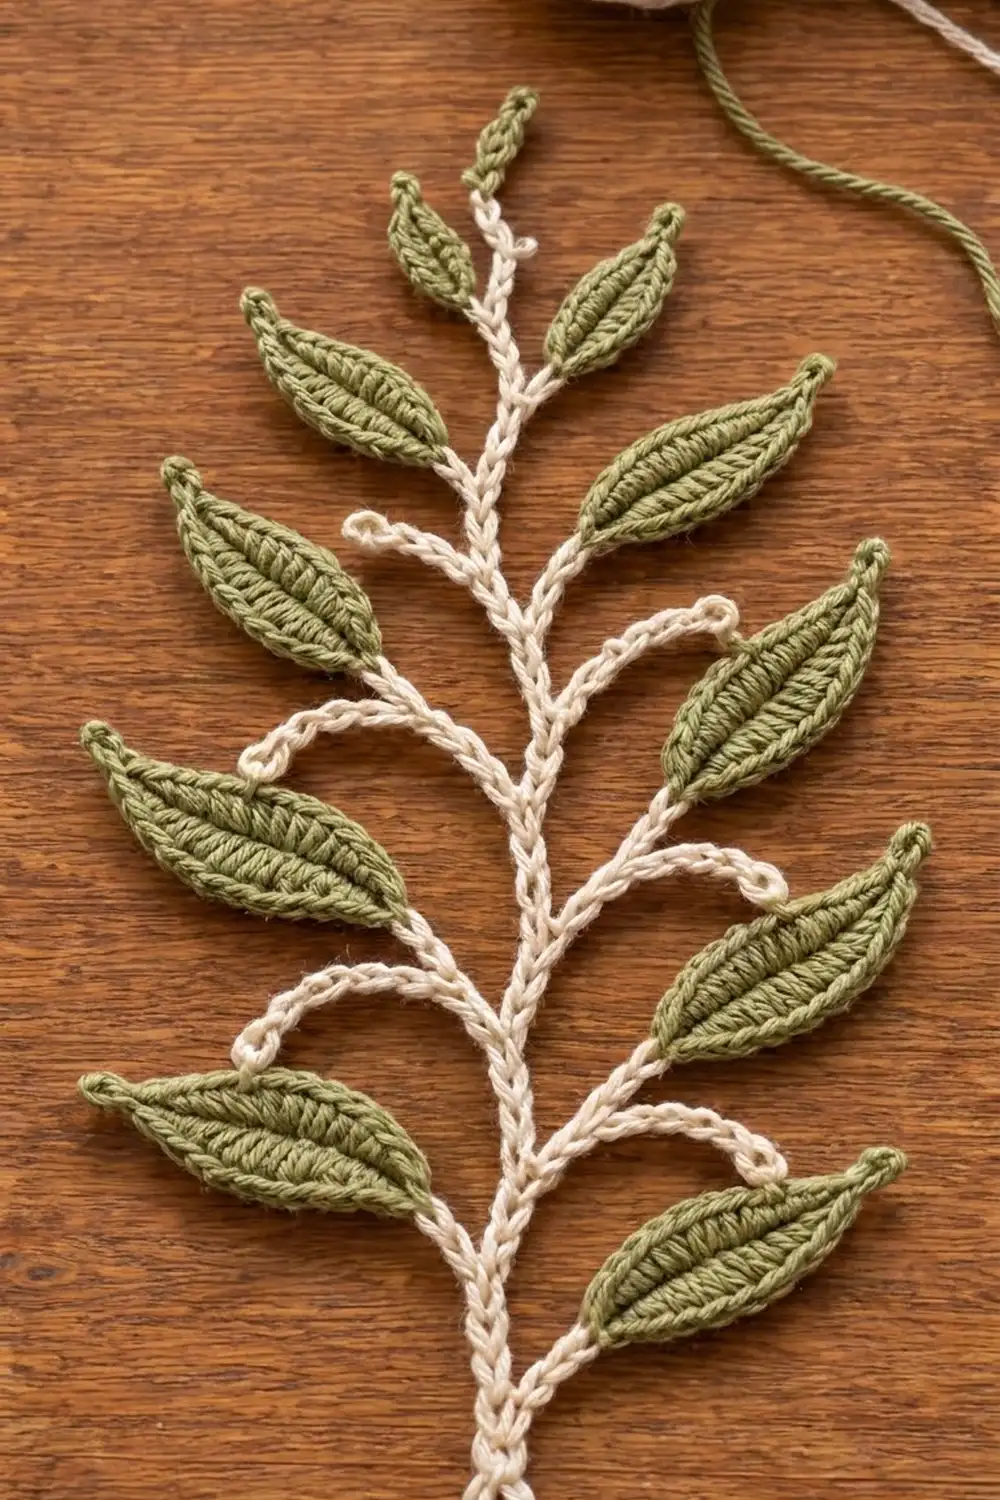
Leaves (Make 11 in Color B)
You work each leaf around both sides of a foundation chain, so that chain becomes the center vein. Stitch heights rise from a sl st at the pointed tip up to dc in the middle, then drop back down. On every leaf, the 3-sc end is the base that you sew to the stem.
Large Leaf (Make 4)
Ch 14.
Round 1: Side A: sl st in 2nd ch from hook, sc in next ch, hdc in next 2 ch, dc in next 5 ch, hdc in next 2 ch, sc in next ch (12 sts). Work 3 sc in the last ch (base). Now rotate and work along the free loops on the other side of the chain. Side B: sc in next ch, hdc in next 2 ch, dc in next 5 ch, hdc in next 2 ch, sc in next ch, sl st in last ch (12 sts). Join with sl st to the first sl st. (27 sts: 12 + 3 + 12)
Checkpoint: 2.25 x 0.75 in (5.7 x 1.9 cm). Do not fasten off yet. The edging round is in the Border section below.
Medium Leaf (Make 4)
Ch 11.
Round 1: Side A: sl st in 2nd ch from hook, sc in next ch, hdc in next ch, dc in next 4 ch, hdc in next ch, sc in next ch (9 sts). Work 3 sc in the last ch (base). Side B, along the free loops: sc in next ch, hdc in next ch, dc in next 4 ch, hdc in next ch, sc in next ch, sl st in last ch (9 sts). Join with sl st to the first sl st. (21 sts: 9 + 3 + 9)
Checkpoint: 1.75 x 0.5 in (4.4 x 1.3 cm).
Small Leaf (Make 3)
Ch 8.
Round 1: Side A: sl st in 2nd ch from hook, sc in next ch, hdc in next ch, dc in next 2 ch, sc in next ch (6 sts). Work 3 sc in the last ch (base). Side B, along the free loops: sc in next ch, dc in next 2 ch, hdc in next ch, sc in next ch, sl st in last ch (6 sts). Join with sl st to the first sl st. (15 sts: 6 + 3 + 6)
Checkpoint: 1.25 x 0.375 in (3.2 x 1.0 cm).
Stem with Branches and Tendrils (Make 1 in Color A)
You chain the stem upward first. Then you slip stitch back down it, and at each branch point you chain out sideways and slip stitch back along that new chain to the stem. Every sl st goes into a back bump.
Bottom loop: Ch 8 and sl st in the first ch to form a loop. It measures about 0.5 in (1.3 cm).
Main stem: Ch 49. That is 48 stem ch plus 1 turning ch. Checkpoint: the 48 stem ch measure 8 in (20.3 cm).
Working back down. For a branch, “ch X, sl st back” means: ch X, sl st in the back bump of the 2nd ch from the hook and of each remaining branch ch (X minus 1 sl sts). Each branch sits on whichever side you set when you block.
- Sl st in the 2nd ch from the hook and the next 4 stem ch (5 stem sts). Branch 1 (left): ch 6, sl st back (5).
- Sl st in next 3 stem ch. Branch 2 (right): ch 6, sl st back (5).
- Sl st in next 3 stem ch. Tendril 1 (left): ch 8, sl st back (7).
- Sl st in next 3 stem ch. Branch 3 (right): ch 8, sl st back (7).
- Sl st in next 4 stem ch. Branch 4 (left): ch 8, sl st back (7).
- Sl st in next 3 stem ch. Tendril 2 (right): ch 8, sl st back (7).
- Sl st in next 3 stem ch. Branch 5 (left): ch 9, sl st back (8).
- Sl st in next 4 stem ch. Branch 6 (right): ch 9, sl st back (8).
- Sl st in next 3 stem ch. Tendril 3 (left): ch 10, sl st back (9).
- Sl st in next 3 stem ch. Branch 7 (right): ch 10, sl st back (9).
- Sl st in next 4 stem ch. Branch 8 (left): ch 10, sl st back (9).
- Sl st in next 3 stem ch. Tendril 4 (right): ch 10, sl st back (9).
- Sl st in next 3 stem ch. Branch 9 (left): ch 12, sl st back (11).
- Sl st in next 3 stem ch. Branch 10 (right): ch 12, sl st back (11).
- Sl st in the last 4 stem ch, then sl st into the base of the bottom loop. Fasten off and weave in the ends.
Stem count check:
- Stem sl sts: 5 + 3 + 3 + 3 + 4 + 3 + 3 + 4 + 3 + 3 + 4 + 3 + 3 + 3 + 4 = 48, which matches the 48 stem ch.
- Branch and tendril sl sts: 5 + 5 + 7 + 7 + 7 + 7 + 8 + 8 + 9 + 9 + 9 + 9 + 11 + 11 = 112.
- Total: 160 sl sts for the downward pass.
The branches get longer toward the bottom. Branches 1 and 2 are 1 in (2.5 cm) long, and Branches 9 and 10 are 2 in (5.1 cm). Together with the graded leaves, this gives the sprig its tapering outline.
Attaching the Leaves
Use the 8 in (20.3 cm) tail left on each leaf after its edging to sew it on.
- Small leaves: Branches 1 and 2, plus 1 at the very top of the main stem as the tip leaf.
- Medium leaves: Branches 3, 4, 5 and 6.
- Large leaves: Branches 7, 8, 9 and 10.
For each leaf, lay its 3-sc base over the last 2–3 sl sts at the tip of its branch. Angle the leaf up and out, about 45 degrees from the stem. Whipstitch through the base sts and the branch, keeping your stitches on the back. Use small, snug stitches so the leaf cannot swivel, but keep them loose enough that the base does not pucker. Leave the tendrils bare.
Border: Leaf Edging
The sprig does not have an outer border. The leaf edging below plays that role: it frames each leaf, adds the ridged outline, and forms the pointed tip.
Border gauge: The edging adds about 0.125 in (0.3 cm) to each long side, so each leaf gets 0.25 in (0.6 cm) wider. The tip picot adds about 0.25 in (0.6 cm) to the length.
Round 2 (all sizes), worked in BLO: Ch 1. Work 1 sc in BLO of each st around, starting with the sl st at the tip: all Side A sts, then the 3 base sts, then all Side B sts. Join with sl st to the first sc. Work a tip picot (ch 3, sl st in 3rd ch from hook). Sl st into the first sc again. Fasten off, leaving an 8 in (20.3 cm) sewing tail.
This is a trim round: 1 sc in each existing st, with 0 extra sts and 1 picot:
- Large: 12 Side A + 3 base + 12 Side B = 27 sc + 1 picot
- Medium: 9 Side A + 3 base + 9 Side B = 21 sc + 1 picot
- Small: 6 Side A + 3 base + 6 Side B = 15 sc + 1 picot
Why the math works: The 3 sc at the base already made the turn around the chain end in Round 1, and the tip is a narrow sl st point. Neither end needs extra increases, so 1 sc per st lies flat. Working in BLO leaves the front loops of Round 1 as a raised outline. That outline, together with the angled dc posts, gives the leaves their ridged texture.
Final Blocking
- Weave in any loose ends, but leave long tails uncut until after blocking.
- Spray the sprig with water until it is damp all the way through but not dripping.
- Lay it face up on the mat. Pin the bottom loop and the top tip leaf so the stem is straight and 10 in (25.4 cm) long overall.
- Fan each branch out to about 45 degrees, mirroring the pairs.
- Pin each leaf tip through its picot so the leaf lies straight and reaches its finished length.
- Shape each tendril into a loose curl about 0.5 in (1.3 cm) across, and pin the curl at its end.
- Check that the widest point, across the Large leaves, is 7 in (17.8 cm).
- Let it dry completely, unpin it, and trim the remaining tails.
Final Quality-Control Checklist
- [ ] There are 11 leaves: 4 Large, 4 Medium, 3 Small
- [ ] Leaf stitch counts after edging are 27 / 21 / 15 sc, plus 1 picot each
- [ ] The stem has 48 stem sl sts and 112 branch and tendril sl sts
- [ ] The stem front shows a smooth V on every st
- [ ] Every leaf base is sewn firmly with no visible stitches on the front
- [ ] Leaves get smaller from bottom to top
- [ ] The motif measures 10 x 7 in (25.4 x 17.8 cm)
- [ ] All ends are secured and trimmed
Troubleshooting
Leaves curl lengthwise. Your foundation chain is too tight. Make the chain with a hook one size larger, then go back to the 3.5 mm hook for Round 1.
Leaf edging ruffles. You have added extra sc. Count again against 27 / 21 / 15.
Stem twists into a spiral. Your sl sts are too tight. Loosen them, or work them with a 4 mm hook.
Branches droop. Pin them more firmly while blocking and let the sprig dry flat.
Hard to find the back bumps. Turn the chain over and work in good light. Each bump sits directly behind its V.
Leaf base gapes open. Add one more whipstitch across the center of the 3 base sc.
Care
Hand wash in cool water with mild soap, press out the water in a towel, and dry flat, reshaping the branches and tendrils as it dries. Do not tumble dry or wring it.
Final Notes
Each measurement in this pattern builds on the one before it. A chain gauge of 6 ch per 1 in (2.5 cm) gives a 48 ch stem of 8 in (20.3 cm). Large leaves measure 2.25 in (5.7 cm) after Round 1 and 2.5 in (6.4 cm) after edging. The stem plus the 0.5 in (1.3 cm) bottom loop and the 1.5 in (3.8 cm) tip leaf make the full 10 in (25.4 cm) height. The graded branches and leaves give the 7 in (17.8 cm) width. If your test leaf and stem chain are on gauge, everything after them will line up.
Happy crocheting!