

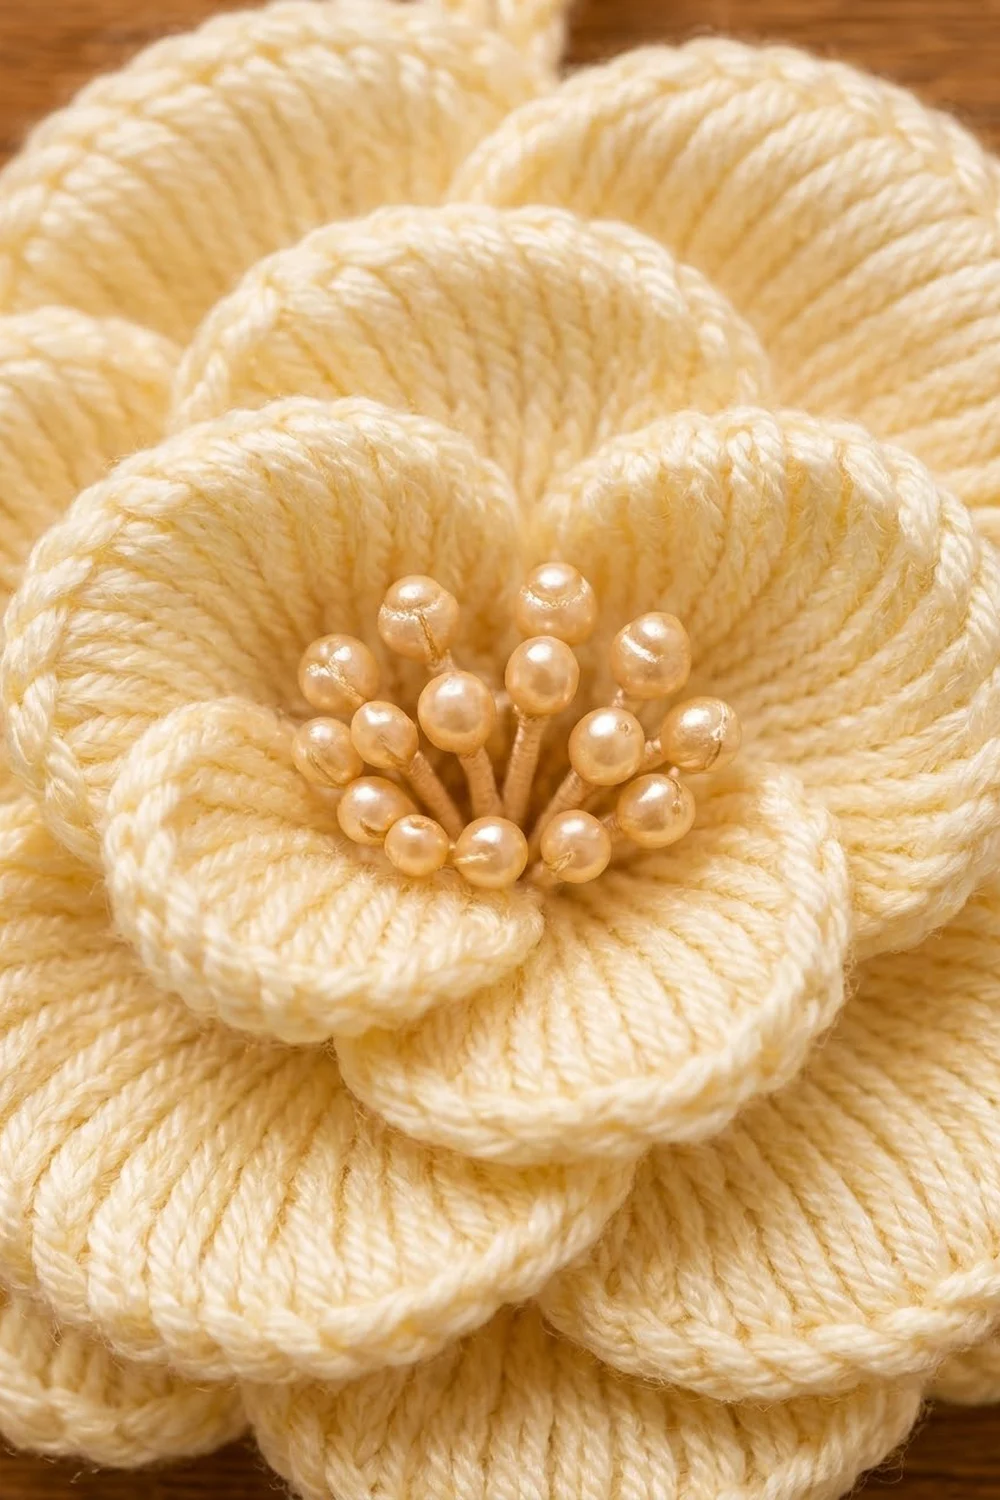
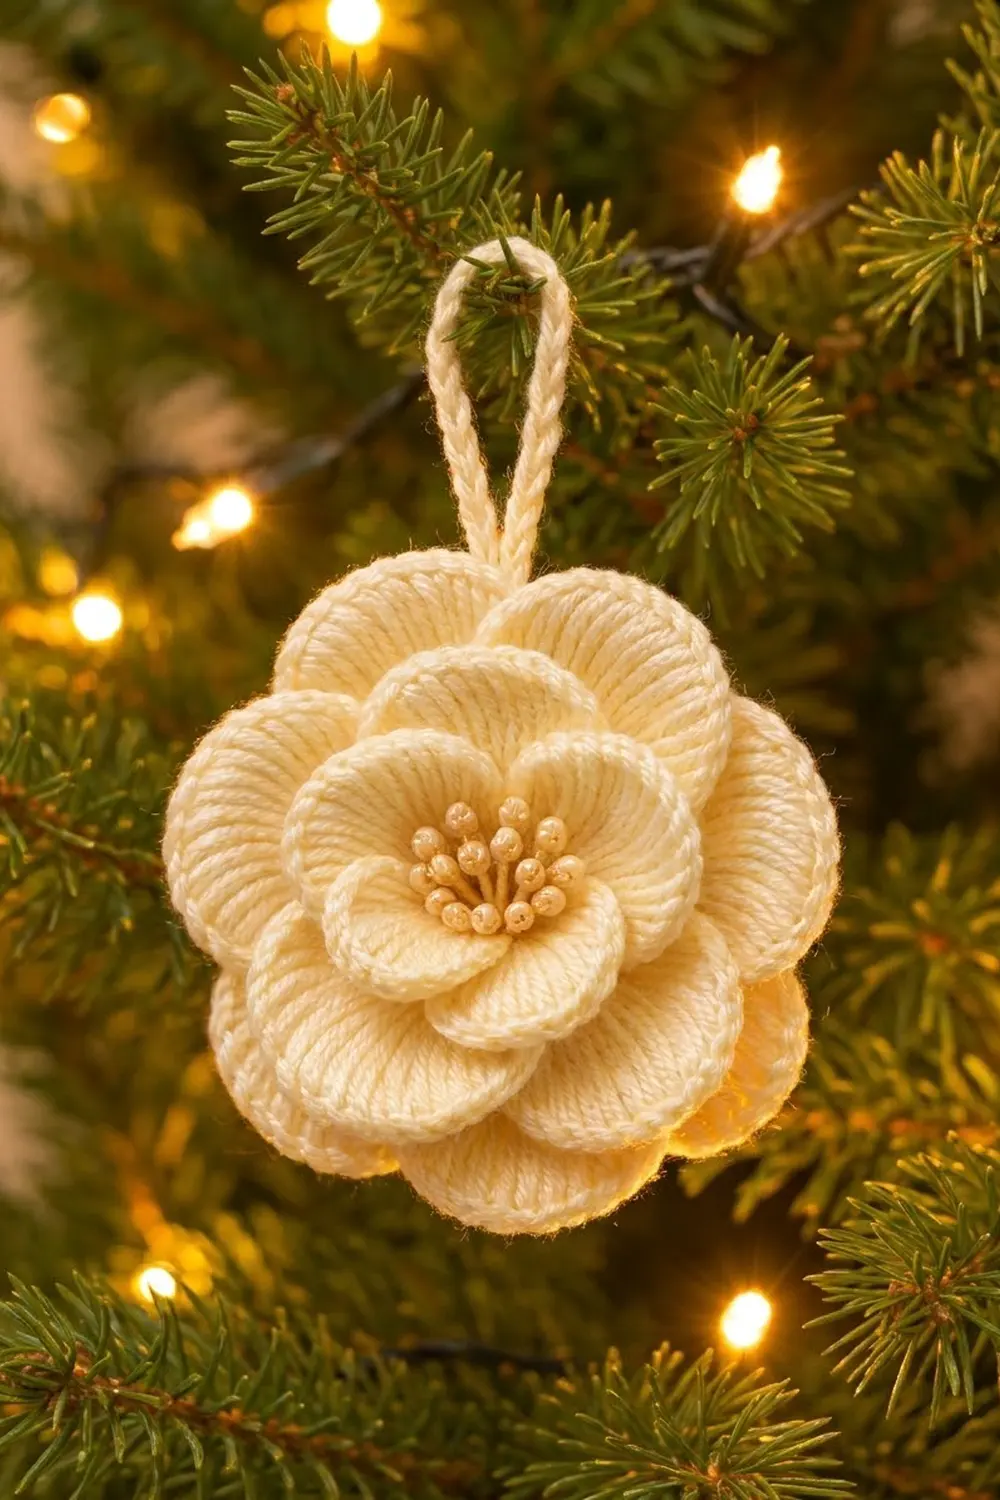
The Vanilla Camellia is a soft, layered flower ornament. It looks right on a Christmas tree, on a gift package, or hanging in a window all year. Three tiers of rounded petals open around a cluster of tiny bead-tipped stamens, so the flower looks full and sculpted while staying light.
The flower is worked in one cream color, with light tan for the stamens. The ribbed texture on each petal comes from the posts of tall stitches fanning out from a chain loop. A slip-stitch rim gives the outer petals a clean, rolled edge.
This pattern uses US crochet terms. The finished ornament is 4.25 in (10.8 cm) across. The hanging loop adds about 1.5 in (3.8 cm), so the total height is 5.75 in (14.6 cm).
Construction is simple and all in the round. You make a small tan center and add the stamens in the front loops. Then you switch to cream and build three petal tiers, each one anchored behind the tier before it. A slip-stitch rim and a chain loop finish the piece.
Finished Size and Construction
- Finished size: 4.25 in (10.8 cm) across, plus a 1.5 in (3.8 cm) loop
- Skill level: Intermediate
- Terminology: US crochet terms
- Yarn weight: DK (light, #3)
- Hook: 3.5 mm (E-4)
- Number of pieces: 1 (one continuous motif, no sewing of separate parts)
- Layout: Single flower: stamen center plus 3 tiers of 5 petals
- Piece size: 4.25 in (10.8 cm) across
- Size before border: 4 in (10.2 cm) across after Round 9
- Border depth: 0.125 in (0.3 cm) per edge, a one-round slip-stitch rim
Materials
Choose a smooth, tightly plied DK yarn. Cotton or a cotton blend shows the petal ribs best and holds the cupped shape. Fuzzy or very soft acrylic will blur the ribs and make the petals flop.
- Color A, Cream: 15 g, about 35 m
- Color B, Light Tan: 3 g, about 7 m
These quantities include a margin of about 20 percent for gauge swatching and weaving in ends.
Tools:
- 3.5 mm (E-4) crochet hook
- Tapestry needle
- Scissors
- Stitch marker
- Rust-proof pins and a foam blocking mat
- Spray bottle with water
- Ruler or tape measure
Abbreviations (US Terms)
- ch: chain
- sl st: slip stitch
- sc: single crochet
- hdc: half double crochet
- dc: double crochet
- tr: treble crochet
- sp: space
- sk: skip
- st(s): stitch(es)
- BLO / FLO: back loop only / front loop only
- BP: back post (insert the hook from the back, around the post, and out the back)
Special stitches
Stamen: Ch 6. In the 2nd ch from hook, (yo, insert hook, pull up a loop) 3 times, yo and pull through all 7 loops on the hook, ch 1 to close. This puff is the bead-like tip. Sl st in each of the next 4 ch back down the stalk.
Standing BPsc: With a slip knot on the hook, insert the hook from the back around the post of the stated stitch, yo, pull up a loop, yo, pull through both loops. Use it to start a new tier from behind without a visible join.
Gauge and Checkpoints
Exact gauge matters less here than for a garment, but it decides whether the tiers overlap evenly. Work Rounds 1 to 3 as a test before you continue.
Gauge: Rounds 1 to 3 measure 1 in (2.5 cm) across, laid flat.
Checkpoints:
- After Round 1: 0.5 in (1.3 cm)
- After Round 3: 1 in (2.5 cm)
- After Round 5 (inner tier): 2 in (5.1 cm)
- After Round 7 (middle tier): 3 in (7.6 cm)
- After Round 9 (outer tier): 4 in (10.2 cm)
- After Round 10 (rim): 4.25 in (10.8 cm)
If your piece is too big, go down to a 3.25 mm hook, or keep the ch loops snug. If it is too small, go up to a 3.75 mm hook. Being off by 0.25 in (0.6 cm) at Round 3 grows to almost 1 in (2.5 cm) by Round 9, so fix it early.
Pattern
Center and Stamens (Color B)
Round 1: Make a magic ring. Ch 1, work 10 sc into the ring, sl st to the first sc. Pull the ring tight. (10 sc)
Round 2 (stamens): Working in the FLO only, sl st in the next st, Stamen, sl st in the same FLO; repeat from * around. Sl st to the first sl st. (10 stamens)*
The back loops of Round 1 stay free for Round 3. Push all the stamens up and toward the center so they stand like a little bouquet. Fasten off B and weave in the end on the wrong side.
Base Round (Color A)
Round 3: Join A with a sl st in the BLO of any Round 1 sc. Ch 1, work 2 sc in the BLO of each st around, sl st to the first sc. (20 sc)
Checkpoint: 1 in (2.5 cm) across.
Round 4 (inner petal loops): Ch 1, sc in the first st, ch 3, sk 3 sts, sc in the next st, ch 3, sk 3 sts; repeat from * 3 more times. Sl st to the first sc. (5 sc and 5 ch-3 sps)*
Each repeat uses 4 stitches, so 5 repeats use exactly 20.
Inner Petal Tier
Round 5: In each ch-3 sp work (sc, hdc, 2 dc, 3 tr, 2 dc, hdc, sc). Sl st to the first sc. Fasten off. (5 petals of 11 sts each, 55 sts)
Each petal has 11 stitches fanned into a 3-chain space, so it cups upward. The center tr of each petal is its 6th stitch, the 2nd of the 3 tr.
Checkpoint: 2 in (5.1 cm) across, measured from petal tip to petal tip.
Middle Petal Tier
Round 6 (middle petal loops): Turn the flower to face the back. Make a Standing BPsc around the center tr (6th st) of any inner petal. Ch 5, BPsc around the center tr of the next inner petal; repeat from * 3 more times, ch 5, sl st to the first sc. (5 sc and 5 ch-5 sps)*
Each anchor sits behind the middle of an inner petal, so the new loops cross behind the gaps. That staggers the middle tier between the inner petals.
Round 7: Turn to the front. In each ch-5 sp work (sc, hdc, 2 dc, 5 tr, 2 dc, hdc, sc). Sl st to the first sc. Fasten off. (5 petals of 13 sts each, 65 sts)
The center tr of each middle petal is its 7th stitch, the 3rd of the 5 tr.
Checkpoint: 3 in (7.6 cm) across.
Outer Petal Tier
Round 8 (outer petal loops): From the back, make a Standing BPsc around the center tr (7th st) of any middle petal. Ch 7, BPsc around the center tr of the next middle petal; repeat from * 3 more times, ch 7, sl st to the first sc. (5 sc and 5 ch-7 sps)*
Round 9: Turn to the front. In each ch-7 sp work (sc, hdc, 3 dc, 7 tr, 3 dc, hdc, sc). Sl st to the first sc. Do not fasten off. (5 petals of 17 sts each, 85 sts)
The center tr of each outer petal is its 9th stitch, the 4th of the 7 tr. The long tr posts fanning out make the clear radiating ribs.
Checkpoint: 4 in (10.2 cm) across. This is your size before the border.
Border
The border is one slip-stitch rim, worked on the outer tier only. It firms the petal edge and gives the rolled, chain-like outline of the finished flower.
Border gauge: One slip-stitch round adds about 0.125 in (0.3 cm) to each outer edge, so the width grows by 0.25 in (0.6 cm).
Round 10 (rim, trim round): Working in the BLO, sl st loosely in each st around. Sl st into the first sl st to join. (85 sl st: 85 worked 1-per-existing-stitch + 0 added)
Per petal: 17 sl st on each of the 5 outer petals.
Why the math works: Round 9 has 5 petals × 17 sts = 85 sts. The rim works exactly one sl st into each of those 85 stitches and adds none, so the petals keep their curve without ruffling or pulling in. The width goes from 4 in (10.2 cm) to 4 + 0.25 = 4.25 in (10.8 cm).
Keep each sl st as loose as a normal chain. If the rim is tight, the outer petals will curl forward and close up.
Hanging Loop
With the back facing, choose the outer petal you want at the top. Insert the hook around the post of its center tr (9th st), pull up a loop of A, and ch 1 to secure.
Ch 20, sl st around the same post to form a loop. Sl st in each of the 20 ch around the loop, then sl st around the post again. (20 ch + 20 sl st)
The 20-chain loop is about 3 in (7.6 cm) long, so it stands about 1.5 in (3.8 cm) above the flower. Fasten off, leaving a 6 in (15.2 cm) tail, and weave it securely into the back of the outer tier.
Final Blocking
- Weave in all remaining ends on the back, going through the base rounds where they cannot show.
- Lightly mist the flower with water until it is damp but not wet.
- Place it face up on the blocking mat. Gently shape each petal into a soft cup by pressing the center of the petal down with a fingertip.
- Pin only the outer petal tips to a 4.25 in (10.8 cm) circle. Do not stretch them past this size.
- Fluff the stamens upright and fan them slightly outward.
- Lift the inner and middle tiers forward with your fingers so the three layers sit at different heights.
- Let it dry completely, at least 6 hours, before unpinning.
- For a firmer ornament that holds its shape on the tree, mist the back with a light fabric stiffener before the final drying.
Final Quality-Control Checklist
- The Round 1 ring is fully closed, with no hole in the center.
- 10 stamens stand up, each with a round puff tip.
- Inner tier: 5 petals, 11 sts each (55 sts).
- Middle tier: 5 petals, 13 sts each (65 sts), sitting between the inner petals.
- Outer tier: 5 petals, 17 sts each (85 sts), sitting between the middle petals.
- Rim: 85 sl st, smooth and not tight.
- The flower is 4.25 in (10.8 cm) across, within 0.125 in (0.3 cm).
- The loop is centered over one outer petal and stands about 1.5 in (3.8 cm) tall.
- No ends show on the front.
Troubleshooting
Petals lie flat instead of cupping. The ch loops are too long or loose. Chain more firmly, or go down half a hook size.
Petals ruffle or wave. The ch loops are too short for the stitches packed into them. Loosen your chains a little.
Tiers do not stagger. The BPsc anchors went between petals instead of around each center tr. Recount to the 6th st (inner) or the 7th st (middle) and redo the round.
Stamens droop. The puff is too loose or the stalk sl sts are slack. Tighten the closing ch 1 and the sl sts.
Rim pulls the outer petals forward. Work the slip stitches looser, or use a hook one size larger for Round 10 only.
Ornament hangs crooked. The loop is not centered. Remove it and reattach it at the center tr of the top petal.
Care
Hand wash in cool water with mild soap, press out the water in a towel, and reshape the petals while damp. Dry flat, and store the ornament flat or hanging so the tiers do not get crushed.
Final Notes
The measurement chain is short and easy to follow. Your 1 in (2.5 cm) base after Round 3 leads to a 2 in (5.1 cm) inner tier, a 3 in (7.6 cm) middle tier, a 4 in (10.2 cm) outer tier, and a 4.25 in (10.8 cm) flower after the rim. The 1.5 in (3.8 cm) loop brings the total height to 5.75 in (14.6 cm). Check each step as you go and the flower will turn out balanced.
Make one in cream to start, then try blush, ivory, or soft gold for a matching set of tree ornaments.
Happy crocheting!