
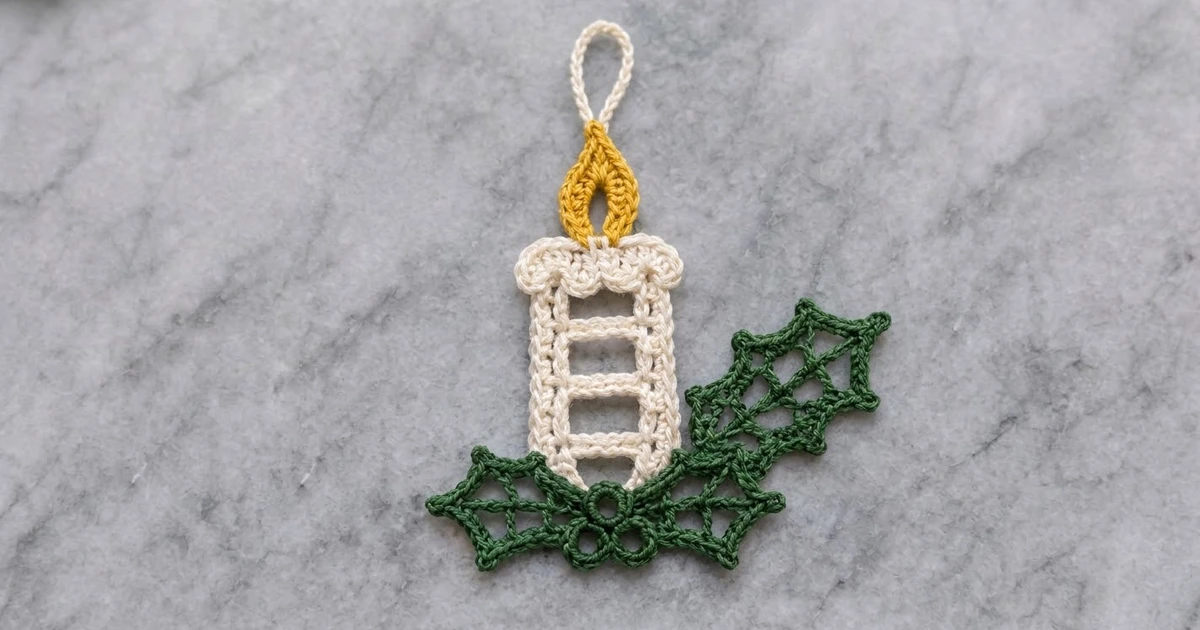
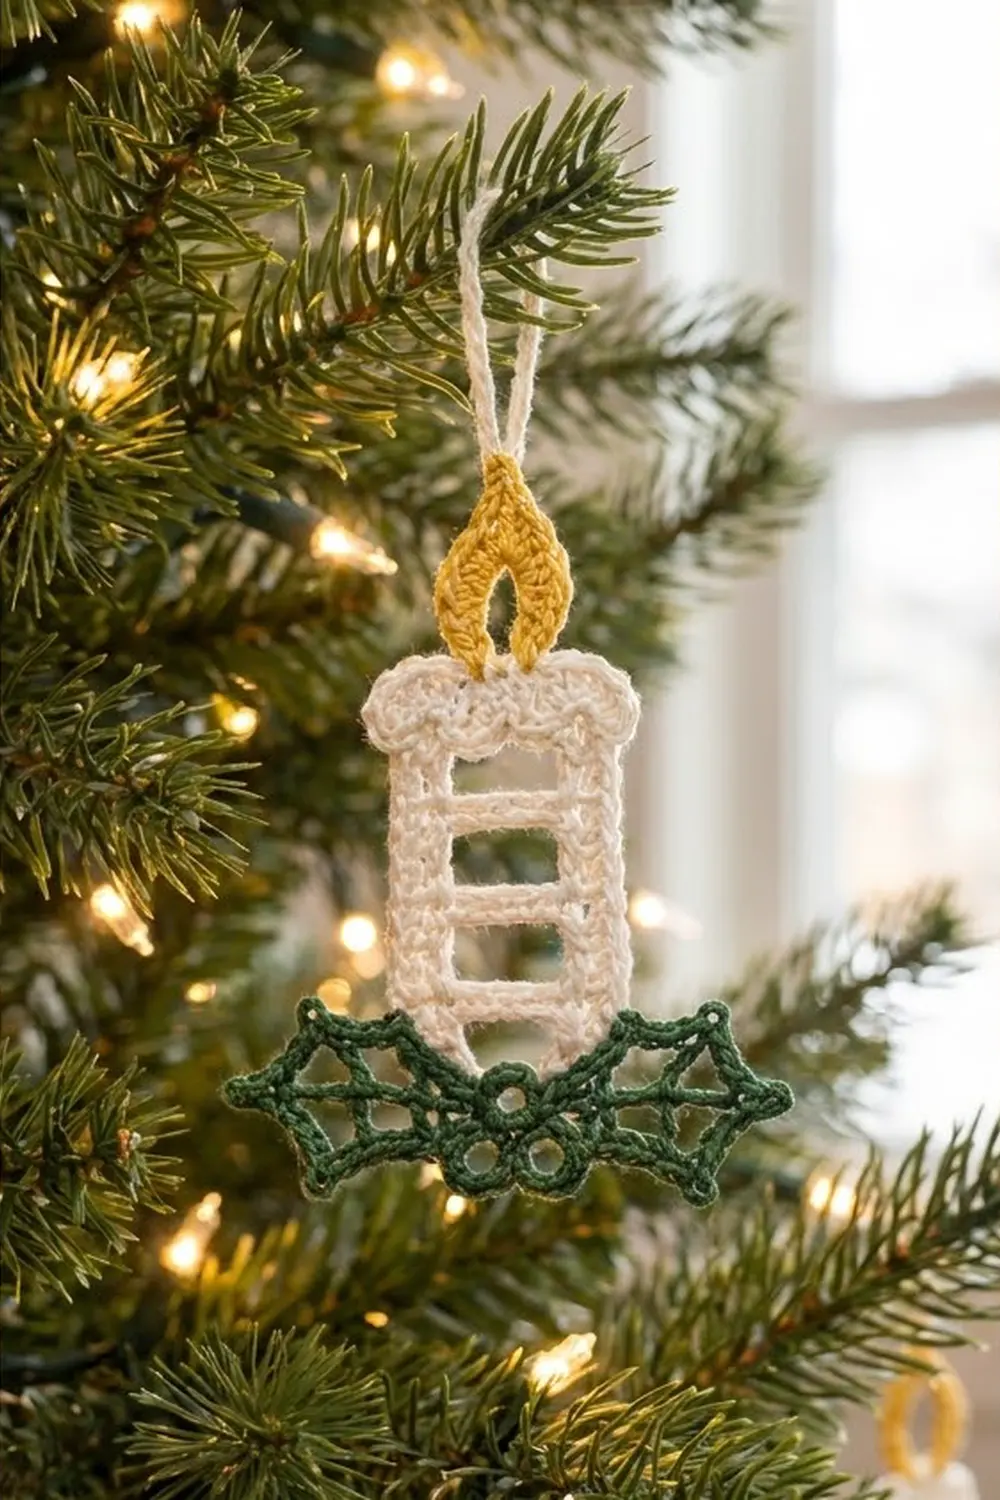
The Hollyglow Candle is a small, lacy Christmas ornament. It is a cream ladder-style candle with a golden flame, sitting in a spray of forest-green holly. The open windows let tree lights shine through, so it looks delicate on a branch but stays crisp and flat.
The colors are classic: cream, golden yellow and deep green. The style is filet-like openwork. The top of the candle has a soft, rolled wax-drip rim, and the holly leaves are pointed with a lacy center vein.
This pattern uses US crochet terms. The finished ornament measures about 4.25 in (10.8 cm) wide and 4.25 in (10.8 cm) tall, plus a 1.5 in (3.8 cm) hanging loop.
Construction is simple. You crochet the candle body in rows, then edge it with one round of single crochet and a scalloped drip rim. Next you make a flame, two holly leaves and three berry rings. Everything is sewn into one ornament, and a chain loop is added at the flame tip.
Finished Size and Construction
- Finished size: 4.25 in (10.8 cm) wide x 4.25 in (10.8 cm) tall, plus a 1.5 in (3.8 cm) loop
- Skill level: Advanced beginner
- Terminology: US
- Yarn weight: Fingering (#1 super fine) cotton or size 3 crochet thread
- Hook: 2.5 mm
- Number of pieces: 1 ornament, made from 7 small components (1 candle, 1 flame, 2 leaves, 3 berries)
- Layout: The candle is centered and upright. The leaves spread left and right across its base, and the berries form a triangle at the center.
- Candle body before border: 1.25 in (3.2 cm) wide x 2 in (5.1 cm) tall
- Candle after border: 1.5 in (3.8 cm) wide x 2.25 in (5.7 cm) tall
- Border depth: 0.125 in (0.3 cm) per side, plus a 0.25 in (0.6 cm) drip rim at the top
Materials
Choose a smooth mercerized cotton in fingering weight. Cotton holds the open windows and leaf points crisply and blocks well. Avoid fuzzy or very stretchy yarns, because they blur the ladder rungs.
- Cream: 5 g, about 17 m (candle, border, drip rim, hanging loop)
- Golden yellow: 2 g, about 7 m (flame)
- Forest green: 5 g, about 17 m (two leaves, three berries)
These quantities include a margin for a gauge test and sewing tails.
Tools:
– 2.5 mm crochet hook
– Tapestry needle
– Scissors
– Rust-proof pins and a foam blocking mat
– Spray bottle with water
– Optional: liquid fabric stiffener
Abbreviations (US Terms)
- ch: chain
- sl st: slip stitch
- sc: single crochet
- hdc: half double crochet
- dc: double crochet
- sk: skip
- sp: space
- st(s): stitch(es)
- FLO: front loop only
Special stitch: picot point (pt). Ch 3, sl st in 3rd ch from hook. This makes a small, sharp point.
Gauge and Checkpoints
Gauge: 14 sc and 16 sc rows = 2 in (5.1 cm). One dc row is about 0.3125 in (0.8 cm) tall.
Make the candle body first as your test piece. It sets the scale for everything else.
Checkpoints:
– After Row 1: 9 sc measure 1.25 in (3.2 cm).
– After Row 10: the body measures 1.25 in (3.2 cm) x 2 in (5.1 cm).
– After Border Rnd 1: the candle measures 1.5 in (3.8 cm) x 2.25 in (5.7 cm).
– Each leaf: about 2.25 in (5.7 cm) long and 1 in (2.5 cm) wide, including points.
– Flame: about 0.75 in (1.9 cm) wide x 1.25 in (3.2 cm) tall.
Too big? Go down to a 2.25 mm hook. Too small? Go up to a 2.75 mm hook. A small size difference is fine for an ornament, but make all components at the same gauge so they line up.
Part 1: Candle Body (Cream)
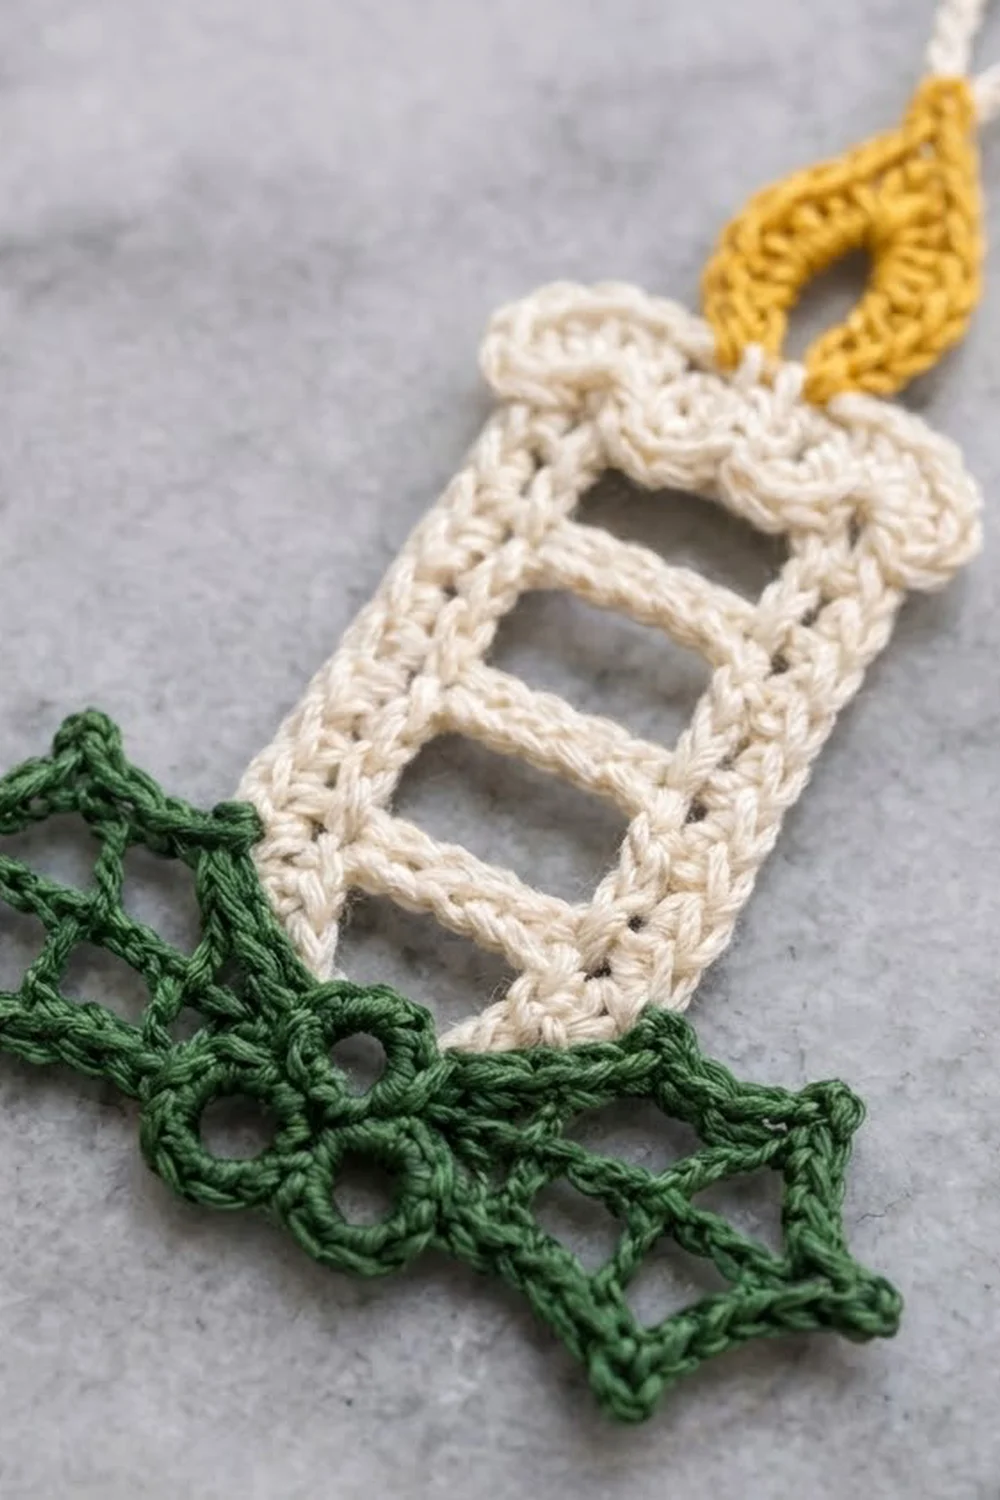
The body is worked in rows. Solid sc rows form the rungs, and dc rows with a chain gap form the windows.
Row 1: Ch 10, sc in 2nd ch from hook and in each ch across, turn. (9 sc)
Row 2 (window row): Ch 3 (counts as dc), dc in next st, ch 5, sk 5 sts, dc in last 2 sts, turn. (4 dc, 1 ch-5 sp)
Row 3 (rung row): Ch 1, sc in first 2 dc, 5 sc in ch-5 sp, sc in next dc, sc in top of turning ch, turn. (9 sc)
Rows 4–9: Repeat Rows 2–3 three more times. (Row 9: 9 sc)
Row 10: Ch 1, sc in each st across. (9 sc) Do not fasten off.
You now have 4 windows, side columns 2 dc wide, and 6 sc rows in total (Rows 1, 3, 5, 7, 9 and 10). The body measures 1.25 in (3.2 cm) x 2 in (5.1 cm). That is 6 sc rows at 0.125 in (0.3 cm) each plus 4 dc rows at 0.3125 in (0.8 cm) each.
Part 2: Flame (Golden Yellow)
Base ring: Ch 10, sl st in first ch to form a ring.
Rnd 1: Ch 1. Working into the ring: 2 sc, 3 hdc, 2 dc, (dc, pt, dc), 2 dc, 3 hdc, 2 sc. Join with sl st to first sc. (16 sts, 1 pt)
Fasten off, leaving an 8 in (20.3 cm) tail. Shape the ring into a teardrop with the picot at the top and the sc at the bottom. The center stays open.
Part 3: Holly Leaves (Forest Green), Make 2
Foundation: Ch 18.
Rnd 1:
– Side A: Sc in 2nd ch from hook, hdc in next ch, dc in next ch, [ch 1, sk 1 ch, dc in next ch] 6 times, hdc in next ch, 3 sc in last ch (tip).
– Side B: Rotate and work along the other side of the foundation: hdc in next ch, dc in next ch, [ch 1, sk 1 ch, dc in next ch] 6 times, hdc in next ch, sc in same ch as first sc. Join with sl st to first sc.
Count: Side A has 10 sts + 6 ch-1 sps. The tip has 3 sc. Side B has 10 sts + 6 ch-1 sps. (23 sts + 12 ch-1 sps = 35 places to work) The ch-1 spaces make the lacy center vein.
Rnd 2 (pointed edge): Ch 1.
– Side A: [Sc in next 4 sts or sps, pt] 3 times, sc in next 4 sts or sps. (16 sc, 3 pts)
– Tip: Sc in first tip sc, (sc, pt, sc) in center tip sc, sc in last tip sc. (4 sc, 1 pt)
– Side B: [Sc in next 4 sts or sps, pt] 3 times, sc in next 4 sts or sps. (16 sc, 3 pts)
– Join with sl st to first sc.
Count: 35 sc worked one in each st or sp, + 1 extra sc at the tip = 36 sc and 7 picot points.
Fasten off, leaving a 10 in (25.4 cm) tail on one leaf.
Part 4: Berries (Forest Green), Make 3
Base ring: Ch 4, sl st in first ch to form a ring.
Rnd 1: Ch 1, 10 sc in ring, join with sl st to first sc. (10 sc)
Fasten off, leaving a 6 in (15.2 cm) tail. Each berry is about 0.5 in (1.3 cm) across with an open center.
Border
The border has two parts. First you work one round of sc around the candle body, then a scalloped drip rim across the top only.
Border gauge: Same as the body, 7 sc per 1 in (2.5 cm). Each corner is 3 sc in one st, and the center sc of each group is the corner st.
Border Rnd 1 (cream, continue from Row 10): Ch 1.
– Top: 3 sc in first st, sc in next 7 sts, 3 sc in last st.
– Long side: Working in row ends, sc 14 sts evenly down the side: 1 sc in the end of each sc row and 2 sc in the end of each dc row.
– Bottom: Working in the foundation ch, 3 sc in first ch, sc in next 7 ch, 3 sc in last ch.
– Second long side: Sc 14 sts evenly, as before.
– Join with sl st to first sc.
Counts per side (each includes its 2 corner sts):
– Top and bottom: 11 sc each
– Long sides: 18 sc each
– Total: 2 x 11 + 2 x 18 − 4 shared corners = 54 sc
Why the math works: Each long side covers 6 sc rows (1 sc each) and 4 dc rows (2 sc each), so 14 sc lie along 2 in (5.1 cm). That is 7 sc per inch, which matches the body gauge, so the edges stay flat. The top and bottom put 9 sc over the 9 body sts, plus 2 extra sc at each corner to turn it. The single sc border adds 0.125 in (0.3 cm) on every side, which brings the candle to 1.5 in (3.8 cm) x 2.25 in (5.7 cm).
Border Row 2 (drip rim, top only): Fasten off. Rejoin cream in the FLO of the st just below the top right corner on the long side. You will work 13 sts in FLO: that 1 side st, the 11 top sts, and the 1 side st just past the top left corner.
Sc in first st, [sc in next st, 5 hdc in next st, sc in next st] 4 times. (29 sts)
Count: 13 sts worked one in each st + 16 extra sts (4 extra in each of the 4 drips) = 29 sts.
Fasten off, leaving a 10 in (25.4 cm) tail. Because you work in front loops only, the rim rolls forward and hangs over the body. It measures about 1.75 in (4.4 cm) across and 0.25 in (0.6 cm) deep.
Assembly and Hanging Loop
- Leaves: Lay the two leaves with their tips pointing out to the left and right and their bases touching at the center. Sew the bases together with the long green tail.
- Candle: Place the candle behind the leaves, centered, so its bottom 0.5 in (1.3 cm) is hidden. Whipstitch the backs of the leaves to the candle with matching yarn.
- Berries: Sew one berry centered over the leaf join. Sew the other two side by side just below it, forming a small triangle.
- Flame: Center the flame above the drip rim and tuck 0.25 in (0.6 cm) of its base behind the top edge. Sew it in place from the back.
- Hanging loop: Join cream with sl st in the flame’s picot point, ch 20, sl st in the same picot. Fasten off and weave in the ends. The loop hangs about 1.5 in (3.8 cm).
Size checkpoint: The ornament should measure 4.25 in (10.8 cm) across the leaf tips and 4.25 in (10.8 cm) from the lowest leaf point to the flame tip.
Final Blocking
- Weave in all remaining ends on the back, hiding them inside stitches of the same color.
- Mist the ornament evenly until it is damp but not soaking.
- Pin it to the mat face up. Pin the candle’s corners square to 1.5 in (3.8 cm) x 2.25 in (5.7 cm).
- Open each window with a pin so the rungs run straight and level.
- Pin each leaf’s 7 picot points outward, and stretch the ch-1 vein so it opens.
- Shape the flame into a teardrop and pin the tip straight up.
- Ease the drip rim forward so the scallops sit evenly.
- Let it dry completely. For extra stiffness, brush on diluted fabric stiffener and let it dry again.
Final Quality-Control Checklist
- [ ] The candle body has 4 even windows and 9 sc on every sc row.
- [ ] Border Rnd 1 has 54 sc: 11 on the top and bottom, 18 on each long side.
- [ ] The drip rim has 29 sts with 4 even drips.
- [ ] Each leaf has 36 sc and 7 sharp points.
- [ ] The flame has 16 sts and a centered picot tip.
- [ ] Each berry has 10 sc and an open center.
- [ ] The ornament measures 4.25 in (10.8 cm) x 4.25 in (10.8 cm).
- [ ] The loop is secure and the ornament hangs straight.
Troubleshooting
- Windows are lopsided: Check that you skip exactly 5 sts in each window row and work 5 sc into each ch-5 space.
- Candle sides ripple: You have too many row-end stitches. Keep to 14 per side.
- Candle sides pull in: You have too few row-end stitches. Make sure each dc row gets 2 sc.
- Leaf curls: Rnd 2 is too tight. Loosen the picots slightly and block firmly.
- Flame looks round: Pull the base tail snug and pin the tip upward while blocking.
- Ornament tilts on the tree: Re-center the loop on the picot point.
Care
Hand wash in cool water with mild soap, press the water out in a towel, and reshape flat to dry. If the ornament was stiffened, re-block it to refresh its shape.
Final Notes
The measurement chain is simple. At a gauge of 7 sc per inch, 9 sc make a body 1.25 in (3.2 cm) wide. Ten rows make it 2 in (5.1 cm) tall, and one border round brings it to 1.5 in (3.8 cm) x 2.25 in (5.7 cm). Add the 0.25 in (0.6 cm) drip rim, the flame and the 2.25 in (5.7 cm) leaves, and the finished ornament is 4.25 in (10.8 cm) square. It hangs from a 1.5 in (3.8 cm) loop. Make one for every branch.
Happy crocheting!