
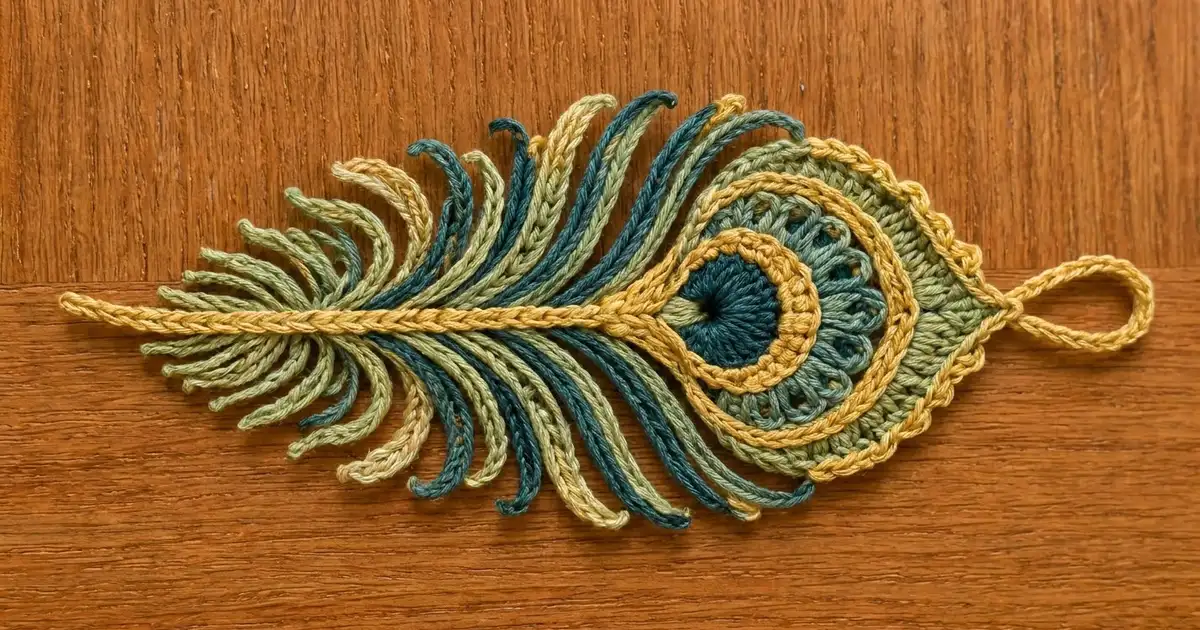
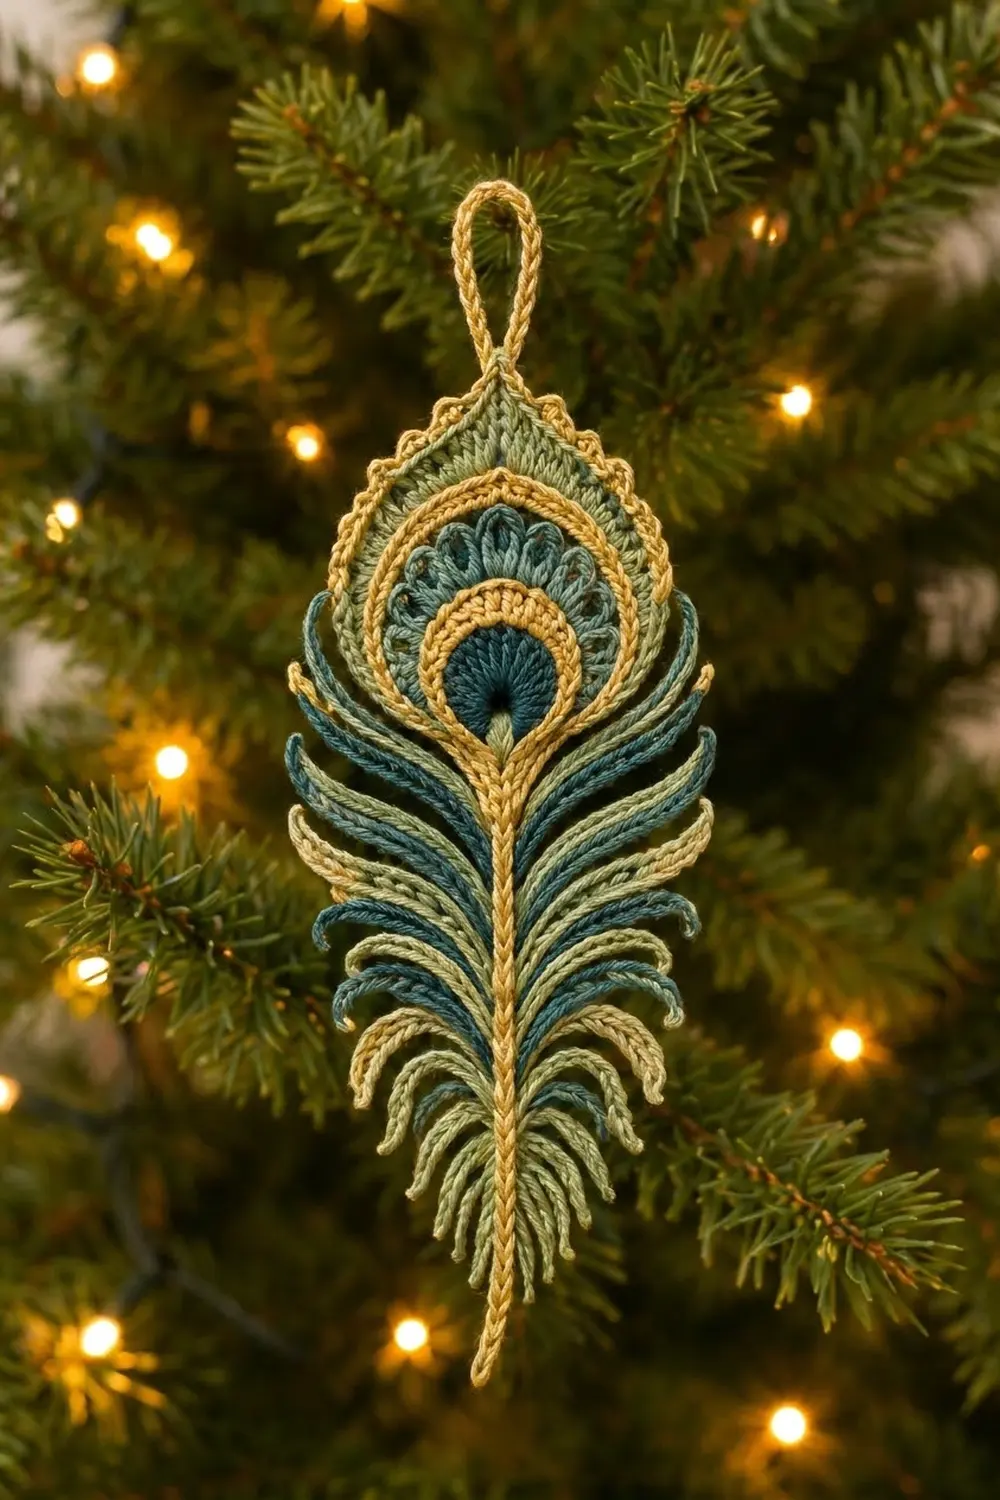
This peacock feather ornament has a layered, jewel-toned eye and soft, curling barbs. Dark teal, sage green, mustard gold and light sage give it the look of a real feather, and the hanging loop makes it ready for a tree, a window or a gift tag.
The pattern uses US crochet terms. The finished ornament is about 7 in (17.8 cm) long without the loop and about 3.5 in (8.9 cm) wide across the barbs. The loop adds about 1.5 in (3.8 cm).
You’ll crochet the eye in seven rounds, starting at the center and finishing with a gold picot edge that forms the pointed tip. Then you’ll work a gold vein and a slip-stitch shaft straight down from the center. Last, you’ll attach three layers of tapered, self-curling barbs to both sides of the shaft. Everything ends up as one connected piece.
This is a single-piece design, so there’s no joining. Blocking does most of the finishing work.
Finished Size and Construction
- Finished size: 7 in (17.8 cm) long × 3.5 in (8.9 cm) wide, plus a 1.5 in (3.8 cm) loop
- Skill level: Intermediate
- Terminology: US
- Yarn weight: Sport (#2), mercerized cotton
- Hook: 2.75 mm (C/2)
- Number of pieces: 1
- Layout: Teardrop eye at the top, with the shaft and barbs hanging below
- Eye size before border: 2.25 in (5.7 cm) wide × 2.75 in (7.0 cm) tall
- Eye size after border: 2.5 in (6.4 cm) wide × 3 in (7.6 cm) tall
- Border depth: about 0.125 in (0.3 cm) per edge, not counting picots
Materials
Use a smooth, mercerized sport-weight cotton. It shows stitch detail clearly and holds a curl after blocking. Acrylic will work, but the barbs will curl less.
- Dark teal (A): 6 g, about 19 m
- Sage green (B): 5 g, about 16 m
- Mustard gold (C): 5 g, about 16 m
- Light sage (D): 3 g, about 9 m
All quantities include a margin of about 20% for gauge swatching and weaving in ends.
Tools:
– 2.75 mm (C/2) crochet hook
– Tapestry needle
– 2 locking stitch markers
– Blocking mat and rust-proof pins
– Spray bottle
– A pencil or a 0.25 in (0.6 cm) dowel, for curling the barbs
– Ruler or tape measure
Abbreviations (US Terms)
- ch: chain
- sl st: slip stitch
- sc: single crochet
- hdc: half double crochet
- dc: double crochet
- tr: treble crochet
- sk: skip
- st(s): stitch(es)
- sp: space
- Shell: 5 dc in the same stitch
- Picot: ch 3, sl st into the front loop and left leg of the sc just made
- Barb (ch N): ch N. Working back along the chain, sl st in 2nd ch from hook and in next 2 ch, sc in each ch until 2 ch remain, then hdc in last 2 ch. This makes N − 1 stitches: 3 sl st, (N − 6) sc and 2 hdc. The tight slip stitches at the tip make it curl naturally.
Gauge and Checkpoints
Make the eye first and measure it before you start the shaft. If the eye is on gauge, the shaft and barbs will be too.
- Chain gauge: 8 ch = 1 in (2.5 cm)
- After Rnd 1: 0.75 in (1.9 cm) across
- After Rnd 2: 1.25 in (3.2 cm) across
- After Rnd 3: 1.5 in (3.8 cm) across
- After Rnd 5: 2 in (5.1 cm) wide
- After Rnd 6: 2.25 in (5.7 cm) × 2.75 in (7.0 cm)
- After Rnd 7: 2.5 in (6.4 cm) × 3 in (7.6 cm)
If your eye is too big, go down to a 2.5 mm hook. If it’s too small, go up to a 3.0 mm hook. If the piece ruffles, your increases are too loose. If it cups, crochet the taller stitches in Rnd 6 a little more loosely.
The Eye
Join every round with a sl st in the first stitch. The beginning ch does not count as a stitch unless the instructions say it does. The join point is the bottom center of the eye for the whole piece. Mark it.
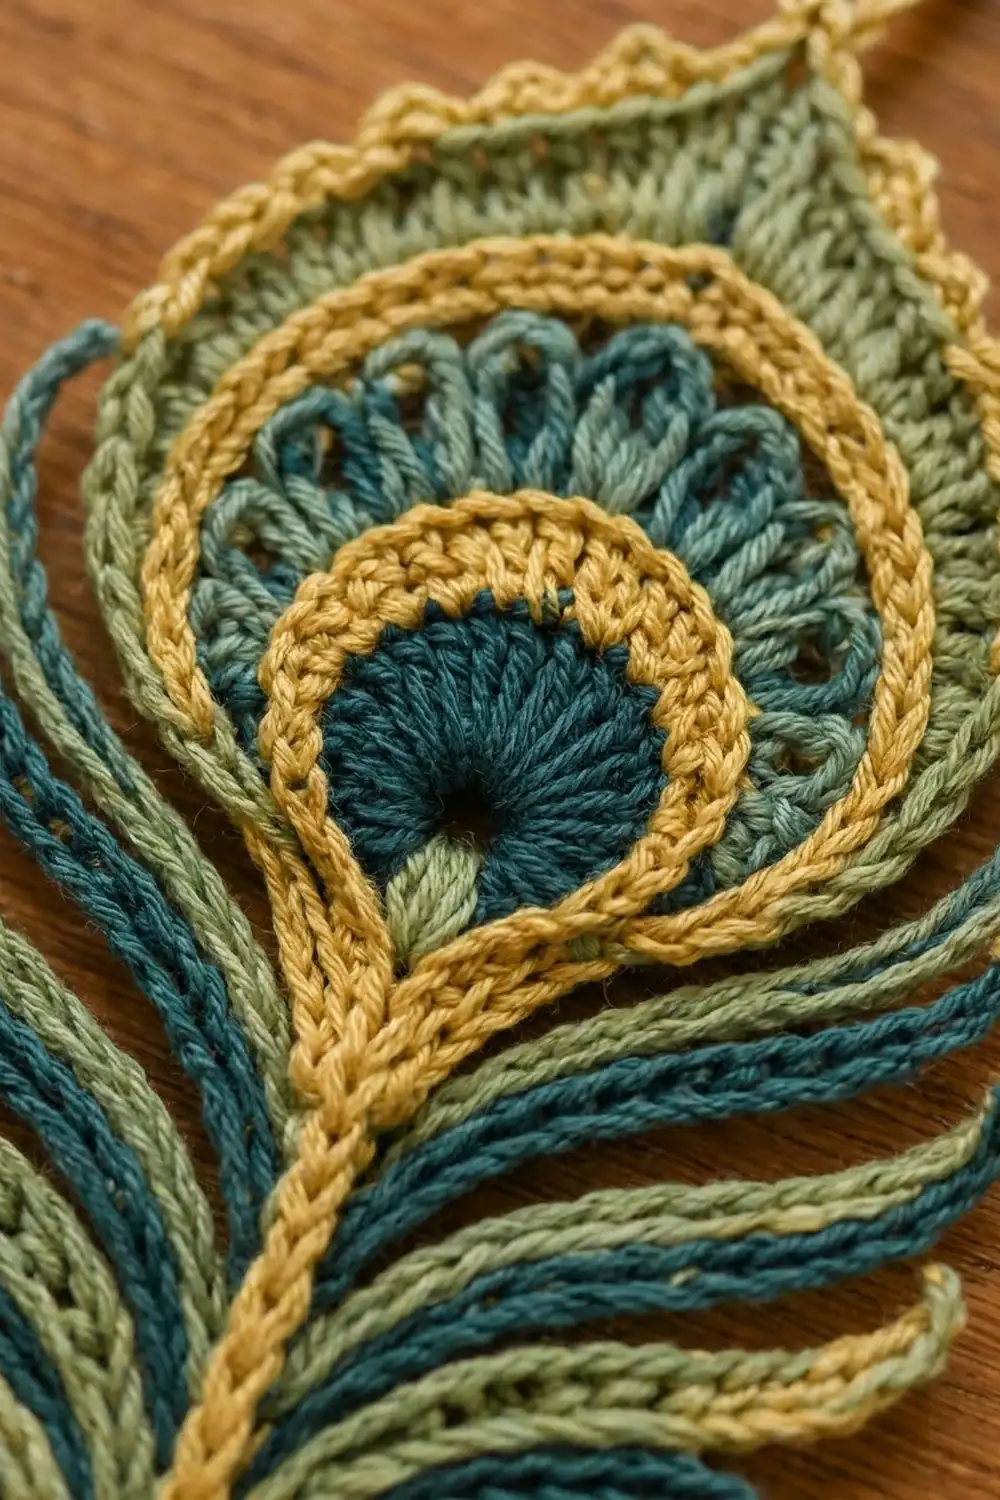
Rnd 1 (A): Make a magic ring. Ch 2, then work 12 dc into the ring. Pull the ring tight and join. (12 sts)
Rnd 2 (A): Ch 2, work 2 dc in each st around, and join. (24 sts) Fasten off A.
Rnd 3 (C): Join C at the bottom center. Ch 1, sc in next st, 2 sc in next st, repeat from * around and join. (36 sts) Fasten off C.
Rnd 4 (A): This round makes the shell arch. Join A at the bottom center. Ch 1, sc in first 4 sts, then sk 1, shell in next st, sk 1, sc in next st 7 times. Sc in the last 4 sts and join.
Check your count: 4 sc + 7 × (5 dc + 1 sc) + 4 sc = 50 sts, using all 36 stitches of Rnd 3 (4 + 28 + 4).
The 7 shells cover the upper arch. The plain sc at the bottom keep the arch open where the shaft will start. Fasten off A.
Rnd 5 (C): Join C at the bottom center. Ch 1, sc in each st around, but work 2 sc in the center dc of each shell. Join.
That’s 50 sts worked once each, plus 7 extra = 57 sts. Place a marker in st 29. It sits at the top center, right above the middle shell. Fasten off C.
Rnd 6 (B): This round makes the teardrop. Join B at the bottom center. Ch 1, then:
- Sc in sts 1–4.
- Hdc in sts 5–10.
- Dc in next 3 sts, 2 dc in next st 3 times, over sts 11–22.
- Tr in next st, 2 tr in next st 3 times, over sts 23–28.
- Work (tr, ch 2, tr) in marked st 29.
- 2 tr in next st, tr in next st 3 times, over sts 30–35.
- 2 dc in next st, dc in next 3 sts 3 times, over sts 36–47.
- Hdc in sts 48–53.
- Sc in sts 54–57, then join.
That’s 57 sts worked once each, plus 13 extra (6 dc increases, 6 tr increases and 1 extra tr at the point) = 70 sts and a ch-2 tip space.
Per side, from the bottom center to the tip: 4 sc + 6 hdc + 15 dc + 9 tr + 1 tr = 35 sts. Since 35 × 2 = 70, the count checks out.
The stitches get taller as you go up, which pulls the round into a teardrop with a raised point. Fasten off B.
Border: Gold Picot Edge
Border gauge: 9 sc = 1 in (2.5 cm) along the edge.
Rnd 7 (C): Join C at the bottom center. Ch 1, then:
- Sc in the first 4 sts.
- Sc in next 2 sts, sc in next st, picot 10 times, over the 30 hdc/dc/tr of side one.
- Sc in the next tr.
- Work (sc, ch 3, sc) in the ch-2 tip space.
- Sc in the next tr.
- Sc in next 2 sts, sc in next st, picot 10 times, over side two.
- Sc in the last 4 sts and join.
That’s 70 sts worked once each, plus 2 sc in the tip space = 72 sc, with 20 picots and 1 ch-3 tip loop.
Each side, from the bottom center up to and including one tip sc, has 4 + 30 + 1 + 1 = 36 sc and 10 picots. Two sides × 36 = 72.
Why the math works: Each 30-stitch section from Rnd 6 divides evenly into ten 3-stitch picot repeats. The smooth bottom 8 sc leave room for the shaft, and the 2 extra sc at the tip keep the point sharp without flaring. Do not fasten off.
Hanging loop (C): Sl st into the ch-3 tip loop. Ch 30, then sl st into the same tip loop. Turn, and sl st into the back bump of each of the 30 ch. Sl st into the tip loop again and fasten off. (30 sl sts) The finished loop stands about 1.5 in (3.8 cm) tall.
Checkpoint: The eye should measure 2.5 in (6.4 cm) × 3 in (7.6 cm).
The Vein and Shaft
Gold vein (C): Hold C behind the work. Insert your hook from front to back at the center of the magic ring and pull up a loop. Surface sl st straight down, between stitches, through Rnds 1–7 toward the bottom-center marker. That’s about 9 surface sl sts, roughly 1.125 in (2.9 cm), ending at the bottom edge.
Shaft (C): Without cutting the yarn, ch 33. Sl st in the 2nd ch from hook and in each ch back up toward the eye. (32 sl sts) Sl st into the bottom-center sc of Rnd 7 and fasten off.
The shaft should be 4 in (10.2 cm) long. Number its stitches from 1 (just below the eye) to 32 (the tip). Leave sts 29–32 bare to form the quill tip.
The Barbs
Make each barb the same way:
- Join the yarn with a sl st under the outer strand of the given shaft stitch.
- Work a barb (ch N).
- Sl st into the same shaft stitch.
Make the barbs on the left side of the shaft first, then repeat the same stitch numbers on the right side. You can carry the yarn along the back of the shaft between barbs of the same color. Catch the strand every few stitches.
Layer 1 (A, dark teal): 5 barbs per side.
– Shaft st 2: ch 17
– Shaft st 6: ch 16
– Shaft st 10: ch 14
– Shaft st 14: ch 12
– Shaft st 18: ch 10
Layer 2 (B, sage): 6 barbs per side.
– Shaft st 4: ch 15
– Shaft st 8: ch 14
– Shaft st 12: ch 12
– Shaft st 16: ch 11
– Shaft st 20: ch 9
– Shaft st 24: ch 8
Layer 3 (D, light sage): 3 barbs per side.
– Shaft st 22: ch 9
– Shaft st 26: ch 8
– Shaft st 28: ch 7
Totals: 14 barbs per side, 28 in all (10 teal, 12 sage, 6 light sage).
The longest teal barb is about 2 in (5.1 cm). Angle the top teal barbs upward so they frame the lower half of the eye. Lay the lower barbs at about 45 degrees, overlapping slightly with the colors alternating.
Checkpoint: The whole ornament should measure 7 in (17.8 cm) × 3.5 in (8.9 cm) before blocking. Weave in all ends along the back of the shaft.
Final Blocking
- Spray the ornament until it is evenly damp, but not dripping.
- Lay it face up on the blocking mat.
- Pin the eye to 2.5 in (6.4 cm) × 3 in (7.6 cm), with one pin at the tip and one at the bottom center.
- Pin the shaft straight, measuring 4 in (10.2 cm) from the bottom of the eye to the quill tip.
- Open each picot with the tip of a pin.
- Fan the barbs out symmetrically to a total width of 3.5 in (8.9 cm).
- Roll the last 0.5 in (1.3 cm) of each barb outward around the pencil, then pin it in place.
- Pin the hanging loop into an open teardrop shape.
- Let it dry completely, about 6–8 hours, before unpinning.
Final Quality-Control Checklist
- Rnd 4 has 50 sts and exactly 7 shells.
- Rnd 5 has 57 sts.
- Rnd 6 has 70 sts and a ch-2 tip.
- Rnd 7 has 72 sc and 20 picots.
- The eye measures 2.5 in (6.4 cm) × 3 in (7.6 cm).
- The shaft has 32 sl sts and measures 4 in (10.2 cm).
- There are 14 barbs on each side, mirrored.
- The barb tips curl outward.
- The gold vein runs straight from the center to the shaft.
- The loop is secure and all ends are hidden.
Troubleshooting
The eye cups: Your Rnd 6 trebles are too tight. Remake the round with looser yarn-overs.
The eye ruffles: Check that you made only 7 increases in Rnd 5 and 13 in Rnd 6.
The tip isn’t pointed: Make sure the (tr, ch 2, tr) lands in st 29. Re-mark it before you start Rnd 6.
The barbs won’t curl: Tighten the 3 tip slip stitches, or re-block around a thinner dowel.
The shaft twists: Work the slip stitches into the back bumps of the chain, then pin it straight while blocking.
The barbs look crowded: Skip the light sage layer at shaft st 22.
Care
Hand wash in cool water, then reshape and pin the barb curls while the ornament dries flat. Store it flat or hanging, not crushed in a box.
Final Notes
The measurements build on each other:
- The center grows from 0.75 in (1.9 cm) to 1.5 in (3.8 cm).
- The shell and gold rounds bring the eye to 2 in (5.1 cm).
- The teardrop round reaches 2.25 in (5.7 cm) × 2.75 in (7.0 cm).
- The picot border finishes the eye at 2.5 in (6.4 cm) × 3 in (7.6 cm).
- The 4 in (10.2 cm) shaft and its barbs bring the ornament to 7 in (17.8 cm) × 3.5 in (8.9 cm), plus a 1.5 in (3.8 cm) loop.
Check each stage against these numbers and your feather will come out right.
Happy crocheting!