
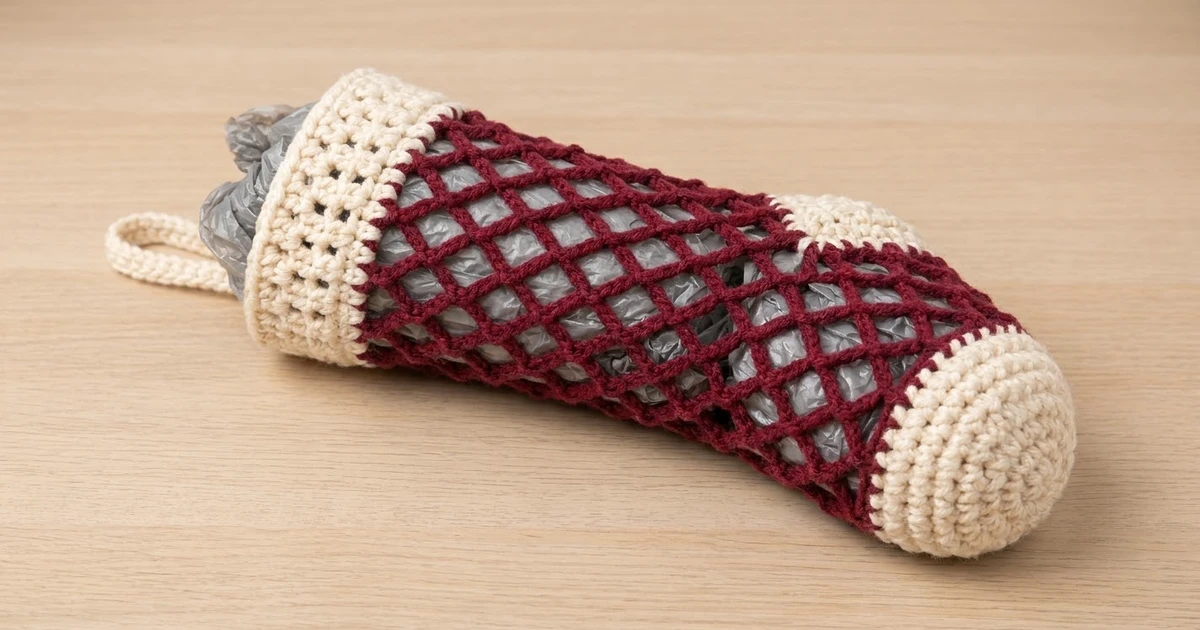
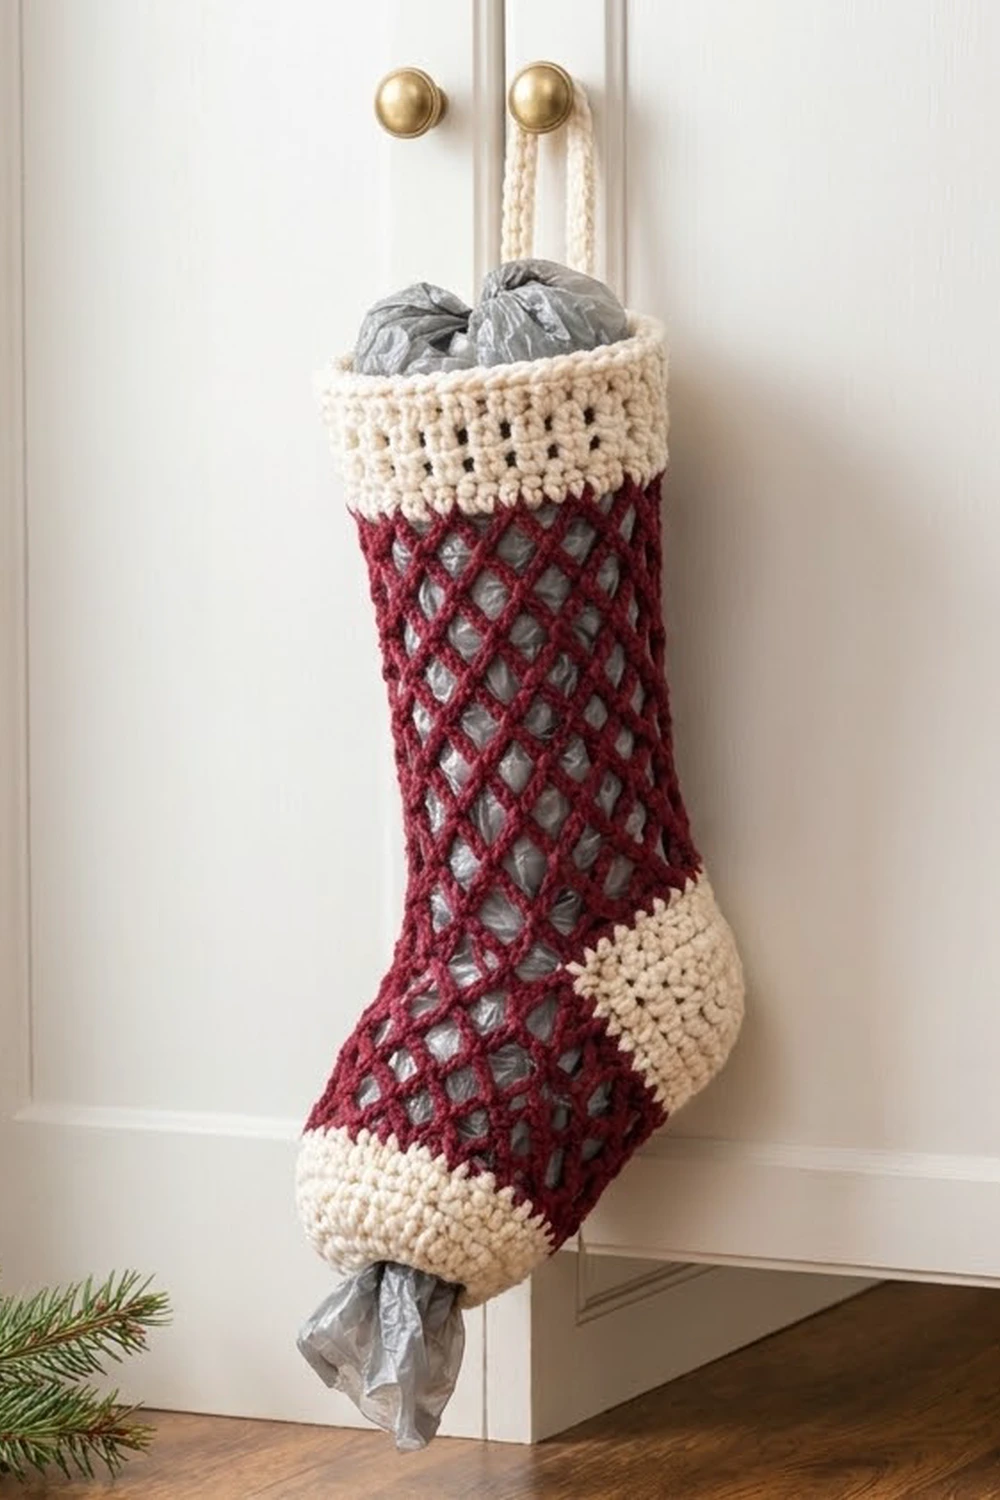
This little stocking is a working Christmas decoration. Its open diamond lattice holds a bundle of plastic grocery bags. You push bags in at the cuff and pull them out one at a time through a small opening at the toe. Hang it on a cabinet knob, and the kitchen gets a festive touch that also earns its keep.
The design uses two colors. The body is a deep burgundy lattice. The toe, heel, cuff, and hanging loop are a warm cream. For a second stocking, swap the burgundy for dark green and keep the cream. The gray of the bags showing through the mesh is part of the look.
This pattern uses US crochet terms. The finished stocking is about 13.5 in (34.3 cm) tall from cuff top to heel bottom and 4.5 in (11.4 cm) wide when flat. The foot is about 6.5 in (16.5 cm) long. The hanging loop adds about 3.5 in (8.9 cm) above the cuff.
The stocking is worked in one piece, in the round, from the toe up. You start with a chain ring that becomes the dispensing opening. Next come the cream toe, the burgundy mesh foot, a short solid band with a heel opening, the mesh leg, and the cream cuff. The heel is worked last, into the opening. The hanging loop is worked straight off the cuff, so there is nothing to sew on.
Finished Size and Construction
- Finished size: 13.5 in (34.3 cm) tall x 4.5 in (11.4 cm) wide, flat
- Foot length: about 6.5 in (16.5 cm)
- Skill level: Easy to intermediate
- Terminology: US crochet terms
- Yarn weight: Worsted weight (#4) cotton
- Hook: 5.0 mm (H-8)
- Number of pieces: 1 (stocking with heel and loop worked in place)
- Layout: Single stocking, toe-up, worked in joined rounds
- Body circumference: 36 sts = 9 in (22.9 cm), or 4.5 in (11.4 cm) flat
- Size before cuff: about 11.75 in (29.8 cm) tall
- Cuff depth: 1.75 in (4.4 cm)
Materials
Use a smooth, firm cotton or cotton blend. Cotton holds its shape when the stocking is packed full of bags. It also won’t stretch out over time the way acrylic can. Avoid fuzzy yarns, because they hide the lattice.
- Burgundy (Color A): 45 g, about 80 m
- Cream (Color B): 35 g, about 60 m
- Alternate body color: Dark green, 45 g, about 80 m, used in place of burgundy
Tools:
- 5.0 mm (H-8) crochet hook
- 4 locking stitch markers
- Tapestry needle
- Scissors
- Measuring tape
- Blocking pins and a rolled towel or small bottle for shaping
All yarn quantities include a margin of about 15 percent for your gauge test and small differences in tension.
Abbreviations (US Terms)
- ch – chain
- sl st – slip stitch
- sc – single crochet
- dc – double crochet
- sc2tog – single crochet 2 together
- st(s) – stitch(es)
- sp – space
- rnd(s) – round(s)
- rep – repeat
Special stitch – mesh loop: “ch 5, sc in next ch-5 loop.” Each mesh loop sits between two sc. Rounds of mesh loops stack into the diamond lattice.
Join loop: At the end of most mesh rounds you work “ch 2, dc in first sc.” The ch 2 plus the dc equals one ch-5 loop. It also leaves your hook in the center of that loop, ready for the next round.
Gauge and Checkpoints
Solid gauge: 16 sc x 18 rnds = 4 in (10.2 cm) in sc worked in the round.
Mesh gauge: 2 mesh rnds = 1 in (2.5 cm) in height, with 12 loops around a 9 in (22.9 cm) circumference.
Test the toe first. It works as the gauge swatch for this project.
Checkpoint 1 (after Rnd 8, toe): The toe is 9 in (22.9 cm) around and about 1.8 in (4.6 cm) deep from the tip.
Checkpoint 2 (after Rnd 17, foot band): The tube is still 4.5 in (11.4 cm) wide flat. The heel opening is 4.5 in (11.4 cm) wide.
Checkpoint 3 (after Rnd 32, top of leg): The leg measures about 7.5 in (19.1 cm) from the heel opening to the top edge.
Checkpoint 4 (finished): 13.5 in (34.3 cm) tall and 4.5 in (11.4 cm) wide.
If your toe is too big, go down a hook size to 4.5 mm (7). If it is too small, go up to 5.5 mm (I-9). Check again after Rnd 8 before moving on. The mesh will relax a little, so don’t stretch it to match.
Toe (Color B, Cream)
The toe begins at the dispensing opening. Work in joined rounds and do not turn.
Foundation: With Color B, ch 12, sl st in first ch to form a ring. Don’t twist the chain. This ring is about 1 in (2.5 cm) across.
Rnd 1: Ch 1, sc in each ch around, sl st in first sc to join. (12 sc)
Rnd 2: Ch 1, sc in next st, 2 sc in next st, rep from * 6 times, join. (18 sc)
Rnd 3: Ch 1, sc in next 2 sts, 2 sc in next st, rep from * 6 times, join. (24 sc)
Rnd 4: Ch 1, sc in next 3 sts, 2 sc in next st, rep from * 6 times, join. (30 sc)
Rnd 5: Ch 1, sc in next 4 sts, 2 sc in next st, rep from * 6 times, join. (36 sc)
Rnds 6–8: Ch 1, sc in each st around, join. (36 sc)
Place a marker in the joining st. Change to Color A in the last sl st of Rnd 8. Fasten off Color B, leaving a 6 in (15.2 cm) tail.
Foot (Color A, Burgundy)
Rnd 9 (setup mesh): Ch 1, sc in next st, ch 5, skip next 2 sts, rep from * 10 more times (11 ch-5 loops made), sc in next st, skip last 2 sts, ch 2, dc in first sc. (12 sc and 12 loops: 11 ch-5 loops + 1 join loop)
Each loop uses 3 base sts: 1 sc plus 2 skipped. 12 loops x 3 sts = 36 sts, so the mesh covers the toe evenly.
Rnd 10: Ch 1, sc around the post of the dc just made, ch 5, sc in next ch-5 loop, rep from * 10 more times, ch 2, dc in first sc. (12 loops)
Rnds 11–13: Rep Rnd 10. (12 loops)
Rnd 14: Ch 1, sc around the dc post, ch 5, sc in next ch-5 loop, rep from * 10 more times, ch 5, sl st in first sc. (12 full ch-5 loops)
The foot now has 6 mesh rounds, about 3 in (7.6 cm).
Rnd 15 (conversion round): Ch 1, 3 sc in each ch-5 loop around, join. (36 sc: 12 loops x 3 sc + 0 extra)
Rnd 16 (heel opening): Lay the foot flat with the join at one side edge. The 18 sts facing down are the sole. Ch 1, sc in next 18 sts across the top of the foot, ch 18, skip the next 18 sts on the sole, sl st in first sc. (18 sc + 18 ch = 36 sts)
Place a marker at each end of the heel opening.
Rnd 17: Ch 1, sc in each sc and in each ch around, join. (36 sc)
Checkpoint 2: The tube is 4.5 in (11.4 cm) wide flat.
Leg (Color A, Burgundy)
Rnd 18: Work as Rnd 9. (12 loops)
Rnds 19–30: Work as Rnd 10. (12 loops)
Rnd 31: Work as Rnd 14. (12 full ch-5 loops)
The leg has 14 mesh rounds, about 7 in (17.8 cm).
Rnd 32 (conversion round): Ch 1, 3 sc in each ch-5 loop around, join. (36 sc: 12 loops x 3 sc + 0 extra)
Change to Color B in the last sl st. Fasten off Color A.
Checkpoint 3: About 7.5 in (19.1 cm) from heel opening to top edge.
Cuff (Top Border, Color B, Cream)
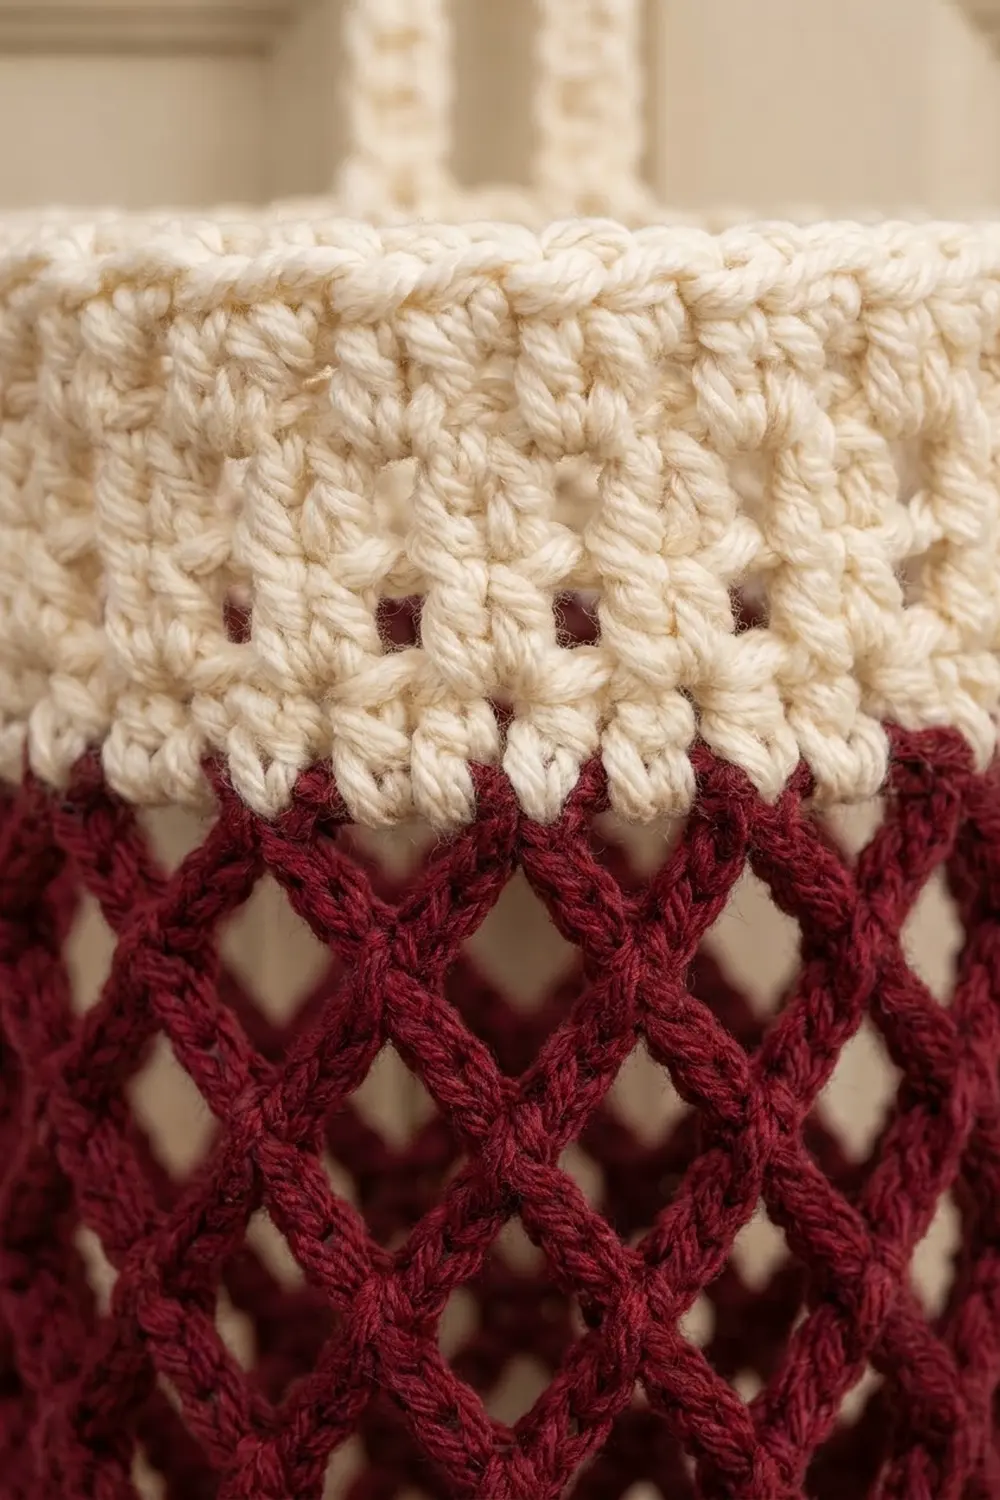
The cuff is this stocking’s border. It firms up the top edge so the opening stays round when you stuff bags in.
Border gauge: 16 sc = 4 in (10.2 cm). The cuff keeps 36 sts on every round, so it matches the leg exactly. It won’t flare or pull in.
When the stocking is flat, the front and the back each hold 18 sts. A tube has no corners, so there are no corner stitches to add.
Rnd 33: Ch 1, sc in each st around, join. (36 sc; 18 per side)
Rnd 34: Rep Rnd 33. (36 sc; 18 per side)
Rnd 35 (eyelet round): Ch 4 (counts as dc and ch 1), skip next st, dc in next st, ch 1, skip next st, rep from * 16 more times, sl st in 3rd ch of beg ch-4. (18 dc + 18 ch-1 sps = 36 sts; 9 eyelets per side)
Rnd 36: Ch 1, sc in each dc and in each ch-1 sp around, join. (36 sc: 18 dc + 18 sps)
Rnds 37–39: Ch 1, sc in each st around, join. (36 sc; 18 per side)
The cuff is 7 rounds, about 1.75 in (4.4 cm) deep. Do not fasten off.
Why the math works: Every solid round on the stocking holds 36 sts. Every mesh round holds 12 loops of 3 sts each. The eyelet round splits the 36 sts into 18 pairs of 1 dc + 1 ch-1 sp. Every transition returns to 36, so the width stays at 4.5 in (11.4 cm) from toe to cuff.
Hanging Loop (Color B, Cream)
Lay the stocking flat with the heel facing away from you. Your working yarn should be at the back center of the cuff. If it isn’t, sl st along the top edge until you reach it.
Loop chain: Ch 30, skip next 3 sts of the cuff, sl st in next st. (30 ch)
Cover round: Ch 1, turn. Work 40 sc over the ch-30 loop, working around the chain, not into it. Sl st in the st where the chain began. (40 sc)
Fasten off and weave in the end. The covered loop is about 0.25 in (0.6 cm) thick and rises about 3.5 in (8.9 cm) above the cuff.
Heel (Color B, Cream)
Rnd 1: Join Color B at one heel marker. Ch 1, sc in each of the 18 skipped sole sts of Rnd 15, sc in the corner gap, sc in each of the 18 underside loops of the chain, sc in the second corner gap, join. (38 sc)
Rnd 2: Ch 1, sc in each st around, join. (38 sc)
Rnd 3: Ch 1, sc in next 17 sts, sc2tog, rep from * 2 times, join. (36 sc)
Rnd 4: Ch 1, sc in next 4 sts, sc2tog, rep from * 6 times, join. (30 sc)
Rnd 5: Ch 1, sc in next 3 sts, sc2tog, rep from * 6 times, join. (24 sc)
Rnd 6: Ch 1, sc in next 2 sts, sc2tog, rep from * 6 times, join. (18 sc)
Rnd 7: Ch 1, sc in next st, sc2tog, rep from * 6 times, join. (12 sc)
Rnd 8: Ch 1, sc2tog 6 times, join. (6 sc)
Fasten off, leaving a 6 in (15.2 cm) tail. Thread it through the front loops of the last 6 sts, pull tight, and secure it inside. Use the tails at the heel corners to close any small gaps.
Final Blocking
- Weave in all tails on the inside, through solid cream stitches where you can.
- Mist the stocking lightly with water until damp, not soaked.
- Slide a rolled towel or a small bottle into the leg so the mesh opens into even diamonds.
- Shape the heel cup with your fingers so it bends neatly at the back.
- Lay it flat and pin the leg to 4.5 in (11.4 cm) wide. Check the full height of 13.5 in (34.3 cm).
- Open the toe ring with a fingertip so it stays round, about 1 in (2.5 cm) across.
- Let it dry completely before you fill it with bags.
Final Quality-Control Checklist
- The toe has 36 sc after Rnd 5 and a round 1 in (2.5 cm) opening.
- Every mesh round has 12 loops.
- Both conversion rounds have 36 sc.
- The heel opening is 18 sts wide on the sole side.
- The cuff has 36 sts on every round and 18 eyelets.
- The hanging loop is centered on the back of the cuff.
- The finished size is 13.5 in (34.3 cm) x 4.5 in (11.4 cm) flat.
- All tails are hidden and secure.
Troubleshooting
Mesh diamonds look twisted or leaning. Joined mesh rounds can drift, and that’s normal. Block over a rolled towel to straighten them.
Toe opening is too tight for bags. Redo the foundation with ch 14. In Rnd 1, work 12 sc around the ring instead of into the chains. You still have 12 sts, so all the later counts still work.
Wrong loop count. Count the loops at the end of each mesh round. An extra loop usually comes from working around the dc post twice.
Holes at the heel corners. Close them with the yarn tail on the inside.
Cuff ruffles. Your sc tension is looser than it was in the toe. Go down 0.5 mm for the cuff only.
Hanging loop twists. Untwist the chain before the sl st that closes it.
Care
Hand wash in cool water with mild soap and lay flat to dry. Reshape the heel and mesh while damp.
Final Notes
The measurement chain is simple. The toe sets a 36-stitch circumference of 9 in (22.9 cm), or 4.5 in (11.4 cm) flat. Twelve mesh loops of 3 stitches each carry that width through the foot and leg. Each conversion round puts 3 sc in every loop to bring the count back to 36. The heel fills an 18-stitch opening. The 36-stitch cuff adds 1.75 in (4.4 cm), for a finished height of 13.5 in (34.3 cm). Make one in burgundy and another in green, and keep your bags tidy all season.
Happy crocheting!