
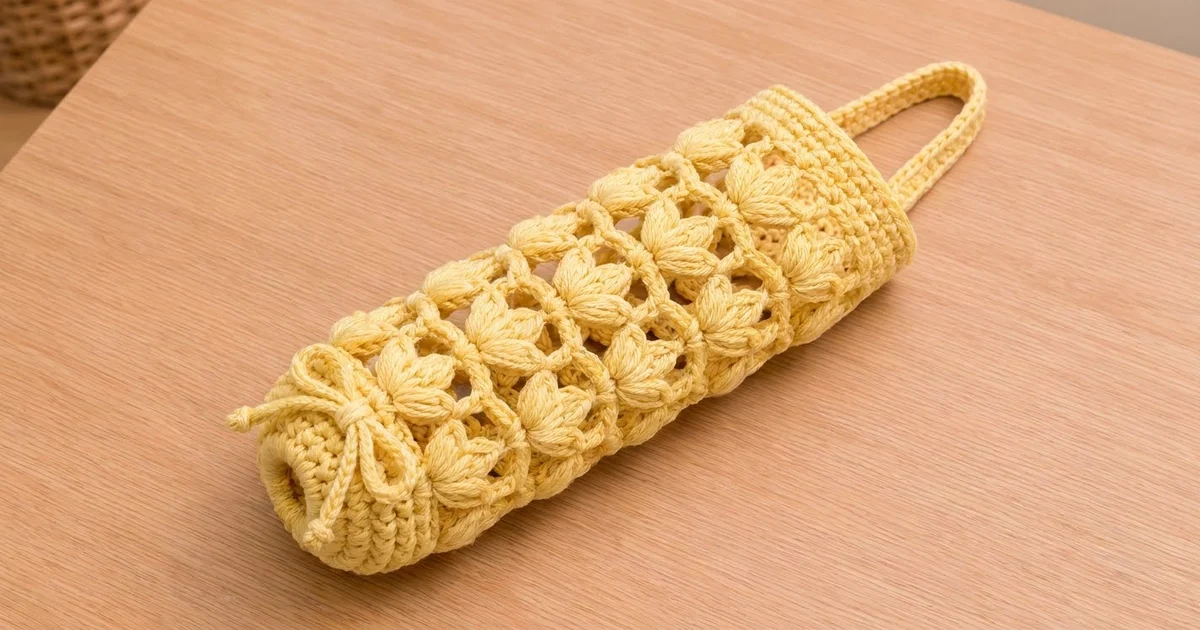
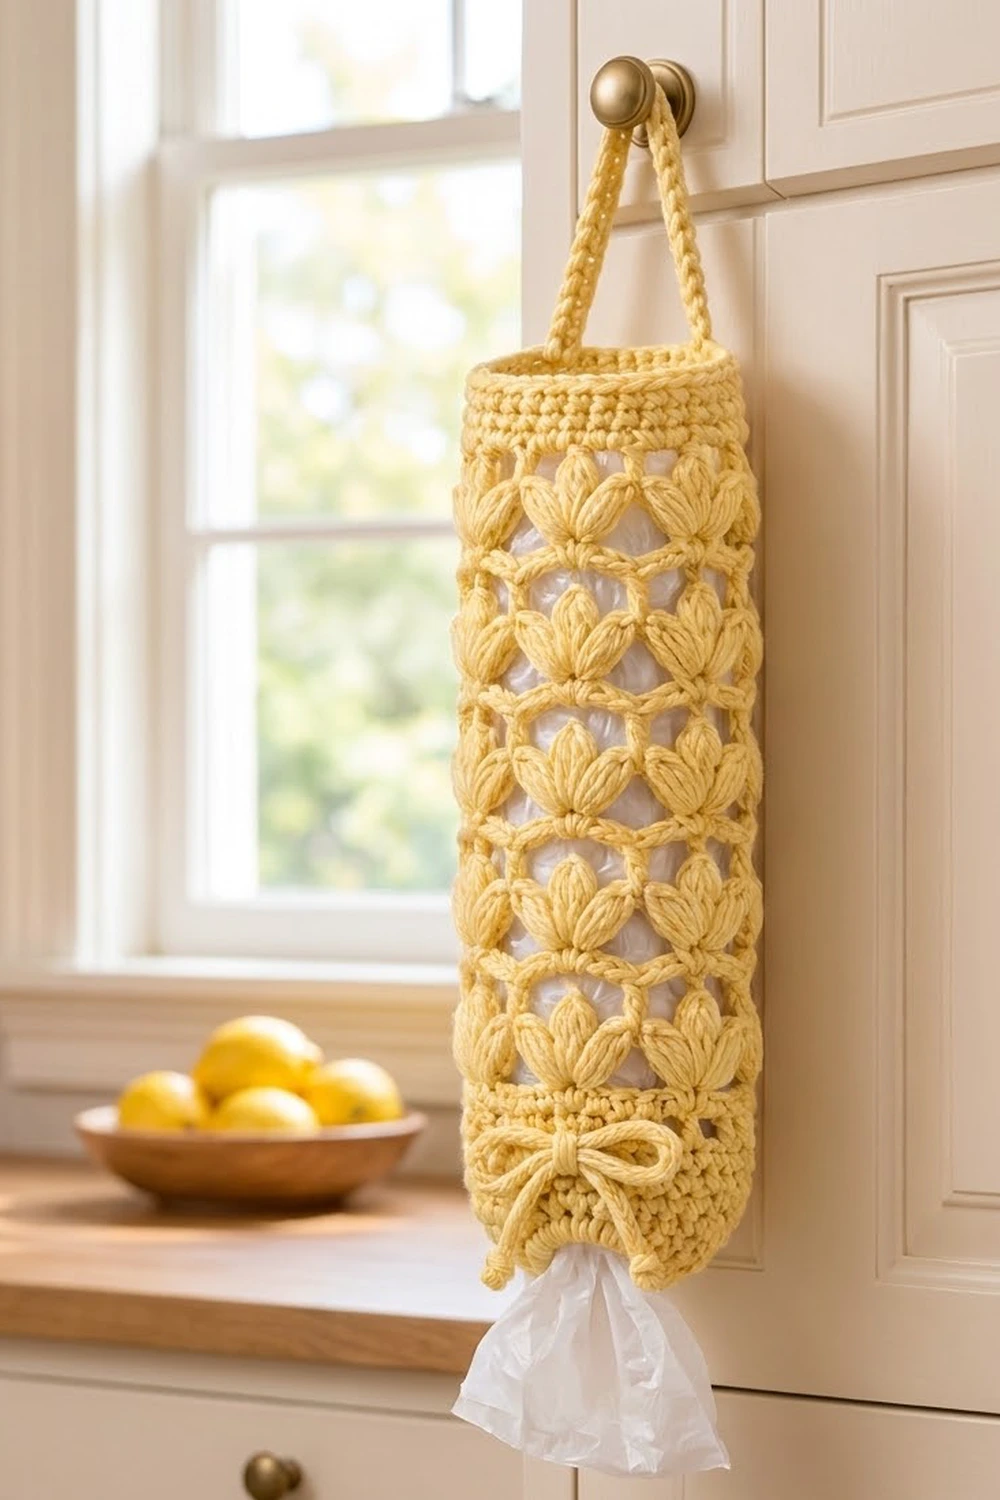
Plastic grocery bags tend to take over a kitchen drawer. This holder keeps them in one neat column on a cabinet knob. You stuff bags in through the top and pull them out one at a time through the small opening at the bottom.
The Butter Tulip design is a single tube with rows of three-petal tulips made from long puff stitches. Each tier of tulips sits halfway between the tulips below it, so the pattern looks like a staggered trellis with oval windows. The sample is in soft butter yellow. A dusty mauve version works just as well. A chain-cord bow at the bottom adds a touch of farmhouse charm.
The pattern uses US crochet terms. The finished holder measures 6 in (15.2 cm) wide laid flat and 19 in (48.3 cm) tall, not counting the strap. The strap loop stands about 5 in (12.7 cm) above the rim.
You work the holder bottom-up in one piece. Start with a small ring for the dispensing opening, then increase into a single-crochet base cuff. Next comes the body: 10 tulip rounds, each followed by an arch round. A solid top band, a fixed strap and a separate bow cord finish the holder.
Finished Size and Construction
- Finished size: 6 in (15.2 cm) wide flat × 19 in (48.3 cm) tall; circumference 12 in (30.5 cm)
- Skill level: Intermediate
- Terminology: US
- Yarn weight: Bulky (#5)
- Hook: 6 mm (US J-10)
- Number of pieces: 1 holder plus 1 bow cord
- Layout: Single tube worked in joined rounds
- Bottom opening: 6 in (15.2 cm) around, about 1.9 in (4.8 cm) across
- Size before top band: 17 in (43.2 cm) tall
- Top band (border) depth: 2 in (5.1 cm)
Materials
Yarn: Use a bulky (#5) cotton or cotton-blend yarn. Cotton holds the puff shapes crisply and doesn’t stretch much under the weight of the bags. Avoid very fuzzy yarns, because they hide the tulip petals.
- Butter Yellow (main color): 200 g, about 250 m (273 yd)
- Alternate colorway: the same amount in Dusty Mauve
These quantities include a margin of about 15 percent for gauge swatching and differences between yarns. The holder itself uses about 170 g.
Tools:
– 6 mm (US J-10) crochet hook
– Locking stitch markers (at least 2)
– Tapestry needle
– Scissors
– Measuring tape
– Rolled towel or a 4 in (10.2 cm) tube for blocking
Abbreviations (US Terms)
- ch – chain
- sl st – slip stitch
- sc – single crochet
- sk – skip
- sp – space
- st(s) – stitch(es)
- rep – repeat
- rnd – round
Special stitches:
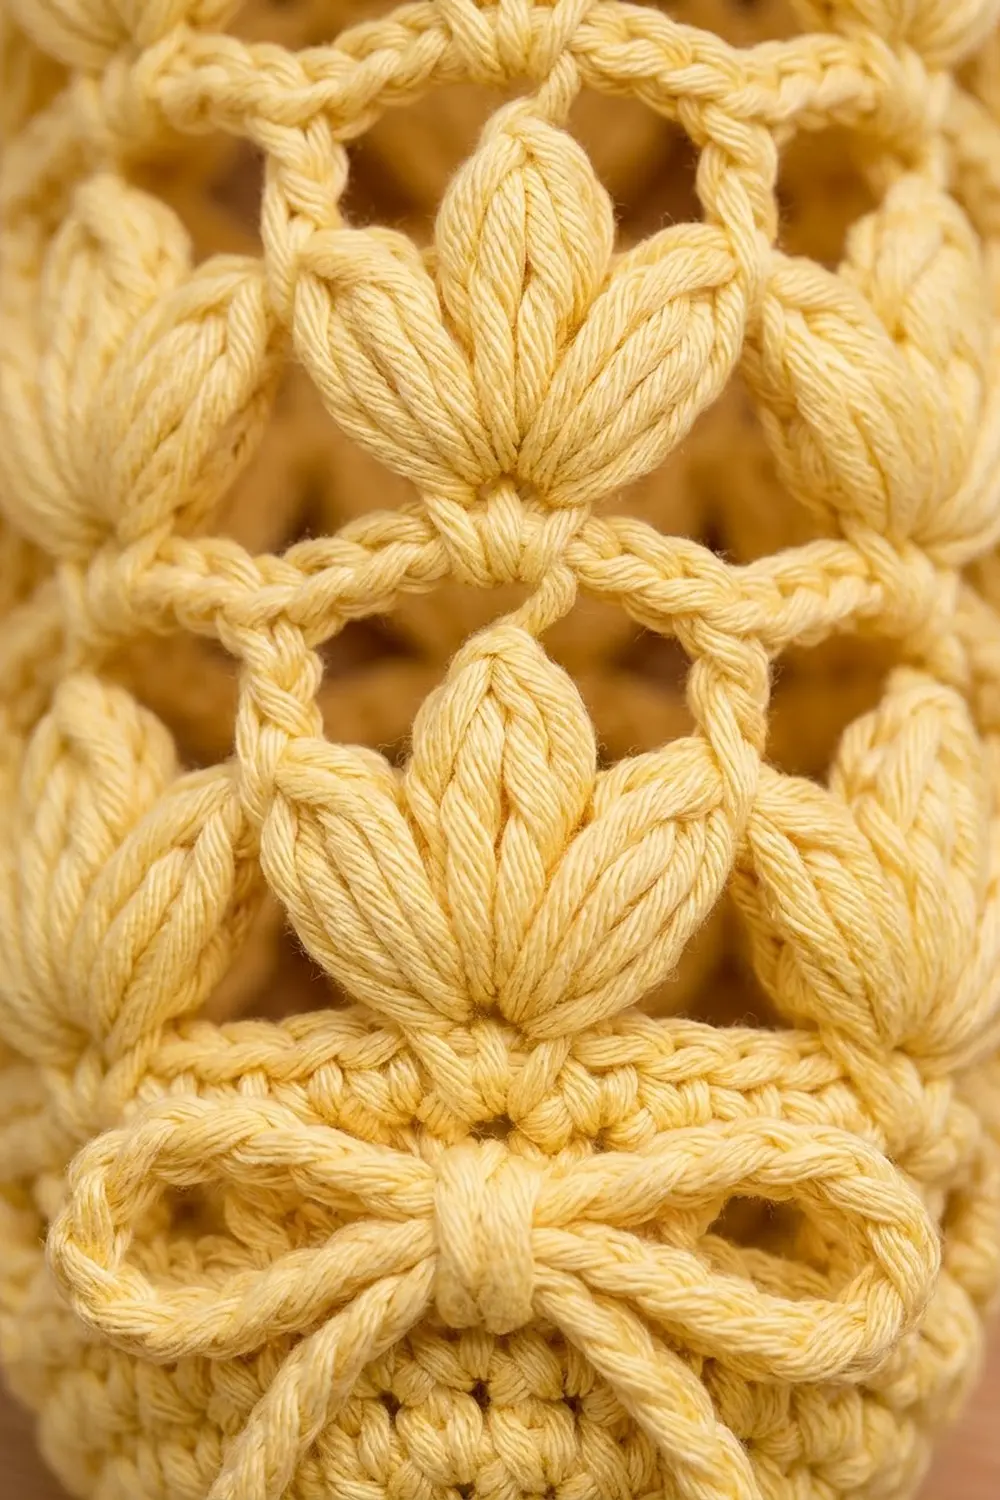
Puff: (Yarn over, insert hook in the stitch or space indicated, yarn over, pull up a loop to 3/4 in (1.9 cm) tall) 3 times. You now have 7 loops on the hook. Yarn over, pull through all 7 loops, then ch 1 to close. The closing chain is not counted as a stitch.
Tulip: (Puff, ch 1, puff, ch 1, puff) all in the same stitch. One tulip = 3 puffs + 2 ch = 5 sts.
Gauge and Checkpoints
Gauge: 12 sc and 12 rnds = 4 in (10.2 cm), worked in the round.
Height of one pattern pair (a tulip round plus an arch round): 1.5 in (3.8 cm). The tulip round is about 1 in (2.5 cm) and the arch round about 0.5 in (1.3 cm).
Make the base cuff (Rnds 1–6) first and treat it as your swatch. If it measures correctly, carry on. If not, rip it out and change hooks.
Checkpoints:
– After Rnd 6: circumference 12 in (30.5 cm), height 2 in (5.1 cm)
– After Rnd 8: height 3.5 in (8.9 cm)
– After Rnd 16: height 9.5 in (24.1 cm)
– After Rnd 26: height 17 in (43.2 cm)
– After Rnd 32: height 19 in (48.3 cm)
If your piece is too big, go down 0.5 mm in hook size. If the puffs are too tall, pull their loops up to only 5/8 in (1.6 cm).
If your piece is too small, go up 0.5 mm in hook size. If the tulips look cramped, pull the puff loops up a little taller.
The stitch counts don’t change, so all of the sizing comes from gauge.
Base Cuff
Start with a chain ring and increase evenly to form a gentle cone around the opening.
Foundation: Ch 18 and join with a sl st to the first ch to form a ring. Don’t twist the chain.
Rnd 1: Ch 1, sc in each ch around, then join with a sl st to the first sc. (18 sc)
Rnd 2: Ch 1, sc in next 2 sts, 2 sc in next st; rep from * around, then join. (24 sc)
Rnd 3: Ch 1, sc in next 3 sts, 2 sc in next st; rep from * around, then join. (30 sc)
Rnd 4: Ch 1, sc in next 4 sts, 2 sc in next st; rep from * around, then join. (36 sc)
Rnds 5–6: Ch 1, sc in each st around, then join. (36 sc)
Checkpoint: The cuff should measure 12 in (30.5 cm) around the top edge and 2 in (5.1 cm) tall. The opening should be about 1.9 in (4.8 cm) across. Put a marker in the first st of Rnd 6.
Tulip Body
The body alternates between two rounds. A tulip round places 6 tulips around the tube. An arch round connects the center puff of each tulip with a ch-5 arch. Every tulip round sets its new tulips into the centers of the arches, so each tier sits halfway between the tulips below it.
Rnd 7 (first tulip round): Ch 1, sc in the first st, ch 2, sk next 2 sts, tulip in next st, ch 2, sk next 2 sts. Sc in next st, ch 2, sk next 2 sts, tulip in next st, ch 2, sk next 2 sts; rep from * 4 more times. Join with a sl st to the first sc.
- Count: 6 sc + 6 tulips (30 sts) + 12 ch-2 sps (24 ch) = 60 sts. That makes 6 repeats of 10 sts each.
- Each repeat uses exactly 6 sts of Rnd 6 (1 sc + 2 skipped + 1 tulip + 2 skipped), and 6 × 6 = 36.
Rnd 8 (arch round): Sl st in each of the next 2 ch, sl st in the top of the first puff, sl st in the next ch-1 sp, then sl st in the top of the center puff. Ch 1 and sc in the same center puff. Ch 5, sc in the center puff of the next tulip; rep from * 4 more times. Ch 5 and join with a sl st to the first sc.
- Count: 6 sc + 6 ch-5 arches (30 ch) = 36 sts.
Checkpoint: The height should be 3.5 in (8.9 cm). The arches should lie flat without pulling the tulips inward.
Rnd 9 (offset tulip round): Ch 1, sc in the first sc, ch 2, tulip in the center (3rd) ch of the next ch-5 arch, ch 2. Sc in next sc, ch 2, tulip in the center ch of the next arch, ch 2; rep from * 4 more times. Join.
- Count: 6 sc + 6 tulips (30 sts) + 12 ch-2 sps (24 ch) = 60 sts.
Work each tulip into the center chain, not around the arch. That keeps it centered and upright. Each sc lands on top of a tulip from 2 rounds earlier, so the new tulips sit in the gaps. This creates the staggered pattern.
Rnd 10: Repeat Rnd 8. (36 sts: 6 sc + 30 ch)
Rnds 11–26: Repeat Rnds 9–10 eight more times.
You now have 10 tulip rounds (Rnds 7, 9, 11, 13, 15, 17, 19, 21, 23 and 25) and 10 arch rounds. You end on Rnd 26, an arch round with 36 sts.
Checkpoints:
– After Rnd 16, the holder should be 9.5 in (24.1 cm) tall.
– After Rnd 26, it should be 17 in (43.2 cm) tall: 2 in (5.1 cm) of base plus 10 pairs × 1.5 in (3.8 cm).
Top Band (Border)
Border gauge: 3 sc per inch (2.5 cm), the same as the base. The goal is to bring the band back to exactly 36 sc, so the top matches the 12 in (30.5 cm) circumference of the cuff.
Rnd 27 (conversion round): Ch 1, sc in the first sc, 5 sc in the next ch-5 arch. Sc in next sc, 5 sc in next ch-5 arch; rep from * 4 more times. Join.
- Count: 6 sc worked 1-per-existing-sc + 30 sc worked into the arches (5 in each of 6 arches) = 36 sc.
Rnds 28–32: Ch 1, sc in each st around, then join. (36 sc)
Laid flat, the band shows 18 sc on the front and 18 sc on the back (18 + 18 = 36). It has no corners, so nothing is counted twice.
Why the math works: Every arch round has exactly 36 sts (6 sc + 30 ch). Putting one sc in each of those positions gives back the 36 sts of the base. At 3 sc per inch (2.5 cm), that’s 12 in (30.5 cm) around, so the tube stays straight from bottom to top instead of flaring or narrowing. The 6 band rounds add 2 in (5.1 cm), which brings the total height to 19 in (48.3 cm). Don’t fasten off yet.
Strap
Row 1: Ch 1, sc in the first 3 sts of Rnd 32, then turn. (3 sc)
Rows 2–42: Ch 1, sc in each st across, then turn. (3 sc)
The strap is 14 in (35.6 cm) long and 1 in (2.5 cm) wide.
Attach: Without twisting the strap, bring its end across the opening to sts 19–21 of Rnd 32. Those stitches are directly opposite sts 1–3, because 1 + 18 = 19. Sl st the last row of the strap to those 3 sts, working through both layers. Fasten off and weave in the end.
Checkpoint: The loop should stand about 5 in (12.7 cm) above the rim.
Bow Cord
Ch 110. Sl st in the back bump of the 2nd ch from the hook and in each ch across (109 sl sts), then fasten off. The cord should measure about 30 in (76.2 cm). Tie an overhand knot about 0.5 in (1.3 cm) from each end and trim the tails close.
Threading: Find the 12 ch-2 spaces of Rnd 7. Starting at the front center, weave the cord in and out through the ch-2 spaces all the way around. Bring both ends out at the front in 2 neighboring spaces. Snug the cord gently so it lies flat but doesn’t pull the tube in. Tie a bow with loops about 2 in (5.1 cm) wide and tails about 2.5 in (6.4 cm) long.
Final Blocking
- Weave in all ends securely, working each one through at least 2 in (5.1 cm) of solid sc.
- Slide a rolled towel or a 4 in (10.2 cm) cardboard tube into the holder.
- Lay it flat and pin it out to 6 in (15.2 cm) wide and 19 in (48.3 cm) tall.
- Hold a steam iron 1 in (2.5 cm) above the fabric and steam it lightly. Don’t press, because pressing flattens the puffs.
- While the yarn is still warm, shape each tulip with your fingertips. Fan the 3 petals evenly and open up the oval windows.
- Pin the strap flat and steam it the same way.
- Let everything dry completely, about 2–4 hours, before you take out the towel.
- Re-tie the bow so the loops are even.
Final Quality-Control Checklist
- Circumference is 12 in (30.5 cm) at the cuff, the body and the band.
- The bottom opening is about 1.9 in (4.8 cm) across and the edge is smooth.
- There are 10 tulip tiers, each with 6 tulips, and they alternate cleanly.
- Every tulip has 3 evenly sized puffs.
- Each arch round has 6 sc and 6 ch-5 arches.
- The top band has 36 sc and 6 rounds.
- The strap is attached directly opposite its starting point and isn’t twisted.
- The bow is centered on the front and both ends are knotted.
- No loose ends show inside or outside.
Troubleshooting
Tube flares toward the top: Your puffs are too loose or too tall. Pull the loops up to a consistent 3/4 in (1.9 cm). Measuring against a ruler a few times helps.
Tube pulls inward at the arches: Your ch-5 arches are too tight. Chain more loosely, or go up a hook size for the arch rounds only.
Tulips aren’t staggered: You probably worked the tulip around the arch instead of into its center chain. It’s also possible that the sc went into a ch instead of the sc below. Rip back to the last arch round.
Stitch count is off after Rnd 27: Count the arches. You need exactly 5 sc in each of the 6 arches, plus 1 sc in each of the 6 sc.
Strap leans to one side: Count 18 sts from the start of the strap and reattach it at sts 19–21.
Bags slip out too easily: Pull the bow cord a little tighter to narrow the bottom.
Care
Hand wash in cool water with mild soap, press out the water in a towel, and dry flat. Reshape the tulips while the holder is damp.
Final Notes
The sizing follows a simple chain. The 18-st ring increases to 36 sc, which gives 12 in (30.5 cm) around. That 36 becomes 6 tulip repeats of 6 base sts each. Every arch round returns to 36 sts, and the top band locks in 36 sc again. Ten pairs at 1.5 in (3.8 cm) each make the 15 in (38.1 cm) body. Add the 2 in (5.1 cm) base and the 2 in (5.1 cm) band, and the holder comes out 19 in (48.3 cm) tall. If your gauge matches, every measurement after it will too.
Happy crocheting!