

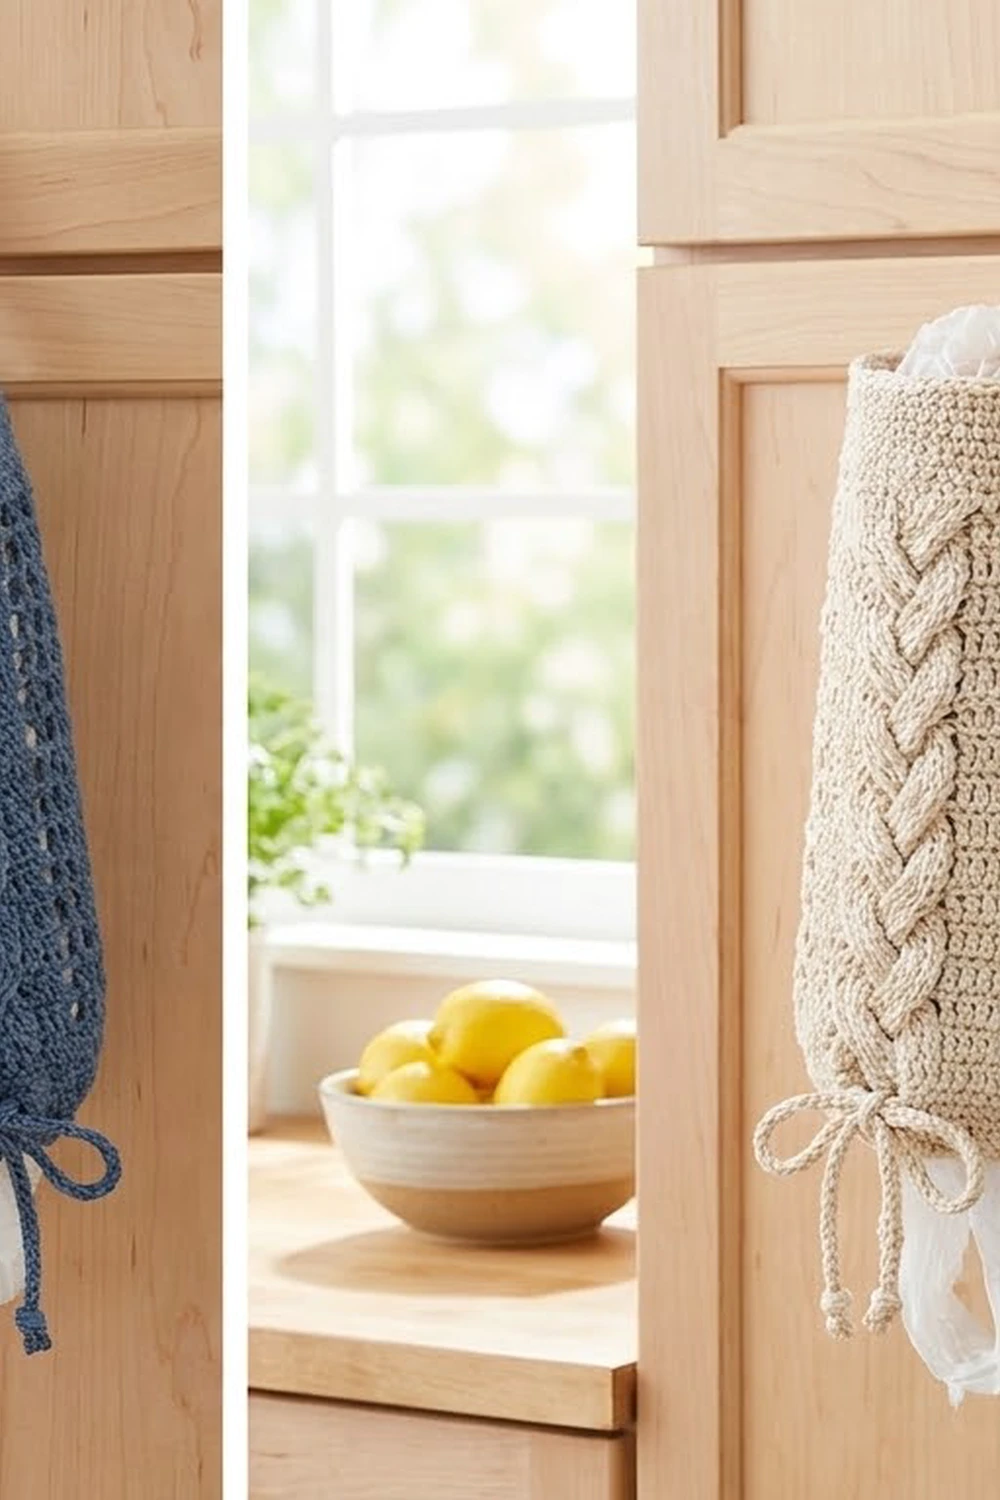
The Kitchen Plait Grocery Bag Holder is a tall, slim tube that hangs from a cabinet knob and keeps plastic bags in one tidy place. You push bags in at the top and pull them out one at a time through the small opening at the bottom.
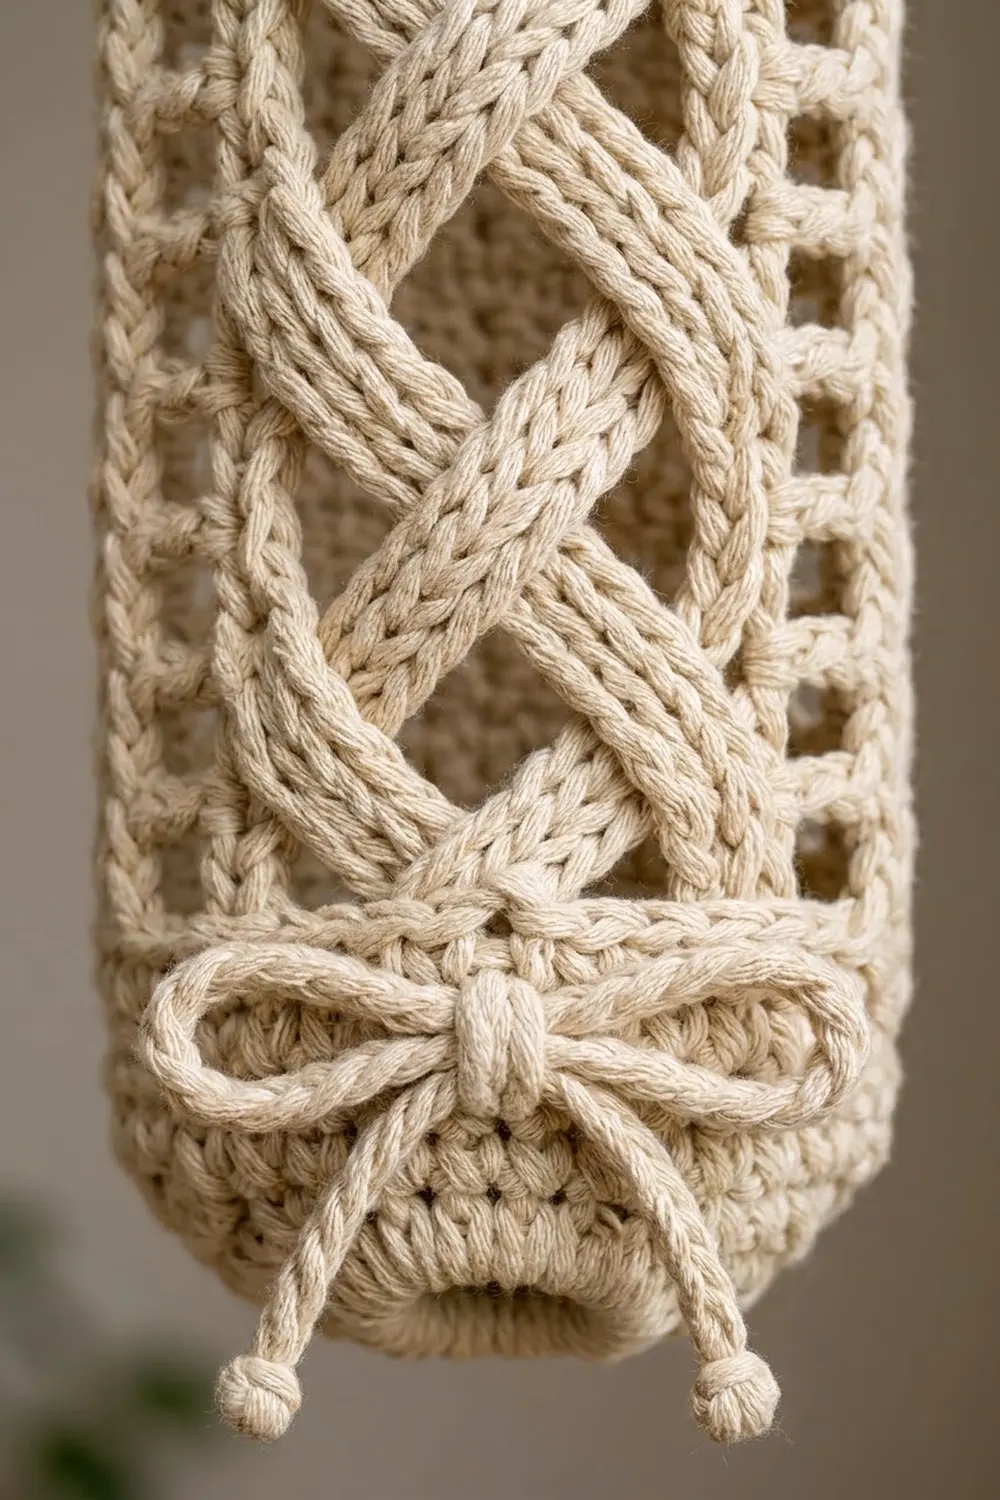
The front and back each carry a raised three-strand plait cable that runs the full height of the body. On each side of the plait is a single column of square mesh windows, so the bags show through a little and the piece feels light rather than heavy. A solid single crochet rim finishes the top and a hanging loop rises from the centre back. A slip-stitch drawstring runs through an eyelet round near the bottom and ties in a bow on the front.
The sample is made in soft cream bulky cotton cord, which shows the cable texture well. Denim blue or any other smooth, solid colour works just as well. All instructions use US crochet terms.
The finished holder is 7 in (17.8 cm) wide when flat and 17.75 in (45.1 cm) tall, plus a 3.5 in (8.9 cm) hanging loop. You make it in one piece from the bottom up:
- a small ring of single crochet forms the opening
- increase rounds widen it to full size
- an eyelet round holds the drawstring
- the cabled body, the top rim and the loop follow
Finished Size and Construction
- Finished size: 7 in (17.8 cm) wide when flat x 17.75 in (45.1 cm) tall, without the loop
- Circumference: 14 in (35.6 cm)
- Hanging loop: 3.5 in (8.9 cm) tall
- Skill level: Intermediate (front post cables worked in the round)
- Terminology: US crochet terms
- Yarn weight: Bulky (#5) cotton cord
- Hook: 6.0 mm (US J-10)
- Number of pieces: 1 (one tube, plus a separate drawstring cord)
- Layout: Joined rounds with the right side always facing; you never turn
- Stitches per round: 42 (21 on the front half, 21 on the back half)
- Size before the rim: 7 in (17.8 cm) wide x 16.75 in (42.5 cm) tall
- Rim depth: 1 in (2.5 cm)
Materials
Choose a smooth, round cotton cord or a bulky cotton yarn with good stitch definition. Avoid fuzzy or brushed yarns, because the plait needs crisp edges to show clearly. Cotton also keeps its shape when the holder is stuffed full of bags.
- Main colour (Cream): 260 g, about 330 m
- Optional second colourway (Denim Blue): another 260 g, about 330 m, if you want a matching second holder
Tools:
- 6.0 mm (US J-10) crochet hook
- Stitch markers (at least 3)
- Tapestry needle
- Scissors
- Measuring tape
- Rust-proof pins and a blocking surface
The quantities include about 15% extra for your gauge swatch and small differences in tension.
Abbreviations (US Terms)
- ch: chain
- sl st: slip stitch
- sc: single crochet
- dc: double crochet
- tr: treble crochet
- sk: skip
- sp: space
- st(s): stitch(es)
- rnd: round
- rep: repeat
- FPdc: front post double crochet. Yarn over, insert the hook from front to back to front around the post of the stitch below, then finish as a dc.
- FPtr: front post treble crochet. Yarn over twice, insert the hook around the post from the front, then finish as a tr.
Special stitches:
- Left cross (LC): Sk the next 3 sts and FPtr around each of the next 3 sts. Then, working in front of the 3 sts you just made, FPtr around each of the 3 skipped sts. (6 sts)
- Right cross (RC): Sk the next 3 sts and FPtr around each of the next 3 sts. Then, working behind the 3 sts you just made, FPtr around each of the 3 skipped sts. (6 sts)
Each post stitch replaces exactly one stitch of the round, so the stitch count never changes.
Gauge and Checkpoints
Gauge:
- 12 sts and 6 rnds = 4 in (10.2 cm) in the body pattern
- 12 sc and 12 rnds = 4 in (10.2 cm) in sc
To make a swatch, ch 14 and dc in the 4th ch from the hook and in each ch across (12 sts, counting the skipped chains as a dc). Work 6 rows in total, then measure. Because the holder is a single tube, the piece itself is your best test: work through Rnd 8 and check the width before you start the cables.
Checkpoints:
- After Rnd 5: You have 42 sts and the piece lies as a shallow cone. The outer edge measures 14 in (35.6 cm) around.
- After Rnd 8: The tube measures 7 in (17.8 cm) wide when flat.
- After Rnd 16: The body (Rnds 8–16) measures 6 in (15.2 cm) tall.
- After Rnd 28: The body (Rnds 8–28) measures 14 in (35.6 cm) tall.
- After Rnd 32: The total height is 17.75 in (45.1 cm).
If it’s too big, go down one hook size (5.5 mm). If it’s too small, go up one size (6.5 mm). The cables pull in by about 0.25 in (0.6 cm) per panel; the gauge above already allows for this.
Pattern
Bottom Opening and Base
Ch 21 and join with a sl st to the first ch to form a ring, taking care not to twist it. The ring is 7 in (17.8 cm) around, which gives an opening about 2.25 in (5.7 cm) across.
Rnd 1: Ch 1, sc in each ch around, join with a sl st to the first sc. (21 sc)
Rnd 2: Ch 1, sc in each st around, join. (21 sc)
Rnd 3: Ch 1, *sc in next 2 sts, 2 sc in next st; rep from * 7 times, join. (28 sc)
Rnd 4: Ch 1, *sc in next 3 sts, 2 sc in next st; rep from * 7 times, join. (35 sc)
Rnd 5: Ch 1, *sc in next 4 sts, 2 sc in next st; rep from * 7 times, join. (42 sc)
Rnd 6 (eyelet round): Ch 4 (counts as dc and ch-1), sk next st, *dc in next st, ch 1, sk next st; rep from * 20 times, join with a sl st to the 3rd ch of the beginning ch-4. (21 dc + 21 ch-1 sps = 42 sts; 21 eyelets)
Rnd 7: Ch 1, sc in each dc and each ch-1 sp around, join. (42 sc)
Place a marker in the first st of the round to mark the left side fold, and a second marker in st 22 to mark the right side fold. Sts 1–21 are the front half and sts 22–42 are the back half.
When flat, the base (Rnds 1–7) measures about 2.75 in (7.0 cm) up from the opening edge.
Body Setup
Rnd 8: Ch 3 (counts as dc), dc in each st around, join with a sl st to the top of the ch-3. (42 dc)
Body Pattern
You work every body round the same way on both halves. Each 21-st half is laid out like this:
- St 1: side dc
- Sts 2–4: mesh window (dc, ch 1, dc)
- Sts 5–6: 2 background dc
- Sts 7–15: 9-st plait panel (three strands of 3 sts)
- Sts 16–17: 2 background dc
- Sts 18–20: mesh window (dc, ch 1, dc)
- St 21: side dc
On Rnd 9, the ch-1 of each window skips a dc. On every round after that, it skips the ch-1 sp below, so the windows stack into straight columns. The beginning ch-3 always counts as the first side dc.
Rnd 9 (Round A): Ch 3. On each half: dc, ch 1, sk next st, dc, dc in next 2 sts, LC, FPdc around each of the next 3 sts, dc in next 2 sts, dc, ch 1, sk next st, dc, dc. Join. (42 sts; 21 per half)
Rnd 10 (Round B): Ch 3. On each half: dc, ch 1, sk ch-1 sp, dc, dc in next 2 sts, FPdc around each of the next 9 sts, dc in next 2 sts, dc, ch 1, sk ch-1 sp, dc, dc. Join. (42 sts)
Rnd 11 (Round C): Ch 3. On each half: dc, ch 1, sk ch-1 sp, dc, dc in next 2 sts, FPdc around each of the next 3 sts, RC, dc in next 2 sts, dc, ch 1, sk ch-1 sp, dc, dc. Join. (42 sts)
Rnd 12 (Round B): Work as Rnd 10. (42 sts)
The LC carries the left strand over the middle strand, and the RC carries the right strand over the middle strand. Alternating them on every other round builds a true three-strand plait. The plain FPdc rounds let each crossing settle, which leaves small openings between the strands, just like the sample.
Rnds 13–28: Rep Rnds 9–12 four more times. (42 sts on every round)
That gives you 5 full plait repeats on top of the setup round. The body (Rnds 8–28) is 21 rnds, or 14 in (35.6 cm), and the piece now measures 16.75 in (42.5 cm) from the opening edge.
Hanging Loop
Work the rim first (see Border below), then come back and make the loop.
With the right side facing, join the yarn to st 31 of Rnd 31. This is the first of the 3 centre back sts (sts 31–33).
Row 1: Ch 1, sc in sts 31, 32 and 33. (3 sc)
Rows 2–21: Ch 1, turn, sc in each st across. (3 sc)
The strap is 7 in (17.8 cm) long. Fold it toward the inside and sew the last row firmly to the inside of Rnd 29, directly behind sts 31–33. This makes a 3.5 in (8.9 cm) loop centred on the back, which shows above the rim from the front.
Drawstring Cord
Ch 66. Sl st in the back bump of the 2nd ch from the hook and in each ch across. (65 sl sts, about 22 in / 55.9 cm)
Starting at the centre front, weave the cord in and out of all 21 eyelets of Rnd 6 so both ends come out of neighbouring eyelets at the front. Tie an overhand knot 0.5 in (1.3 cm) from each tip and trim. Tie the ends in a bow with two 2 in (5.1 cm) loops.
Border
The border is the top rim, worked directly on Rnd 28.
Border gauge: 12 sc and 12 rnds = 4 in (10.2 cm).
Rnd 29 (conversion round): Ch 1, sc in each dc, each post st and each ch-1 sp around, join. (42 sc: 21 per half worked 1 per existing st + 0 added)
Rnd 30: Ch 1, sc in each st around, join. (42 sc: 21 per half)
Rnd 31: Ch 1, sc in each st around, join. (42 sc: 21 per half)
Rnd 32: Sl st loosely in each st around. Fasten off. (42 sl sts: 21 per half)
Why the math works:
- Each half of the body has 21 sts, and the rim keeps exactly 21 sts per half, 1 sc per existing st.
- At 12 sc per 4 in (10.2 cm), 21 sts = 7 in (17.8 cm), which matches the body width. The rim neither ruffles nor pulls in.
- The three sc rounds add 1 in (2.5 cm), and the sl st round adds almost no height.
- Total height: 2.75 in (7.0 cm) base + 14 in (35.6 cm) body + 1 in (2.5 cm) rim = 17.75 in (45.1 cm).
Weave in all ends on the inside, then make the hanging loop.
Final Blocking
- Soak the holder in cool water for 10 minutes and gently press out the water. Do not wring it.
- Roll it in a towel to remove more moisture.
- Stuff it loosely with a rolled towel or plastic bags so it holds its tube shape.
- Lay it flat with the plait centred on top. Smooth the side folds so the mesh columns sit straight.
- Pat it out to 7 in (17.8 cm) wide and 17.75 in (45.1 cm) tall, then pin the rim and the base.
- Pinch each plait strand lightly so it stands up.
- Let it dry completely, then turn it over and check the back plait.
Final Quality-Control Checklist
- 42 sts on every round from Rnd 5 to Rnd 32
- 21 open, evenly spaced eyelets in Rnd 6
- Two straight mesh columns on each half, one on each side of the plait
- 5 full plait repeats on the front and 5 on the back
- Every crossing lies in front of the middle strand
- Width 7 in (17.8 cm), height 17.75 in (45.1 cm)
- Loop centred on the back, sewn securely, 3.5 in (8.9 cm) tall
- Drawstring knotted at both tips and tied in a neat bow at the centre front
- All ends woven in on the inside
Troubleshooting
The body is narrower than the base. Post stitches pull in. Work them a little looser, or go up one hook size for the body only.
The plait looks flat. Pull each FPtr loop up to full height before you finish the stitch. Make sure every post stitch goes around the post, not into the top of the stitch.
The mesh columns lean. Check that each ch-1 sits directly over the ch-1 sp below, and that the ch-3 at the start of each round counts as the side dc.
The stitch count drifts. Count each half separately after every crossing round. Each half must have 21 sts.
Bags fall out too fast. Tighten the drawstring bow. If the opening is still too wide, start again with ch 18 and adjust Rnds 3–5 so you still reach 42 sts.
The rim flares. Use a hook one size smaller for Rnds 29–32.
Care
Hand wash in cool water with mild soap, then dry flat, stuffed with a towel to keep its shape. Do not tumble dry, because it can distort the cables.
Final Notes
The whole design comes down to one chain of measurements:
- A 21-ch ring opens out to 42 sts.
- At 12 sts per 4 in (10.2 cm), 42 sts give 14 in (35.6 cm) around and 7 in (17.8 cm) when flat. That count stays the same all the way up.
- The 2.75 in (7.0 cm) base, the 14 in (35.6 cm) body of 21 rounds and the 1 in (2.5 cm) rim add up to 17.75 in (45.1 cm).
- A 3.5 in (8.9 cm) loop sits on top.
Check your gauge at each checkpoint and the holder will hang straight and full.
Happy crocheting!