
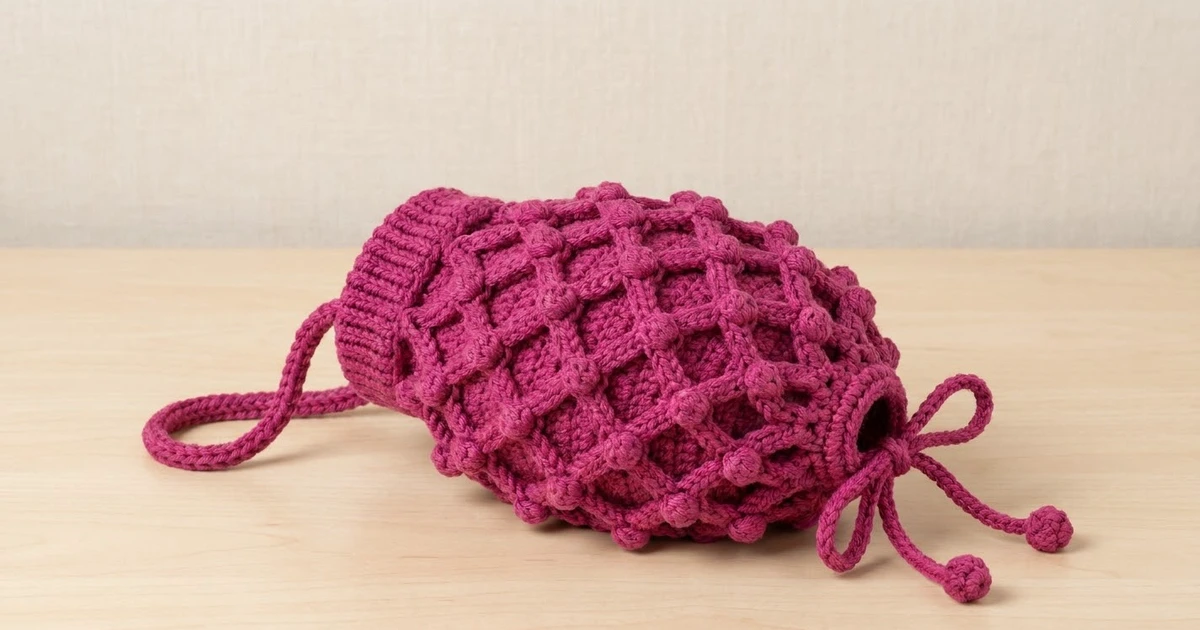
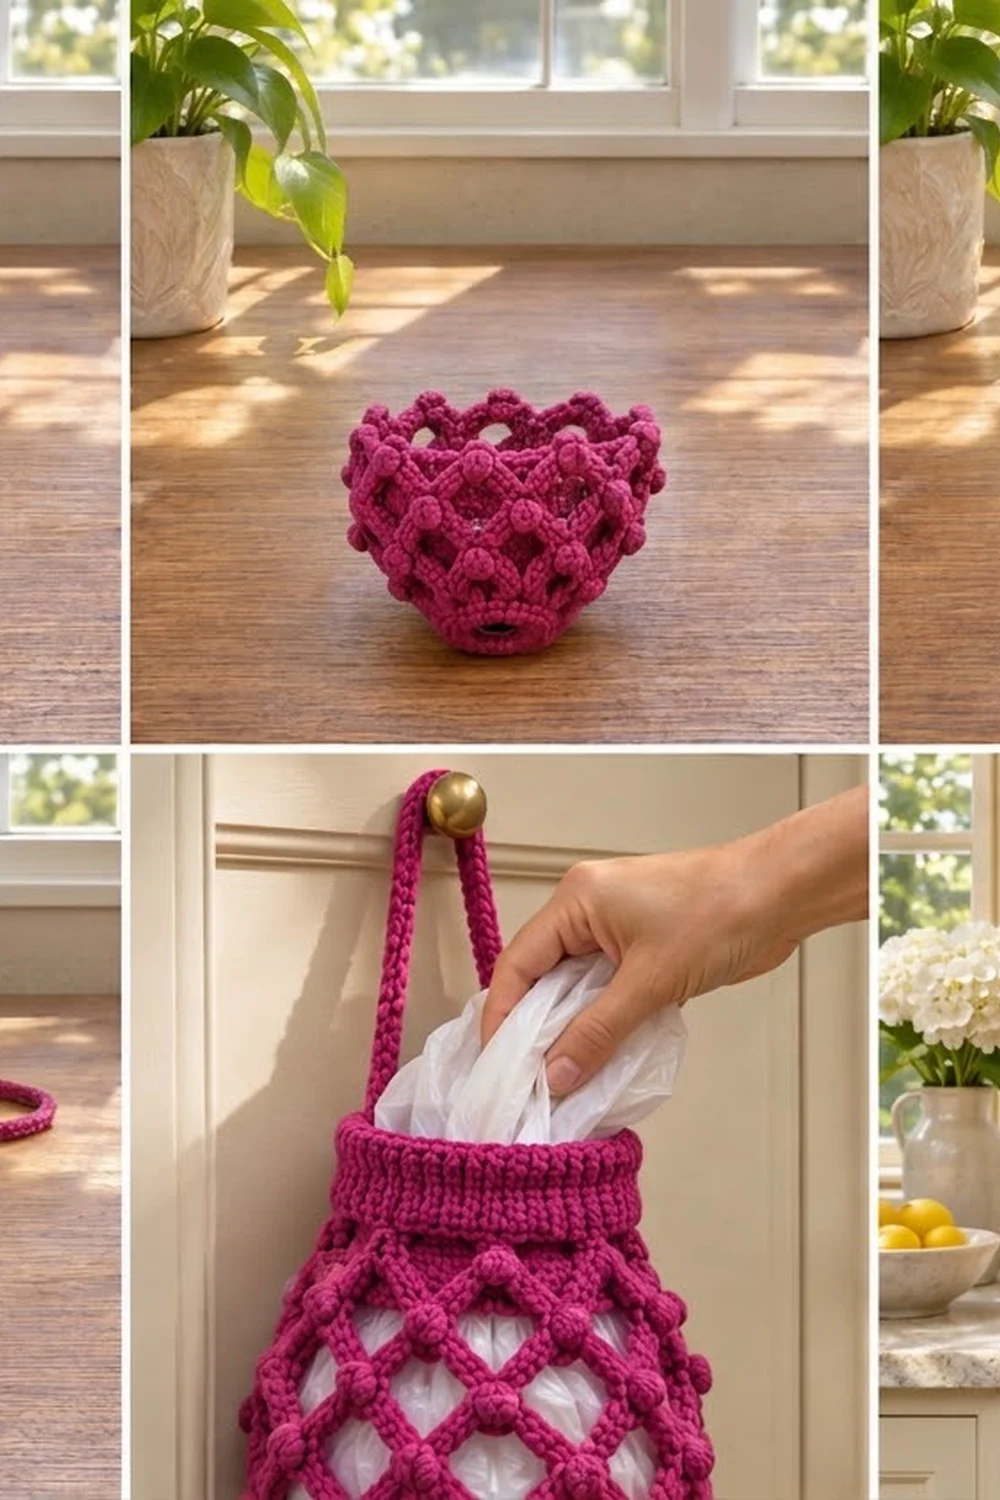
This holder keeps plastic shopping bags neat on a cabinet door. Push used bags in at the ribbed top and pull them out one at a time from the bottom. The body is an open diamond lattice with a bobble at every crossing, so you can see the white bags through the mesh.
The sample is a deep raspberry-magenta cotton. The same pattern looks just as good in sage green, or in any color that suits your kitchen. The style is cottage-kitchen: chunky bars, round bobbles, a ribbed knit-look collar and a bow-tied bottom.
This pattern uses US crochet terms. The finished holder measures about 9 in (22.9 cm) wide at its widest when flat and 14 in (35.6 cm) tall, not counting the strap.
You work the body in one piece from the bottom up. It starts with a small solid ring, then 14 rounds of bobble lattice that grow and then narrow into a teardrop. A conversion round sets up a ribbed collar. Last, you add a cord strap and a bobble-tipped drawstring.
Finished Size and Construction
- Finished size: 9 in (22.9 cm) wide at widest × 14 in (35.6 cm) tall, flat
- Skill level: Intermediate
- Terminology: US crochet terms
- Yarn weight: Worsted (#4), cotton or cotton blend
- Hook: 5.0 mm (H-8)
- Number of pieces: 1 body, plus 1 strap and 1 drawstring
- Layout: Worked in the round from the bottom up, 12 lattice diamonds around
- Piece size: Base ring 4 in (10.2 cm) across; collar 6 in (15.2 cm) wide flat
- Size before collar: 9 in (22.9 cm) wide × 12 in (30.5 cm) tall
- Collar (border) depth: 2 in (5.1 cm)
Materials
Cotton is the best choice here. It holds the lattice shape, doesn’t stretch out under the weight of the bags, and washes well. A cotton-acrylic blend also works. Avoid very fuzzy yarns, because they hide the bobbles.
- Color A, Raspberry Pink: 150 g / 270 m
- Optional Color B, Sage Green: 150 g / 270 m (only if you’re making a second holder)
Tools:
- 5.0 mm (H-8) crochet hook
- Tapestry needle
- 2 stitch markers
- Scissors
- Tape measure
- Blocking pins and spray bottle
- A rolled towel or a stuffed bag of plastic bags for shaping
The yarn quantities include a margin of about 20% for your gauge swatch and small differences in tension.
Abbreviations (US Terms)
- ch – chain
- sl st – slip stitch
- sc – single crochet
- hdc – half double crochet
- dc – double crochet
- FPdc – front post double crochet
- BPdc – back post double crochet
- sp – space
- st(s) – stitch(es)
- rnd – round
- B – bobble (see below)
Special stitches
- Bobble (B): Yarn over, insert hook in the stated space, yarn over and pull up a loop, yarn over and pull through 2 loops. Repeat from * 4 more times (6 loops on hook). Yarn over and pull through all 6 loops.
- Beginning Bobble (Beg B): Ch 2. Yarn over, insert hook in the same space, yarn over and pull up a loop, yarn over and pull through 2 loops. Repeat from * 3 more times (5 loops on hook). Yarn over and pull through all 5 loops.
Gauge and Checkpoints
Gauge: 16 sc × 18 rnds = 4 in (10.2 cm) square.
Before you start, make a small swatch in sc. Then work the base and the first two lattice rounds, and use these checkpoints:
- After Rnd 3: The base ring measures 4 in (10.2 cm) across, with a center hole about 1.25 in (3.2 cm) wide.
- After Rnd 6: The piece is about 3 in (7.6 cm) tall from the base.
- After Rnd 12: The piece is 9 in (22.9 cm) wide flat and about 8 in (20.3 cm) tall.
- After Rnd 17: The piece is about 6 in (15.2 cm) wide at the neck and 12 in (30.5 cm) tall.
- After Rnd 23: The piece is 14 in (35.6 cm) tall overall.
If your piece is too big, go down to a 4.5 mm hook. In the lattice section, you can also chain one fewer in each loop.
If your piece is too small, go up to a 5.5 mm hook.
The collar must stay at 48 stitches no matter which hook you use, so only change the hook, never the stitch count.
Base Ring
Ch 16 and sl st to the first ch to form a ring. Don’t twist the chain.
Rnd 1: Ch 1, work 24 sc into the ring (over the chain), sl st to the first sc to join. (24 sts)
Rnd 2: Ch 1, sc in next st, 2 sc in next st 12 times, join. (36 sts)
Rnd 3: Ch 1, sc in next 2 sts, 2 sc in next st 12 times, join. (48 sts)
The base is now a flat ring, 4 in (10.2 cm) across, with a firm opening in the center. You’ll weave the drawstring through Rnd 1 later.
Lattice Body
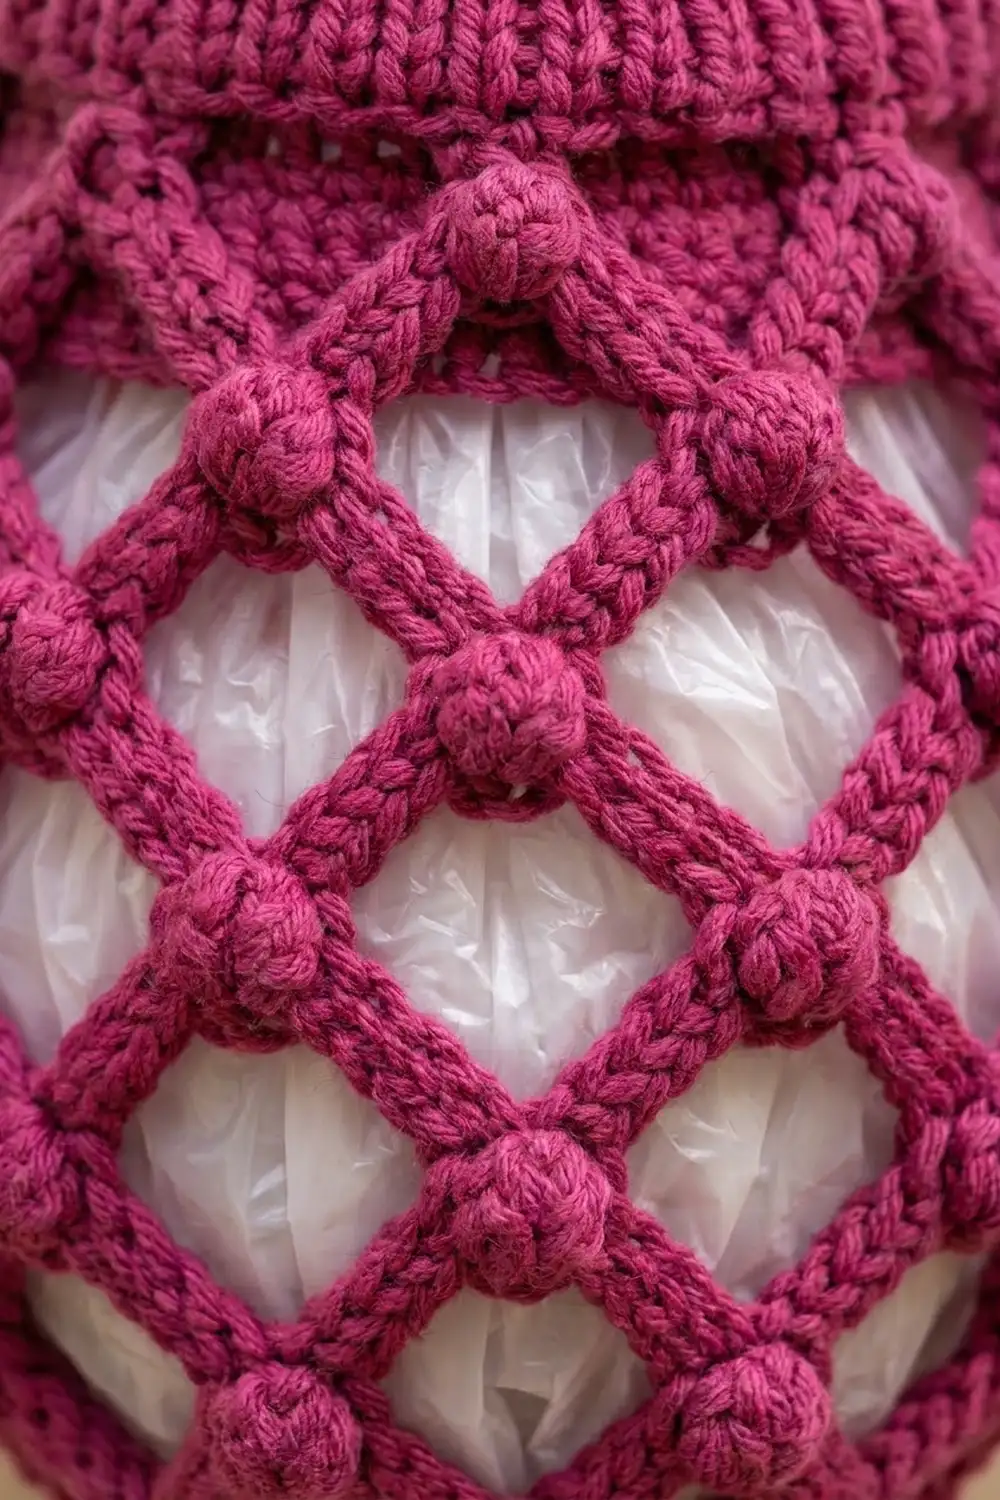
Each lattice round anchors a bobble in the center of the chain loop below it. That offset is what builds the diamonds. The number of diamonds stays at 12 every round. Only the loop length changes, and that’s what shapes the teardrop.
Rnd 4 (foundation net): Ch 1, sc in first st, ch 5, skip 3 sts, sc in next st 11 times, ch 5, skip 3 sts, sl st to the first sc. (12 sc, 12 ch-5 sps)
Check the math: 12 sc + (12 × 3 skipped) = 48, which matches Rnd 3.
Rnd 5: Sl st into the first ch-5 sp, Beg B in the same sp, ch 5, B in next ch-5 sp 11 times, ch 5, sl st to the top of Beg B. (12 bobbles, 12 ch-5 sps)
The edge now forms 12 scallops, each tipped with a bobble.
Rnd 6: Sl st into the next ch-5 sp, Beg B in the same sp, ch 5, B in next ch-5 sp 11 times, ch 5, join. (12 bobbles, 12 ch-5 sps)
The piece will start to cup upward into a bowl.
Rnds 7–8: Work as Rnd 6, but ch 6 between bobbles. (12 bobbles, 12 ch-6 sps each rnd)
Rnds 9–12: Work as Rnd 6, but ch 7 between bobbles. (12 bobbles, 12 ch-7 sps each rnd)
This is the widest part. Check your width now: 9 in (22.9 cm) flat.
Rnds 13–14: Work as Rnd 6, but ch 6 between bobbles. (12 bobbles, 12 ch-6 sps each rnd)
Rnds 15–16: Work as Rnd 6, ch 5 between bobbles. (12 bobbles, 12 ch-5 sps each rnd)
Rnd 17: Work as Rnd 6, but ch 4 between bobbles. (12 bobbles, 12 ch-4 sps)
The neck is now about 6 in (15.2 cm) wide flat, and the body is about 12 in (30.5 cm) tall.
Ribbed Collar (Border)
The collar works like a border on this single piece. It turns the open lattice into a solid band that’s firm enough to push bags through.
Border gauge: 16 sts = 4 in (10.2 cm), the same as the sc gauge.
The collar is worked in the round. When you lay it flat, each side (front and back) has 24 stitches, so the two sides total 48. There are no corner stitches, and nothing is counted twice.
Rnd 18 (conversion): Ch 1, sc in the top of next B, 3 sc in next ch-4 sp 12 times, join.
(12 sts worked 1 per bobble + 36 sts worked into the 12 ch-4 sps = 48 sc; 24 per flat side)
Rnd 19: Ch 2 (does not count as a st), hdc in each st around, join. (48 hdc; 24 per side)
Rnds 20–22: Ch 2 (does not count as a st), FPdc around next st, BPdc around next st 24 times, join. (48 sts: 24 FPdc + 24 BPdc; 24 per side)
On every round, work FPdc around the FPdc and BPdc around the BPdc so the ribs stack in columns.
Rnd 23: Ch 1, sl st loosely in each st around, join. (48 sl sts)
Fasten off and weave in the end. The top edge rolls slightly outward, just like the sample.
Why the math works: 48 sts ÷ 4 sts per inch = 12 in (30.5 cm) of circumference, which is 6 in (15.2 cm) when flat. That matches the 6 in (15.2 cm) neck width after Rnd 17. The collar sits on the lattice without ruffling or pulling. Rnds 18–23 add 2 in (5.1 cm), bringing the total height from 12 in (30.5 cm) to 14 in (35.6 cm).
Strap
Row 1: Ch 49, sc in the 2nd ch from the hook and in each ch across, turn. (48 sc)
Row 2: Ch 1, sl st in the back loop only of each st across. (48 sl sts)
Fasten off and leave a 10 in (25.4 cm) tail. Do the same at the starting end.
The strap is 12 in (30.5 cm) long. Place a marker in collar st 1 and another in st 25, so the markers sit on opposite sides. Sew each end of the strap to the inside of the collar at a marker, covering Rnds 19–22. Stitch through both layers several times, because this point carries all the weight.
Drawstring
- Ch 84.
- Work a B in the 4th ch from the hook. This is end bobble 1.
- Sl st in the back bump of each of the remaining 80 ch.
- Ch 3, then work a B in the 3rd ch from the hook (end bobble 2).
- Sl st at the base of the bobble and fasten off.
The finished cord is about 20 in (50.8 cm) long.
Weave the cord in and out through Rnd 1, passing under 3 sts at a time (8 passes around 24 sts). Pull it gently until the bottom opening is about 1 in (2.5 cm) wide, then tie a bow. That’s small enough to hold the bags in and large enough to pull one out.
Final Blocking
- Lightly spray the whole holder with water until it’s damp but not dripping.
- Stuff the body firmly with a rolled towel or a bag full of plastic bags to set the teardrop shape.
- Lay it flat and gently pull each diamond open so the bars are straight and the bobbles sit at the crossings.
- Pin the collar to 6 in (15.2 cm) wide and the widest point to 9 in (22.9 cm).
- Check that the height is 14 in (35.6 cm).
- Pin the strap straight and leave everything to dry completely.
- Take out the stuffing, retie the bow and hang the holder.
Final Quality-Control Checklist
- [ ] The base ring has 48 sts and lies flat before the lattice begins.
- [ ] Every lattice round has 12 bobbles and 12 chain loops.
- [ ] The loop lengths follow 5-5-5-6-6-7-7-7-7-6-6-5-5-4 (Rnds 4–17).
- [ ] Rnd 18 has exactly 48 sc.
- [ ] The rib columns stay aligned on all three post rounds.
- [ ] The finished size is 9 in (22.9 cm) wide × 14 in (35.6 cm) tall.
- [ ] The strap ends are sewn securely at opposite sides of the collar.
- [ ] The drawstring closes the bottom to about 1 in (2.5 cm), and both bobble ends are secure.
- [ ] All ends are woven in on the inside.
Troubleshooting
The diamonds look lopsided. Make sure each bobble goes into the chain space, not into a chain stitch, so it centers itself in the loop.
The bobbles are flat. Keep each yarn-over loop the same height, and pull firmly when you close the bobble.
The piece twists in a spiral. Join every round with a sl st to the top of the Beg B. Don’t work in a continuous spiral.
The collar ruffles. Your post stitches are too loose. Go down 0.5 mm for Rnds 19–22 only.
The collar pulls the neck in. Check that Rnd 18 has exactly 3 sc in each ch-4 sp.
Bags fall out of the bottom. Pull the drawstring tighter, or thread it through every 2 sts instead of every 3.
The strap stretches. Use cotton, and add a third row of sl sts along the other side of the chain.
Care
Machine wash cold on a gentle cycle in a mesh laundry bag. Reshape while damp and lay flat to dry.
Final Notes
The measurements build on each other:
- The 48-stitch base ring measures 4 in (10.2 cm).
- The 14 lattice rounds grow to 9 in (22.9 cm) wide and narrow back to a 6 in (15.2 cm) neck at 12 in (30.5 cm) tall.
- The 48-stitch collar matches that neck exactly and brings the height to 14 in (35.6 cm).
- The 12 in (30.5 cm) strap and the 20 in (50.8 cm) drawstring finish the holder.
If you check your gauge and keep 12 bobbles in every round, the teardrop will shape itself.
Happy crocheting!