
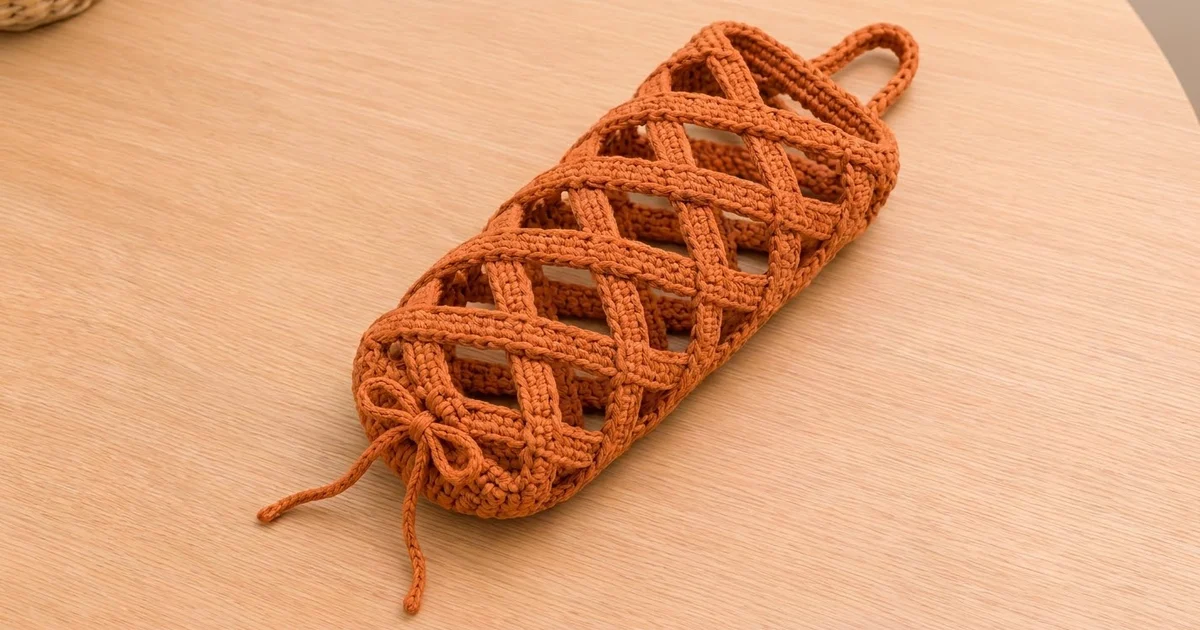
The Terracotta Lattice Bag Holder is a tall, open tube that hangs on a cabinet knob and stores plastic grocery bags. Wide, flat strips of crochet cross the body diagonally and weave over and under each other, which makes a bold diamond lattice. You can see the bags through the gaps, and you pull them out through the gathered bottom opening.
The sample is made in a warm rust-orange bulky cotton. The rims are solid single crochet, and the strips are worked lengthwise, so their rows run along each band. A light beige version looks just as good, so pick whatever color suits your kitchen.
This pattern uses US crochet terms. The finished holder measures 8 in (20.3 cm) wide when flat (16 in / 40.6 cm around) and 16 in (40.6 cm) tall. The hanging loop adds about 4 in (10.2 cm).
Here is how it goes together. You crochet a bottom rim with an eyelet round and a plain top rim, both worked in the round. Next you make 12 flat strips, sew them diagonally between the rims, and weave them as you go. Last, you add a hanging strap, a reverse single crochet edge on both openings, and a corded drawstring tied in a bow.
Finished Size and Construction
- Finished size: 8 in (20.3 cm) flat width × 16 in (40.6 cm) tall, plus a 4 in (10.2 cm) loop
- Circumference: 16 in (40.6 cm); diameter about 5.1 in (13.0 cm)
- Skill level: Intermediate
- Terminology: US
- Yarn weight: Bulky (#5) cotton or cotton blend
- Hook: 6.0 mm (US J-10)
- Number of pieces: 1 finished holder, assembled from 2 rims, 12 strips, 1 strap and 1 tie
- Layout: Tube with 6 right-leaning and 6 left-leaning strips woven between the rims
- Strip size: 16 in (40.6 cm) long × 1 in (2.5 cm) wide
- Size before border: 15.5 in (39.4 cm) tall
- Border depth: 0.25 in (0.6 cm) at each opening
Materials
Choose a firm, smooth bulky cotton or cotton-blend yarn. A twisted, cord-like yarn gives the clearest stitch texture on the strips. Avoid very stretchy acrylic, because a full bag stash pulls the strips longer over time.
- Main color (Rust/Terracotta): about 300 g, roughly 330 m (361 yd)
- Optional alternate (Light Beige): same amount, if you want a second holder
These amounts include a margin of about 15% for gauge swatching and weaving tails.
Tools:
– 6.0 mm (US J-10) crochet hook
– Tapestry needle
– 12 locking stitch markers
– 12 binder clips or sewing clips
– Measuring tape
– Scissors
– A 5 in (12.7 cm) wide tube or a rolled towel for blocking
Abbreviations (US Terms)
- ch – chain
- sl st – slip stitch
- sc – single crochet
- dc – double crochet
- sk – skip
- sp – space
- st(s) – stitch(es)
- rev sc – reverse single crochet
Reverse single crochet (crab stitch): Work from left to right (right to left if you crochet left-handed). Insert the hook into the next stitch to the right, yarn over, pull up a loop, then yarn over and pull through both loops. It makes a firm, twisted, rope-like edge.
Gauge and Checkpoints
Gauge: 12 sc × 12 rows = 4 in (10.2 cm) square in sc.
Make one strip before anything else. It is the quickest test piece, and it shows straight away whether your gauge will work.
- Strip after Row 1: 48 sc should measure 16 in (40.6 cm).
- Strip after Row 3: the width should be 1 in (2.5 cm).
- Rim foundation ring: 48 ch, joined, should lie flat at 16 in (40.6 cm) around without stretching.
- Bottom rim done: 2.5 in (6.4 cm) tall.
- Top rim done: 2 in (5.1 cm) tall.
If your strip is longer than 16.25 in (41.3 cm), go down half a hook size. If it is shorter than 15.75 in (40.0 cm), go up half a hook size. Fix your gauge on the strip before you make the rims, because the strip length and the rim circumference must match the same stitch scale.
Part 1: Bottom Rim
The bottom rim is worked in the round from the bottom opening upward. Do not turn between rounds.
Foundation: Ch 48 and sl st to the first ch to form a ring. Make sure the chain is not twisted.
Rnd 1: Ch 1, sc in each ch around, sl st to the first sc. (48 sc)
Rnd 2: Ch 1, sc in each st around, join. (48 sc)
Rnd 3 (eyelet round): Ch 4 (counts as dc + ch 1), sk next st, dc in next st, ch 1, sk next st; repeat from * 23 times, then sl st to the 3rd ch of the beginning ch-4. (24 dc + 24 ch-1 sps = 48 sts)
Rnd 4 (conversion round): Ch 1, sc in the same st, sc in the next ch-1 sp, sc in next dc, sc in next ch-1 sp; repeat from * 23 times, join. (24 sc worked in dc + 24 sc worked in spaces = 48 sc)
Rnds 5–7: Ch 1, sc in each st around, join. (48 sc)
Fasten off. Checkpoint: the rim is 2.5 in (6.4 cm) tall and 16 in (40.6 cm) around. That height is 6 sc rounds (2 in / 5.1 cm) plus 1 dc round (0.5 in / 1.3 cm).
Part 2: Top Rim
Foundation: Ch 48 and sl st to form a ring without twisting.
Rnd 1: Ch 1, sc in each ch around, join. (48 sc)
Rnds 2–6: Ch 1, sc in each st around, join. (48 sc)
Fasten off. Checkpoint: the rim is 2 in (5.1 cm) tall and 16 in (40.6 cm) around. The foundation edge is the lower edge, which faces the lattice. Rnd 6 is the top opening.
Part 3: Strips (Make 12)
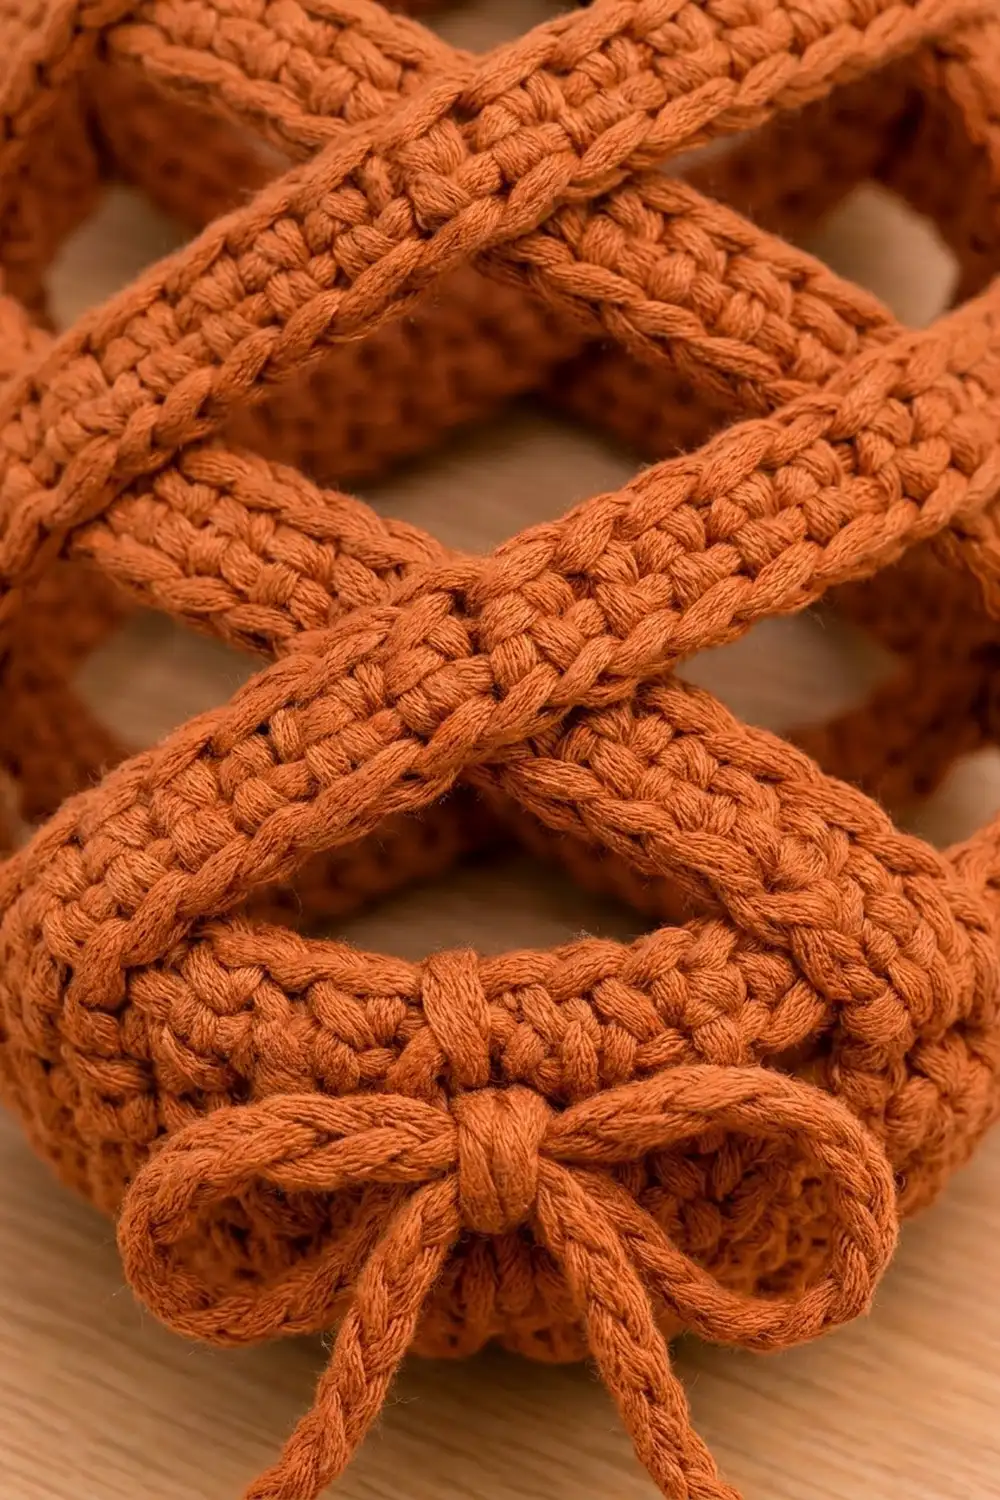
The strips are worked lengthwise, so their rows run along each band just as in the photo.
Foundation: Ch 49.
Row 1: Sc in the 2nd ch from the hook and in each ch across. (48 sc)
Rows 2–3: Ch 1, turn, sc in each st across. (48 sc)
Fasten off and leave a 12 in (30.5 cm) tail. Checkpoint: each strip is 16 in (40.6 cm) × 1 in (2.5 cm). Lay all 12 strips side by side. They should match within 0.25 in (0.6 cm).
Part 4: Marking the Rims
On the last round of the bottom rim (Rnd 7), place 6 markers in sts 1, 9, 17, 25, 33 and 41. That puts one marker every 8 sts, or every 2.67 in (6.8 cm).
On the foundation edge of the top rim, place 6 markers in the same positions: sts 1, 9, 17, 25, 33 and 41.
Line up the rims so the joins of both are at the center back. This is also where the hanging strap will go.
Part 5: Placing and Weaving the Strips
Each strip covers 11 in (27.9 cm) of height and travels halfway around the tube, a horizontal shift of 8 in (20.3 cm). The diagonal measures about 13.6 in (34.5 cm). Weaving takes up a little length, so each strip uses about 14 in (35.6 cm) of visible length plus 1 in (2.5 cm) tucked inside each rim, for 16 in (40.6 cm) in total.
- Stand the bottom rim on the table and hold the top rim 11 in (27.9 cm) above it. A tall jar or a rolled towel inside helps.
- Right-leaning strips (6): Center one end of a strip on a bottom-rim marker and slide 1 in (2.5 cm) of it inside the rim. Clip it in place. Bring the strip up and around to the right, halfway around the tube, and tuck its other end 1 in (2.5 cm) inside the top rim at the marker directly opposite (24 sts away). Clip it. Repeat at all 6 markers.
- Left-leaning strips (6): Start each one at the same bottom markers and travel to the left, ending at the same opposite top marker. As you go, weave over one right-leaning strip, under the next. Start each left strip with “over” at its first crossing, so the lattice alternates evenly around the tube.
- Check that the gap between the rims is 11 in (27.9 cm) all the way around and that every strip lies flat with no twist.
- Using the tails, whipstitch each strip end to the inside of its rim. Sew along all 3 sides of the 1 in (2.5 cm) overlap, catching only the back loops of the rim so the stitches don’t show on the outside.
Checkpoint: the assembled tube is 15.5 in (39.4 cm) tall and 8 in (20.3 cm) wide when flat.
Part 6: Hanging Strap
Foundation: Ch 31.
Row 1: Sc in the 2nd ch from the hook and in each ch across. (30 sc)
Rows 2–3: Ch 1, turn, sc across. (30 sc)
Fasten off with a long tail. The strap is 10 in (25.4 cm) × 1 in (2.5 cm). At the center back, sew 1 in (2.5 cm) of one end inside the top rim. Bend the strap into a loop and sew the other end over the first, so the loop stands about 4 in (10.2 cm) above the rim.
Part 7: Drawstring Tie
Ch 100, which is about 33 in (83.8 cm). Sl st in the back bump of the 2nd ch from the hook and in each ch across (99 sl sts). This makes a firm cord about 32 in (81.3 cm) long. Fasten off and knot each end.
Wait until the border is done before you thread the tie.
Border
Border gauge: 1 rev sc per st, so 12 rev sc = 4 in (10.2 cm), the same as the body.
Top edge: Join yarn in the last round of the top rim at the center back. Ch 1 and work rev sc in each st around, then join. (48 rev sc: 24 on the front face and 24 on the back face when flat)
Bottom edge: Join yarn in the free loops of the bottom rim’s foundation chain. Ch 1 and work rev sc in each loop around, then join. (48 rev sc: 24 on the front and 24 on the back)
Why the math works: each opening is a plain circle of 48 sts, so working 1 rev sc into each st keeps the edge at exactly 16 in (40.6 cm). There are no corners to ease, so you don’t add or skip any stitches. Each border adds 0.25 in (0.6 cm), so the 15.5 in (39.4 cm) tube becomes 16 in (40.6 cm) tall.
Thread the tie: Start at the center front and weave the cord in and out through the 24 eyelets of Rnd 3. Bring both ends out at the front. Pull until the bottom opening is about 3 in (7.6 cm) across, then tie a bow.
Final Blocking
- Untie the bow and remove the cord.
- Slide the holder over a 5 in (12.7 cm) wide tube or a firmly rolled towel.
- Straighten all strips so the diamonds look even and the crossings sit centered.
- Pin or clip the rims so the tube measures 16 in (40.6 cm) tall.
- Steam lightly from 1 in (2.5 cm) away without touching the yarn, or spritz with water until just damp.
- Let it dry completely on the form.
- Re-thread the tie and finish with a bow.
Final Quality-Control Checklist
- Both rims have 48 sts, and both borders have 48 rev sc.
- The flat width is 8 in (20.3 cm) and the body height is 16 in (40.6 cm).
- All 12 strips are 16 in (40.6 cm) long and 1 in (2.5 cm) wide.
- The weave alternates over and under at every crossing.
- No strip ends or sewing stitches show on the outside.
- The loop is firmly sewn and stands about 4 in (10.2 cm) high.
- The bow sits at the center front of the bottom rim.
Troubleshooting
Strips sag or bow outward: they are too long. Unpick one end, tuck an extra 0.5 in (1.3 cm) inside the rim, and sew it again.
The tube twists: the rims are not lined up. Make sure both joins sit at the center back and that each strip ends exactly 24 sts from where it started.
The rim flares: your rim gauge is looser than your strip gauge. Rework the rim with a hook half a size smaller.
Gaps look uneven: you started the left-leaning strips inconsistently. Re-weave them so each one starts with “over.”
The border ruffles or pulls in: check that you worked exactly 1 rev sc per st, 48 in total.
Care
Hand wash in cool water, reshape over a rolled towel and lay it flat or stand it up to dry. Avoid hanging it to dry while wet, because the strips will stretch.

Final Notes
The measurement chain is simple. A gauge of 12 sc = 4 in (10.2 cm) gives 48-st rims that are 16 in (40.6 cm) around. The 48-sc strips are 16 in (40.6 cm) long, and they bridge an 11 in (27.9 cm) gap between a 2.5 in (6.4 cm) bottom rim and a 2 in (5.1 cm) top rim. Two 0.25 in (0.6 cm) borders bring the 15.5 in (39.4 cm) tube to its final 16 in (40.6 cm). If you check each link in that chain, the lattice will hang straight and even.
Happy crocheting!