
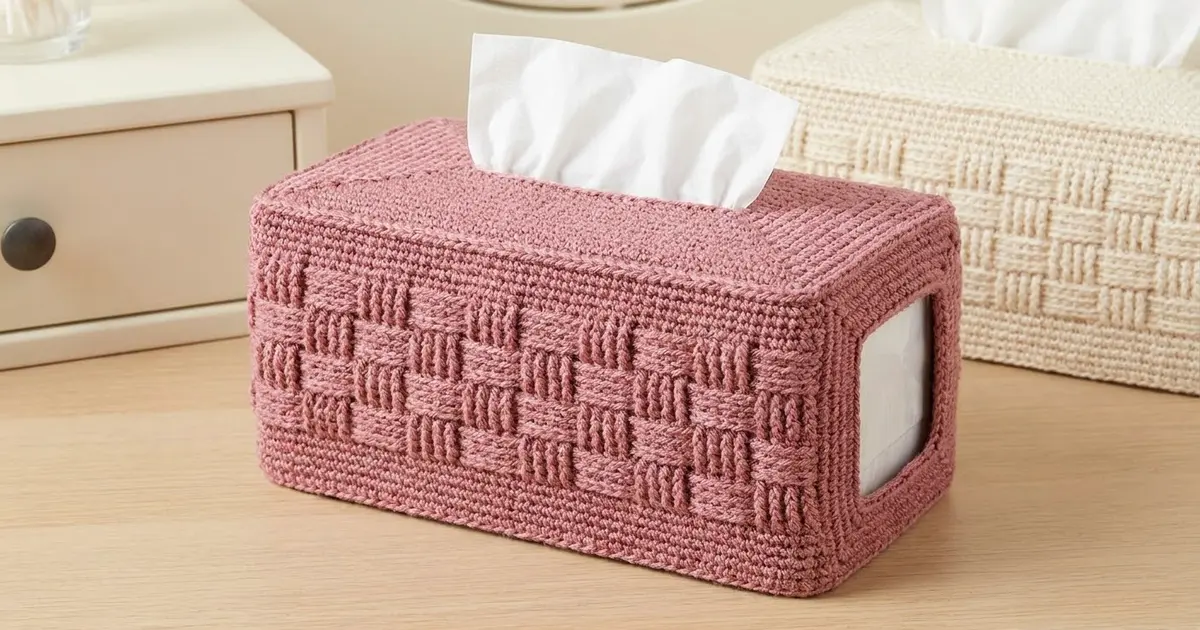
The Rosewood Basketweave Tissue Box Cover is a tidy, structured cover worked in one dusty rose shade. The sides are covered in a raised basketweave of post-stitch blocks, the top is a smooth single crochet panel with a narrow tissue slot, and one short end has a framed opening so you can slide a fresh box in without lifting the whole cover.
The look is soft but sturdy: chunky texture on the sides, a clean ridge where the top meets the walls, and a firm single crochet rim along the bottom edge. It suits a vanity, nightstand, or bathroom shelf.
This pattern uses US crochet terms. The finished cover measures about 10 in (25.4 cm) long, 5 in (12.7 cm) wide, and 4.5 in (11.4 cm) tall. It fits rectangular tissue boxes up to about 9.5 x 4.75 x 4.25 in (24.1 x 12.1 x 10.8 cm).
Construction is seamless. You work the top panel in rounds outward from a chain ring that becomes the slot. Then you join new yarn and work the walls downward in rounds, switching to turned rows for six rows to form the end opening. A rim round and an edging around the opening finish the piece.
Finished Size and Construction
- Finished size: 10 x 5 x 4.5 in (25.4 x 12.7 x 11.4 cm)
- Skill level: Intermediate
- Terminology: US
- Yarn weight: Bulky (#5)
- Hook: 6.0 mm (US J-10)
- Number of pieces: 1 (seamless)
- Layout: Top panel plus four walls, worked as one piece; open underside
- Top panel size: 10 x 5 in (25.4 x 12.7 cm)
- Slot: about 5.5 x 0.5 in (14.0 x 1.3 cm)
- End opening: about 3.7 in (9.4 cm) wide x 2.7 in (6.9 cm) tall
- Height before rim: 4.25 in (10.8 cm)
- Rim (border) depth: about 0.25 in (0.6 cm)
Materials
Choose a bulky (#5) cotton or cotton-blend yarn with good stitch definition. A plied or chainette yarn shows the basketweave best. Avoid fuzzy or very stretchy yarns, because the cover needs to hold its box shape.
- Dusty Rose: 250 g, about 300 m (328 yd)
This amount includes a margin of about 15%, because post stitches use more yarn than standard stitches and tension varies from one crocheter to another.
Tools:
- 6.0 mm (US J-10) crochet hook
- Tapestry needle
- 5 locking stitch markers
- Scissors
- Tape measure
- Spray bottle
- A tissue box or cardboard form for blocking
Abbreviations (US Terms)
- ch – chain
- sl st – slip stitch
- sc – single crochet
- dc – double crochet
- BLO – back loop only
- st(s) – stitch(es)
- rnd(s) – round(s)
- RS / WS – right side / wrong side
- rep – repeat
Special stitches:
- FPdc (front post double crochet): Yarn over, insert hook from front to back to front around the post of the stitch below, yarn over and pull up a loop, [yarn over, pull through 2 loops] twice.
- BPdc (back post double crochet): Yarn over, insert hook from back to front to back around the post of the stitch below, yarn over and pull up a loop, [yarn over, pull through 2 loops] twice.
Pattern notes: The ch 1 or ch 2 at the start of a round or row never counts as a stitch. Work the first stitch into the same stitch as the join. Do not turn at the end of rounds unless the pattern tells you to.
Gauge and Checkpoints
- Single crochet: 12 sts and 14 rnds = 4 in (10.2 cm)
- Basketweave (post stitches): 12 sts and 9 rnds = 4 in (10.2 cm)
- One basketweave block: 5 sts x 2 rnds, about 1.7 x 0.9 in (4.3 x 2.3 cm)
Because this is a single piece, the top panel is your test piece. Make it first and measure it before you start the walls.
Checkpoints:
- After Top Rnd 1: about 6 x 1 in (15.2 x 2.5 cm)
- After Top Rnd 4: about 8 x 3 in (20.3 x 7.6 cm)
- After Top Rnd 7: 10 x 5 in (25.4 x 12.7 cm), measured corner to corner
- After Wall Rnd 4: wall height about 1.6 in (4.1 cm)
- After Wall Row 9: wall height about 3.75 in (9.5 cm)
- After Wall Rnd 10: wall height 4.25 in (10.8 cm)
If the top panel is too big by more than 0.25 in (0.6 cm) on the long side, rework it with a 5.5 mm hook. If it is too small, use a 6.5 mm hook. Do not change the stitch counts, because the walls depend on exactly 90 stitches.
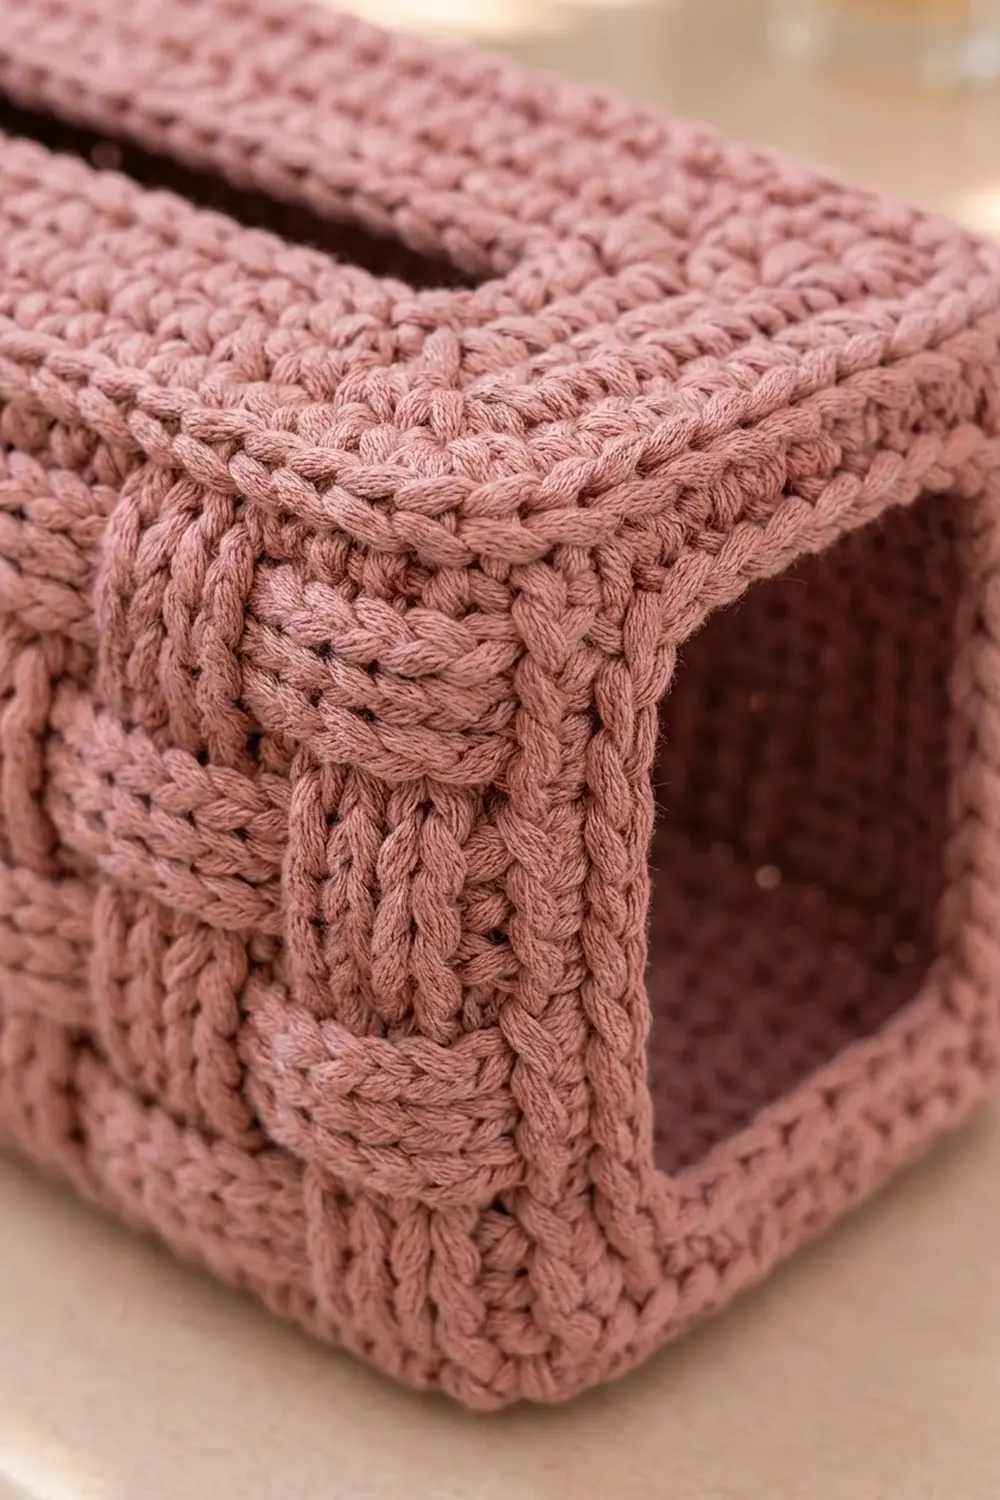
Top Panel
The top is worked in joined rounds around a chain ring, and the ring forms the tissue slot. Each round has 4 corner stitches (the center sc of each 3-sc group). Place a marker in each corner stitch and move it up every round.
Foundation: Ch 34 and join with a sl st to the first ch to form a ring, taking care not to twist it. Lay the ring flat as a long, narrow loop.
Rnd 1: Ch 1, 3 sc in first ch (corner group), sc in next 15 ch, 3 sc in each of next 2 ch (two corner groups), sc in next 15 ch, 3 sc in last ch (corner group), sl st to first sc. (42 sts)
Each long side now has 19 sts and each short side has 4 sts, counting both corner stitches. Check: 2 x 19 + 2 x 4 − 4 shared corners = 42.
Rnd 2: Ch 1, sc in same st, *3 sc in corner st, sc in each st to next corner st; rep from * 3 more times, ending the last rep with sc in each st to end, sl st to first sc. (50 sts)
Rnds 3–7: Rep Rnd 2. Each round adds 8 sts, 2 at each corner.
- Rnd 3: 58 sts
- Rnd 4: 66 sts
- Rnd 5: 74 sts
- Rnd 6: 82 sts
- Rnd 7: 90 sts
After Rnd 7, each long side has 31 sts and each short side has 16 sts, counting both corners. Check: 2 x 31 + 2 x 16 − 4 = 90.
Fasten off and weave the starting tail in around the slot. Measure: the panel should be 10 x 5 in (25.4 x 12.7 cm).
Walls
For the walls, each of the 90 stitches belongs to only one side: 30 sts per long side and 15 sts per short side (2 x 30 + 2 x 15 = 90). Each side owns the corner stitch at its start.
Joining position: Hold the top panel with the RS facing you. Pick one short side to be the opening end. Moving in your working direction, start at the corner stitch of that short side (stitch 1 of 16). Skip it and the next stitch, then join yarn in the BLO of the 3rd stitch. This stitch is Wall stitch 1.
Wall stitches 1–11 will become the opening. Stitches 12–13 and 89–90 frame it, so the opening end holds sts 89–90 plus sts 1–13, for 15 sts in all.
Rnd 1 (ridge): Ch 1, sc in BLO of same st and in BLO of each st around, sl st to first sc. (90 sts)
The unworked front loops form a crisp ridge on the outside, and the walls begin to fold down.
Rnd 2: Ch 2, dc in each st around, sl st to first dc. (90 sts)
Rnd 3 (Pattern A): Ch 2, [5 FPdc, 5 BPdc] 9 times, sl st to first FPdc. (90 sts; 18 blocks)
Pattern A places FPdc blocks over sts 1–5, 11–15, 21–25, and so on. Pattern B is the reverse.
End Opening Rows
Now work in turned rows from one side of the opening to the other. On WS rows, a stitch that should show as FP on the outside is worked as a BPdc, and the other way around. Every row has 79 sts (sts 12–90).
Set-up: Sl st loosely in the next 10 sts (sts 2–11). Sts 1–11 of Rnd 3 stay unworked and form the top of the opening.
Row 4 (RS, Pattern A): Ch 2, beginning in st 12: 4 FPdc, [5 BPdc, 5 FPdc] 7 times, 5 BPdc, turn. (79 sts)
Row 5 (WS, Pattern B): Ch 2, [5 BPdc, 5 FPdc] 7 times, 5 BPdc, 4 FPdc, turn. (79 sts)
Row 6 (RS, Pattern B): Ch 2, 4 BPdc, [5 FPdc, 5 BPdc] 7 times, 5 FPdc, turn. (79 sts)
Row 7 (WS, Pattern A): Ch 2, [5 FPdc, 5 BPdc] 7 times, 5 FPdc, 4 BPdc, turn. (79 sts)
Row 8 (RS, Pattern A): Rep Row 4. (79 sts)
Row 9 (WS, Pattern B): Rep Row 5, but do not turn yet. (79 sts)
The basketweave bands now run: Rnds 3–4 Pattern A, Rows 5–6 Pattern B, Rows 7–8 Pattern A. Row 9 starts the last Pattern B band.
Closing the Opening
Rnd 10 (RS, Pattern B): Ch 2, turn, 4 BPdc, [5 FPdc, 5 BPdc] 7 times, 5 FPdc, ch 11 loosely, sl st to first BPdc. (79 sts + 11 ch)
The ch 11 bridges the bottom of the opening. Chain loosely so the chain matches the width of 11 stitches, about 3.7 in (9.4 cm). The opening is now framed on all four sides.
Border: Bottom Rim and Opening Edging
Border gauge: 12 sc = 4 in (10.2 cm), the same as the top panel.
Rnd 11 (rim): Ch 1, sc in same st and in each of next 78 sts, sc in each of next 11 ch, sl st to first sc. (79 + 11 = 90 sts)
Counts per side: long side 30, closed short end 15, long side 30, and opening end 15 (2 + 11 + 2). Fasten off.
Why the math works: The rim has exactly the same 90 stitches as the last round of the top panel, so the bottom edge matches the top edge stitch for stitch. At 3 sts per inch, 30 sts give 10 in (25.4 cm) and 15 sts give 5 in (12.7 cm). The walls neither flare out nor pull in.
Opening edging: With the RS facing, join yarn at the top right corner of the opening.
- Top edge: Work 11 sc across the tops of Rnd 3 sts 1–11, inserting the hook beneath the slip stitches. (11 sts)
- Side edge: Work 8 sc down the row ends of Rows 4–9: 1 sc in each row end, plus 1 extra sc in the 2nd and 5th row ends. (8 sts)
- Bottom edge: Work 11 sc into the free loops of the ch 11. (11 sts)
- Second side edge: Work 8 sc up the row ends, placed the same way. (8 sts)
Sl st to first sc. (38 sts) Fasten off.
Six dc rows measure about 2.7 in (6.9 cm), and 8 sc at 3 sts per inch also measure about 2.7 in (6.9 cm). That is why each side takes 8 stitches rather than 6 or 12. Do not add stitches at the corners of the opening; the edge should stay taut.
Weave in all ends on the WS.
Final Blocking
- Turn the cover RS out and push the corners into shape from the inside.
- Slide a tissue box inside, or a cardboard form cut to 10 x 5 x 4.5 in (25.4 x 12.7 x 11.4 cm).
- Mist the whole cover with water until it is damp but not soaked.
- Pat the top panel flat and smooth the slot into a straight, even line.
- Pinch the ridge along each top edge so it stands sharp.
- Straighten the basketweave columns with your fingers so each block sits square.
- Square the opening and press its edging flat.
- Let the cover dry completely on the form, which takes about 24 hours.
Final Quality-Control Checklist
- The top panel measures 10 x 5 in (25.4 x 12.7 cm) and lies flat.
- The slot is centered and about 5.5 in (14.0 cm) long.
- The ridge from Wall Rnd 1 runs evenly along all four top edges.
- The walls are 4.5 in (11.4 cm) tall all the way around.
- The basketweave blocks alternate in four bands of 2 rnds each.
- The opening is framed on all four sides and measures about 3.7 x 2.7 in (9.4 x 6.9 cm).
- The rim has 90 sts and the opening edging has 38 sts.
- All ends are woven in and can’t be seen from the RS.
Troubleshooting
Top panel cups or ruffles: Cupping means your tension is too tight at the corners; ruffling means it is too loose. Check that each round adds exactly 8 sts, then adjust the hook size.
Slot is twisted: The foundation ring was twisted when you joined it. Restart the ring.
Basketweave looks like ribs, not blocks: You missed a pattern switch. Each band is exactly 2 rnds tall, and then A and B swap.
Blocks shift on WS rows: On WS rows, work the FPdc stitches as BPdc and the BPdc stitches as FPdc. Count your stitches against the written sequence.
Opening edges are wavy: There are too many stitches on the sides. Work exactly 8 sc per side.
Bottom of the opening sags: The ch 11 is too loose. Redo it with tighter chains.
Cover is too loose on the box: Use a hook 0.5 mm smaller for the walls only.
Care
Hand wash in cool water with a mild detergent, then reshape the cover on a box or form and let it dry. Do not tumble dry, because heat can shrink cotton and distort the box shape.
Final Notes
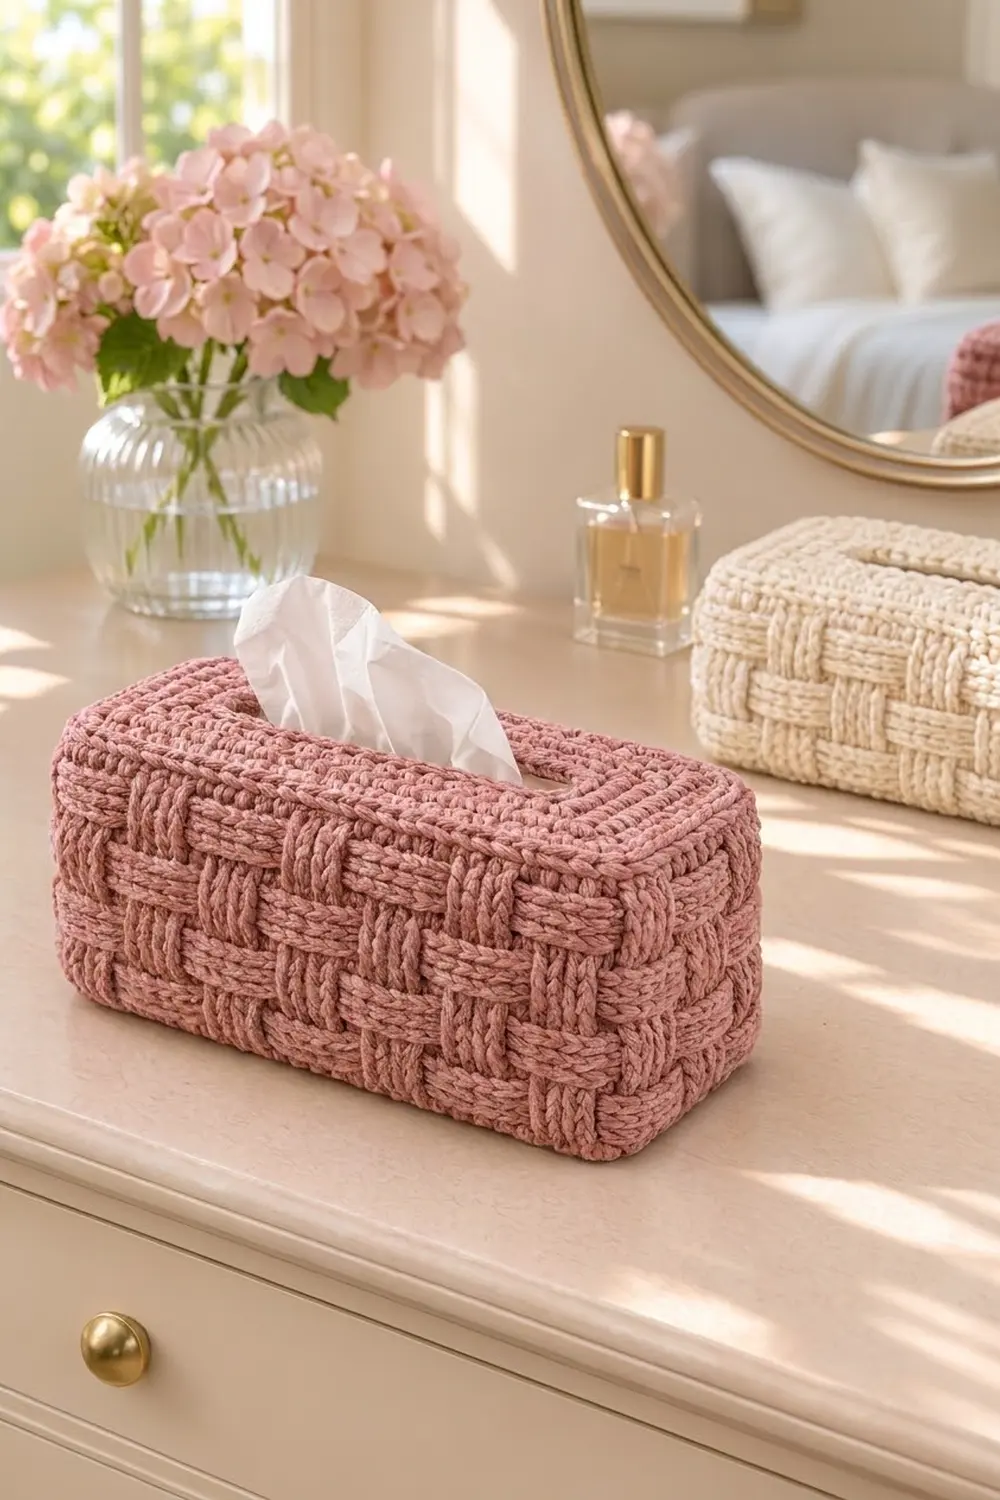
The measurement chain is simple. The top panel grows to 90 sts and measures 10 x 5 in (25.4 x 12.7 cm). The walls keep those 90 sts from the ridge round to the rim, divided 30-15-30-15 around the box. Nine dc-height rounds plus the ridge round bring the walls to 4.25 in (10.8 cm), and the rim round adds about 0.25 in (0.6 cm) for a total height of 4.5 in (11.4 cm). The end opening uses 11 sts and 6 rows, and its 38-stitch edging keeps it square.
Measure at each checkpoint, and the finished cover will slide neatly over your tissue box.
Happy crocheting!