

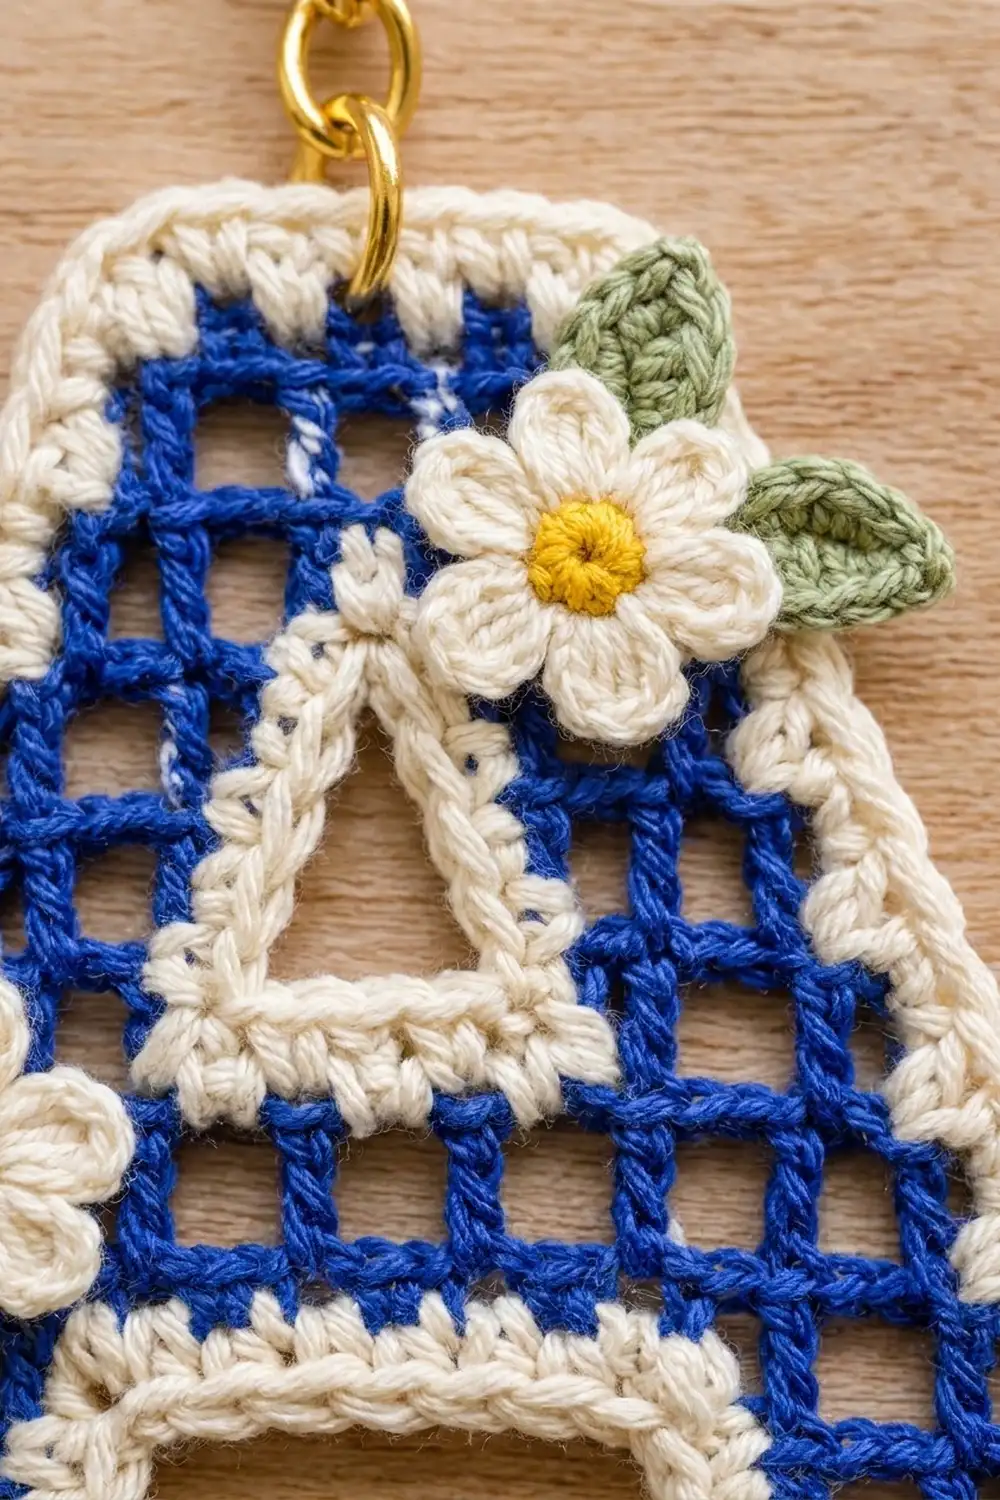
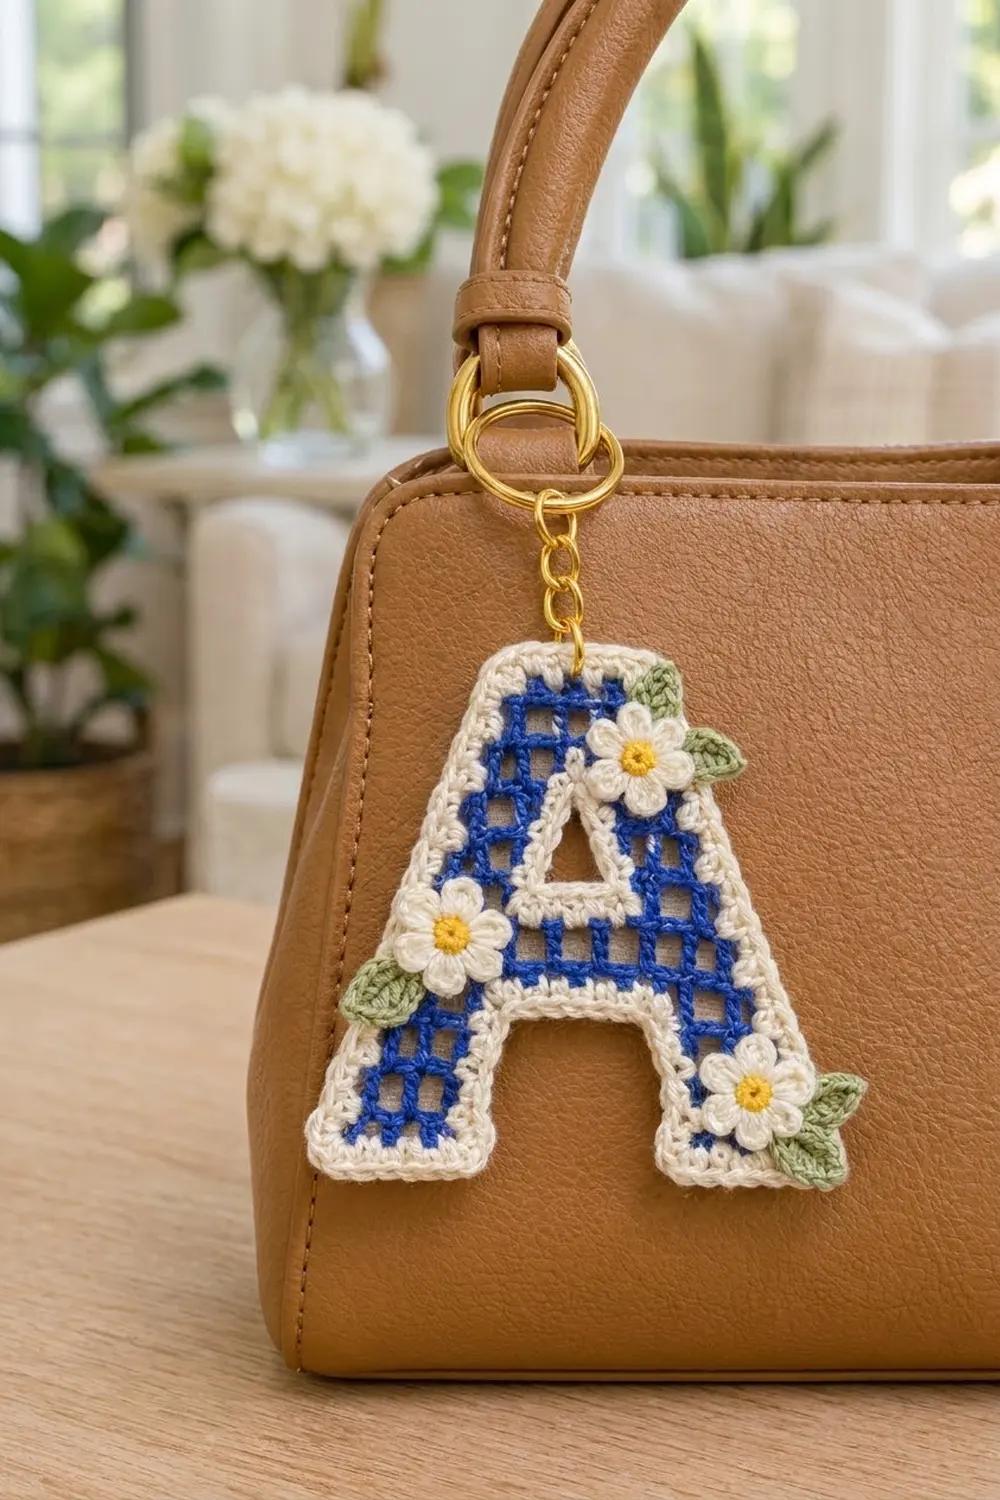
This little letter A is a bag charm with a lot of character. The body is an open filet grid in royal blue. A thick cream single crochet border frames it and also outlines a small triangular window near the top of the letter. Three tiny cream daisies with yellow centers and soft green leaves sit along the edges. A gold split ring on a short chain lets the charm hang from a bag handle or a set of keys.
The style is crisp and graphic, with a cottage-garden touch. The blue and cream give it a classic, almost tile-like look, and the flowers soften the outline.
This pattern uses US crochet terms. The finished letter measures 3.7 in (9.4 cm) wide at the base and 3.9 in (9.9 cm) tall, not counting the hardware.
The letter is one single piece. You work the two legs separately, then join them with a chain bridge to form the crossbar. The work splits again around the window, bridges once more, and finishes with the top. Next you add a two-round cream border inside the window and around the outside. Finally, you make the flowers and leaves, sew them on, and attach the keyring.
Finished Size and Construction
- Finished size: 3.7 in (9.4 cm) wide x 3.9 in (9.9 cm) tall
- Skill level: Intermediate (filet shaping, chain bridges)
- Terminology: US
- Yarn weight: Sport (#2) cotton
- Hook: 2.5 mm
- Number of pieces: 1 letter, plus 3 flowers and 5 leaves as appliqués
- Layout: a single letter A, with no assembly of multiple motifs
- Size before border: 3.3 in (8.4 cm) wide x 3.5 in (8.9 cm) tall
- Border depth: 2 rounds of sc, about 0.2 in (0.5 cm) on every edge
Materials
Choose a smooth, mercerized sport-weight cotton. It shows the mesh clearly, holds its shape on a bag, and does not fuzz with handling. Pick a strong, saturated blue so the grid stands out against the cream.
- Royal blue (A): 5 g / about 15 m
- Cream (B): 5 g / about 15 m
- Yellow (C): 1 g / about 3 m
- Sage green (D): 1 g / about 3 m
Tools:
- 2.5 mm crochet hook
- Tapestry needle
- Gold split keyring, 1 in (2.5 cm), with a short chain and jump ring
- Small pliers for the jump ring
- Stitch markers (2)
- Blocking mat and rust-proof pins
- Scissors
All yarn amounts include extra for a gauge test and for weaving in ends.
Abbreviations (US Terms)
- ch – chain
- sl st – slip stitch
- sc – single crochet
- hdc – half double crochet
- dc – double crochet
- sc2tog – single crochet 2 together
- sk – skip
- sp – space
- st(s) – stitch(es)
- RS / WS – right side / wrong side
Special stitch – Mesh: one mesh is (ch 1, sk 1, dc in next st). A row of N meshes has N + 1 dc and N ch-1 spaces, so 2N + 1 sts in total. The ch 4 at the start of a row counts as the first dc plus ch 1.
Mesh decrease at the start of a row: sl st in the first ch-1 sp and in the next dc, then ch 4.
Mesh decrease at the end of a row: stop at the second-to-last dc and leave the last mesh unworked.
Gauge and Checkpoints
Gauge: 10 meshes = 3 in (7.6 cm) wide; 10 rows = 3.5 in (8.9 cm) tall. One mesh is 0.3 in (0.8 cm) wide and one row is 0.35 in (0.9 cm) tall.
Crochet Rows 1–2 of one leg first and measure them before going on. This is your gauge test.
- After Leg Row 2: 1.2 in (3.0 cm) wide x 0.7 in (1.8 cm) tall.
- After Row 5: 2.7 in (6.9 cm) wide x 1.75 in (4.4 cm) tall.
- After Row 10: 3.3 in (8.4 cm) at the base, 1.5 in (3.8 cm) across the top, 3.5 in (8.9 cm) tall.
- After the border: 3.7 in (9.4 cm) x 3.9 in (9.9 cm).
If your leg is too wide, change to a 2.25 mm hook. If it is too narrow, change to a 2.75 mm hook. If only the height is off, pull up the dc loop to a different height instead of changing hooks.
Main Pattern: The Filet Letter
The letter is a grid that narrows in steps:
- Rows 1–2: two legs of 4 meshes each, with a 3-mesh gap (11 meshes across).
- Row 3: legs of 3 meshes each.
- Rows 4–5: 9 meshes.
- Rows 6–8: 7 meshes, with a 3-mesh window in Rows 6–7.
- Rows 9–10: 5 meshes.
Leg A (right leg)
With A, ch 12.
Row 1 (RS): Dc in 6th ch from hook, (ch 1, sk 1 ch, dc in next ch) 3 times. Turn. (4 meshes; 5 dc, 9 sts)
Row 2: Ch 4, dc in next dc, (ch 1, dc in next dc) twice, ch 1, dc in 3rd ch of the skipped beginning ch. Turn. (4 meshes)
Row 3 (decrease at start): Sl st in first ch-1 sp and next dc, ch 4, dc in next dc, ch 1, dc in next dc, ch 1, dc in 3rd ch of turning ch. (3 meshes; 4 dc, 7 sts) Fasten off.
Leg B (left leg)
With A, ch 12. Work Rows 1–2 exactly as for Leg A.
Row 3 (decrease at end): Ch 4, dc in next dc, (ch 1, dc in next dc) twice. Leave the last mesh unworked. (3 meshes) Do not fasten off.
Crossbar
Lay both legs RS up, with Leg B on the left and the decreased edges on the outside.
Row 4 (bridge row): Ch 4, turn, dc in next dc, ch 1, dc in next dc, ch 1, dc in 3rd ch of turning ch. This is the inner edge of Leg B. Ch 5 for the bridge. Dc in the last dc of Leg A Row 3 (its inner edge), (ch 1, dc in next dc) twice, ch 1, dc in 3rd ch of turning ch. Turn. (3 meshes + ch-5 bridge + 3 meshes; 8 dc)
Row 5: Ch 4, dc in next dc, (ch 1, dc in next dc) twice. Over the bridge: (ch 1, sk 1 ch, dc in next ch) twice, ch 1, sk 1 ch, dc in next dc. Then (ch 1, dc in next dc) twice, ch 1, dc in 3rd ch of turning ch. Turn. (9 meshes; 10 dc, 19 sts)
Window Sides
Row 6, Side 1: Sl st in first ch-1 sp and next dc (decrease), ch 4, dc in next dc, ch 1, dc in next dc. Turn. (2 meshes)
Row 7, Side 1: Ch 4, dc in next dc, ch 1, dc in 3rd ch of turning ch. (2 meshes) Do not fasten off. Put the live loop on a marker.
Row 6, Side 2: On Row 5, skip the 3 meshes after Side 1; this gap is the window. Join A with a sl st in the next dc, then ch 4, dc in next dc, ch 1, dc in next dc. Leave the last mesh unworked (decrease). Turn. (2 meshes)
Row 7, Side 2: Ch 4, dc in next dc, ch 1, dc in 3rd ch of turning ch. (2 meshes) Fasten off.
The window is now 3 meshes wide and 2 rows tall: 0.9 in (2.3 cm) x 0.7 in (1.8 cm).
Top
Row 8: Put the live loop of Side 1 back on the hook. Ch 4, turn, dc in next dc, ch 1, dc in 3rd ch of turning ch. Ch 5 for the bridge. Dc in the last dc of Side 2 Row 7, ch 1, dc in next dc, ch 1, dc in 3rd ch of turning ch. Turn. (2 meshes + ch-5 bridge + 2 meshes; 6 dc)
Row 9: Sl st in first ch-1 sp and next dc (decrease), ch 4, dc in next dc. Over the bridge: (ch 1, sk 1 ch, dc in next ch) twice, ch 1, sk 1 ch, dc in next dc. Ch 1, dc in next dc. Leave the last mesh unworked. Turn. (5 meshes; 6 dc, 11 sts)
Row 10: Ch 4, dc in next dc, (ch 1, dc in next dc) 3 times, ch 1, dc in 3rd ch of turning ch. (5 meshes) Fasten off. Weave in all A ends along the dc posts.
Check: the letter should be 3.3 in (8.4 cm) wide at the base and 3.5 in (8.9 cm) tall.
Window Border (B)
Round 1: With RS facing, join B at a bottom corner of the window. Work 2 sc per mesh along the bottom and along the top (the underside of the Row 8 bridge). Work 2 sc around each row-end post on the sides. That gives 6 sc along the bottom, 4 sc up one side, 6 sc across the top and 4 sc down the other side. Sl st to first sc. (20 sc)
Round 2 (triangle shaping): Ch 1.
- Bottom: sc in each of 6 sts.
- First side, going up: sc, hdc, dc, dc.
- Top: dc, hdc, sc, sc, hdc, dc.
- Second side, going down: dc, dc, hdc, sc.
Sl st to first sc. (20 sts) Fasten off.
The taller stitches fill the two upper corners, so the opening becomes a small triangle pointing up. It is about 0.5 in (1.3 cm) wide at the base and 0.4 in (1.0 cm) tall.
Flowers (make 3)
With C, make a magic ring.
Round 1: 5 sc in ring, sl st to first sc. Fasten off. (5 sc)
Round 2: Join B in any sc. In each sc around: (sl st, ch 2, 2 dc, ch 2, sl st). Fasten off. (5 petals)
Each flower is about 0.75 in (1.9 cm) across.
Leaves (make 5)
With D, ch 5. Sl st in 2nd ch from hook, sc in next ch, hdc in next ch, sc in last ch. Ch 1, rotate, and work along the other side of the chain: sc, hdc, sc, sl st. Fasten off, leaving a tail for sewing. Each leaf is about 0.5 in (1.3 cm) long.
Border
Border gauge: about 6–7 sc per 1 in (2.5 cm). That works out to 2 sc per mesh (0.3 in / 0.8 cm) and 2 sc per row end (0.35 in / 0.9 cm).
The outline has six sections:
- right outer side
- top
- left outer side
- left leg bottom
- inner arch (up Leg B, under the Row 4 bridge, down Leg A)
- right leg bottom
There are six outer corners: the outer and inner bottom corners of each leg, plus the two top corners.
Round 1: With RS facing, join B at the bottom-outer corner of the right leg. Work 2 sc around each row-end post. Work 2 sc per mesh along every horizontal edge: the leg bottoms, the step ledges, the top and the underside of the bridge. Add 1 extra sc at each of the 6 corners. Sl st to first sc.
- Right side: 10 row ends + 3 ledges = 26 sc
- Top: 10 sc + 2 corner sc = 12 sc
- Left side: 26 sc
- Left leg bottom: 8 sc + 2 corner sc = 10 sc
- Inner arch: 6 row ends + 3-mesh bridge = 18 sc
- Right leg bottom: 8 sc + 2 corner sc = 10 sc
- Total: 102 sc
Round 2: Ch 1. Sc in each st, with these changes:
- Work 2 sc in each of the 6 corner sts.
- Sc2tog over the inside corner of each of the 6 step ledges.
- Sc2tog at each of the 2 corners where the arch meets the legs.
Sl st to first sc.
- Right side: 26 − 3 = 23 sts
- Top: 12 + 2 = 14 sts
- Left side: 26 − 3 = 23 sts
- Left leg bottom: 10 + 2 = 12 sts
- Inner arch: 18 − 2 = 16 sts
- Right leg bottom: 10 + 2 = 12 sts
- Total: 100 sts
Fasten off and weave in the ends.
Why the math works: Each mesh is 2 sts wide, so 2 sc per mesh lies flat. A row end is only slightly taller than a mesh is wide, so 2 sc covers it without ruffling. The corner increases turn the points cleanly. The sc2tog at each step pulls the staircase edge into a smooth diagonal, so the stepped grid reads as a true slanted A.
Final Blocking
- Soak the letter in cool water, then press out the extra water in a towel.
- Pin it RS up on the mat to 3.7 in (9.4 cm) wide x 3.9 in (9.9 cm) tall.
- Pin along each slanted side so it runs in a straight line from the leg corner to the top corner.
- Square up the mesh with your fingertips so the grid lines run straight.
- Pin the window into its triangle shape.
- Let it dry completely before sewing on the appliqués.
- Appliqués:
- Sew flower 1 to the right slanted side near the top, with 2 leaves tucked behind it.
- Sew flower 2 to the outer edge of the left leg at about Row 4, with 1 leaf.
- Sew flower 3 to the bottom-outer corner of the right leg, with 2 leaves.
- Stitch only through the cream border and the flower centers so the mesh stays open.
- Hardware: Open the jump ring with pliers and thread it through the center of the top border. Attach the chain and split ring, then close the jump ring firmly.
Final Quality-Control Checklist
- Letter measures 3.7 in (9.4 cm) x 3.9 in (9.9 cm).
- Row 5 has 9 meshes; Row 10 has 5 meshes.
- Both bridges sit straight, with 3 meshes worked over each.
- Window border has 20 sts in each round and forms a triangle pointing up.
- Outer border: Round 1 = 102 sc, Round 2 = 100 sts.
- Slanted sides are straight, not stepped.
- All 3 flowers and 5 leaves are secure, and the jump ring is fully closed.
- All ends are hidden in dc posts or the border.
Troubleshooting
- Legs lean or twist: Check that both legs lie RS up before you work Row 4.
- Bridge sags: Your ch 5 is too loose. Redo it with tighter tension, or use a smaller hook just for the chain.
- Border ruffles: Work 2 sc per row end, not 3, and check your tension.
- Border cups: If the edge visibly pulls in, add 1 sc on the long sides only, then recheck the size.
- Slant looks stair-stepped: Make sure you worked the sc2tog at all 6 ledges in Round 2, and pin firmly while blocking.
- Window stays square: Make the dc stitches in Round 2 of the window border a bit taller, and pin the corners closed while the letter dries.
- Petals flop: Pull each ch 2 snug before you work the dc.
Care
Spot clean or hand wash in cool water and lay flat to dry. Take off the metal keyring first so it can’t leave rust or tarnish marks.
Final Notes
All the measurements build from the gauge. Each mesh is 0.3 in (0.8 cm) and each row is 0.35 in (0.9 cm), so 11 meshes and 10 rows give 3.3 in (8.4 cm) x 3.5 in (8.9 cm). Two rounds of cream border add 0.2 in (0.5 cm) on every side, for a finished letter of 3.7 in (9.4 cm) x 3.9 in (9.9 cm). Check your first leg, follow the stitch counts, and the rest of the A will come out right.
Happy crocheting!