
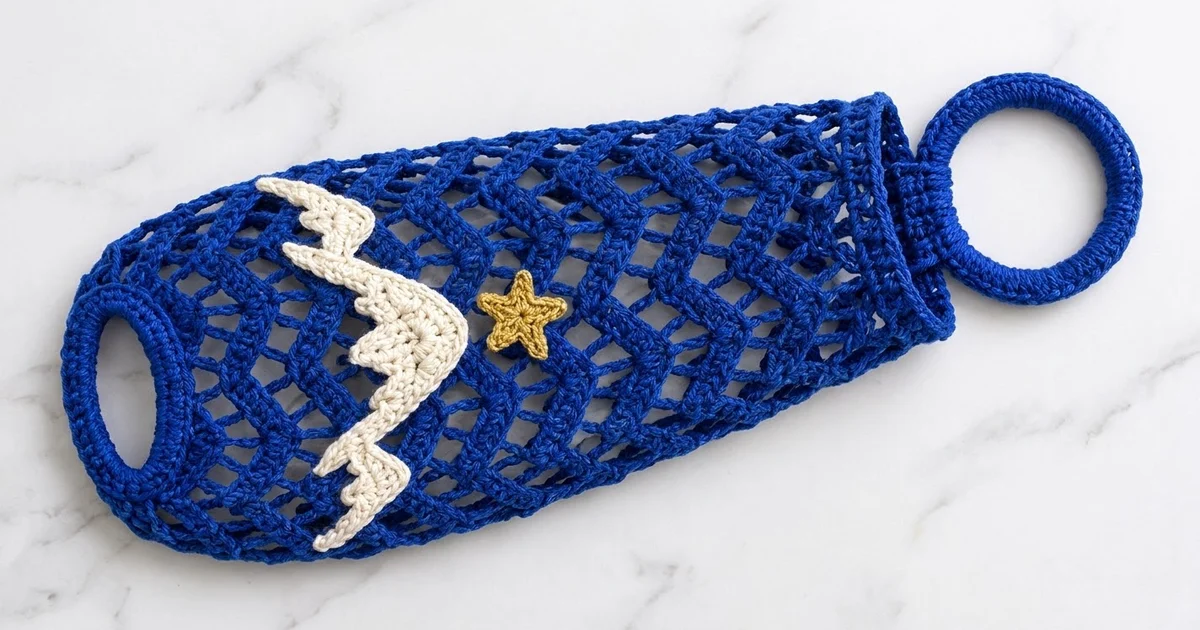
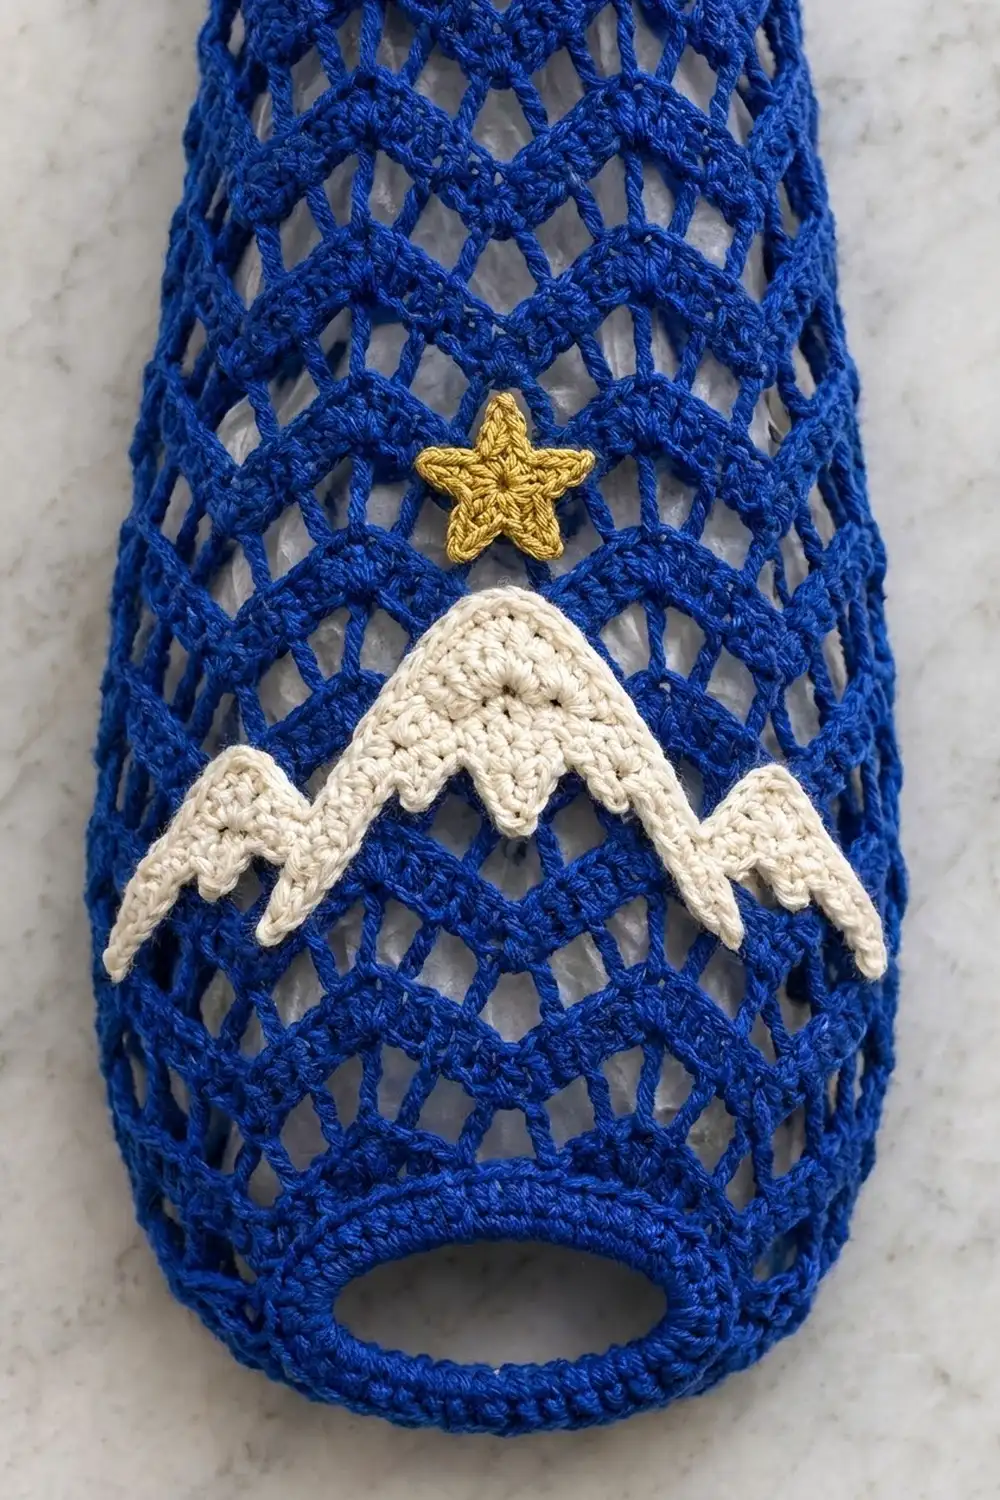
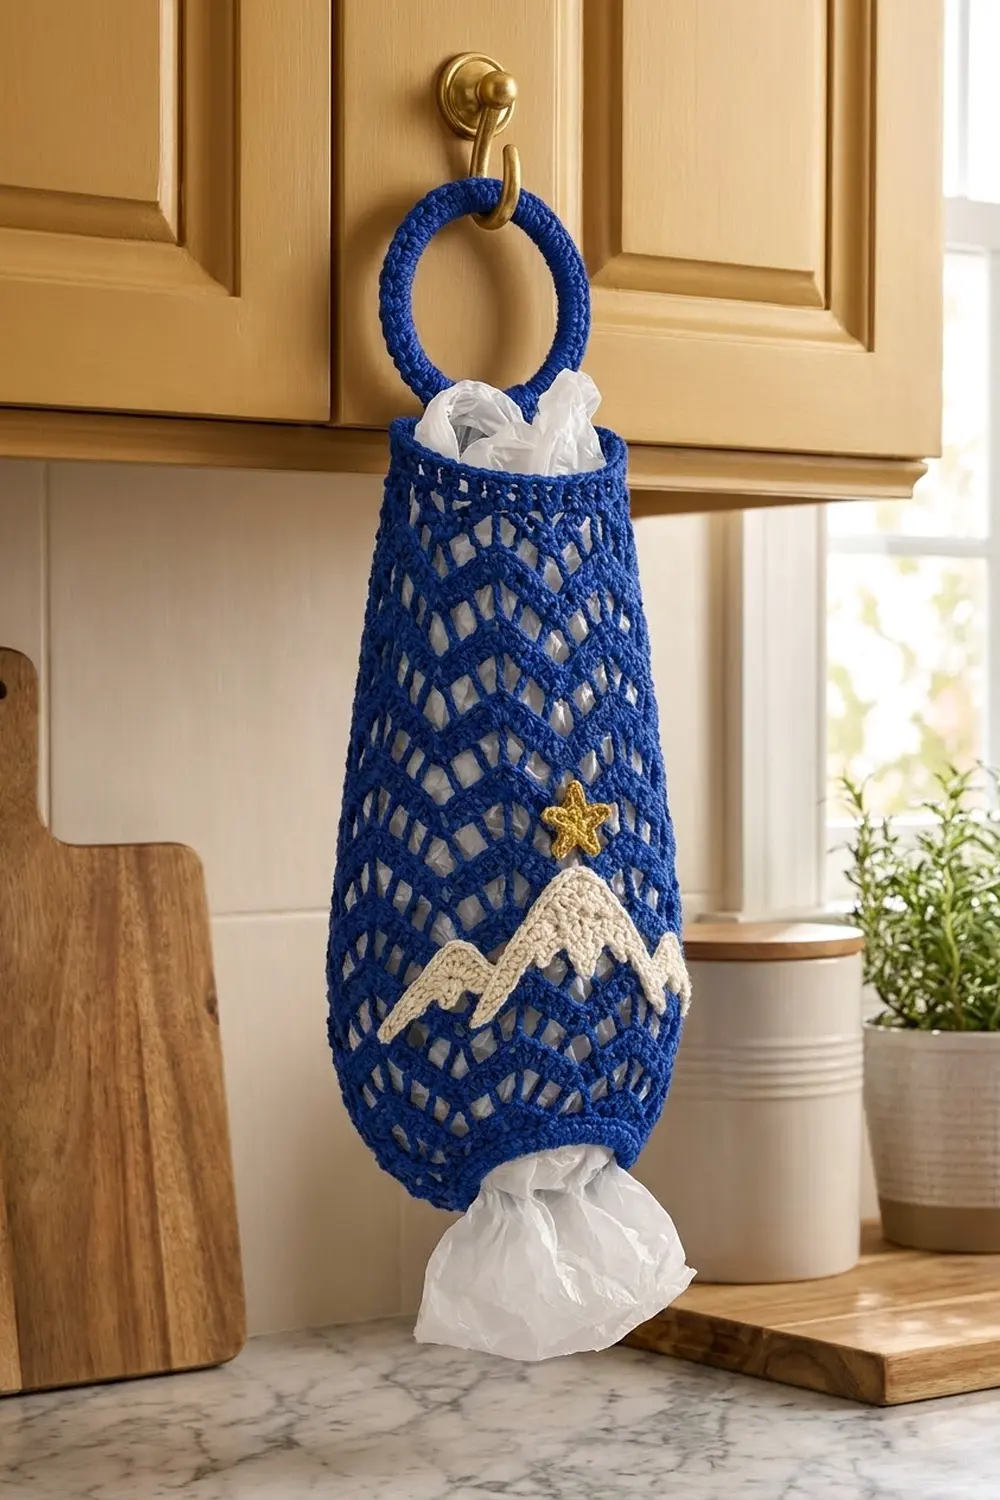
Plastic bags end up all over a kitchen, and this holder gives them one tidy home. The tall bottle-shaped body is worked in an open chevron mesh. The open mesh shows what’s inside and stretches to hold a big stack of bags. A solid band finishes the top, and a firm oval rim around the bottom opening lets you pull bags out one at a time.
The main color is royal blue. On the front, a cream mountain appliqué has jagged snowy peaks, with a small gold star above the summit. The look is wintry and a little festive, but it stays calm enough to leave up all year. A deep burgundy body with the same cream and gold trims works just as well.
This pattern uses US crochet terms throughout. The body measures 7 in (17.8 cm) wide at the base of the mesh and 7.7 in (19.6 cm) at its widest. It is 14.1 in (35.8 cm) tall. With the hanging ring, the total length is about 18.5 in (47.0 cm).
You start at the bottom opening and work upward in joined rounds. First comes a solid single-crochet base, then 20 rounds of chevron mesh, then a leveling round and a solid top border. The ring, tab, mountain and star are made separately and sewn on after blocking.
Finished Size and Construction
- Finished size: body 7 in (17.8 cm) wide at the mesh base, 7.7 in (19.6 cm) at the widest point, 5.25 in (13.3 cm) across the top rim; body height 14.1 in (35.8 cm); about 18.5 in (47.0 cm) including the ring
- Skill level: Intermediate (lace worked in the round)
- Terminology: US
- Yarn weight: worsted (#4) cotton
- Hook: 4.5 mm (US 7)
- Number of pieces: 1 holder, made from 4 components (body, ring with tab, mountain, star)
- Layout: a single hanging piece, not a grid of motifs
- Body flattened width before border: 5.25 in (13.3 cm) at the top after the leveling round
- Border depth: top band about 1.0 in (2.5 cm); bottom opening edging is 1 round
Materials
Use a smooth, mercerized or matte worsted-weight cotton. Cotton holds the chevron shape and won’t stretch out under the weight of the bags. Avoid fuzzy yarns, because they blur the mesh.
- Royal blue (main color): 110 g, about 170 m
- Cream (mountain): 15 g, about 23 m
- Gold (star): 4 g, about 6 m
These quantities include a margin of roughly 10–15% for gauge swatching and differences between yarns.
Tools:
- 4.5 mm (US 7) crochet hook
- One plastic or wooden ring, 3 in (7.6 cm) outer diameter
- 4 stitch markers
- Tapestry needle
- Rust-proof pins
- Measuring tape
- Blocking mat and spray bottle
Abbreviations (US Terms)
- ch – chain
- sl st – slip stitch
- sc – single crochet
- hdc – half double crochet
- dc – double crochet
- tr – treble crochet
- sc2tog – single crochet 2 together
- sp(s) – space(s)
- st(s) – stitch(es)
- rep – repeat
Special stitches:
- V-peak: (dc, ch 2, dc) in the same st or sp.
- Wide V-peak: (dc, ch 3, dc) in the same sp.
- Valley cluster: [yarn over, insert hook in the first indicated sp, pull up a loop, yarn over, pull through 2 loops] twice, working the second leg in the second indicated sp. Yarn over and pull through all 3 loops.
Gauge and Checkpoints
- Solid sc: 16 sts × 18 rounds = 4 in (10.2 cm)
- Chevron mesh: 1 repeat = 2 in (5.1 cm) wide with V-peaks, 2.2 in (5.6 cm) with wide V-peaks. Each mesh round is about 0.6 in (1.5 cm) tall, so 4 mesh rounds = 2.4 in (6.1 cm).
Test first. Work Base Rounds 1–5 and Mesh Rounds 1–4, then measure. These stitches become part of the body, so nothing is wasted.
Checkpoints:
- After Base Rnd 5: the circumference is 14 in (35.6 cm) and the flattened width is 7 in (17.8 cm). The base band is 1.1 in (2.8 cm) tall.
- After Mesh Rnd 6: the body is 4.7 in (11.9 cm) tall from the opening edge.
- After Mesh Rnd 16: the body is 10.7 in (27.2 cm) tall and about 7.7 in (19.6 cm) wide flattened.
- After Mesh Rnd 20: the body is 13.1 in (33.3 cm) tall.
- After Top Rnd 1: the flattened top is 5.25 in (13.3 cm) wide.
If you’re off: if the piece is more than 0.25 in (0.6 cm) too big at Checkpoint 1, go down to a 4.0 mm hook. If it’s too small, go up to a 5.0 mm hook. If the width matches but the mesh rounds come out short, loosen the chains rather than changing hooks.
Part 1: Base
With blue:
Foundation: ch 28 and join with a sl st to the first ch to form a ring. Take care not to twist the chain.
Rnd 1: ch 1, sc in each ch around, join to the first sc. (28 sts)
Rnd 2: ch 1, sc in the next 3 sts, 2 sc in the next st; rep from * 6 more times, join. (35 sts)
Rnd 3: ch 1, sc in the next 4 sts, 2 sc in the next st; rep 6 more times, join. (42 sts)
Rnd 4: ch 1, sc in the next 5 sts, 2 sc in the next st; rep 6 more times, join. (49 sts)
Rnd 5: ch 1, sc in the next 6 sts, 2 sc in the next st; rep 6 more times, join. (56 sts)
Each round adds 7 sts. A perfectly flat circle needs only about 5–6, so the extra stitches make the base flare slightly into a shallow dish. That is the angled rim you see around the opening. 56 sts divide into 7 repeats of 8 sts.
Part 2: Chevron Mesh
Each mesh repeat has 11 positions: 5 stitch tops (2 dc of the peak, 2 side dc and 1 valley stitch) plus 6 chains. In the repeat descriptions, the sps are named in order after the peak: sp a, sp c, sp e, sp g.
Mesh Rnd 1 (setup): sl st in the next st. Ch 3 (counts as dc), ch 2, dc in the same st [first V-peak made].
Ch 1, skip 1 st, dc in the next st, ch 1, skip 1 st, dc in the next st [valley], ch 1, skip 1 st, dc in the next st, ch 1, skip 1 st, V-peak in the next st; rep from * 5 more times. End the last repeat after the final ch 1, skipping the last st. Join to the 3rd ch of the beginning ch-3.
(7 repeats: 35 sts + 42 ch = 77 positions)
Mesh Rnd 2: sl st into the first ch-2 sp. Ch 3, (ch 2, dc) in the same sp.
Ch 1, dc in sp a, ch 1, valley cluster with legs in sp c and sp e (skipping the valley st between them), ch 1, dc in sp g, ch 1, V-peak in the next ch-2 sp; rep around, ending with ch 1, then join.
(35 sts + 42 ch = 77 positions)
The peaks push outward and the clusters pull the valleys together, so each round stacks into a V directly above the last one.
Mesh Rnds 3–6: rep Mesh Rnd 2. (77 positions each) This is Checkpoint 2.
Mesh Rnds 7–16: work as for Mesh Rnd 2, but use a wide V-peak in each peak sp. On Rnd 7, work the wide V-peaks into the ch-2 sps; from Rnd 8 on, work them into the ch-3 sps.
(7 repeats: 35 sts + 49 ch = 84 positions)
The extra chain in each peak widens every repeat from 2 in (5.1 cm) to 2.2 in (5.6 cm). That gives the body its bottle-like belly. This is Checkpoint 3.
Mesh Rnds 17–20: return to regular V-peaks. On Rnd 17, work each V-peak into a ch-3 sp; after that, work them into the ch-2 sps. (77 positions each) This is Checkpoint 4.
Part 3: Leveling Round
The chevron edge has to become a straight edge before the top band. You do this by grading stitch heights: short stitches over the peaks and tall stitches in the valleys.
Top Rnd 1: sl st into the first ch-2 sp, ch 1. Sc in the peak sp, hdc in sp a, dc in sp c, tr in the top of the valley cluster, dc in sp e, hdc in sp g; rep around, join.
(6 sts per repeat × 7 repeats = 42 sts)
The dc stitches on either side of each peak and valley are skipped on purpose. Going from 56 stitch-equivalents to 42 sts narrows the top. That makes the shoulder you see in the photo and helps keep the bags inside. This is Checkpoint 5.
Part 4: Ring and Tab
Ring: with blue, work 64 sc over the 3 in (7.6 cm) ring, pushing the sts together as you go. Join and fasten off, leaving a long tail. If your yarn covers the ring before you reach 64, stop at full coverage. The covered ring measures about 3.5 in (8.9 cm) across.
Tab:
- Row 1: ch 7, sc in the 2nd ch from the hook and in each ch across, turn. (6 sts)
- Rows 2–12: ch 1, sc in each st across, turn. (6 sts)
Fasten off, leaving a 12 in (30.5 cm) tail. The tab is 1.5 in (3.8 cm) wide and 2.7 in (6.9 cm) long.
Part 5: Mountain Appliqué
With cream:
Row 1: ch 25, sc in the 2nd ch from the hook and in each ch across, turn. (24 sts)
Rows 2–12: ch 1, sc2tog, sc to the last 2 sts, sc2tog, turn. Each row is 2 sts shorter than the last. The row counts are 22, 20, 18, 16, 14, 12, 10, 8, 6, 4, 2.
At the end, Row 12 has 2 sts. The triangle is 6 in (15.2 cm) wide and 2.7 in (6.9 cm) tall.
Snowcap edging: fasten off. Rejoin at the bottom right corner and work up the right slope, placing 1 sc in each row end. Spikes are worked off the last sc made:
- Small spike: ch 3, sl st in the 2nd ch from the hook, sc in the next ch
- Large spike: ch 5, sl st in the 2nd ch, sc, hdc, dc
- Summit spike: ch 6, sl st in the 2nd ch, sc, hdc, dc, dc
Right slope (12 row ends): [2 sc, small spike] twice, 2 sc, large spike, [2 sc, small spike] twice, 2 sc.
Summit: sc in the first st of Row 12, summit spike, sc in the next st.
Left slope: work the right slope in mirror image.
Total: 26 sc and 11 spikes (8 small, 2 large, 1 summit). The large spikes form the side peaks. The finished mountain is 3.2 in (8.1 cm) tall at the summit. Fasten off and weave in the ends.
Part 6: Star
With gold:
Rnd 1: make a magic ring and work 10 sc into it. Pull the ring closed and join. (10 sts)
Rnd 2: ch 4, sl st in the 2nd ch from the hook, sc in the next ch, hdc in the next ch, skip 1 sc, sl st in the next sc; rep 4 more times. (5 points)
The star is about 1.5 in (3.8 cm) across. Leave a tail for sewing.
Border
Border gauge: 16 sc = 4 in (10.2 cm).
Top Rnds 2–4: with blue, ch 1, sc in each st around, join. (42 sts)
Top Rnd 5: sl st loosely in each st around. (42 sl sts) Fasten off.
Flattened, the top has 21 sts per side. 21 ÷ 4 sts per in = 5.25 in (13.3 cm), and the band is about 1.0 in (2.5 cm) deep.
Bottom opening edging: join blue in a free loop of the foundation ch. Sc in each free loop around and join. (28 sts: 14 per side) That gives 14 ÷ 4 = 3.5 in (8.9 cm) across the flattened opening.
Why the math works: a tube has no corners. The two fold points are ordinary stitches, so no corner stitches are added. Each border round keeps exactly the count of the round below it, so the rim stays flat without ruffling or cupping.
Final Blocking
- Weave in all ends. On the mesh, weave along the dc posts so the tails don’t show.
- Spray the body until damp. Lay it flat with the round-start seam at one side fold.
- Pin it to the target sizes: 7 in (17.8 cm) at the mesh base, 7.7 in (19.6 cm) at the widest point, 5.25 in (13.3 cm) at the top rim and 14.1 in (35.8 cm) tall. Line the V-peaks up vertically.
- Pin the mountain flat, opening each spike to a sharp point. Pin the star points as well. Let everything dry completely.
- Fold the tab around the ring. Sew both tab ends to the inside of the back rim, centered and overlapping the band by 1 in (2.5 cm).
- Center the mountain on the front with its bottom edge 3 in (7.6 cm) above the opening edge. Whipstitch around the outline, catching the mesh stitches behind it. Sew only through the front layer.
- Sew the star centered 0.75 in (1.9 cm) above the summit spike.
Final Quality-Control Checklist
- [ ] 56 sts after Base Rnd 5, and 42 sts in the top band
- [ ] 7 aligned chevron columns, with no twisted or drifting peaks
- [ ] Wide V-peaks in Mesh Rnds 7–16 only
- [ ] Body is 14.1 in (35.8 cm) tall, and about 18.5 in (47.0 cm) overall
- [ ] Opening edging has 28 sts and lies flat
- [ ] Ring is fully covered and the tab is stitched securely
- [ ] Mountain has 11 crisp spikes and is sewn through the front layer only
- [ ] Star sits centered above the summit
Troubleshooting
- Peaks lean sideways: you probably started a round in a ch-1 sp instead of the peak sp. Always sl st into the peak sp before the beginning ch-3.
- Base ruffles too much: tighten your tension, or work Rnd 2 as (sc 4, 2 sc) to soften the flare. Keep the 56-st total for Rnd 5.
- Top band flares: the tr stitches were worked too loosely. Rework the leveling round with tighter tr, or use dc instead of tr.
- Spikes curl: steam-block them, pinning each spike tip.
- Bags fall out of the bottom: add a second round of sc to the opening, keeping 28 sts.
Care
Hand wash in cool water and lay flat to dry, reshaping the chevron peaks. Don’t put it in the dryer.
Final Notes
Each measurement leads into the next. The 28-st opening grows to a 56-st base that is 7 in (17.8 cm) wide. Seven mesh repeats widen to 7.7 in (19.6 cm) in the wide-peak rounds, then narrow again. The leveling round reduces the top to 42 sts, which sets a 5.25 in (13.3 cm) rim, and the body finishes at 14.1 in (35.8 cm) tall. Check each stage as you go and the finished holder will hang straight. Fill it with bags and pull them out through the bottom one at a time.
Happy crocheting!