

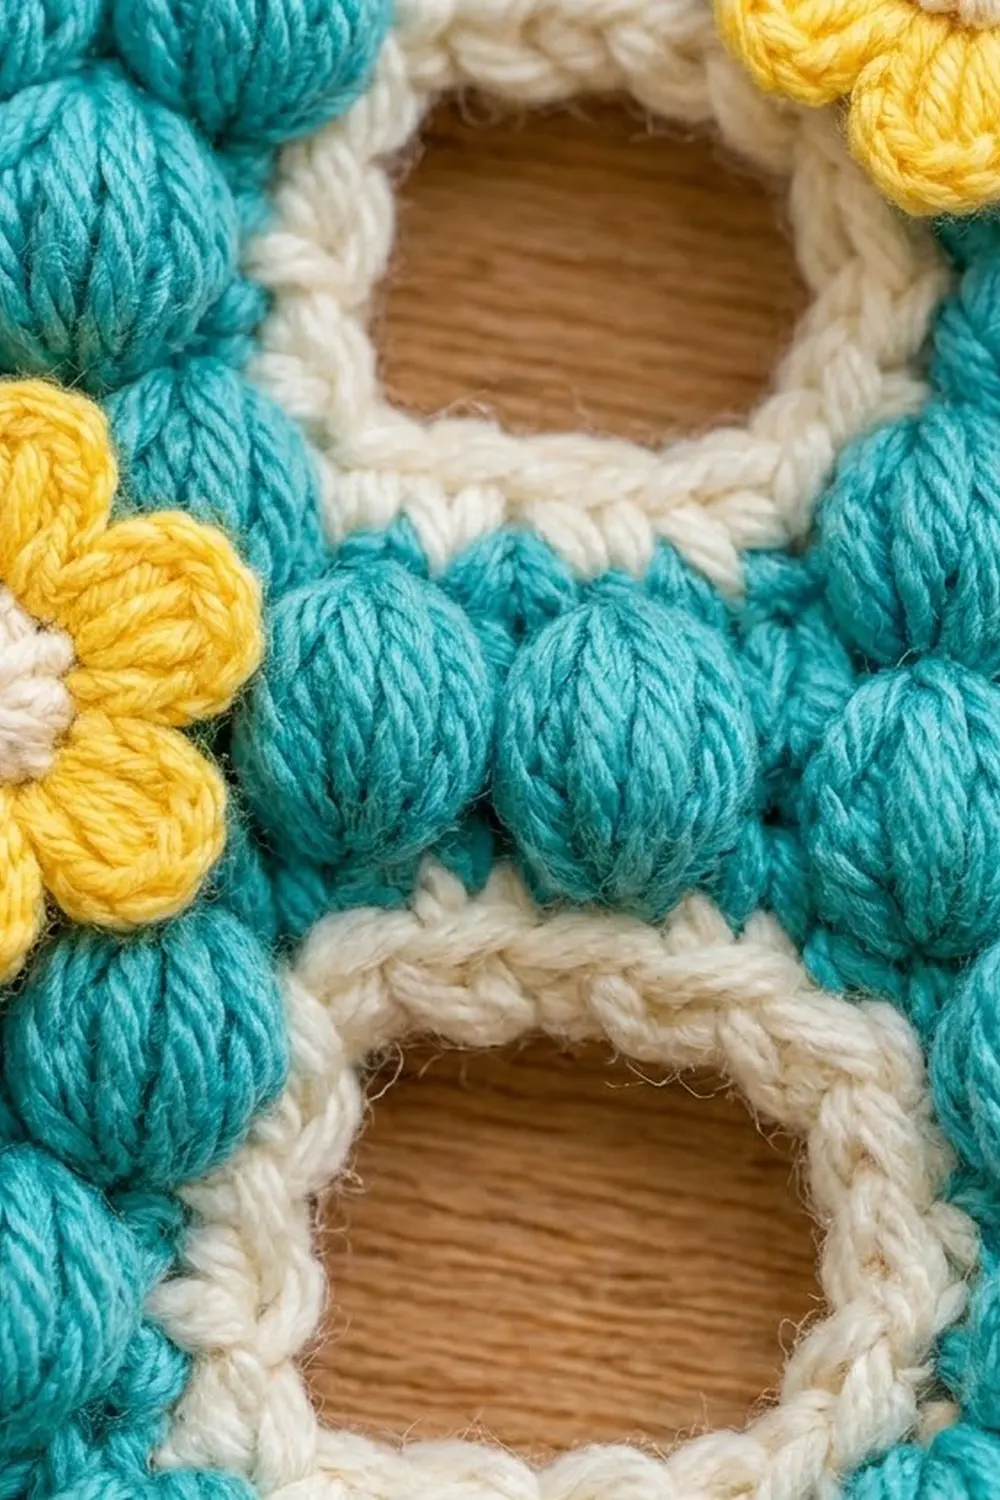
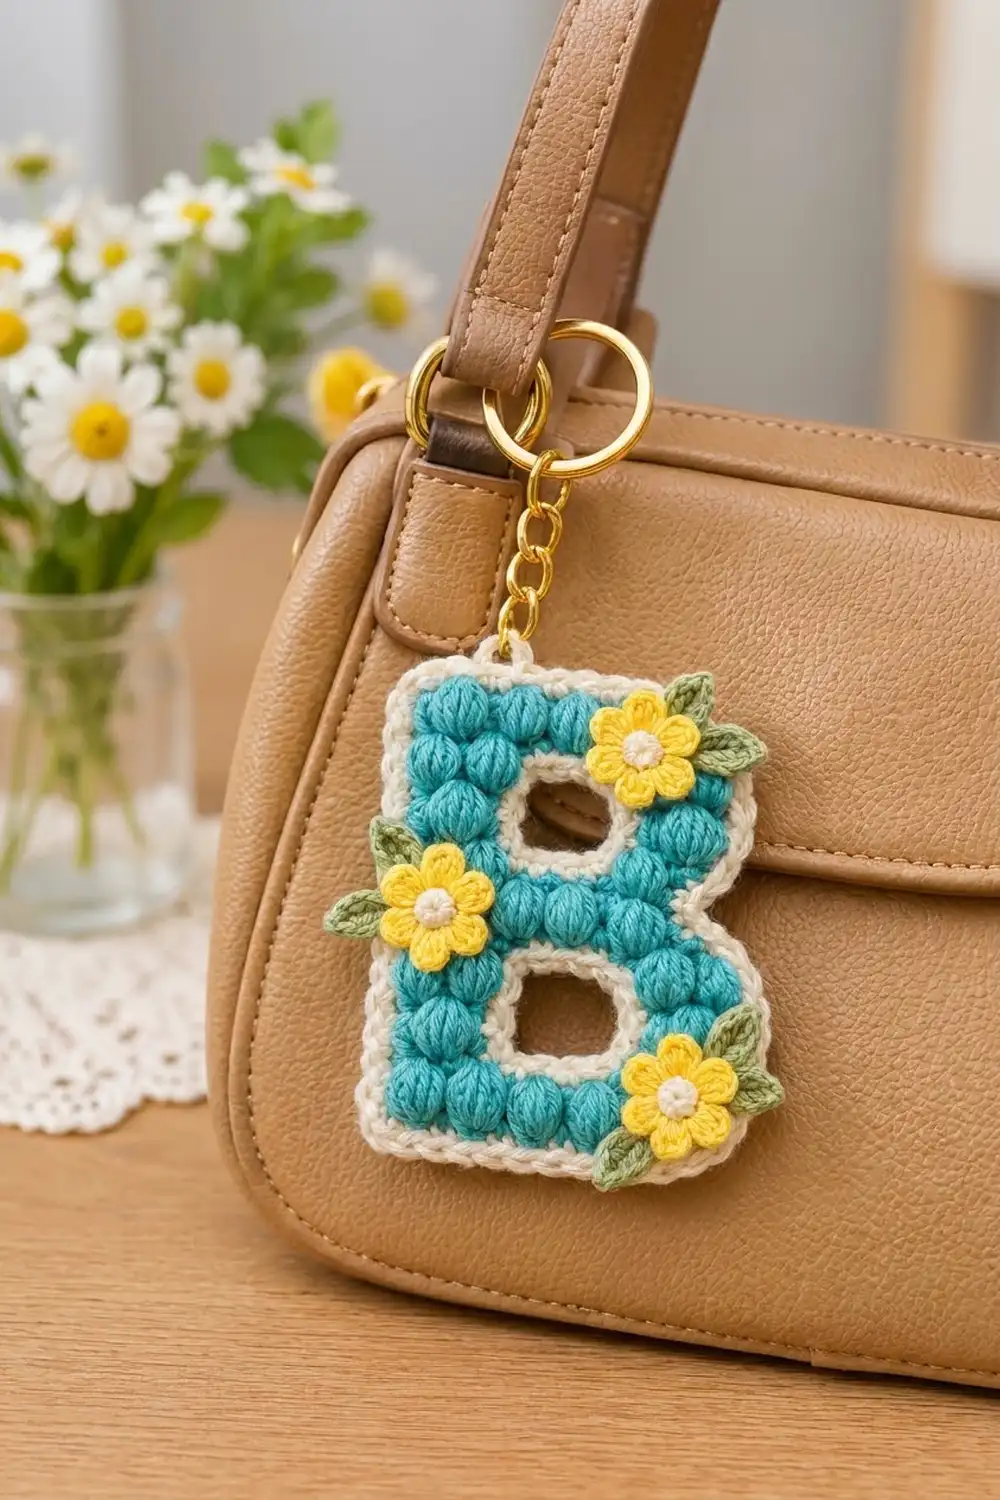
This puffy letter B keychain is small enough to finish in an evening, and it makes a good personalized gift. The teal body is made of plump puff stitches lined up in tidy columns. A cream rope-style edge outlines the letter and both of its holes.
Three cheerful yellow flowers with cream centers and sage-green leaves sit on the corners and the spine. A gold keyring and short chain finish it, ready to clip onto a bag, backpack, or set of keys.
The pattern uses US crochet terms. The finished letter measures 3.1 x 4.0 in (7.9 x 10.2 cm), not counting the hardware.
The letter is worked flat in rows, starting at the bottom. RS rows are puff rows and WS rows are single crochet. The two holes are made by working the spine and the bowl separately for three rows, then bridging across with a chain. A two-round cream border goes around the outside, a single round of cream trims each hole, and then you sew on the flowers and leaves.
Finished Size and Construction
- Finished size: 3.1 x 4.0 in (7.9 x 10.2 cm)
- Skill level: Intermediate (split sections, puff stitches, reverse sc)
- Terminology: US
- Yarn weight: DK (#3)
- Hook: 3.5 mm (E-4)
- Number of pieces: 1 letter + 3 flowers + 6 leaves (appliqués)
- Layout: Single letter; flowers at upper-right corner, mid-left spine, lower-right corner
- Letter body size: 13 sts wide at its widest, 14 rows tall
- Size before border: 2.6 x 3.5 in (6.6 x 8.9 cm)
- Border depth: 0.25 in (0.6 cm) per side
Materials
Use a smooth DK cotton or cotton blend. Cotton gives crisp stitch definition and holds the puffs’ shape on something that gets handled a lot. Avoid fuzzy or very splitty yarns, because the puffs will lose their clean columns.
- Teal (main body): 12 g / 30 m
- Cream (border, hole trim, flower centers): 5 g / 12 m
- Yellow (petals): 3 g / 7 m
- Sage green (leaves): 2 g / 5 m
All quantities include a margin of about 20% for gauge differences and weaving in.
Tools:
– 3.5 mm (E-4) crochet hook
– Tapestry needle
– 2 stitch markers
– Gold split keyring, about 1 in (2.5 cm) across, with 1 in (2.5 cm) of chain and an 8 mm jump ring
– 2 small flat-nose pliers
– Pins, a blocking mat, and a spray bottle
Abbreviations (US Terms)
- ch – chain
- sl st – slip stitch
- sc – single crochet
- hdc – half double crochet
- dc – double crochet
- st(s) – stitch(es)
- sk – skip
- RS / WS – right side / wrong side
- rev sc – reverse single crochet (crab stitch): working left to right, insert the hook into the next st to the right, yo, pull up a loop, yo, pull through both loops.
- pos – stitch position, counted from the letter’s left (spine) edge with the RS facing
Puff stitch (puff): [Yo, insert hook in st, yo, pull up a loop to about 3/8 in (1.0 cm)] 3 times (7 loops on hook). Yo, pull through all 7 loops, then ch 1 to lock. The locking ch does not count as a stitch.
Positions: The widest row has 13 sts. Puffs always sit in even positions (2, 4, 6, 8, 10, 12) and sc sit in odd positions. Because the puffs stay in the same positions every row, they stack into neat columns.
Gauge and Checkpoints
Gauge: 5 sts = 1 in (2.5 cm) across in the puff/sc pattern. One puff row is about 0.3 in (0.8 cm) tall, and one sc row is about 0.2 in (0.5 cm).
You only need to make one letter, so the letter itself works as your test piece. Measure it at these checkpoints:
- After Row 3: 11 sts measure 2.2 in (5.6 cm) wide; the piece is 0.7 in (1.8 cm) tall.
- After Row 7: the widest row (13 sts) measures 2.6 in (6.6 cm); the piece is 1.7 in (4.3 cm) tall.
- After Row 14: 2.6 x 3.5 in (6.6 x 8.9 cm).
- After the border: 3.1 x 4.0 in (7.9 x 10.2 cm).
If your piece is more than 0.2 in (0.5 cm) too wide at Row 3, rip back and go down to a 3.25 mm hook. If it’s too narrow, go up to 3.75 mm. If only the height is off, adjust how tall you pull the puff loops rather than changing the hook.
Letter Body
Use teal throughout. Row 1 is a WS row. RS rows are worked right to left as you face them, starting at the letter’s right edge.
Row 1 (WS): Ch 12. Sc in 2nd ch from hook and in each ch across. Turn. (11 sc: pos 1–11)
Row 2 (RS, puff row): Ch 1. Sc in first st, [puff in next st, sc in next st] 5 times. Turn. (11 sts: 5 puffs, 6 sc)
Row 3 (WS): Ch 1. Sc in each st across (11 sc), then ch 3 and turn. The ch-3 builds out the lower bowl. (11 sc + ch-3)
Lower Hole: Right Section
Row 4 (RS): Sc in 2nd ch from hook (pos 13), puff in next ch (pos 12), sc in next sc (pos 11), puff in next st (pos 10), sc in next st (pos 9). Turn, leaving the rest unworked. (5 sts: 2 puffs)
Row 5 (WS): Ch 1, sc in each of 5 sts. Turn. (5 sc)
Row 6 (RS): Ch 1, sc in first st, puff in next, sc in next, puff in next, sc in last. (5 sts) Fasten off, leaving a 4 in (10.2 cm) tail.
Lower Hole: Left Section
Row 4L (RS): With the RS facing, skip pos 11 through pos 6 of Row 3 and join teal in pos 5. Ch 1, sc in same st, puff in next st, sc in next st, puff in next st, sc in last st (pos 1). Turn. (5 sts: 2 puffs)
Pos 6, 7, and 8 of Row 3 stay unworked. They form the bottom of the lower hole.
Row 5L (WS): Ch 1, sc in each of 5 sts. Turn. (5 sc)
Row 6L (RS): Ch 1, sc, puff, sc, puff, sc. Turn. Do not fasten off. (5 sts)
Bridge and Waist
Row 7 (WS): Ch 1. Sc in each of the 5 left-section sts, ch 3, then sc in each of the 5 sts of Row 6 on the right section. Turn. (13 sts: 10 sc + ch-3)
The hole is now closed at the top. It is 3 sts wide (pos 6–8) and three rows tall.
Row 8 (RS, waist row): Sl st in each of the first 2 sts (pos 13, 12). Ch 1, sc in next st (pos 11), puff in next st (pos 10), sc in next st (pos 9), puff in next ch (pos 8), sc in next ch (pos 7), puff in next ch (pos 6), sc in next st (pos 5), puff in next st, sc in next st, puff in next st, sc in last st (pos 1). Turn. (11 sts: 5 puffs, 6 sc; the sl sts are not counted)
Skipping pos 12–13 creates the notch at the waist of the B.
Row 9 (WS): Ch 1. Sc in each st across (11 sc), ch 3, turn. (11 sc + ch-3)
Upper Hole
Rows 10–12, right section: Work exactly as Rows 4–6. (5 sts per row) Fasten off.
Rows 10L–12L, left section: Join teal in pos 5 of Row 9 and work exactly as Rows 4L–6L. (5 sts per row) Do not fasten off.
Row 13 (WS): Work as Row 7. (13 sts)
Row 14 (RS): Work as Row 8. (11 sts: 5 puffs) Fasten off.
Puff total: 5 + 4 + 4 + 5 + 4 + 4 + 5 = 31 puffs. Weave in the teal tails, keeping them on the WS.
Border
The border is worked in cream. The outer edge gets one round of sc and one round of rev sc. Each hole gets one round of sc.
Border gauge: Along the row ends, work 2 sc on each puff row and 1 sc on each sc row. On the top and bottom edges, work 1 sc per stitch.
Outer Rnd 1 (sc)
With the RS facing, join cream in the last st of Row 14 (pos 11, the top right). Work the round in the segments below, then sl st to the first sc to join.
- Top: 3 sc in pos 11, sc in each of the next 9 sts, 3 sc in pos 1. (15)
- Left edge, Rows 14 to 1: 2 sc in each puff-row end × 7 + 1 sc in each sc-row end × 7. (21)
- Bottom, along the foundation ch: 3 sc in pos 1, sc in each of the next 9 ch, 3 sc in pos 11. (15)
- Right edge, Rows 1–3 ends: 1 + 2 + 1. (4)
- Underside of Row 3’s ch-3: sc in the first ch, 3 sc in the tip ch. (4)
- Right edge, Rows 4–7 ends: 2 + 1 + 2 + 1. (6)
- Top of Row 7, pos 13–12: 3 sc in pos 13, sc in pos 12. (4)
- Waist, Rows 8–9 ends: 2 + 1. (3)
- Underside of Row 9’s ch-3: sc in first ch, 3 sc in tip ch. (4)
- Right edge, Rows 10–13 ends: 2 + 1 + 2 + 1. (6)
- Top of Row 13, pos 13–12: 3 sc in pos 13, sc in pos 12. (4)
- Row 14 end: 2 sc. (2)
Rnd 1 total: 15 + 21 + 15 + 4 + 4 + 6 + 4 + 3 + 4 + 6 + 4 + 2 = 88 sc
At the two inner corners of the waist notch, don’t add extra stitches. Keeping those corners un-increased helps the notch stay crisp.
Outer Rnd 2 (rev sc)
Ch 1. Rev sc in each st around. (88 rev sc) Sl st to the first st and fasten off. This round gives the rope-like edge.
Hole Trim
Work this on each hole. With the RS facing, join cream in the first unworked st at the bottom of the hole. Then work:
- 1 sc in each of the 3 unworked sts (3)
- 2 + 1 + 2 sc up the row ends of the right section (5)
- 3 sc along the underside of the bridge ch-3 (3)
- 2 + 1 + 2 sc down the row ends of the left section (5)
Sl st to the first sc. (16 sc per hole) Fasten off.
Before trimming, each hole is about 0.6 x 0.8 in (1.5 x 2.0 cm). After trimming it’s about 0.4 x 0.5 in (1.0 x 1.3 cm).
Why the Math Works
Each straight edge gets 3 sc at each outer corner, and those corner stitches are counted inside that edge’s total, never twice. The top and bottom edges each have 11 sts plus 2 extra sc at each corner, giving 15. The left edge has 21 sc over 3.5 in (8.9 cm), about 6 per inch. That is slightly denser than the 5 per inch across the top. This is on purpose: puff-row ends are thick and loose, and the rev sc round pulls the edge back into line. The holes get no increases, which keeps the cream trim taut and the openings rounded.
Flowers and Leaves
Flowers (make 3)
Center: With cream, make a magic ring. Rnd 1: Ch 1, 5 sc in the ring. Pull the ring closed and sl st to the first sc. (5 sc) Fasten off.
Petals: Join yellow in any sc. [Ch 2, 2 dc, ch 2, sl st] in the same st, then sl st in the next st. Repeat from * to * 4 more times. (5 petals) Fasten off and leave an 8 in (20.3 cm) tail for sewing.
Each flower measures 0.9 in (2.3 cm) across.
Leaves (make 6)
With green, ch 5. Working from the 2nd ch from the hook:
- Sc, hdc, hdc, sc along the chain.
- Ch 1 at the tip, then work sc, hdc, hdc, sc along the other side of the foundation ch.
- Sl st to the first sc.
Each leaf is pointed and about 0.6 in (1.5 cm) long. Leave an 8 in (20.3 cm) tail.
Placement
Sew all the leaves first, then sew the flowers on top so they cover the leaf bases. Each leaf should stick out about 0.3 in (0.8 cm) past the cream border.
- Flower 1: Upper-right bowl, over the puffs at pos 10–12 of Rows 12–14. Put one leaf pointing up and one pointing right.
- Flower 2: Spine, over pos 2–4 of Rows 6–8. Let it overlap the left border by about 0.2 in (0.5 cm). Put one leaf pointing up-left and one pointing down-left.
- Flower 3: Lower-right bowl, over pos 10–12 of Rows 2–4. Put one leaf pointing up-right and one pointing down-left.
Stitch through the flower centers and the bases of the petals into the teal sts. Keep the stitches from showing on the back.
Hardware
Use pliers to open the jump ring and thread it through Outer Rnd 2 above pos 3–4, near the top-left corner. Hook the chain on and close the ring fully.
Final Blocking
- Lightly mist the letter, keeping the flowers fairly dry.
- Pin it face up to 3.1 x 4.0 in (7.9 x 10.2 cm), with the spine straight.
- Pin the rounded bowls into smooth curves and press the waist notch gently inward.
- Put a pin inside each hole to open it into a soft oval.
- Fluff the puffs with your fingertips so they stand proud.
- Let it dry completely, about 2–4 hours, before you attach the keyring.
Final Quality-Control Checklist
- 31 puffs, in straight vertical columns
- Both holes open, each trimmed with 16 cream sc
- Outer Rnd 1 has 88 sc and Rnd 2 has 88 rev sc
- The waist notch is visible on the right side
- Finished size is 3.1 x 4.0 in (7.9 x 10.2 cm), within 0.2 in (0.5 cm)
- 3 flowers and 6 leaves sewn securely, with all leaf tips outside the border
- The jump ring is fully closed and all tails are woven in on the WS
Troubleshooting
- Puffs lean or twist: Pull all 3 loops to the same height, and always ch 1 to lock each puff.
- Holes close up: You probably worked into the ch-3 on Row 3 or Row 9. Leave pos 6–8 unworked.
- Border ruffles on the left edge: Use 1 sc on the sc-row ends, not 2.
- Border cups: Check that each outer corner has 3 sc.
- Waist notch disappears: Make sure the 2 sl sts at the start of Rows 8 and 14 are worked, and that no sc are added at the inner corners.
- Flowers flop: Add a second tack stitch at the base of each petal.
Care
Hand wash in cool water and lay flat to dry, reshaping the puffs while the letter is damp. Remove the metal hardware before washing.
Final Notes
Every measurement builds on the one before it:
- Gauge: 5 sts = 1 in (2.5 cm)
- 13 sts make the widest row 2.6 in (6.6 cm), and 14 rows make the body 3.5 in (8.9 cm) tall
- The 0.25 in (0.6 cm) border on each side brings the letter to 3.1 x 4.0 in (7.9 x 10.2 cm)
Check your size at Row 3, Row 7, and Row 14, and the finished keychain will match.
Happy crocheting!