
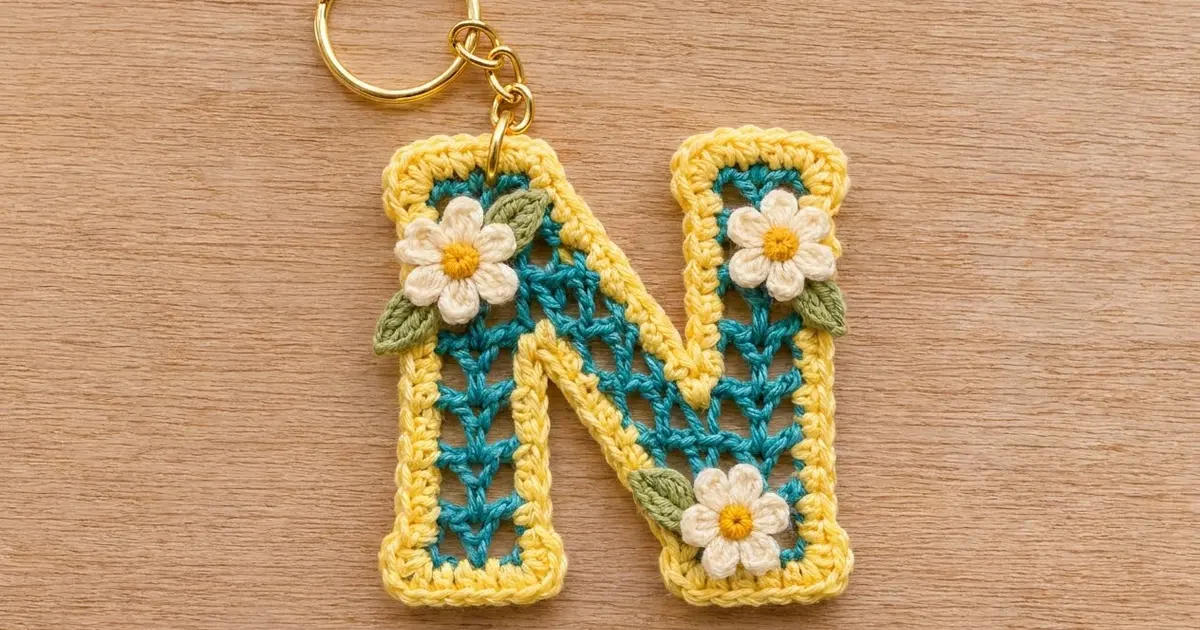
This Letter N keychain pairs an open teal lattice with a soft butter-yellow outline and three tiny cream daisies. The teal fabric is a simple V-stitch mesh. Each stroke of the letter shows neat columns of V shapes with small windows between them. The yellow border frames every edge, including the two notches of the N, so the letter keeps a crisp, readable shape.
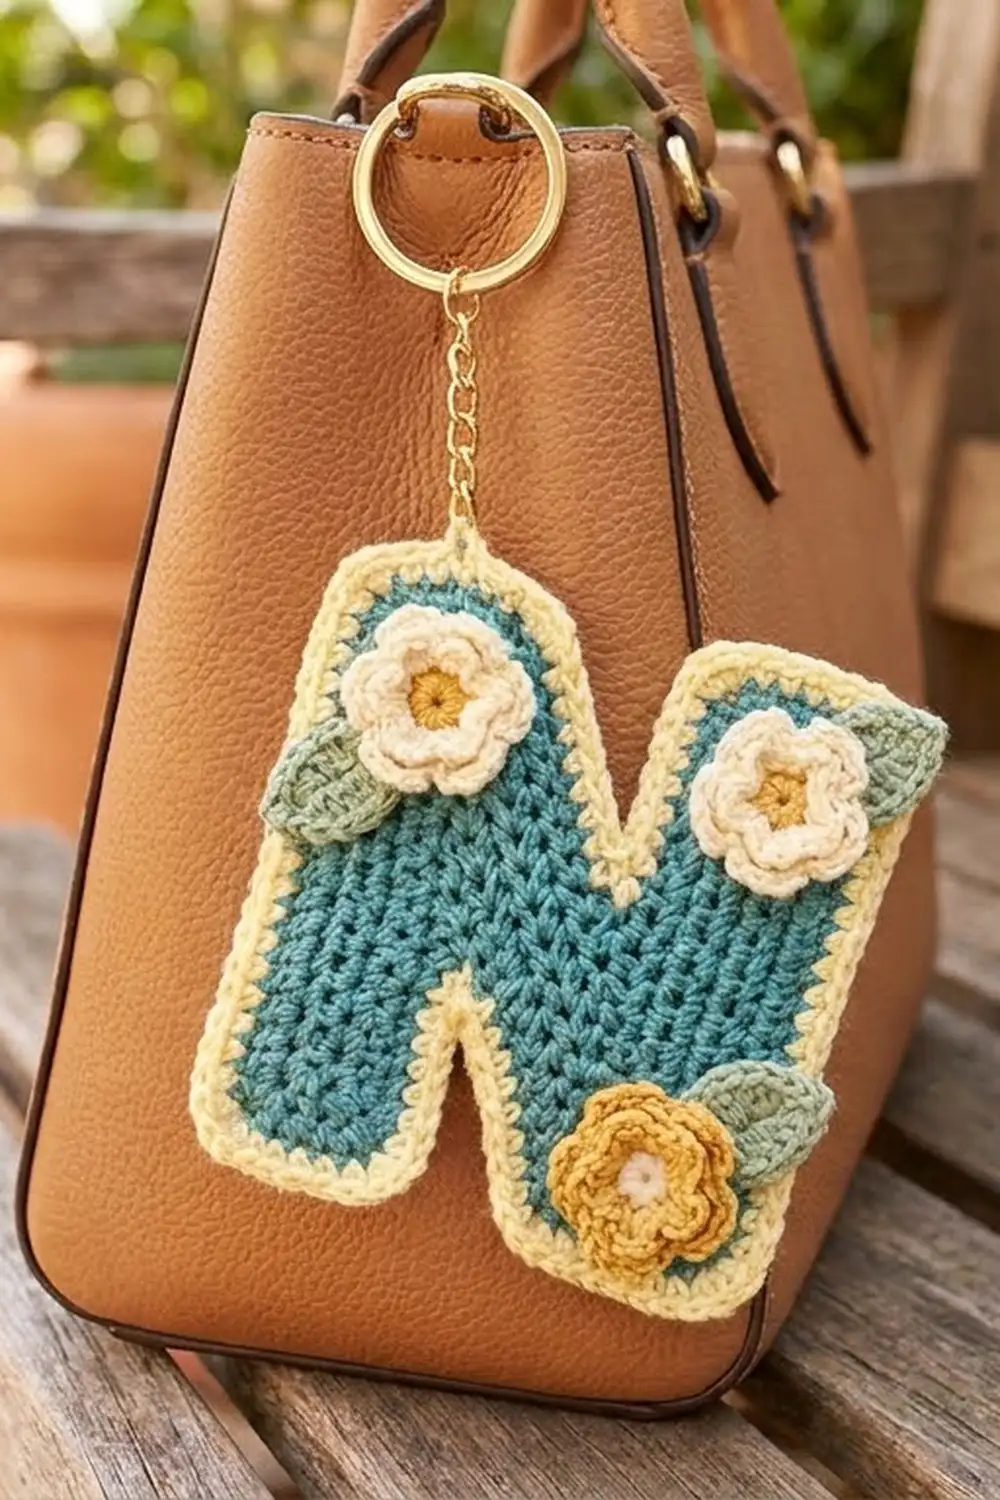
The palette is bright and fresh: teal mesh, a light yellow border, cream petals with golden centers, and sage green leaves. A gold split ring on a short chain hangs from the top of the left leg. It makes a cheerful bag charm or a personalized gift.
All instructions use US crochet terms. The finished letter measures 4.0 in (10.2 cm) tall and 3.7 in (9.4 cm) wide, not counting the flowers or hardware.
You work the letter flat in rows as one piece, in three parts: the left leg, then the base and right leg, then the diagonal. The diagonal joins the two legs together at the top. Two rounds of single crochet go around the whole outline. Last, you crochet the flowers and leaves and sew them on.
Finished Size and Construction
- Finished size: 4.0 in (10.2 cm) tall x 3.7 in (9.4 cm) wide
- Skill level: Intermediate
- Terminology: US crochet terms
- Yarn weight: Sport weight (#2) cotton
- Hook: 2.75 mm (C-2)
- Number of pieces: 1 letter, plus 3 flowers and 4 leaves (small appliqués)
- Layout: Two straight legs, each 2 V-stitches wide, joined by a diagonal that is also 2 V-stitches wide
- Piece size before border: 3.5 in (8.9 cm) tall x 3.2 in (8.1 cm) wide
- Border depth: 0.25 in (0.6 cm) on every side
- Size after border: 4.0 in (10.2 cm) x 3.7 in (9.4 cm)
Materials
Use a smooth mercerized cotton or cotton blend in sport weight. Cotton keeps the open mesh crisp and holds up well on a bag handle. A typical ball is 50 g and about 150 m.
- Color A, teal (mesh): 8 g, about 24 m
- Color B, light yellow (border): 6 g, about 18 m
- Color C, cream (petals): 3 g, about 9 m
- Color D, golden yellow (flower centers): 1 g, about 3 m
- Color E, sage green (leaves): 2 g, about 6 m
These amounts include a small margin for testing gauge and weaving in ends.
Tools:
- 2.75 mm (C-2) crochet hook
- Tapestry needle
- 4 locking stitch markers
- Gold split key ring, 1 in (2.5 cm), with a short chain and an 8 mm jump ring
- 2 pairs of flat-nose pliers
- Rust-proof pins, a blocking mat, and a spray bottle
Abbreviations (US Terms)
- ch: chain
- sl st: slip stitch
- sc: single crochet
- hdc: half double crochet
- dc: double crochet
- sc2tog: single crochet 2 together
- dc2tog: double crochet 2 together
- sk: skip
- sp: space
- tch: turning chain
- st(s): stitch(es)
- RS / WS: right side / wrong side
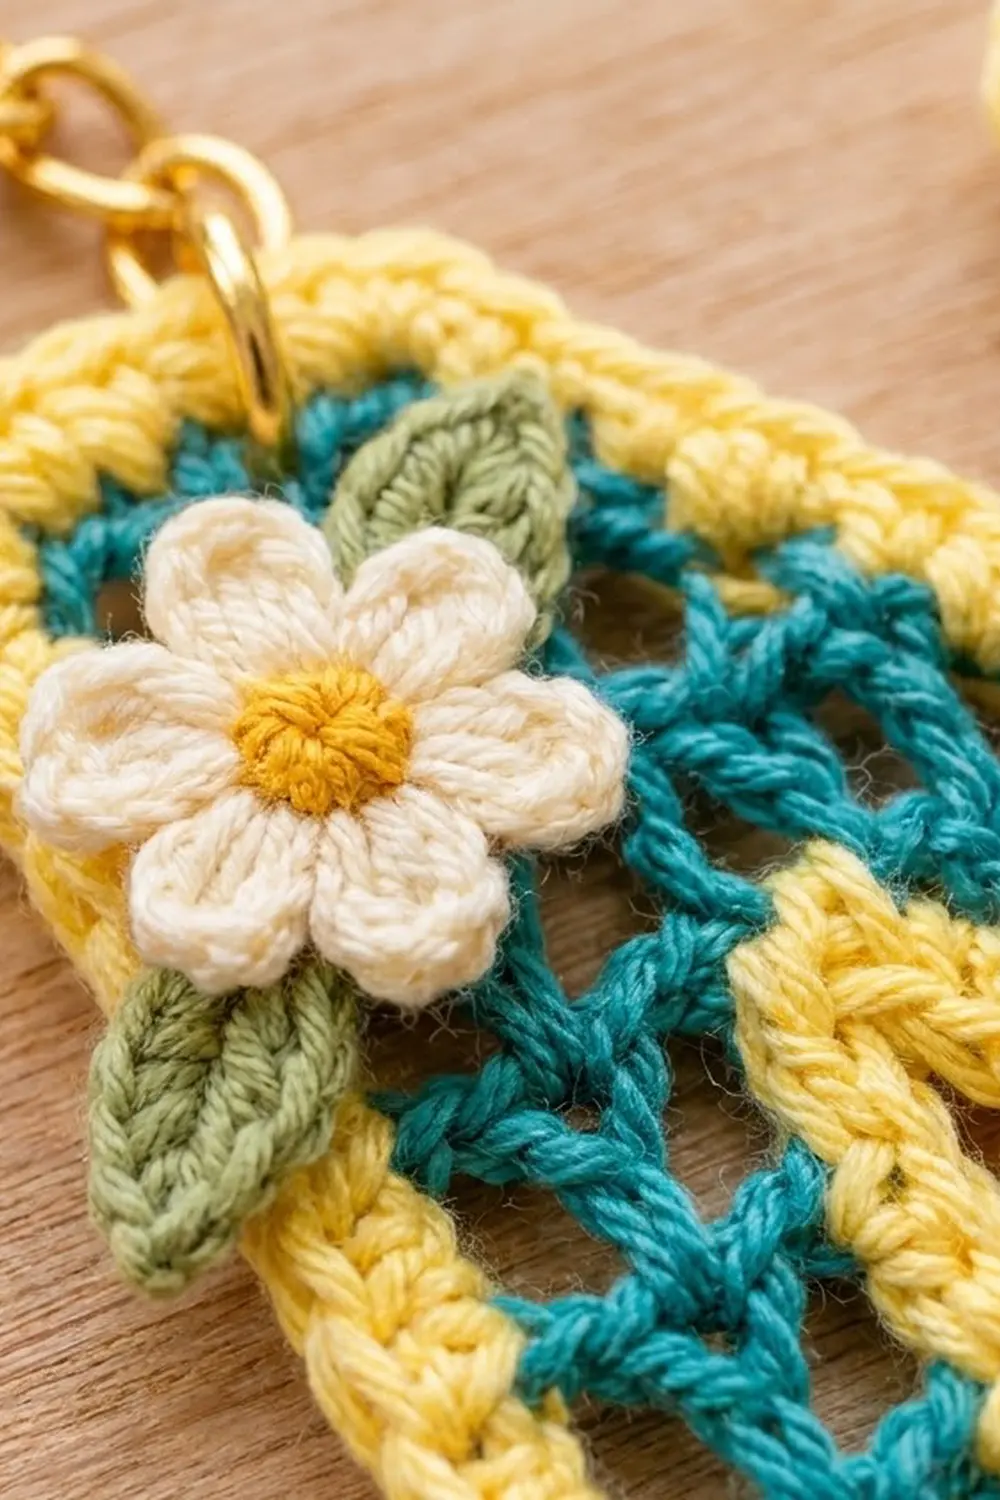
V-stitch (V-st): (dc, ch 1, dc) in the same stitch or space. Its ch-1 space is called the V-sp.
Edge dc: The dc at each end of a row. At the start of a row, ch 3 counts as the edge dc.
Shift row: A row that moves the diagonal half a V-st toward the left leg. Each V-st goes into the space between two stitches of the row below, not into a V-sp.
Gauge and Checkpoints
Gauge: In V-st pattern, 5 V-sts = 2.0 in (5.1 cm) wide and 10 rows = 3.5 in (8.9 cm) tall.
Make the left leg first and use it to test your gauge. It’s a real part of the letter, so no yarn is wasted. After Row 8 it should measure 0.8 in (2.0 cm) wide x 2.8 in (7.1 cm) tall.
Checkpoints:
- Left leg after Row 8: 0.8 in (2.0 cm) x 2.8 in (7.1 cm)
- Base after Row 2: 1.6 in (4.1 cm) wide x 0.7 in (1.8 cm) tall
- Right leg after Row 10: 3.5 in (8.9 cm) tall
- Finished mesh: 3.5 in (8.9 cm) x 3.2 in (8.1 cm)
- After the border: 4.0 in (10.2 cm) x 3.7 in (9.4 cm)
Too big? Use a hook 0.25 mm smaller. Too small? Use a hook 0.25 mm larger. If the width is right but the rows are too tall, wrap the yarn more snugly on each “yo, pull through 2” step. Don’t change the stitch counts, because the diagonal depends on them.
Part 1: Left Leg
With Color A, ch 10.
Row 1 (RS): V-st in 5th ch from hook (the 4 skipped ch count as an edge dc plus 1 skipped ch), sk 2 ch, V-st in next ch, sk 1 ch, dc in last ch. (2 V-sts + 2 edge dc = 6 dc)
Row 2 (WS): Ch 3 (counts as dc), turn, V-st in each V-sp across, dc in top of tch. (6 dc)
Rows 3–8: Repeat Row 2. (6 dc per row)
Fasten off. Checkpoint: 0.8 in (2.0 cm) x 2.8 in (7.1 cm). Row 8 was a WS row, so its last dc is at the right edge when the RS faces you. Place a marker in that dc.
Part 2: Base and Right Leg
With Color A, ch 16.
Row 1 (RS): V-st in 5th ch from hook, [sk 2 ch, V-st in next ch] 3 times, sk 1 ch, dc in last ch. (4 V-sts + 2 edge dc = 10 dc)
Row 2 (WS): Ch 3, turn, V-st in each of the 4 V-sps, dc in top of tch. (10 dc)
Checkpoint: 1.6 in (4.1 cm) x 0.7 in (1.8 cm). The left 2 V-sts of the base will hold the diagonal. The right 2 V-sts start the right leg.
Row 3 (RS): Ch 3, turn, V-st in each of the next 2 V-sps, dc in the sp between the 2nd and 3rd V-sts. Leave the last 2 V-sts unworked. (6 dc)
Rows 4–10: Ch 3, turn, V-st in each V-sp, dc in top of tch. (6 dc per row)
Fasten off. Checkpoint: the right leg measures 3.5 in (8.9 cm) from the foundation edge.
Part 3: Diagonal and Top
The diagonal moves half a V-st to the left on every RS row. After four shift rows, it sits right next to the left leg.
Row 3 (RS, shift): With RS facing, join Color A with a sl st in the V-sp of the 2nd V-st from the left on base Row 2. Ch 3 (counts as dc), V-st in the sp between this V-st and the next V-st, V-st in the sp between that V-st and the tch, dc in top of tch. (6 dc)
Row 4 (WS): Ch 3, turn, V-st in each V-sp, dc in top of tch. (6 dc)
Row 5 (RS, shift): Turn, sl st in next dc and in next V-sp, ch 3 (counts as dc), V-st in the sp between this V-st and the next V-st, V-st in the sp between that V-st and the tch, dc in top of tch. (6 dc)
Row 6: Repeat Row 4. (6 dc)
Row 7: Repeat Row 5. (6 dc)
Row 8: Repeat Row 4. (6 dc)
Lay the left leg to the left of the diagonal, RS up, with its bottom edge level with the base. The marked dc should sit right beside the diagonal’s left edge.
Row 9 (RS, shift and join): Turn, sl st in next dc and in next V-sp, ch 3, V-st in the sp between this V-st and the next V-st, V-st in the sp between that V-st and the tch. Join the two parts with a dc2tog: work the first leg into the top of the diagonal’s tch and the second leg into the marked dc of the left leg. Then V-st in each of the 2 V-sps of the left leg, and dc in top of the left leg’s tch. (4 V-sts + 2 edge dc + 1 dc2tog = 11 dc)
Row 10 (WS): Ch 3, turn, V-st in each of the 4 V-sps, dc in top of tch. (4 V-sts + 2 edge dc = 10 dc)
Fasten off. The mesh is now one piece: two straight legs, with an open notch at the bottom left and another at the top right. Checkpoint: 3.5 in (8.9 cm) tall x 3.2 in (8.1 cm) wide. The gap at the bottom between the left leg and the base should be 0.8 in (2.0 cm). Pin it if it moves.
Border
Border gauge: 7 sc = 1 in (2.5 cm). Along row ends, work 5 sc for every 2 rows (2 sc in the first row end, then 3 sc in the next). Along the tops and foundation edges, work 1 sc in each edge stitch and 2 sc in each V-sp. On a foundation edge, work the 2 sc into the chain at the base of each V-st.
Round 1 edge counts:
| Edge | Source | sc |
|---|---|---|
| Left leg, outer side | 10 row ends | 25 |
| Top (left leg + diagonal) | Row 10 | 10 |
| Diagonal, right edge | 8 row ends | 20 |
| Right leg, inner side | 8 row ends | 20 |
| Right leg, top | Row 10 | 6 |
| Right leg, outer side | 10 row ends | 25 |
| Base, foundation edge | 4 V-sts + 2 edges | 10 |
| Base side + diagonal, left edge | 8 row ends | 20 |
| Left leg, inner side | 8 row ends | 20 |
| Left leg, foundation edge | 2 V-sts + 2 edges | 6 |
| Total edge sc | 162 |
The letter has 8 outer corners:
– both bottom corners of the left leg
– the top-left corner
– the point where the top edge turns down into the diagonal
– both top corners of the right leg
– both bottom corners of the base
It also has 2 inner corners, one at the bottom of each notch.
Round 1: With RS facing, join Color B with a sl st at the bottom-left corner of the left leg. Ch 1, 3 sc in the corner. Working clockwise, work each edge with the counts in the table, and work 3 sc in each outer corner. At the 2 inner corners, don’t add or skip any stitches. Join with a sl st to the first sc. (162 edge sc + 24 corner sc = 186 sc)
Round 2: Ch 1, sc in each sc around. Work 3 sc in the center sc of each 3-sc corner group. At each inner corner, sc2tog over the 2 sc on either side of the corner. Join. (186 sc worked into, − 2 from the sc2tog, + 16 added at corners = 200 sc)
Fasten off. Checkpoint: 4.0 in (10.2 cm) x 3.7 in (9.4 cm).
Why the math works: On the sides, 5 sc for every 2 rows gives 7.1 sc per inch (25 sc over 3.5 in). That matches the border gauge of 7 sc per inch, so the edges lie flat without ruffling or cupping. On the outer corners, 3 sc in Round 1 and 2 more in Round 2 keep the points square. In the notches, the sc2tog takes up the extra length, so the border hugs the inner corner instead of bulging. The two sc rounds add 0.25 in (0.6 cm) per side. That takes the height from 3.5 in to 4.0 in (10.2 cm) and the width from 3.2 in to 3.7 in (9.4 cm).
Flowers (make 3)
Round 1: With Color D, make a magic ring, 5 sc in ring, pull the ring closed, join with a sl st. Fasten off. (5 sc)
Round 2: Join Color C in any sc. In each sc, work (sl st, ch 2, 2 dc, ch 2, sl st). (5 petals)
Fasten off, leaving a 10 in (25.4 cm) tail. Each flower is about 1.0 in (2.5 cm) across.
Leaves (make 4)
With Color E, ch 6. Sc in 2nd ch from hook, hdc in next ch, dc in next ch, hdc in next ch, sc in last ch. Ch 1, then work along the other side of the chain: sc, hdc, dc, hdc, sc. Sl st to the first sc. (10 sts) Fasten off, leaving a tail. Each leaf is about 0.75 in (1.9 cm) long.
Attaching the Flowers and Hardware
- Sew Flower 1 to the top of the left leg. Tuck 2 leaves under it, one pointing up and to the right and one pointing down and to the left.
- Sew Flower 2 near the top of the right leg, with 1 leaf tucked under it pointing down and to the right.
- Sew Flower 3 low on the diagonal, where it meets the right leg, with 1 leaf pointing up and to the left.
- Sew through both the flower or leaf and the mesh or border underneath. Keep your stitches hidden under the petals.
- Use two pliers to twist the jump ring open sideways. Pass it through both border rounds at the center top of the left leg. Add the chain and split ring, then twist the jump ring closed so the ends meet flush.
Final Blocking
- Weave in all ends before you block. Run each end through at least 1 in (2.5 cm) of stitches in the same color.
- Mist the letter until it’s damp but not soaked.
- Pin it RS up to 4.0 in (10.2 cm) x 3.7 in (9.4 cm).
- Pin both legs straight and parallel, with a 0.8 in (2.0 cm) gap at the bottom.
- Gently open each V-sp with the tip of a pin so the lattice shows clearly.
- Pin each petal flat, pointing outward.
- Let the letter dry completely, about 6–8 hours, before you remove the pins.
Final Quality-Control Checklist
- Every row of each leg has 6 dc.
- Row 9 has 11 dc and Row 10 has 10 dc.
- Round 1 has 186 sc and Round 2 has 200 sc.
- Both notches are open, and the border runs down into each one.
- The letter measures 4.0 in (10.2 cm) x 3.7 in (9.4 cm).
- The flowers are firmly attached and the sewing doesn’t show.
- The jump ring is fully closed and passes through both border rounds.
Troubleshooting
The diagonal edges look stepped. This is normal before the border goes on. The sc border and blocking smooth the steps into a clean slant.
The border ruffles. Work 2 sc in every row end on the long sides, or use a hook one size smaller for the border only.
The border cups. Check that every outer corner has its 3 sc. If the corners are right, use a hook one size larger for the border.
The legs aren’t parallel. Re-block, and pin the bottom gap to 0.8 in (2.0 cm).
The left leg doesn’t line up in Row 9. Check that the left leg has exactly 8 rows and that you’re joining into its last dc, at the right edge.
The petals curl. Steam them lightly and pin them flat to dry.
Care
Remove the metal hardware first so it can’t scratch or stain the yarn. Hand wash in cool water with mild soap, press out the water in a towel, and dry flat.
Final Notes
The measurements are easy to check as you go. The left leg sets your gauge at 0.8 in (2.0 cm) x 2.8 in (7.1 cm). The finished mesh measures 3.5 in (8.9 cm) x 3.2 in (8.1 cm). The 0.25 in (0.6 cm) border brings the letter to 4.0 in (10.2 cm) x 3.7 in (9.4 cm), ready for its daisies and key ring. If each checkpoint matches, the finished letter will match too.
Happy crocheting!