
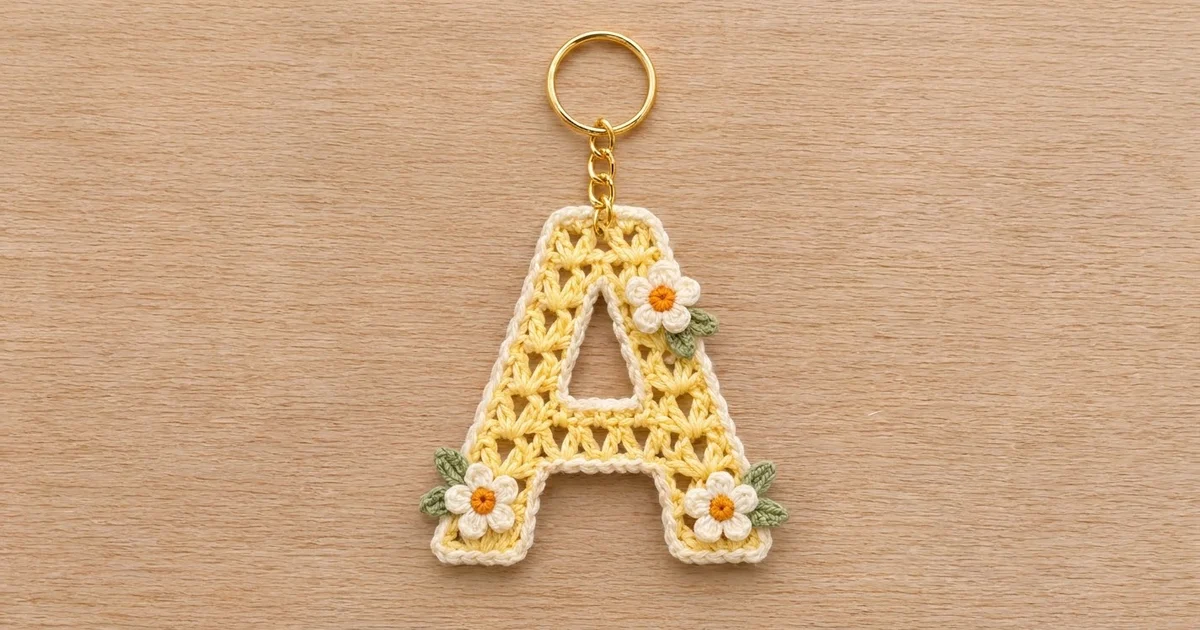
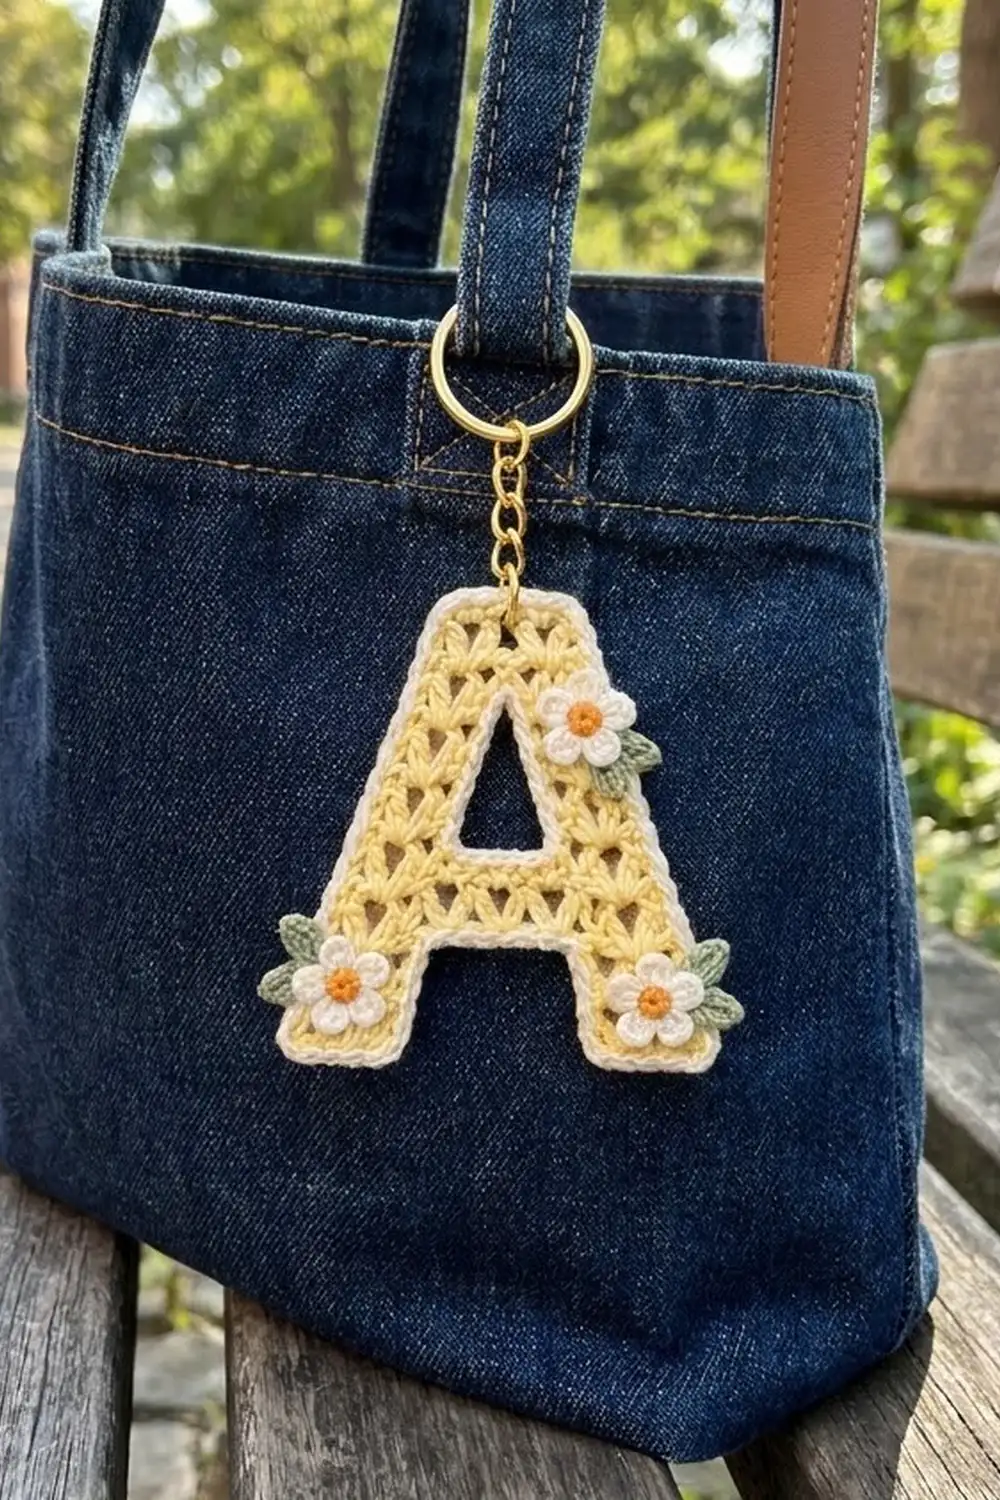
Buttercup Bloom is a small initial charm: a capital letter A worked in airy butter-yellow V-stitches, edged in cream and finished with three tiny daisies. It hangs from a gold split ring and works well as a bag charm, a key fob or a personalized gift.
There are four colors: pale yellow for the letter, cream for the outline and petals, marigold orange for the flower centers and sage green for the leaves. The staggered V-stitches give the letter a light, lacy texture, and the cream edge keeps the outline crisp.
This pattern uses US crochet terms. The finished letter measures 3.9 in (9.9 cm) wide by 3.8 in (9.7 cm) tall, not counting the hardware.
You work the letter in one piece from the bottom up. First you make two short legs. A chain bridges them into a crossbar, and then the legs split again around a small hole. A second, shorter bridge closes the top. One round of cream single crochet outlines the letter and the hole, and the flowers and leaves are sewn on at the end.
Finished Size and Construction
- Finished size: 3.9 in (9.9 cm) wide × 3.8 in (9.7 cm) tall
- Skill level: Intermediate
- Terminology: US
- Yarn weight: Fingering (super fine #1) cotton
- Hook: 2.5 mm
- Number of pieces: 1 letter, plus 3 flowers and 5 leaves as appliqués
- Layout: Single piece, so there is no assembly grid
- Letter size before border: 3.6 in (9.1 cm) wide × 3.5 in (8.9 cm) tall
- Border depth: 0.15 in (0.4 cm) on every edge
- Flower diameter: 0.7 in (1.8 cm); leaf length 0.5 in (1.3 cm)
Materials
Use a smooth, mercerized fingering-weight cotton. It shows the V-stitches clearly, holds its shape on a keychain and doesn’t fuzz with handling. The amounts below assume a yarn of about 170 m per 50 g.
- Pale butter yellow (letter): 6 g, about 20 m
- Cream (border and petals): 3 g, about 10 m
- Marigold orange (flower centers): 1 g, about 3 m
- Sage green (leaves): 1 g, about 3 m
All quantities include a margin for a gauge swatch and weaving in ends.
Tools:
– 2.5 mm crochet hook
– Tapestry needle
– Scissors
– 2 stitch markers
– Rust-proof pins and a foam blocking mat
– Spray bottle
– Gold split key ring, 1 in (2.5 cm)
– Gold chain, about 1 in (2.5 cm), plus one 6 mm jump ring
– 2 pairs of flat-nose pliers
– Optional: fabric stiffener
Abbreviations (US Terms)
- ch – chain
- sl st – slip stitch
- sc – single crochet
- hdc – half double crochet
- dc – double crochet
- st(s) – stitch(es)
- sp – space
- sk – skip
- tch – turning chain
- RS / WS – right side / wrong side
Special stitches:
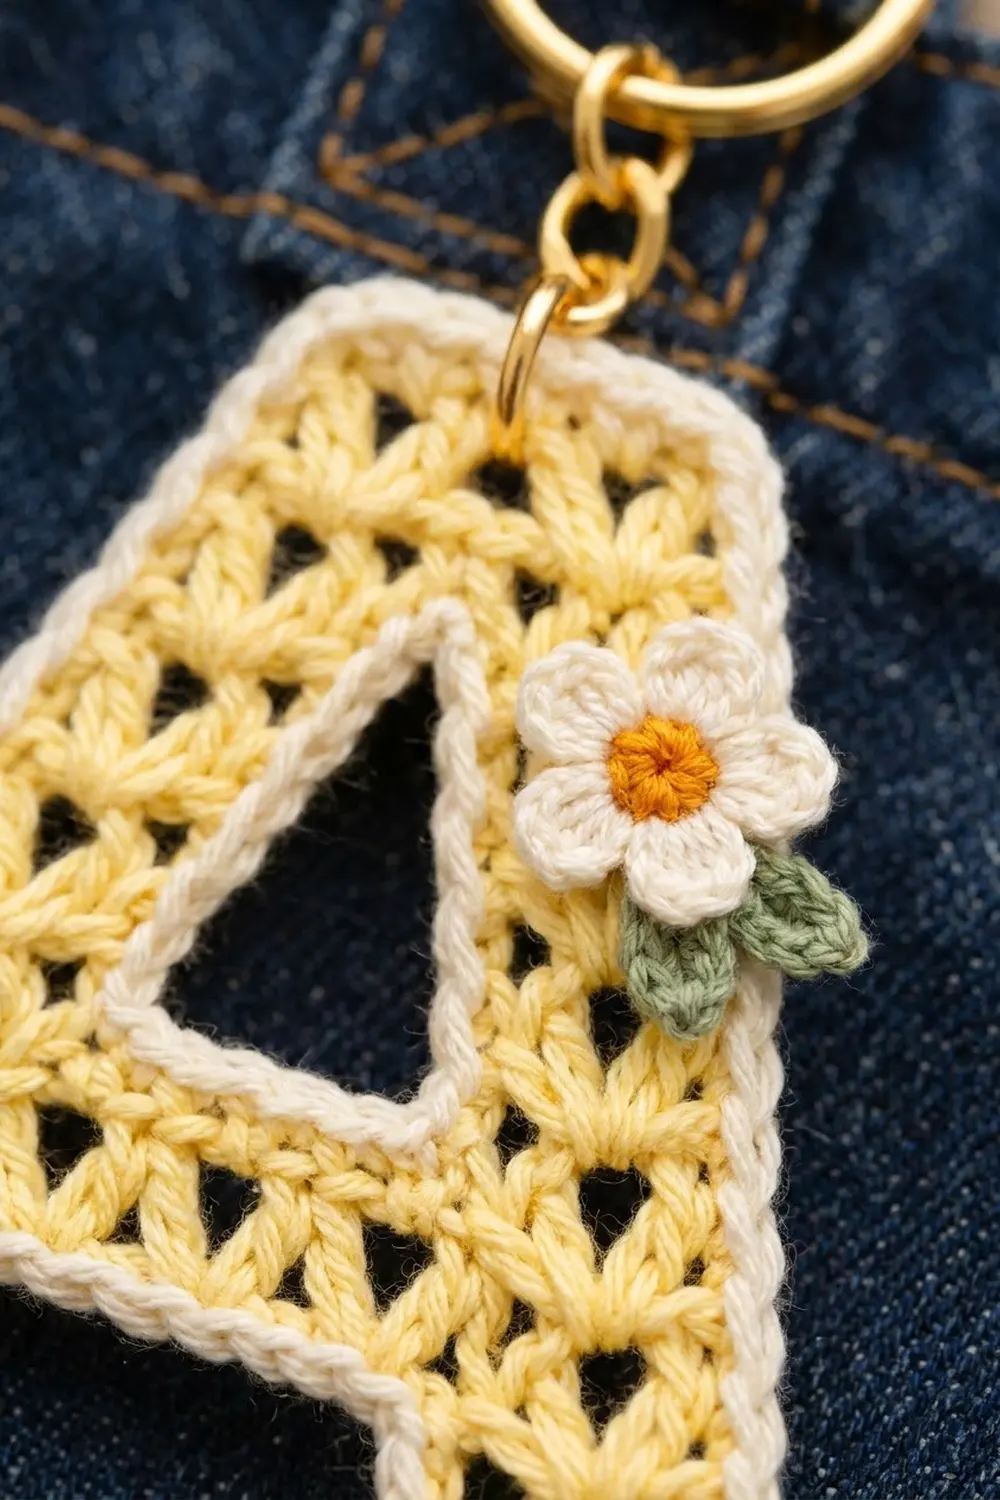
– V-st (V-stitch): (dc, ch 1, dc) worked into the same stitch or space.
– Between-sp: the gap between two neighboring stitch groups, for example between two V-sts, or between a V-st and an edge dc.
Notes: Ch 3 at the start of a row counts as a dc throughout. Every leg row has 8 sts: 1 edge dc, 2 V-sts (3 sts each) and 1 edge dc.
Gauge and Checkpoints
Gauge: 14 sc = 2 in (5.1 cm), and 6 V-st rows = 2 in (5.1 cm).
That works out to one stitch column every 0.14 in (0.4 cm). Each V-st row is about 0.33 in (0.8 cm) tall, and the single sc row is about 0.17 in (0.4 cm).
Make Leg A first and use it as your swatch.
- After Row 1: the leg is 1 in (2.5 cm) wide.
- After Row 4: the leg is about 1.2 in (3.0 cm) tall.
- After Row 6: the crossbar is 3.0 in (7.6 cm) wide and the piece is about 1.8 in (4.6 cm) tall.
- After Row 9: the piece is about 2.8 in (7.1 cm) tall.
- After Row 11: the piece is 3.6 in (9.1 cm) across the feet, 2.4 in (6.1 cm) across the top and 3.5 in (8.9 cm) tall.
If Leg A is wider than 1 in (2.5 cm), go down to a 2.25 mm hook. If it’s narrower, go up to a 2.75 mm hook. If only the height is off, adjust how far you pull up each dc rather than changing hooks.
Lower Legs
Leg A (left leg)
With yellow, ch 8.
Row 1 (RS): Sc in 2nd ch from hook and in each ch across, turn. (7 sc)
Row 2 (WS): Ch 3, sk next sc, V-st in next sc, sk next sc, V-st in next sc, sk next sc, dc in last sc, turn. (2 V-sts + 2 dc = 8 sts)
Row 3 (RS, shift): Ch 3. V-st in next between-sp (before the first V-st), then V-st in next between-sp (between the V-sts). Dc in next between-sp (before the tch), leaving the tch unworked. Turn. (8 sts)
Row 4 (WS): Ch 3, V-st in ch-1 sp of each of next 2 V-sts, dc in top of tch. (8 sts)
Fasten off.
Row 3 is a “shift row.” The outer edge steps in by one stitch column, while the inner edge stays put. The two V-sts settle half a V toward the center, which tilts the leg inward.
Leg B (right leg)
Work Rows 1–2 the same as Leg A.
Row 3 (RS, shift): Sl st in next between-sp, ch 3, V-st in each of next 2 between-sps, dc in top of tch, turn. (8 sts)
Row 4 (WS): Ch 3, V-st in ch-1 sp of each of next 2 V-sts, dc in top of tch, turn. (8 sts)
Do not fasten off.
Crossbar
Row 5 (RS, shift and join):
1. Sl st in next between-sp, ch 3, V-st in each of next 2 between-sps, dc in top of tch.
2. Ch 7 for the bridge.
3. Hold Leg A RS facing, with its last-made dc nearest the bridge. Dc in top of that dc, V-st in each of next 2 between-sps, dc in next between-sp. Leave the tch unworked. Turn.
(8 + 7 ch + 8 = 23 sts)
Check that the bridge isn’t twisted. The opening between the feet is now 1.6 in (4.1 cm) wide at the bottom and 1.2 in (3.0 cm) tall.
Row 6 (WS, crossbar):
1. Ch 3, V-st in ch-1 sp of each of next 2 V-sts.
2. V-st in top of next dc.
3. [Sk next ch, V-st in next ch] 3 times, then sk last ch.
4. V-st in top of next dc.
5. V-st in ch-1 sp of each of next 2 V-sts, dc in top of tch, turn.
(9 V-sts + 2 dc = 29 sts)
Upper Legs and Top
Leg B upper
Row 7 (RS, shift): Sl st in next between-sp, ch 3, V-st in each of next 2 between-sps, dc in next between-sp, turn. Leave the rest unworked. (8 sts)
Row 8 (WS): Ch 3, V-st in each of the 2 V-st sps, dc in top of tch, turn. (8 sts)
Row 9 (RS, shift): Sl st in next between-sp, ch 3, V-st in each of next 2 between-sps, dc in top of tch. (8 sts)
Fasten off.
Leg A upper
Row 7 (RS): With RS facing, leave the next 3 V-sts of Row 6 unworked. They form the bottom of the hole. Join yellow in the next between-sp. Ch 3, V-st in each of next 2 between-sps, dc in next between-sp. Leave the tch unworked. Turn. (8 sts)
Row 8 (WS): Ch 3, V-st in each of the 2 V-st sps, dc in top of tch, turn. (8 sts)
Row 9 (RS, shift): Ch 3, V-st in each of next 2 between-sps, dc in next between-sp. Leave the tch unworked. Turn. (8 sts)
Top
Row 10 (WS, join):
1. Ch 3, V-st in each of the 2 V-st sps, dc in top of tch.
2. Ch 3 for the bridge.
3. Dc in top of the last-made dc of Leg B, V-st in each of the 2 V-st sps, dc in top of tch, turn.
(8 + 3 ch + 8 = 19 sts)
Row 11 (RS, top):
1. Ch 3, V-st in each of next 2 V-st sps.
2. V-st in top of next dc.
3. Sk next ch, V-st in next ch, sk next ch.
4. V-st in top of next dc.
5. V-st in each of next 2 V-st sps, dc in top of tch.
(7 V-sts + 2 dc = 23 sts)
Fasten off.
The hole is 0.7 in (1.8 cm) wide at its base, 0.43 in (1.1 cm) wide at the top and 1 in (2.5 cm) tall.
Flowers (make 3)
Rnd 1: With orange, make a magic ring. Ch 1, 5 sc in ring, sl st to first sc. Fasten off. (5 sc)
Rnd 2: Join cream in any sc. Work (sl st, ch 2, 2 dc, ch 2, sl st) in each sc around. (5 petals)
Fasten off, leaving a 6 in (15.2 cm) tail. Each flower should be about 0.7 in (1.8 cm) across.
Leaves (make 5)
With green, ch 5.
- Sl st in 2nd ch from hook, sc in next ch, hdc in next ch, sc in last ch, ch 1.
- Working along the other side of the chain: sc in same ch, hdc in next ch, sc in next ch, sl st in last ch.
(8 sts + tip ch)
Fasten off, leaving a 6 in (15.2 cm) tail.
Border
Border gauge: 7 sc = 1 in (2.5 cm) along stitch edges, and 2 sc per V-st row end.
Outer round
With cream and RS facing, make a standing sc in the outer corner of Leg A’s foundation chain. Work 2 more sc in the same ch, then continue:
- Leg A bottom: sc in each of next 5 ch, 3 sc in last ch. (11 sc, including the corners)
- Leg A inner side: 1 sc in the Row 1 end, then 2 sc in each of the Row 2–4 ends. (7)
- Bridge underside: sc in the unused loop of each of the 7 ch. (7)
- Leg B inner side: 2 sc in each of the Row 4–2 ends, then 1 sc in the Row 1 end. (7)
- Leg B bottom: 3 sc in first ch, sc in each of next 5 ch, 3 sc in last ch. (11)
- Leg B outer side: 1 sc in the Row 1 end, then 2 sc in each of the Row 2–11 ends. (21)
- Top: 3 sc in top of the tch. Then sc in each between-sp and each V-st sp across: 15 sc. Finish with 3 sc in the last dc. (21)
- Leg A outer side: 2 sc in each of the Row 11–2 ends, then 1 sc in the Row 1 end. (21)
Sl st to the first sc. (106 sc) Fasten off.
Hole round
Make a standing sc in the first exposed V-st at the bottom of the hole.
- Bottom: sc in the next 4 spaces. (5 sc in total)
- First side: 2 sc in each of 3 row ends. (6)
- Top of hole: sc in the unused loop of each of the 3 bridge ch. (3)
- Second side: 2 sc in each of 3 row ends. (6)
Sl st to the first sc. (20 sc) Fasten off.
Why the math works
- Along stitch edges: each sc fills one stitch column, which is 0.14 in (0.4 cm). The 7 columns of each foot give 1 in (2.5 cm), plus 2 extra corner sc at each end. That gives 11 sc per foot.
- Along row ends: 2 sc cover about 0.29 in (0.7 cm) of each 0.33 in (0.8 cm) row. That slight snugness smooths out the stepped shift edges instead of rippling.
- Corners: the outer (convex) corners get 3 sc. The inside corners of the notch and hole get no extra stitches, so they stay sharp.
- Total depth: the border adds 0.15 in (0.4 cm) per side. That takes the letter from 3.6 × 3.5 in (9.1 × 8.9 cm) to 3.9 × 3.8 in (9.9 × 9.7 cm).
Final Blocking
- Weave in all yellow and cream ends. Leave the flower and leaf tails for sewing.
- Pin the letter RS up on the mat to 3.9 in (9.9 cm) wide × 3.8 in (9.7 cm) tall. Pin each foot square and the top edge straight.
- Pin the hole open to 0.7 in (1.8 cm) at its base.
- Mist until damp and let dry completely.
- Optional: brush a thin layer of fabric stiffener on the WS and let it dry.
- Sew the flowers in place. Put one on Leg A’s foot, tucking 2 leaves behind its outer side. Put one on Leg B’s foot, also with 2 leaves. Put the third on Leg B’s upper section beside the hole, with 1 leaf below it.
- Open the jump ring with both pliers and pass it through the top border at the center stitch. Add the chain and split ring, then close the ring flush.
Final Quality-Control Checklist
- [ ] Every leg row has 8 sts, Row 6 has 29 sts and Row 11 has 23 sts.
- [ ] Both bridges are untwisted.
- [ ] The letter is 3.9 × 3.8 in (9.9 × 9.7 cm).
- [ ] The outer border has 106 sc and the hole border has 20 sc.
- [ ] The notch and hole corners are crisp.
- [ ] The flowers lie flat, with the leaves peeking past the border.
- [ ] The jump ring is fully closed.
Troubleshooting
- The legs don’t lean: you may be skipping the step-in on shift rows. Check Rows 3, 5, 7 and 9.
- The crossbar puckers: the bridge chain is too tight. Work it with a looser tension or go up 0.25 mm on the hook for those 7 ch.
- The border ruffles: you are working more than 1 sc per stitch column across the top. Use exactly 15 sc between the corners.
- The border pulls in: loosen your sc a little. Don’t add stitches.
- The flowers cup: work Rnd 1 more loosely or press the flowers flat before sewing.
Care
Hand wash in cool water, press out the water in a towel and dry flat. Re-pin the letter to size if it relaxes.
Final Notes
Here is the measurement chain:
- Each leg starts 1 in (2.5 cm) wide.
- The crossbar reaches 3.0 in (7.6 cm).
- Before the border, the letter measures 3.6 × 3.5 in (9.1 × 8.9 cm).
- The cream border adds 0.15 in (0.4 cm) per side.
- The finished charm measures 3.9 × 3.8 in (9.9 × 9.7 cm).
If your counts and checkpoints match at each stage, you’ll end up with a crisp, sunny initial that’s ready to hang. Happy crocheting!