
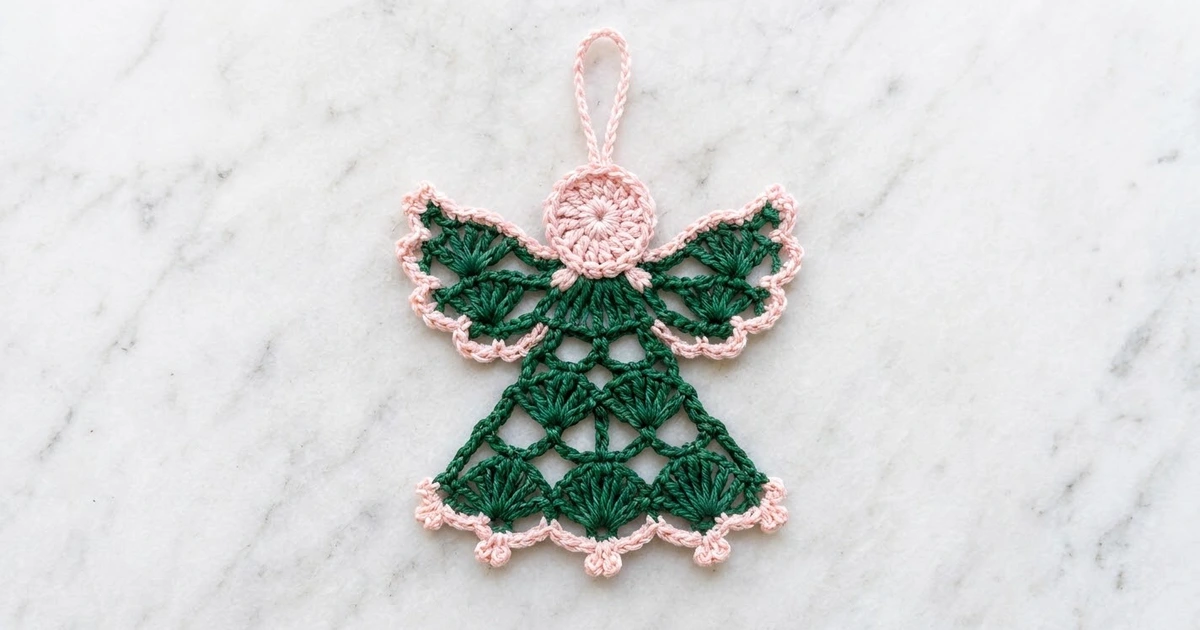
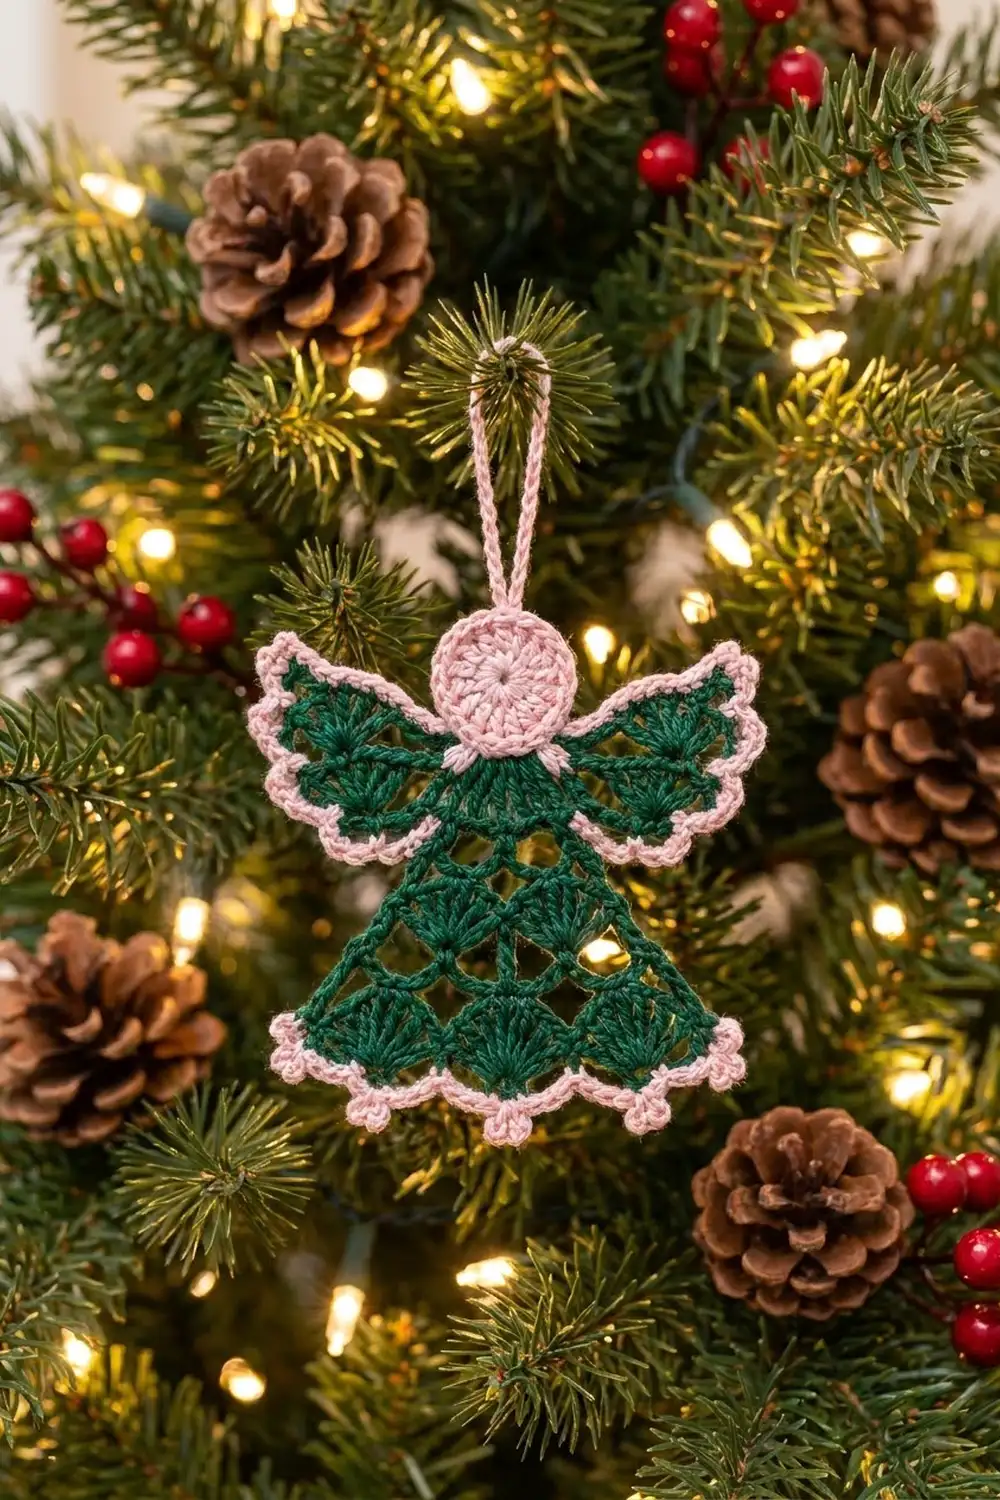
This little angel is a flat lace ornament. It has a soft pink head, a forest-green shell-lace skirt and two fan-shaped wings. A fine pink edging outlines the wings and the hem, and four tiny picots dot the lower edge. A pink chain loop at the top makes it ready to hang.
Deep evergreen and pale blush still say Christmas, but they feel softer and more vintage than red and green. Mercerized cotton keeps the fans crisp, and the open loops let tree lights shine through.
The pattern uses US crochet terms. The finished angel measures 4.5 in (11.4 cm) from wing tip to wing tip and 3.75 in (9.5 cm) from the top of the head to the hem picots. The hanging loop adds 1.75 in (4.4 cm) above the head.
The angel is worked in one piece. First you crochet a round head. Then you work the green body in rows down from the bottom of the head, and work each wing outward from the side edge of the yoke. Last, you add pink edging to the hem and wings and chain a hanging loop.
Finished Size and Construction
- Finished size: 4.5 in (11.4 cm) wide x 3.75 in (9.5 cm) tall, plus a 1.75 in (4.4 cm) loop
- Skill level: Intermediate
- Terminology: US crochet terms
- Yarn weight: Super fine (#1) fingering-weight mercerized cotton, or size 3 crochet thread
- Hook: 2.5 mm
- Number of pieces: 1 (worked in one piece with color changes)
- Layout: A single ornament on its own; no joining
- Piece size before edging: 4.25 in (10.8 cm) wingspan x 3.5 in (8.9 cm) tall; the hem is 3.5 in (8.9 cm) wide
- Edging depth: 0.125 in (0.3 cm) of sc; the hem picots add another 0.125 in (0.3 cm)
Materials
Choose a smooth, mercerized cotton. Its sheen shows off the fans, and cotton holds starch well, so the wings stay flat. Avoid fuzzy yarns, which blur the lace.
- Color A, forest green: 8 g, about 27 m
- Color B, blush pink: 5 g, about 17 m
Both amounts include about 30 percent extra for the gauge check, weaving in ends and differences in tension. One 50 g ball of each color makes several angels.
Tools:
- 2.5 mm crochet hook
- Tapestry needle
- Scissors
- 2 stitch markers
- Blocking mat and rust-proof pins
- Spray starch or a starch-and-water solution
Abbreviations (US Terms)
- ch = chain
- sl st = slip stitch
- sc = single crochet
- hdc = half double crochet
- dc = double crochet
- sk = skip
- st(s) = stitch(es)
- sp = space
- RS / WS = right side / wrong side
Special stitches:
- Fan: 7 dc (wings and skirt Row 3) or 9 dc (skirt Row 5), all worked into the same ch loop.
- Picot: ch 3, sl st in the 3rd ch from the hook.
Gauge and Checkpoints
Gauge is 8 dc = 1 in (2.5 cm) in rows. The head works as your gauge swatch, so make it first and measure it before you go on.
Checkpoints:
- Head after Round 2: 1.1 in (2.8 cm) across.
- Head after Round 3: 1.4 in (3.6 cm) across.
- Body after Row 2: 1.75 in (4.4 cm) across the loops.
- Body after Row 3: 2.75 in (7.0 cm) across the fans.
- Body after Row 5: the hem is 3.5 in (8.9 cm) wide, and the skirt is 2.1 in (5.3 cm) long from the head.
- Each wing: reaches 1.25 in (3.2 cm) out from the yoke, for a 4.25 in (10.8 cm) wingspan.
If the head is wider than 1.5 in (3.8 cm), switch to a 2.25 mm hook. If it is smaller than 1.3 in (3.3 cm), switch to a 2.75 mm hook. Make the head again after changing hooks. A head that is 0.1 in (0.3 cm) off makes the wingspan about 0.3 in (0.8 cm) off.
Head
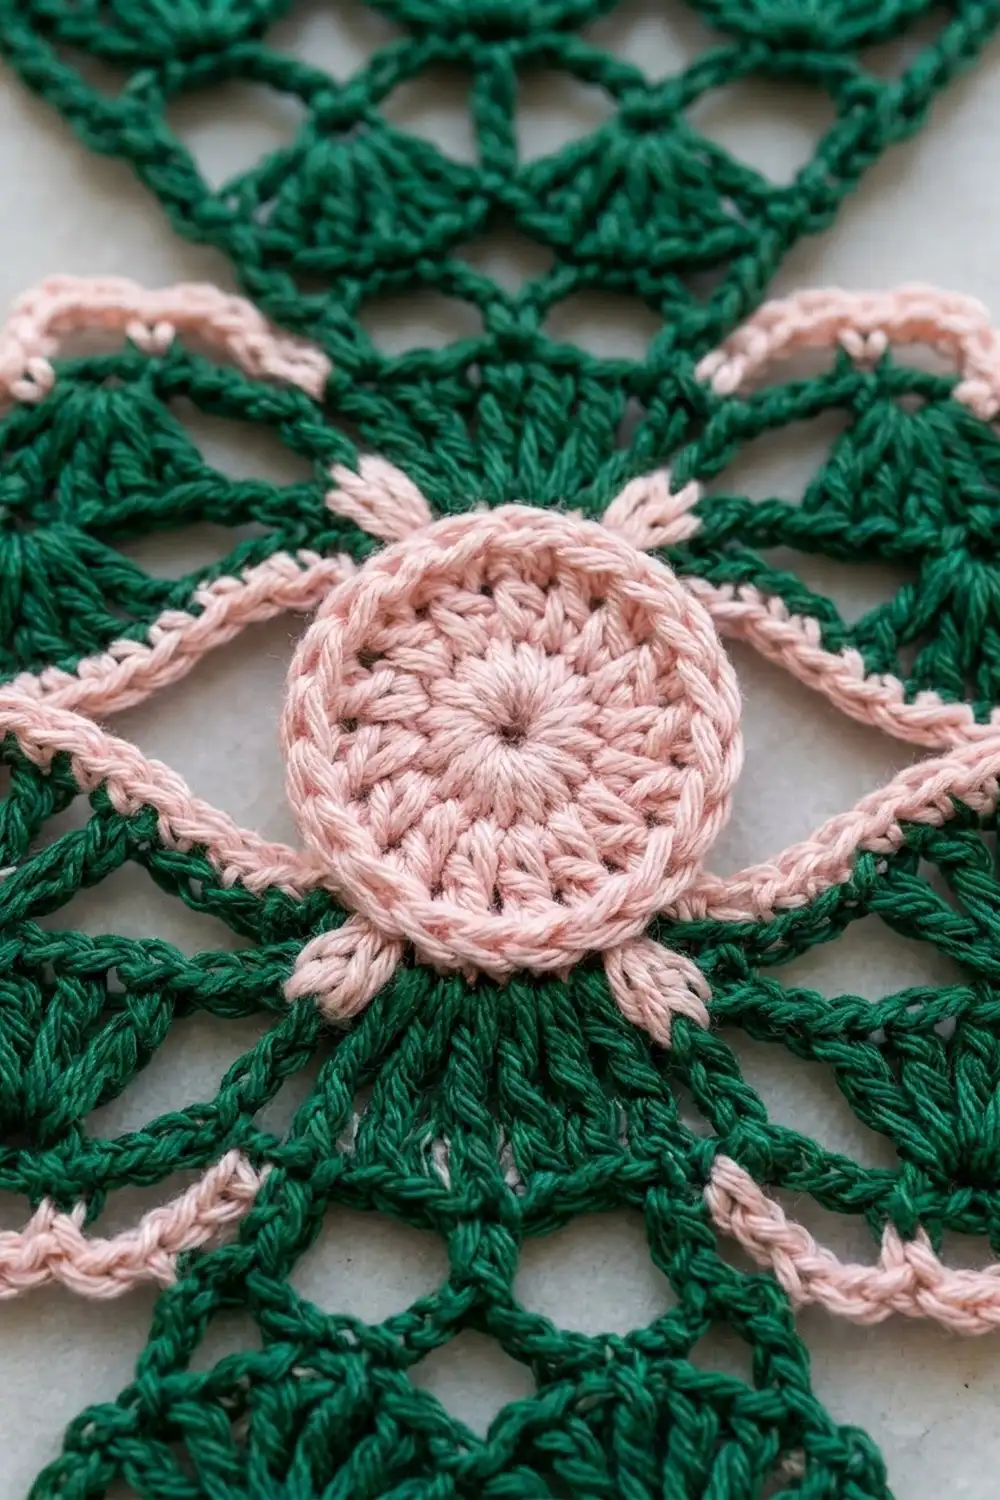
Use Color B and work in joined rounds with the RS facing.
Round 1: Make a magic ring. Ch 3 (counts as dc) and work 11 dc in the ring. Pull the ring closed and sl st to the top of the ch-3. (12 dc)
Round 2: Ch 3 (counts as dc). Work 1 dc in the same st, then 2 dc in each st around. Sl st to the top of the ch-3. (24 dc)
Round 3: Ch 1. Work 1 sc in the first st and 2 sc in the next st. Work 1 sc in the next st and 2 sc in the next st; repeat from * around. Sl st to the first sc. (36 sc)*
Fasten off. Count the first sc of Round 3 as st 1 and put a marker in it. This is the top of the head.
Body
Use Color A and work in rows, turning at the end of each row.
Row 1 (RS): With the RS facing, join Color A with a sl st in st 15 of the head. Ch 3 (counts as dc) and work 1 dc in the same st. Then work 2 dc in each of the next 7 sts (sts 16 to 22). Turn. (16 dc)
This row forms the yoke. It spreads 8 head stitches into 16 dc to make the shoulders.
Row 2 (WS): Ch 1 and work 1 sc in the first dc. Ch 5, sk 2 dc, sc in the next dc; repeat from * 4 more times. The last sc goes in the top of the turning ch-3. Turn. (6 sc, 5 ch-5 loops)*
Row 3 (RS): Work these steps in order:
- Ch 1, sc in the first sc, ch 2.
- Sc in the next ch-5 loop.
- 7-dc fan in the next loop.
- Sc in the next loop.
- 7-dc fan in the next loop.
- Sc in the next loop.
- Ch 2, sc in the last sc. Turn.
(2 fans = 14 dc, 5 sc, 2 ch-2 sps)
Row 4 (WS): Work these steps in order:
- Ch 1, sc in the first sc.
- Ch 7. Sk the ch-2 sp, the next sc and the first 3 dc of the fan. Sc in the 4th (center) dc of the fan.
- Ch 6. Sk the last 3 dc of that fan, the center sc and the first 3 dc of the next fan. Sc in the 4th dc of that fan.
- Ch 7, sc in the last sc. Turn.
(4 sc, 3 loops: ch-7, ch-6, ch-7)
The longer loops at the ends let the skirt widen into a triangle.
Row 5 (RS): Work these steps in order:
- Ch 1, sc in the first sc.
- 9-dc fan in the first ch-7 loop, sc in the next sc.
- 9-dc fan in the ch-6 loop, sc in the next sc.
- 9-dc fan in the last ch-7 loop, sc in the last sc.
(3 fans = 27 dc, 4 sc)
Fasten off. The center fan sits directly below the center sc of Row 3, so the lace forms a neat diamond pattern. Checkpoint: The hem is 3.5 in (8.9 cm) wide, and the skirt is 2.1 in (5.3 cm) long.
Wings (Make 2, Worked onto the Body)
Each wing is worked outward from the side edge of the yoke, across the ends of body Rows 1 and 2. Only the starting point is different for each wing, so you keep working counterclockwise with the RS facing. If you crochet left-handed, swap the two instructions.
Right wing, Row 1 (RS): With the RS facing, join Color A at the end of body Row 2 on the right edge. Ch 3 (counts as dc) and work 2 dc into the end of Row 2. Then work 4 dc around the end post of Row 1. Turn. (7 dc)
Left wing, Row 1 (RS): With the RS facing, join Color A at the end of body Row 1 on the left edge, next to the head. Ch 3 (counts as dc) and work 3 dc around the end post of Row 1. Then work 3 dc into the end of Row 2. Turn. (7 dc)
Work the rest of both wings the same way:
Row 2 (WS): Ch 1 and work 1 sc in the first dc. Ch 5, sk 2 dc, sc in the next dc; repeat from * once more. Turn. (3 sc, 2 ch-5 loops)*
Row 3 (RS): Ch 1 and work 1 sc in the first sc. Work a 7-dc fan in the next loop, then 1 sc in the next sc. Work a 7-dc fan in the next loop, then 1 sc in the last sc. Turn. (2 fans = 14 dc, 3 sc)
Row 4 (WS): Work these steps in order:
- Ch 1, sc in the first sc.
- Ch 5, sc in the 4th dc of the next fan.
- Ch 5, sc in the center sc.
- Ch 5, sc in the 4th dc of the next fan.
- Ch 5, sc in the last sc.
(5 sc, 4 ch-5 loops)
Fasten off. Checkpoint: Each wing reaches 1.25 in (3.2 cm) out from the yoke, and the wingspan is 4.25 in (10.8 cm).
Hanging Loop
Use Color B. Join with a sl st in the marked st 1 at the top of the head. Ch 30, then sl st in the same st. To make the loop firmer, sl st in each of the 30 ch around the loop, then sl st once more in st 1. Fasten off. The loop stands 1.75 in (4.4 cm) tall.
Border (Pink Edging)
Use Color B for the hem and for the outer edges of each wing. The sides of the skirt stay green. Edging gauge is 8 sc = 1 in (2.5 cm) along an edge.
Hem Edging
Row 1 (RS): With the RS facing, join Color B in the first sc of body Row 5. Then work across the hem:
- Right corner: ch 1, (sc, picot, sc) in the first sc. (2 sc, 1 picot)
- Fan 1: sc in each of the next 4 dc, 2 sc in the 5th dc, sc in each of the next 4 dc. (10 sc)
- Valley: (sc, picot) in the next sc. (1 sc, 1 picot)
- Fan 2: same as Fan 1. (10 sc)
- Valley: (sc, picot) in the next sc. (1 sc, 1 picot)
- Fan 3: same as Fan 1. (10 sc)
- Left corner: (sc, picot, sc) in the last sc. (2 sc, 1 picot)
Fasten off. Hem total: 36 sc + 4 picots (2 + 10 + 1 + 10 + 1 + 10 + 2 = 36).
Wing Edging (Make 2)
Work counterclockwise with the RS facing. On the left wing, join Color B at the upper inner corner, next to the head. On the right wing, join at the lower inner corner, under the arm.
Row 1 (RS): Ch 1, then:
- First side edge: 2 sc in each of the 4 row-ends. (8 sc)
- Outer edge: (sc, hdc, dc, hdc, sc) in each of the 4 ch-5 loops. (20 sts)
- Second side edge: 2 sc in each of the 4 row-ends. (8 sc)
Fasten off. Wing total: 36 sts per wing (8 + 20 + 8 = 36).
Why the Math Works
Each 9-dc fan curves outward, so its edge gets 1 sc per dc plus 1 extra sc at the center, for 10 sc. That one extra stitch fills the longer outer curve, so the edge neither cups nor ruffles. The hem corners point outward and get 2 sc each. The valleys curve inward and get only 1 sc each, which keeps them crisp. Picots add points but no width.
On the wings, 2 sc per row-end matches the row height at 8 sc per 1 in (2.5 cm). Each 5-stitch shell fills one ch-5 loop to make a scallop. The edging adds 0.125 in (0.3 cm) on each side. The hem grows from 3.5 in (8.9 cm) to 3.75 in (9.5 cm), and the wingspan grows from 4.25 in (10.8 cm) to 4.5 in (11.4 cm).
Final Blocking
- Weave each end in through stitches of its own color. Leave the tails long until after blocking.
- Soak the angel in cool water for 10 minutes. Press out the water in a towel without wringing.
- Pin the head into a 1.4 in (3.6 cm) circle.
- Pin the hem to 3.75 in (9.5 cm) wide, with a pin in each picot.
- Pin the wing tips 4.5 in (11.4 cm) apart, with a pin in each wing scallop.
- Check that the angel is 3.75 in (9.5 cm) from the top of the head to the hem picots, and that both sides match.
- Starch the angel and let it dry completely, which takes 4 to 6 hours.
- Unpin it and trim the tails.
Final Quality-Control Checklist
- The head is a flat circle 1.4 in (3.6 cm) across, with 36 sc in Round 3.
- The yoke has 16 dc and is centered under the head.
- The skirt has 2 fans in Row 3 and 3 fans in Row 5.
- Each wing has a 7-dc base, 2 fans and 4 outer loops.
- The hem edging has 36 sc and 4 picots.
- Each wing edging has 36 sts and 4 even scallops.
- The angel is 4.5 in (11.4 cm) wide x 3.75 in (9.5 cm) tall.
- The 1.75 in (4.4 cm) loop is centered on the head.
Troubleshooting
- Head cups: Round 3 is too tight. Work it with a hook one size larger.
- Head ruffles: Check that Round 3 has exactly 12 increases.
- Skirt pulls in at the sides: The Row 4 loops are too short. Chain more loosely, or add 1 ch to each ch-7 loop.
- Hem ruffles: Each fan should have exactly 9 dc, and the edging should have exactly 10 sc per fan.
- Wings droop: Use stronger starch, and pin the wings slightly higher while they dry.
- Wings don’t match: Check that both wing bases have 7 dc.
- Picots twist: Pin each picot flat while blocking.
Care
Hand wash in cool water and lay flat to dry. Starch and block again whenever the angel softens, and store it flat.
Final Notes
Every measurement here builds on the head. A 1.4 in (3.6 cm) head leads to a yoke 1.75 in (4.4 cm) wide, then a two-fan row 2.75 in (7.0 cm) wide, then a three-fan hem 3.5 in (8.9 cm) wide. Two 1.25 in (3.2 cm) wings make a 4.25 in (10.8 cm) wingspan. The pink edging brings the angel to 4.5 in (11.4 cm) x 3.75 in (9.5 cm), and the loop adds 1.75 in (4.4 cm). Check each measurement as you go, and your angel will come out the right size.
Happy crocheting!