

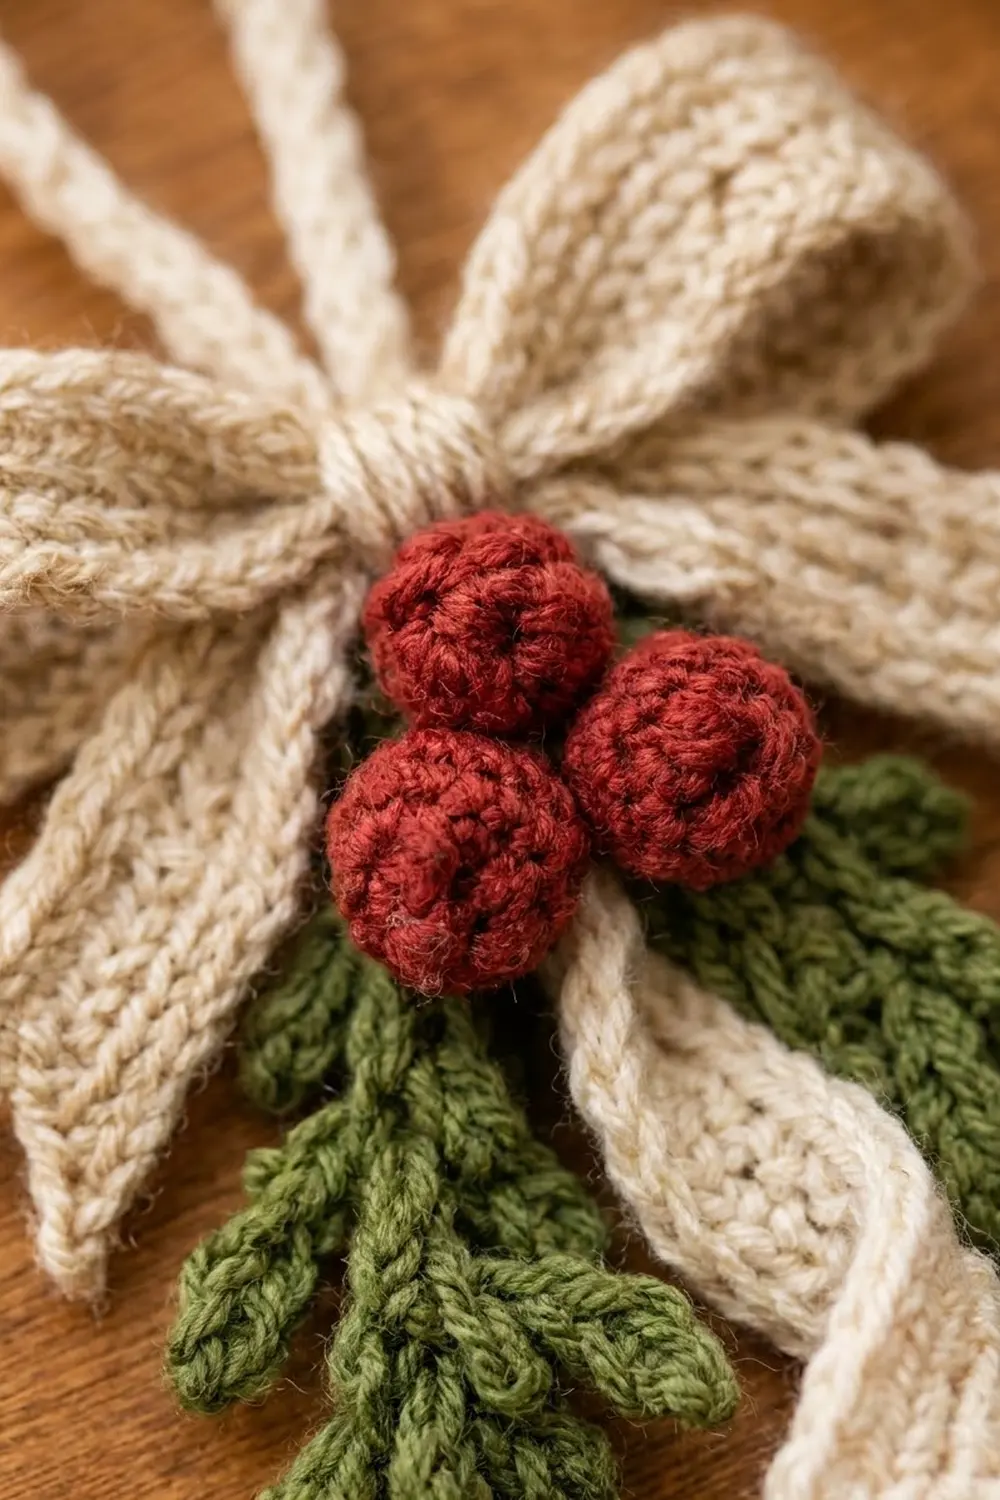
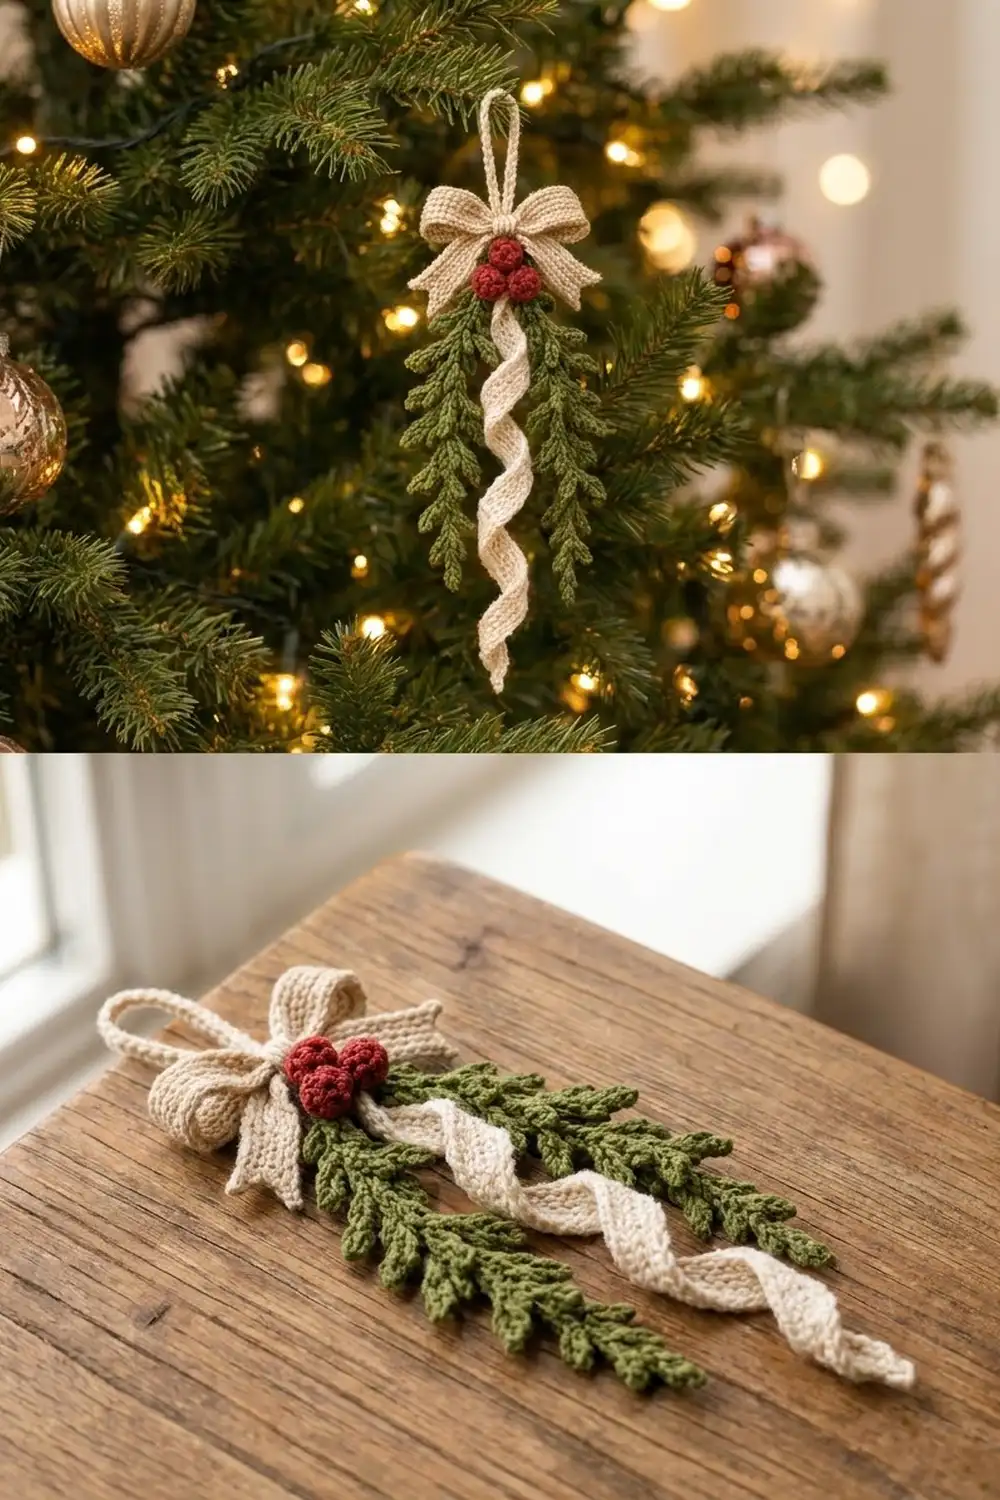
This ornament looks like a small sprig of greenery cut from the tree and tied with a bow. Two olive-green evergreen sprigs splay out in a soft V. A cream spiral ribbon twists down the middle, and three red berries sit under an oatmeal bow. A cream cord loop at the top lets it hang from a branch.
The colors are olive green, cream, deep red and natural oatmeal. The texture comes from slip-stitch needles on the sprigs and back-loop ribbing on the ribbon and bow. The look is rustic and farmhouse, and it works on a tree or on a gift box.
The pattern uses US crochet terms. The finished ornament is 9.5 in (24.1 cm) tall including the loop, 7.5 in (19.1 cm) tall without it, and 4 in (10.2 cm) wide.
You make ten small components: two sprigs, one spiral ribbon, three berries, a bow band, a tail strip, a center wrap and a hanging loop. Then you shape the ribbon, add a border to the bow band and sew everything together in one stack.
Finished Size and Construction
- Finished size: 9.5 in (24.1 cm) tall with loop × 4 in (10.2 cm) wide
- Skill level: Easy-Intermediate
- Terminology: US crochet terms
- Yarn weight: DK (weight 3)
- Hook: 3.5 mm (E-4)
- Number of pieces: 1 ornament, made from 10 components
- Layout: vertical stack (top to bottom): loop, bow, berries, sprigs and ribbon
- Sprig size: 5.5 in × 2 in (14.0 × 5.1 cm)
- Bow band before border: 1.2 in × 7 in (3.0 × 17.8 cm)
- Border depth: 0.2 in (0.5 cm) per edge, 1 round
Materials
Use a smooth cotton or cotton-blend DK yarn. Cotton shows the stitches clearly and holds the spiral shape after blocking. Avoid fuzzy yarns, because they hide the slip-stitch needles.
- Olive green: 10 g / 23 m (sprigs)
- Cream: 5 g / 12 m (spiral ribbon, hanging loop)
- Deep red: 3 g / 7 m (berries)
- Oatmeal beige: 6 g / 14 m (bow band, tails, center wrap)
All quantities include a small margin for swatching and sewing tails.
Tools: 3.5 mm (E-4) hook, tapestry needle, scissors, stitch marker, a pencil or 0.3 in (0.8 cm) dowel, spray starch or diluted fabric stiffener, rust-proof pins and a blocking mat.
Abbreviations (US Terms)
- ch – chain
- sl st – slip stitch
- sc – single crochet
- sc2tog – single crochet 2 together
- BLO – back loop only
- st(s) – stitch(es)
- MR – magic ring
Short Needle: Ch 3, sl st in 2nd ch from hook, sl st in next ch. This makes one needle about 0.4 in (1.0 cm) long.
Branch: Ch 6, sl st in 2nd ch from hook (this is the branch tip). Then work [Short Needle, sl st in next branch ch] 4 times. You end back at the stem. A branch is about 1 in (2.5 cm) long.
Gauge and Checkpoints
Gauge: 20 sc × 20 rows = 4 in (10.2 cm), which is 5 sts and 5 rows per inch. Foundation chains also come out at 5 ch per inch.
Make one sprig first and use it as your test piece. Measure at each checkpoint:
- Sprig stem (25 ch): 5 in (12.7 cm)
- Finished sprig: 5.5 in (14.0 cm) long
- Spiral strip before shaping: 8 in × 0.6 in (20.3 × 1.5 cm)
- Berry: 0.75 in (1.9 cm) across
- Bow band before border: 1.2 in × 7 in (3.0 × 17.8 cm)
- Bow band after border: 1.6 in × 7.4 in (4.1 × 18.8 cm)
If your pieces are too big, change to a 3.25 mm hook. If they are too small, change to a 3.75 mm hook. Slip stitches tighten easily, so keep the loop on your hook relaxed.
Sprigs (Make 2, Olive Green)
You work each sprig all the way around one foundation chain. Side A goes along the back bumps, and Side B goes along the free loops.
Foundation: Ch 26. The first ch from the hook is the turning ch. The other 25 ch are the stem.
Side A (tip to base):
- Sl st in back bump of 2nd ch from hook. (stem st 1)
- [Short Needle, sl st in back bump of next stem ch] 6 times. (stem sts 2–7)
- [Branch, sl st in next 2 stem ch] 4 times. (stem sts 8–15)
- [Short Needle, sl st in next stem ch] 6 times. (stem sts 16–21)
- Sl st in last 4 stem ch. (stem sts 22–25, bare stem)
Check: 1 + 6 + 8 + 6 + 4 = 25 stem sts.
Side B (base to tip): Ch 1, then rotate to work along the free loops of the foundation chain.
- Sl st in first 4 free loops.
- [Short Needle, sl st in next free loop] 6 times.
- [Branch, sl st in next 2 free loops] 4 times.
- [Short Needle, sl st in next free loop] 6 times.
- Sl st in last free loop.
Check: 4 + 6 + 8 + 6 + 1 = 25 stem sts.
Tip: Ch 4, sl st in 2nd ch from hook and in next 2 ch, then sl st in the first sl st of Side A. Fasten off and leave an 8 in (20.3 cm) tail.
Each sprig has: 24 short needles, 8 branches and 1 tip needle. It measures 5.5 in × 2 in (14.0 × 5.1 cm).
Spiral Ribbon (Make 1, Cream)
Foundation: Ch 41.
Row 1: Sc in 2nd ch from hook and in each ch across. (40 sc)
Row 2: Ch 1, turn. Sc BLO in each st. (40 sc)
Row 3 (taper row): Ch 1, turn. Sc BLO in next 37 sts, sl st in last 3 sts. (37 sc + 3 sl st = 40 sts)
Fasten off and leave a 10 in (25.4 cm) tail at the straight end. The sl st end becomes the pointed tip.
Checkpoint: 8 in × 0.6 in (20.3 × 1.5 cm).
Shaping: Dampen the strip. Wrap it around the pencil at a steep diagonal, leaving about 0.3 in (0.8 cm) between turns. Pin both ends and spray with starch. Let it dry for at least 12 hours, then slide it off. The relaxed spiral is about 6.5 in (16.5 cm) long.
Berries (Make 3, Deep Red)
Rnd 1: 6 sc in MR. (6)
Rnd 2: 2 sc in each st. (12)
Rnd 3: Sc in each st. (12)
Rnd 4: Sc2tog 6 times. (6)
Stuff with the starting tail and a few red scraps. Weave the end tail through the front loops of the last 6 sts and pull it closed. Keep the tail for sewing.
Checkpoint: 0.75 in (1.9 cm) across.
Bow Band (Make 1, Oatmeal)
Foundation: Ch 7.
Row 1: Sc in 2nd ch from hook and in each ch across. (6 sc)
Rows 2–35: Ch 1, turn. Sc BLO in each st. (6 sc)
Don’t fasten off. Go straight on to the border.
Checkpoint: 1.2 in × 7 in (3.0 × 17.8 cm): 6 sts and 35 rows at 5 per inch.
Bow Tails (Make 1, Oatmeal)
Foundation: Ch 4.
Row 1: Sc in 2nd ch from hook and in next 2 ch. (3)
Row 2: Ch 1, turn. Sc in next 2 sts, 2 sc in last st. (4)
Row 3: Ch 1, turn. Sc in next 3 sts, 2 sc in last st. (5)
Rows 4–18: Ch 1, turn. Sc in each st. (5)
Row 19: Ch 1, turn. Sc2tog, sc in next 3 sts. (4)
Row 20: Ch 1, turn. Sc2tog, sc in next 2 sts. (3)
Fasten off. Check: 3 + 15 + 2 = 20 rows. The strip measures 1 in × 4 in (2.5 × 10.2 cm) and has angled ends.
Center Wrap (Make 1, Oatmeal)
Foundation: Ch 9.
Row 1: Sc in 2nd ch from hook and in each ch across. (8)
Rows 2–3: Ch 1, turn. Sc in each st. (8)
Fasten off and leave a 10 in (25.4 cm) tail. The wrap measures 1.6 in × 0.6 in (4.1 × 1.5 cm).
Hanging Loop (Make 1, Cream)
Ch 21. Sl st in back bump of 2nd ch from hook and of each ch across. (20 sl st)
The cord is 4 in (10.2 cm) long and folds into a 2 in (5.1 cm) loop.
Make All Pieces
- Olive green: 2 sprigs
- Cream: 1 spiral ribbon, 1 hanging loop
- Deep red: 3 berries
- Oatmeal: 1 bow band, 1 tail strip, 1 center wrap
Total: 10 components. Layout, front view:
            [ LOOP ]
   [ BOW LOOP | WRAP | BOW LOOP ]
              (B)
           (B)   (B)
   [SPRIG]  [RIBBON]  [SPRIG]
       \        |        /
                |
              (tip)
Joining (Assembly)
Sew from the back with small whip stitches and the yarn tails.
- Sprigs: Overlap the bare stem ends so stem sts 22–25 of one sprig line up with stem sts 22–25 of the other. Whip stitch once per stem st, for 4 stitches. Open the sprigs to a V with the tips 3 in (7.6 cm) apart.
- Ribbon: Lay the straight top end over the joined stems with a 0.4 in (1.0 cm) overlap. Sew through all layers with 3 stitches.
- Berries: Arrange them in a triangle over the joint, one at the top and two below. Sew each berry to the stems with its own tail, then sew the berries to each other where they touch.
- Bow: Fold both short ends of the bordered band to the center on the back, overlapping by 0.2 in (0.5 cm). Fold the tail strip into an inverted V and place it behind the band. Pinch everything at the center.
- Wrap: Wrap the center wrap around the pinch. Sew its short ends together at the back, stitch to stitch across the 3 rows.
- Loop: Thread the cord through the back of the wrap and sew its two ends together.
- Attach: Sew the back of the wrap to the top berry and the stem joint.
Tension: Sew just snug enough to hold. Pulling too hard puckers the stems.
Size checkpoint: 9.5 in (24.1 cm) tall with loop, 4 in (10.2 cm) wide.
Border (Bow Band)
Border gauge: 5 sc per inch, the same as the band. One round adds 0.2 in (0.5 cm) to each edge.
Rnd 1: Ch 1, then work around all four sides:
- Short side 1 (Row 35): 3 sc in first st, sc in next 4 sts, 3 sc in last st.
- Long side 1: 1 sc in each of the 35 row ends.
- Short side 2 (foundation): 3 sc in first free loop, sc in next 4 free loops, 3 sc in last free loop.
- Long side 2: 1 sc in each of the 35 row ends.
Join with a sl st to the first sc. Fasten off.
Counts per side (each includes both corner center sts):
- Short sides: 1 corner + 1 + 4 + 1 + 1 corner = 8 sc
- Long sides: 1 corner + 1 + 35 + 1 + 1 corner = 39 sc
- Total: (2 × 8) + (2 × 39) − 4 shared corners = 90 sc
Cross-check: 2 × (3 + 4 + 3) + 2 × 35 = 20 + 70 = 90. ✓
Why the math works: At 5 sts and 5 rows per inch, one sc per row end matches each row’s height exactly, so the long edges stay flat. The 3-sc corners give the extra room needed to turn. After the border, the band measures 1.6 in × 7.4 in (4.1 × 18.8 cm). When you fold it, each bow loop takes half of the length and lies about 1.85 in (4.7 cm) wide. That gives a bow about 3.75 in (9.5 cm) across.
Final Blocking
- Lightly mist the ornament. Don’t soak the spiral.
- Pin it face up with the sprig tips 3 in (7.6 cm) apart.
- Pin each branch so it angles slightly down and away from the stem.
- Fill the bow loops with rolled tissue so they hold their shape.
- Starch the sprigs and bow, but not the berries.
- Let it dry for 12–24 hours.
- Unpin and measure: 9.5 in × 4 in (24.1 × 10.2 cm).
Final Quality-Control Checklist
- Each sprig has 25 stem sts per side, 4 branches per side and 1 tip needle
- The spiral turns evenly and ends in a point
- Each berry is round, firm and 0.75 in (1.9 cm) across
- The bow border has 90 sc, and the corners lie flat
- The two bow loops are the same size, and the tails angle evenly
- The loop is secure and 2 in (5.1 cm) tall
- No yarn tails show on the front
Troubleshooting
- Sprig curls into a C: Your slip stitches are too tight. Use a larger hook, or block the sprig flat with extra starch.
- Needles look floppy: Snug up each needle’s chain a little more.
- Spiral unwinds: Re-wet it, wrap it again with more stiffener and let it dry fully.
- Bow band edge ripples: You added extra stitches. Recount to 35 sc per long side.
- Berries look lumpy: Add more stuffing before you close them.
- Ornament tilts: Move the loop so it sits directly above the ribbon.
Care
Spot clean with cool water and mild soap, then reshape and starch again if needed. Store the ornament flat or hanging so nothing crushes the bow.
Final Notes
Here’s how each measurement leads to the next:
- The 5 in (12.7 cm) stem becomes a 5.5 in (14.0 cm) sprig.
- The 8 in (20.3 cm) strip twists into a 6.5 in (16.5 cm) spiral.
- The 1.2 × 7 in (3.0 × 17.8 cm) band becomes 1.6 × 7.4 in (4.1 × 18.8 cm) after the border, then folds into a 3.75 in (9.5 cm) bow.
- Add the 2 in (5.1 cm) loop and the ornament measures 9.5 in (24.1 cm).
If your gauge is right on the first sprig, the other pieces should come out to size too.
Happy crocheting!