
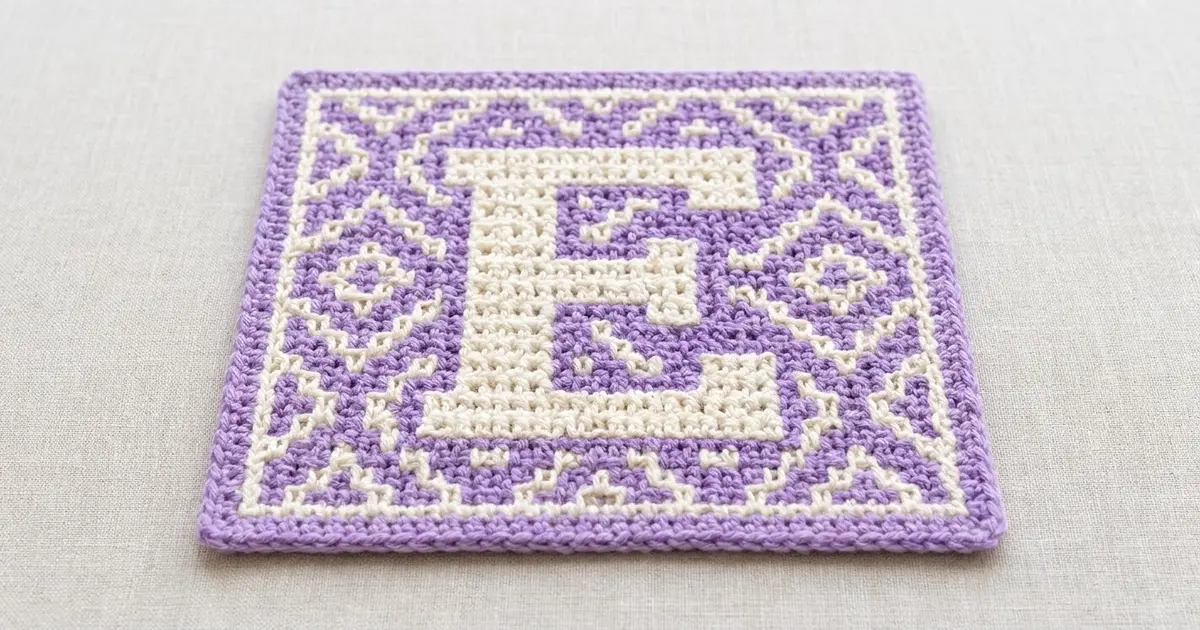
This square has a bold cream letter “E” in the center of a lavender field. Fine cream lines form diamonds, X shapes and zigzag triangles around the letter, and a thin cream frame line sits just inside a smooth lavender border. The look is crisp and slightly pixelated, like a cross-stitch sampler made with a hook.
The palette is just two colors, soft lavender (L) and cream (C). The pattern uses US crochet terms throughout. The finished square measures 8.6 in (21.8 cm) on each side. That is a good size for a monogram mat, a framed nursery initial, a pillow front or a large coaster.
The square is worked flat in rows of tapestry single crochet. You carry the unused color inside every stitch, so there are no floats on the back. All 39 rows have 39 stitches, and the motifs build up row by row from written color sequences. Two rounds of lavender single crochet finish the edge.
The design is symmetrical from top to bottom. Rows 21–39 repeat Rows 19–1 in reverse order, so you only need to follow 20 written rows.
Finished Size and Construction
- Finished size: 8.6 x 8.6 in (21.8 x 21.8 cm)
- Skill level: Intermediate (tapestry color changes)
- Terminology: US crochet terms
- Yarn weight: DK (#3), cotton or cotton blend
- Hook: 3.5 mm (E-4)
- Number of pieces: 1
- Layout: single square, worked flat in rows
- Piece size: 39 sts x 39 rows
- Size before border: 7.8 x 7.8 in (19.8 x 19.8 cm)
- Border depth: 2 rounds, 0.4 in (1.0 cm) on each side
Materials
Choose a smooth, mercerized or matte DK cotton with clear stitch definition. Fuzzy or very splitty yarn will blur the one-stitch cream lines. Pick two colors with strong contrast so the letter reads clearly from across a room.
The amounts below assume a yarn of about 105 m per 50 g:
- Lavender (L): 30 g, about 63 m
- Cream (C): 20 g, about 42 m
Tools:
- 3.5 mm (E-4) crochet hook
- Tapestry needle
- Scissors
- 2 stitch markers
- Blocking mat, rustproof pins and a spray bottle
- Ruler or tape measure
The quantities include a generous margin of about 40% for your gauge swatch, carried yarn and weaving in ends.
Abbreviations (US Terms)
- ch – chain
- sc – single crochet
- sl st – slip stitch
- st(s) – stitch(es)
- rnd – round
- RS / WS – right side / wrong side
- L / C – lavender / cream
- L5, C1, etc. – work 5 sc in lavender, 1 sc in cream, and so on
Tapestry sc (special stitch): Lay the unused color along the top of the row you are working into. Work each sc over it so it is enclosed inside the stitch. To change color, work the last sc of the old color until 2 loops remain on the hook. Then yarn over with the new color and pull through. The new color is now on the hook, and the old color becomes the carried strand.
Reading the color sequences: Each sequence is written left to right as the square appears from the RS.
- Odd rows (RS): read the sequence from the end back to the start.
- Even rows (WS): read the sequence from start to end.
Gauge and Checkpoints
Gauge: 20 sts and 20 rows = 4 in (10.2 cm) in tapestry sc with the second color carried.
Test with a swatch first. Ch 21 and work 20 sc per row for 20 rows, alternating 5 L and 5 C, and carry the second color the whole time. Without the carried strand your gauge will be wrong. Measure the center after a light steam.
Checkpoints on the square itself:
- Row 1: width 7.8 in (19.8 cm)
- Row 10: height 2.0 in (5.1 cm)
- Row 20: height 4.0 in (10.2 cm), the middle bar of the “E” is complete
- Row 39: 7.8 x 7.8 in (19.8 x 19.8 cm)
- After border: 8.6 x 8.6 in (21.8 x 21.8 cm)
Too big: go down half a hook size (3.25 mm) and tug the carried strand snug every few stitches.
Too small, or the piece cups: go up half a hook size (3.75 mm) and avoid pulling the carried strand tight.
Square in width but short in height: your rows are compact. Keep the hook size and add a little height by pulling up a slightly taller loop on each sc.
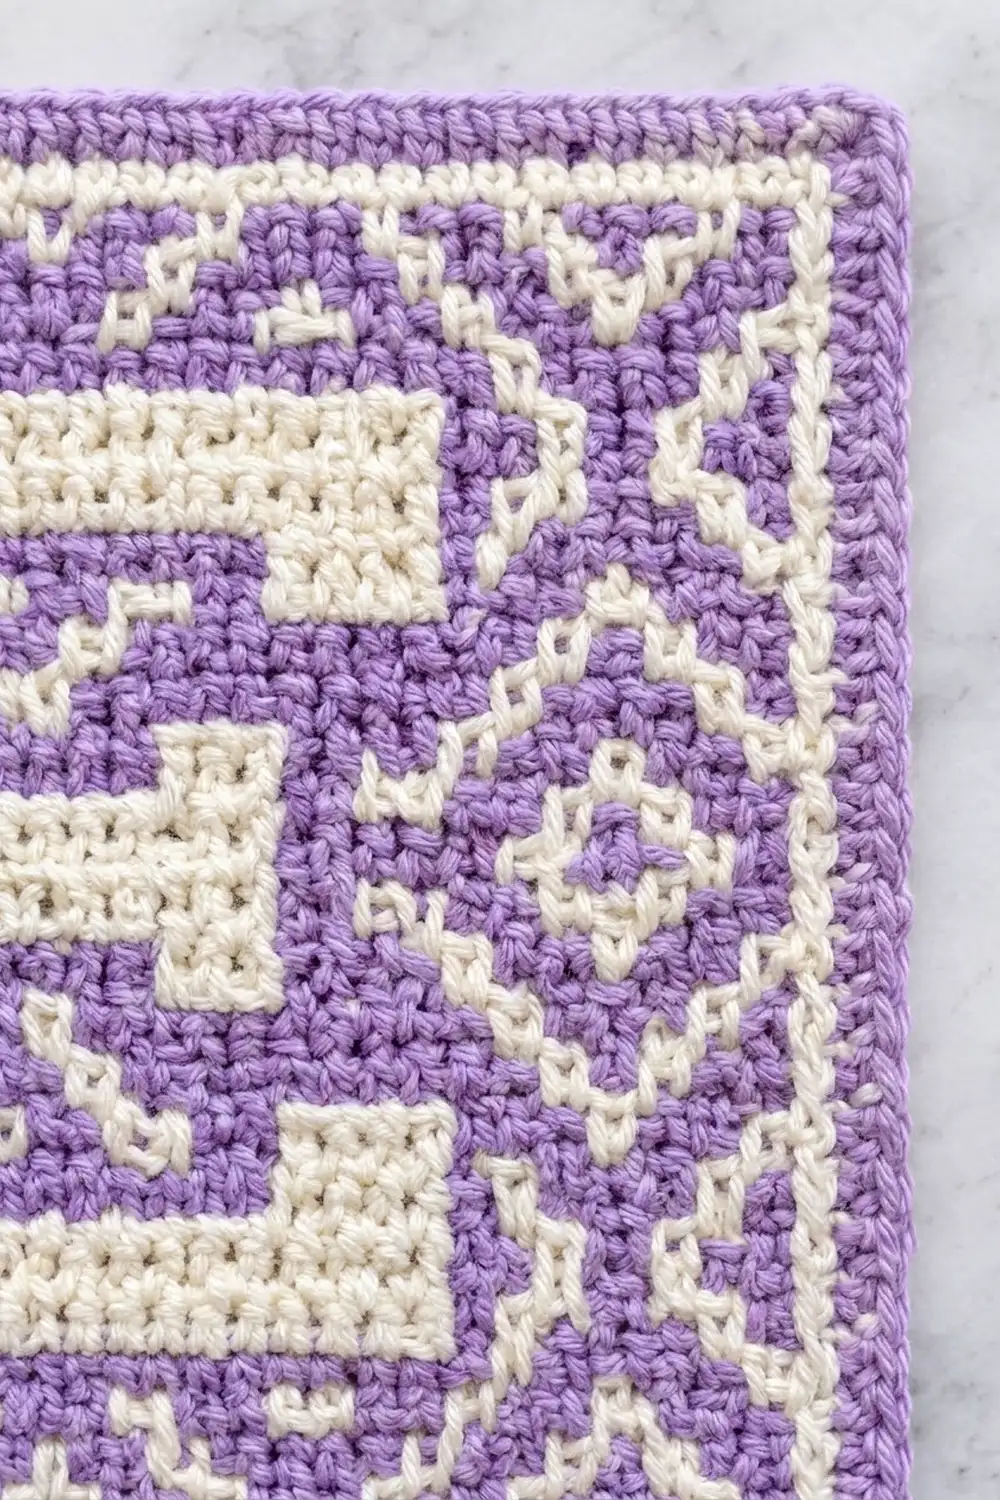
The Square
Foundation: With L, ch 40, leaving a 6 in (15.2 cm) tail.
Row 1 (RS): Lay C along the chain, leaving a 6 in (15.2 cm) tail. With L, sc in the 2nd ch from the hook and in each ch across, working over C. Ch 1, turn. (39 sts)
Carry C from Row 1 onward so every row has the same thickness. From Row 2 on, every row is 39 sc. Ch 1 and turn at the end of each row; the ch 1 never counts as a stitch. At the edges, bring the carried yarn up and work over it in the first stitch of the next row.
Rows 1–20 below go from the bottom edge to the middle of the square.
- Row 1: L39
- Row 2: L1, C37, L1
- Row 3: L1, C1, L35, C1, L1
- Row 4: L1, C1, L5, C1, L7, C1, L7, C1, L7, C1, L5, C1, L1
- Row 5: L1, C1, L4, C1, L1, C1, L5, C1, L1, C1, L5, C1, L1, C1, L5, C1, L1, C1, L4, C1, L1
- Row 6: L1, C1, L3, [C1, L3] 8 times, C1, L1
- Row 7: L1, C1, L2, C1, L5, C1, L1, C1, L5, C1, L1, C1, L5, C1, L1, C1, L5, C1, L2, C1, L1
- Row 8: L1, C1, L1, C1, L7, C1, L7, C1, L7, C1, L7, C1, L1, C1, L1
Rows 4–8 form the zigzag band of triangles. Row 8 has 7 cream sts in total.
- Row 9: L1, C1, L2, C1, L5, C1, L17, C1, L5, C1, L2, C1, L1
- Row 10: L1, C1, L3, C1, L3, C1, L19, C1, L3, C1, L3, C1, L1
- Row 11: L1, C1, L4, C1, L1, C1, L4, C13, L4, C1, L1, C1, L4, C1, L1
- Row 12: L1, C1, L5, C1, L5, C13, L5, C1, L5, C1, L1
- Row 13: Repeat Row 11.
- Row 14: L1, C1, L3, C1, L3, C1, L3, C13, L3, C1, L3, C1, L3, C1, L1
Rows 9–15 build the lower X motifs. Rows 11–14 form the bottom bar of the “E”, which is 13 sts wide and 4 rows tall.
- Row 15: L1, C1, L2, C1, L5, C1, L2, C5, L10, C1, L5, C1, L2, C1, L1
- Row 16: L1, C1, L5, C1, L5, C5, L13, C1, L5, C1, L1
- Row 17: L1, C1, L4, C1, L1, C1, L4, C5, L12, C1, L1, C1, L4, C1, L1
- Row 18: L1, C1, L3, C1, L3, C1, L3, C11, L5, C1, L3, C1, L3, C1, L1
- Row 19: L1, C1, L2, C1, L5, C1, L2, C11, L4, C1, L5, C1, L2, C1, L1
- Row 20: L1, C1, L1, C1, L3, C1, L3, C1, L1, C11, L3, C1, L3, C1, L3, C1, L1, C1, L1 (39 sts: 19 C, 20 L)
Rows 15–17 form the stem of the “E”, which is 5 sts wide. Rows 18–20 begin the middle bar, which is 11 sts wide. Row 20 is the widest row of the side diamonds and holds their center dots.
Rows 21–39: Work each row as Row (40 minus the row number):
- Row 21 = Row 19
- Row 22 = Row 18
- Continue the same way to Row 39 = Row 1.
Rows n and 40 − n always have the same parity, so the reading direction rule still applies. At the end of Row 39, fasten off both colors and weave in the C tail inside the stitches. (39 sts)
Check:
- The “E” spans Rows 11–29. That is 13 sts wide and 19 rows tall, or 2.6 x 3.8 in (6.6 x 9.7 cm).
- Each diamond is 9 sts wide, with a center dot on Row 20.
- The cream frame line sits on Rows 2 and 38 and on the second stitch of every row in between.
Border
Border gauge: 5 sc per 1 in (2.5 cm), each round about 0.2 in (0.5 cm) deep.
Rnd 1: With the RS facing, join L with a sl st in the first st of Row 39, at the top right corner. Ch 1.
- Work 3 sc in the same st (corner).
- Sc in each of the next 37 sts.
- Work 3 sc in the last st (corner).
- Down the left edge, work 1 sc in each row end of Rows 38–2. (37 sc)
- Work 3 sc in the bottom-left corner ch.
- Sc in the free loop of each of the next 37 ch.
- Work 3 sc in the bottom-right corner ch.
- Up the right edge, work 1 sc in each row end of Rows 2–38. (37 sc)
- Join with a sl st to the first sc.
(160 sts = 4 sides x 37 sc + 4 corners x 3 sc)
Each side now has 41 sts, counted from one corner center st to the next and including both corner centers. Place a marker in each corner center.
Rnd 2: Ch 1.
- Sc in the first st.
- Work 3 sc in the next st (corner center).
- [Sc in each of the next 39 sts, 3 sc in the next corner center] 3 times.
- Sc in each of the remaining 38 sts.
- Join with a sl st to the first sc. Fasten off.
(168 sts: 1 + 3 + 3 x 42 + 38)
Each side now has 43 sts, counted from corner center to corner center and including both corner centers: 4 x 43 − 4 shared corners = 168.
Why the math works:
- At gauge, stitches and rows are both 5 per inch. That means 1 sc per row end matches 1 sc per stitch on the top and bottom, so all four sides start with 37 sts between corners and stay square.
- Each round adds 2 sts per side at the corners, which keeps the corners flat as the edge grows outward.
- 43 sts at 5 sts per inch = 8.6 in (21.8 cm), which matches 7.8 in (19.8 cm) plus 0.4 in (1.0 cm) of border on each side.
Final Blocking
- Weave in all tails, keeping each one within its own color area.
- Spray the square until it is evenly damp, or soak it in cool water and roll it in a towel.
- Lay it RS up on the blocking mat.
- Pin the four corners to 8.6 x 8.6 in (21.8 x 21.8 cm), then measure both diagonals; they should be equal.
- Pin the middle of each side, then add pins every 1 in (2.5 cm) along the edges.
- Gently straighten the stem and bars of the “E” with your fingertips so the lines run straight.
- Let it dry completely, at least 12 hours, before unpinning.
Final Quality-Control Checklist
- The square measures 8.6 x 8.6 in (21.8 x 21.8 cm), and the diagonals match.
- Each row has 39 sts, and the border has 168 sts.
- The cream frame line is unbroken on all four sides.
- The two side diamonds mirror each other, and both center dots are on Row 20.
- The “E” bars are 4 rows each and line up with the stem.
- No carried strand shows through on the RS.
- The corners lie flat, and the edges do not ripple.
Troubleshooting
- Cream shows through lavender stitches: keep the carried strand at the back of the stitch, and switch to a tighter cotton if needed.
- The fabric leans or slants: this is normal for tapestry sc and usually blocks out. If it doesn’t, try working into the back loop only on WS rows in your next attempt.
- The motif is off by one stitch: count back to the last cream stitch; most errors come from reading a row in the wrong direction.
- The edges ruffle: your border is too loose. Go down to a 3.25 mm hook for the border only.
- The edges cup: you skipped row ends. Recount for 37 sc between the corners.
- The square is a rectangle: your row gauge differs. Re-block it firmly, or adjust your loop height on the next attempt.
Care
Hand wash cool with mild soap, roll it in a towel, and dry it flat. You can steam it lightly from the WS to refresh the shape.
Final Notes
The measurement chain is short and reliable:
- 20 sts and 20 rows = 4 in (10.2 cm).
- 39 x 39 sts = 7.8 in (19.8 cm) square.
- Two border rounds add 0.4 in (1.0 cm) per side, giving 43 sts per side and 8.6 in (21.8 cm) finished.
Check your gauge first, check again at Row 20, and the letter will sit exactly in the center of its lattice.
Happy crocheting!