

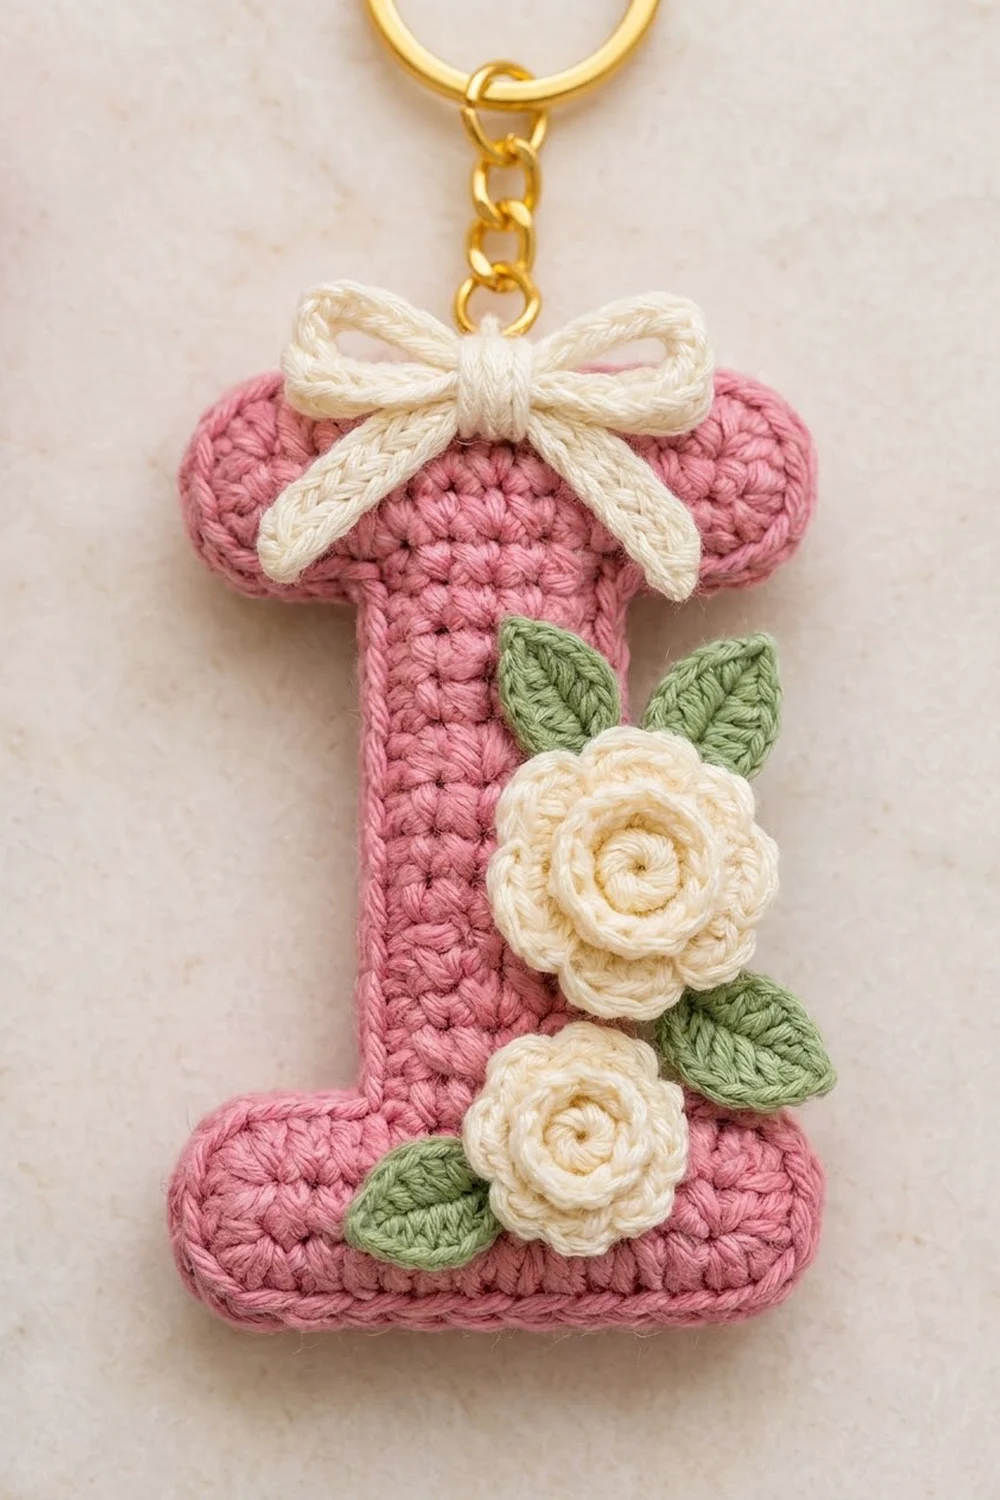
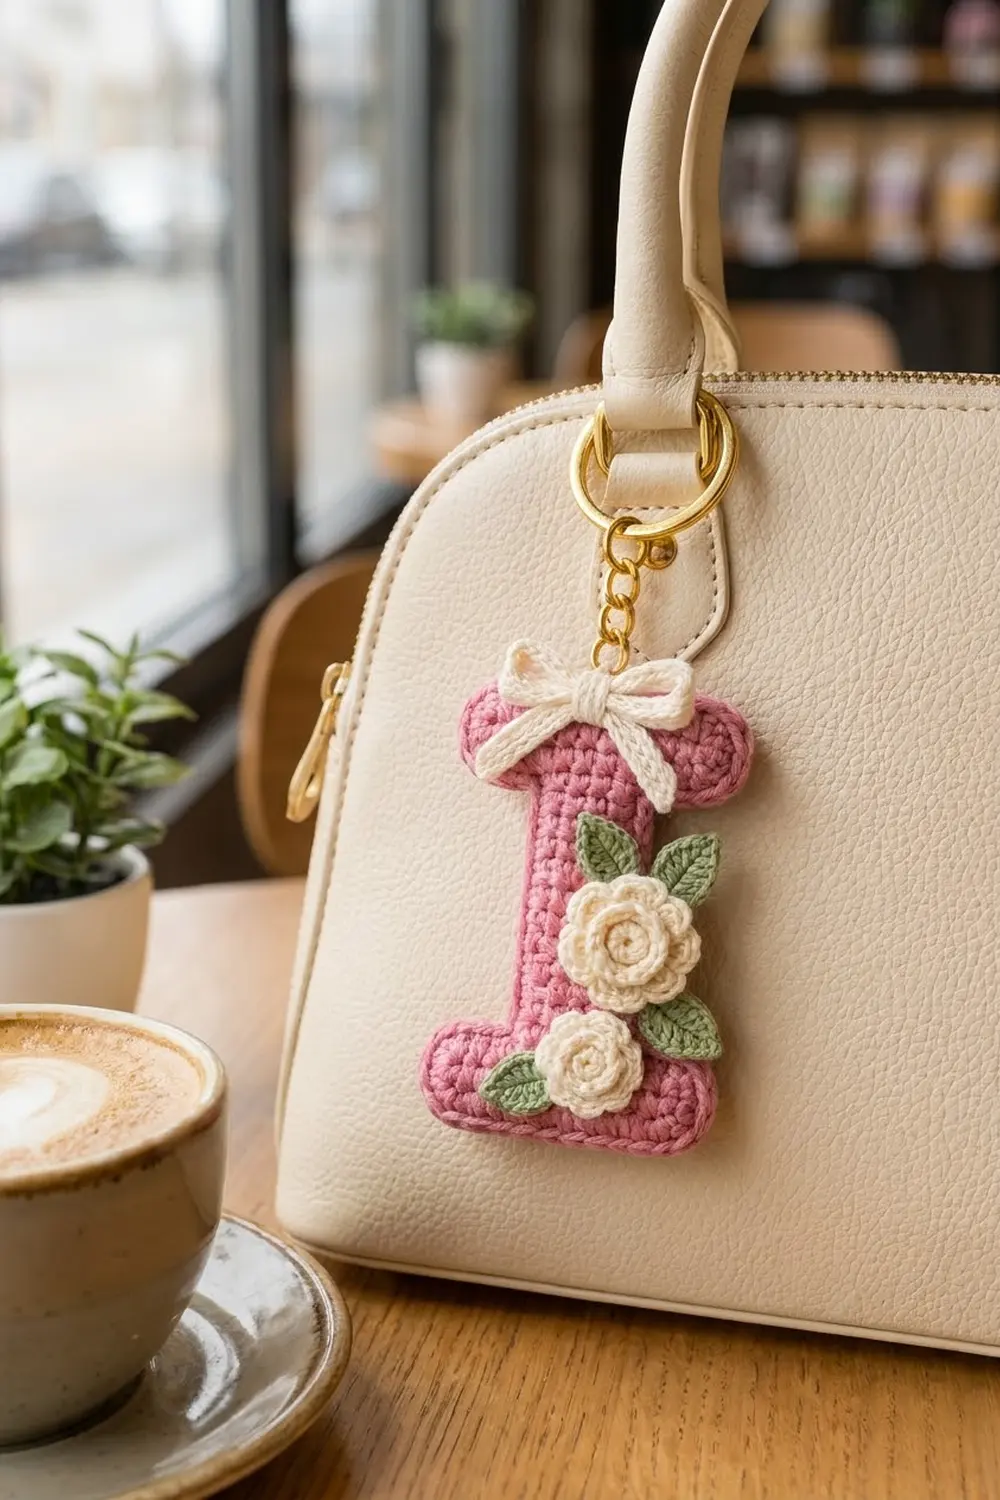
This little letter I is a puffy, padded initial in dusty pink. It has a cream bow at the top, two rolled cream roses, and three small sage-green leaves. It hangs from a gold split ring and chain, so you can use it as a bag charm, a key fob, or a quick personalized gift.
The style is soft and romantic. Tight single crochet gives the letter a neat, firm texture, and the cream and green appliqués add dimension. The colors are dusty rose pink, cream, and sage green, with gold hardware.
This pattern uses US crochet terms. Not counting the hardware, the finished letter measures 2.75 in (7.0 cm) wide by 3.75 in (9.5 cm) tall.
Construction is simple. You crochet two identical flat letter panels in rows, hold them together, and work one single crochet edging through both layers, adding a little stuffing before you close it. Then you make the bow, roses, and leaves and sew them onto the front.
Finished Size and Construction
- Finished size: 2.75 in (7.0 cm) wide x 3.75 in (9.5 cm) tall, plus about 2 in (5.1 cm) of ring and chain
- Skill level: Advanced beginner
- Terminology: US
- Yarn weight: DK (3) cotton or cotton blend
- Hook: 2.75 mm (US C/2)
- Number of pieces: One letter charm (two identical panels joined by the edging), plus 6 small appliqués: 1 bow, 2 roses, 3 leaves
- Layout: Single letter, no grid
- Panel size: 2.5 in (6.4 cm) x 3.5 in (8.9 cm)
- Size before border: 2.5 in (6.4 cm) x 3.5 in (8.9 cm)
- Border depth: about 0.125 in (0.3 cm) per side
Materials
Choose a smooth, tightly plied DK cotton with about 120 m per 50 g. Cotton keeps the stitches crisp and stands up to daily wear on a bag better than fuzzy fibers do.
- Color A, dusty rose pink: 10 g, about 24 m (letter panels and edging)
- Color B, cream: 5 g, about 12 m (bow and roses)
- Color C, sage green: 2 g, about 5 m (leaves)
These quantities include a comfortable margin for your test panel and yarn tails.
Tools:
- 2.75 mm (US C/2) crochet hook
- Tapestry needle
- Small amount of polyester fiberfill
- 1 in (2.5 cm) gold split key ring with a short chain and jump ring
- Two small pliers
- Scissors and stitch markers
- Ruler or tape measure
Abbreviations (US Terms)
- ch: chain
- sl st: slip stitch
- sc: single crochet
- hdc: half double crochet
- dc: double crochet
- sc2tog: single crochet 2 together. Insert the hook in the first position and pull up a loop, insert it in the second position and pull up a loop, then yarn over and draw through all 3 loops.
- st(s): stitch(es)
- WS: wrong side
Special stitch: foundation single crochet (fsc). Insert the hook into the bottom two loops at the base of the last stitch made, yarn over, and pull up a loop. Yarn over and draw through 1 loop to make the chain base, then yarn over and draw through both loops. Each fsc adds one stitch to the end of the row.
Gauge and Checkpoints
Gauge: 24 sc and 24 rows = 4 in (10.2 cm). That is 6 sc and 6 rows per 1 in (2.5 cm).
The gauge needs to be square. The edging places 1 sc in every stitch and 1 sc in every row end, and the edge only lies flat when stitches and rows are the same size.
Make one panel first and measure it before you make the second.
Checkpoints:
- After Row 3: The bottom bar is 2.5 in (6.4 cm) wide and 0.5 in (1.3 cm) tall.
- After Row 18: The stem is about 1.2 in (3.0 cm) wide, and the panel is 3 in (7.6 cm) tall.
- After Row 21: The panel is 2.5 in (6.4 cm) x 3.5 in (8.9 cm).
- After the edging: The letter is 2.75 in (7.0 cm) x 3.75 in (9.5 cm).
If the panel is too big, switch to a 2.5 mm hook. If it is too small, switch to a 3.0 mm hook. If the width is right but the height is off, pull each loop up to a consistent height. Don’t change the stitch counts, because the edging math depends on them.
Letter Panel (Make 2)
With Color A.
Bottom bar:
Ch 16.
Row 1: Sc in 2nd ch from hook and in each ch across. (15 sc)
Rows 2–3: Ch 1, turn, sc in each st across. (15 sc)
Stem:
Row 4: Turn, sl st in first 4 sts, ch 1, sc in next 7 sts. Leave the remaining 4 sts unworked. (7 sc; the sl sts are not counted)
The 4 slip-stitched sts and the 4 unworked sts form the two shoulders of the bottom bar. This leaves the stem centered, with 4 sts on each side.
Rows 5–18: Ch 1, turn, sc in each st across. (7 sc)
You now have 15 stem rows (Rows 4–18).
Top bar:
Row 19: Ch 5, turn, sc in 2nd ch from hook and in next 3 ch (4 sc), sc in each of the 7 stem sts (11 sc), then work 4 fsc. (15 sts)
The 4 chains on one side and the 4 fsc on the other make the top bar stick out by exactly as much as the bottom bar does.
Rows 20–21: Ch 1, turn, sc in each st across. (15 sc)
Fasten off and weave in the ends. Make a second panel the same way.
Panel check: Each panel has 3 rows of 15 sc, then 15 rows of 7 sc, then 3 rows of 15 sts, for 21 rows in total.
Bow
With Color B.
Ch 37.
Row 1: Sc in 2nd ch from hook and in each ch across. (36 sc)
Fasten off, leaving a 10 in (25.4 cm) tail. This makes a cord about 6 in (15.2 cm) long.
Shape the bow: Fold the cord into two loops, using about 2 in (5.1 cm) of cord for each loop. Leave 1 in (2.5 cm) hanging at each end as tails. Wrap the yarn tail tightly around the center 5–6 times to form the knot, then secure it at the back. The bow is about 2 in (5.1 cm) wide. Keep the long tail for sewing.
Large Rose
With Color B.
Ch 26.
Row 1: Sc in 2nd ch from hook and in each ch across. (25 sc)
Row 2: Turn, sl st in first st, *skip 1 st, 5 dc in next st, skip 1 st, sl st in next st; repeat from * 5 more times. (6 petals)
Check: 1 sl st + (6 repeats x 4 sts) = 25 sts used.
Fasten off, leaving a 10 in (25.4 cm) tail. Starting at the end where you finished, roll the strip into a spiral, keeping the base level and the petals facing up. Roll the center tightly and the outer petals more loosely. Stitch through all the layers at the base to hold the shape. The rose is about 1.1 in (2.8 cm) across.
Small Rose
With Color B.
Ch 18.
Row 1: Sc in 2nd ch from hook and in each ch across. (17 sc)
Row 2: Turn, sl st in first st, *skip 1 st, 5 hdc in next st, skip 1 st, sl st in next st; repeat from * 3 more times. (4 petals)
Check: 1 sl st + (4 repeats x 4 sts) = 17 sts used.
Roll and secure it the same way as the large rose. The small rose is about 0.8 in (2.0 cm) across.
Leaves (Make 3)
With Color C.
Ch 8.
Round 1: Sc in 2nd ch from hook, hdc in next ch, dc in next 2 ch, hdc in next ch, sc in next ch, 3 sc in last ch. Working along the other side of the foundation chain: sc in next ch, hdc in next ch, dc in next 2 ch, hdc in next ch, sc in next ch, ch 2, sl st in the same ch as the first sc. (15 sts plus a ch-2 tip)
Fasten off, leaving an 8 in (20.3 cm) tail. The foundation chain forms a natural center vein. Each leaf is about 1.2 in (3.0 cm) long and 0.6 in (1.5 cm) wide.
Border: Joining Edging
Border gauge: One round of sc adds about 0.125 in (0.3 cm) to each side. The letter grows from 2.5 in (6.4 cm) x 3.5 in (8.9 cm) to 2.75 in (7.0 cm) x 3.75 in (9.5 cm).
Hold the two panels with their wrong sides together and the edges lined up. Work every stitch through both layers. With the front panel facing you, join Color A in the first foundation st at the bottom left corner and work counterclockwise.
- Bottom edge: Ch 1, 3 sc in first st, sc in next 13 sts, 3 sc in last st. (19 sc)
- Right end of bottom bar: Sc in each of the 3 row ends. (3 sc; total 22)
- Right shoulder: 3 sc in first st, sc in next 2 sts, sc2tog over the last shoulder st and the row end of Row 4. (6 sc; total 28)
- Right side of stem: Sc in the row ends of Rows 5–17 (13 sc), then sc2tog over the row end of Row 18 and the first st on the underside of the top bar. (14 sc; total 42)
- Right underside of top bar: Sc in next 2 sts, 3 sc in last st. (5 sc; total 47)
- Right end of top bar: Sc in each of the 3 row ends. (3 sc; total 50)
- Top edge: 3 sc in first st, sc in next 13 sts, 3 sc in last st. (19 sc; total 69)
- Left end of top bar: Sc in each of the 3 row ends. (3 sc; total 72)
- Left underside of top bar: 3 sc in first st, sc in next 2 sts, sc2tog over the last st and the row end of Row 18. (6 sc; total 78)
Stop here and stuff the letter lightly through the open left side. Push small tufts into the top bar, the stem, and the bottom bar. The letter should feel padded rather than round, about 0.5 in (1.3 cm) thick.
- Left side of stem: Sc in the row ends of Rows 17–5 (13 sc), then sc2tog over the row end of Row 4 and the first shoulder st. (14 sc; total 92)
- Left shoulder: Sc in next 2 sts, 3 sc in last st. (5 sc; total 97)
- Left end of bottom bar: Sc in each of the 3 row ends. (3 sc; total 100)
Add a last pinch of stuffing if needed, then sl st to the first sc. Fasten off and hide the tail inside the letter. (100 sc)
Why the math works: The outline has 88 edge positions:
- 15 + 15 sts on the bottom and top edges
- 4 x 4 sts on the shoulders and undersides
- 4 x 3 row ends on the bar ends
- 2 x 15 row ends on the stem
Because the gauge is square, 1 sc per position keeps the edge flat. The 8 outer corners each get 2 extra sc (+16) so they turn neatly. The 4 inner corners each lose 1 st through sc2tog (−4) so they don’t bunch up. That gives 88 + 16 − 4 = 100 sc.
Assembly
- Center the bow on the top bar, with the knot about 0.25 in (0.6 cm) below the top edge. Sew through the knot and the back of each loop.
- Place the large rose on the right half of the stem, slightly below center, so it overlaps the right edge.
- Place the small rose lower down on the left, partly over the bottom bar.
- Tuck one leaf above the large rose on the right, one to the right between the roses, and one at the lower left of the small rose.
- Sew through the front panel only, so the stitches don’t show on the back.
- Open the jump ring with pliers. Pass it through stitch 60 of the edging (the center stitch of the top edge) and both layers, attach the chain, and close the ring fully.
Final Blocking
- Lightly mist the letter with water. Don’t soak it, because wet stuffing dries slowly.
- Pinch along the edges to straighten the bars and sharpen the 8 outer corners.
- Ease the stem so both of its sides are straight and parallel.
- Lay the letter flat, front side up, and check that it measures 2.75 in (7.0 cm) x 3.75 in (9.5 cm).
- Fluff the rose petals and open up the bow loops with a fingertip.
- Let it dry completely flat before attaching it to anything.
Final Quality-Control Checklist
- Both panels have 21 rows and match in size.
- The stem is centered, with 4 sts on each shoulder.
- The edging has exactly 100 sc.
- All 8 outer corners are crisp and all 4 inner corners lie flat.
- The stuffing is even, with no lumps.
- The appliqués don’t lift when you tug them.
- The jump ring is completely closed.
- All ends are woven in or hidden inside.
Troubleshooting
Edges ruffle: There are extra stitches in the edging. Count each segment against the list above.
Edges pull in: The edging is tighter than the panels. Relax your tension or go up 0.25 mm in hook size for the edging only.
Inner corners pucker: Use sc2tog at all 4 inner corners instead of two separate sc.
Panels don’t line up: One panel has an extra row. Count both panels before joining.
Letter looks lumpy: Pull out some stuffing and put it back in smaller tufts.
Bow droops: Tack the back of each loop to the letter with one small stitch.
Care
Spot clean with a damp cloth and mild soap, then reshape and dry flat. Don’t machine wash it, because that can loosen the appliqués and shift the stuffing.
Final Notes
The whole keychain follows one measurement chain:
- A gauge of 6 sc and 6 rows per 1 in (2.5 cm) gives a panel of 2.5 in (6.4 cm) x 3.5 in (8.9 cm).
- Two matching panels joined with a 100-stitch edging grow to 2.75 in (7.0 cm) x 3.75 in (9.5 cm).
- The bow, two roses, and three leaves go on last as the finishing touch.
Check your first panel and count your edging, and the rest falls into place.
Happy crocheting!