
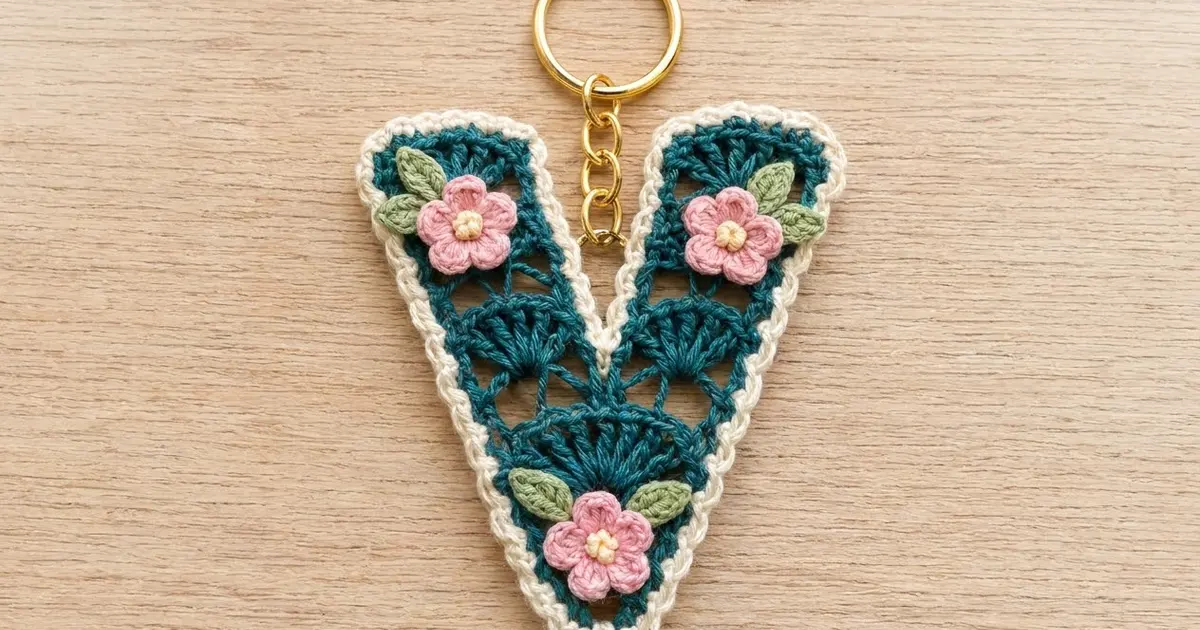
This little letter V is lacy, sturdy, and quick. Deep teal fans stack up the shape like seashells, a cream border frames the outline, and three tiny pink flowers with sage leaves give it a cottage-garden finish. A gold ring and chain turn it into a keychain or bag charm.
The finished piece measures about 3.5 in (8.9 cm) tall and 3.5 in (8.9 cm) wide. It is worked in sport-weight cotton, which keeps the stitches crisp and the shape firm enough to hang from a bag strap without stretching.
The pattern uses US crochet terms throughout.
Construction is simple. You crochet the V as one flat piece in turned rows, starting at the bottom point. Five rows build the point and the large center fan. Each arm is then worked separately off one half of that center fan. A two-round cream border goes around the whole outline, and the flowers and leaves are sewn on after blocking.
Finished Size and Construction
- Finished size: 3.5 in (8.9 cm) tall x 3.5 in (8.9 cm) wide
- Skill level: Easy-intermediate
- Terminology: US crochet terms
- Yarn weight: Sport (#2) cotton
- Hook: 2.5 mm
- Number of pieces: 1 letter V, plus 3 flowers and 6 leaves as appliqués
- Layout: Single motif; no joining
- Piece size before border: about 3 in (7.6 cm) tall x 3 in (7.6 cm) wide
- Border depth: 0.25 in (0.6 cm), 2 rounds of sc
Materials
Choose a smooth, mercerized sport-weight cotton (about 155 m per 50 g). Mercerized cotton shows the fan texture clearly and resists fuzzing on a keychain that gets handled every day.
- Deep teal (V body): 5 g, about 16 m
- Cream (border): 3 g, about 10 m
- Rose pink (petals): 2 g, about 6 m
- Pale yellow (flower centers): 1 g, about 3 m
- Sage green (leaves): 1 g, about 3 m
All quantities include a small safety margin.
Tools:
– 2.5 mm crochet hook
– Tapestry needle
– Stitch markers (2)
– Gold split key ring, 1 in (2.5 cm) diameter, with a 1 in (2.5 cm) gold chain
– Gold jump ring, 0.25 in (0.6 cm)
– Two pairs of small pliers
– Rust-proof pins and a blocking board
– Spray bottle
Abbreviations (US Terms)
- ch – chain
- sl st – slip stitch
- sc – single crochet
- hdc – half double crochet
- dc – double crochet
- sk – skip
- sp – space
- st(s) – stitch(es)
- tch – turning chain
- RS / WS – right side / wrong side
Special stitch – sc3tog: Insert hook in next st, yarn over, pull up a loop; repeat in each of the next 2 sts (4 loops on hook); yarn over and pull through all 4 loops.
Counting note: Beginning ch-3 always counts as 1 dc. Each chain counts as 1 st in the totals.
Gauge and Checkpoints
Gauge matters here because the shape depends on it.
- Arm width: one 17-st arm row = 1 in (2.5 cm) wide
- Band height: 1 arch row + 1 fan row = 0.4 in (1.0 cm)
Work the point section (Rows 1–5) as your test piece, then check:
- After Row 3: 1 in (2.5 cm) wide across the row.
- After Row 5: 1.75 in (4.4 cm) wide and 1.25 in (3.2 cm) tall.
- Each finished arm: 1 in (2.5 cm) wide and 1.75 in (4.4 cm) long.
- Before border: 3 in (7.6 cm) x 3 in (7.6 cm).
- After border: 3.5 in (8.9 cm) x 3.5 in (8.9 cm).
If your piece is too big, go down 0.25 mm in hook size. If it is too small, go up 0.25 mm. Fans that cup or ruffle are also a tension problem: tight fans cup, and loose fans ruffle.
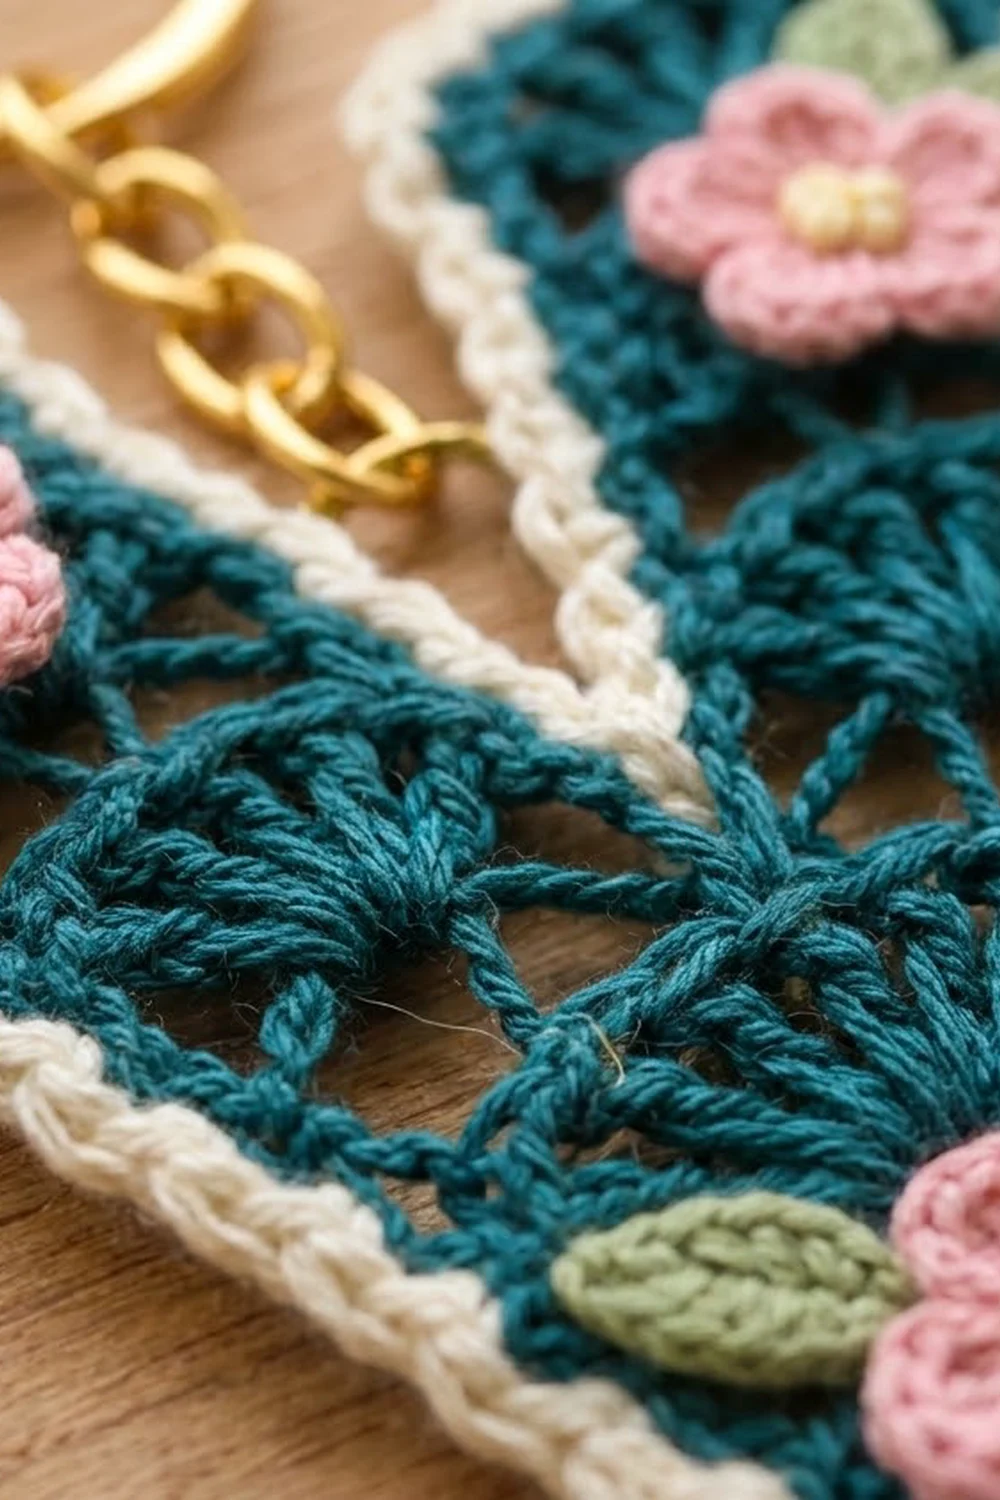
Point Section
Use deep teal.
Row 1 (RS): Ch 4, 6 dc in 4th ch from hook. Turn. (7 dc, counting the skipped ch-3 as 1 dc.)
Row 2 (WS, arch row): Ch 1, (sc, ch 2, sc) in first dc, [ch 2, sk 1 dc, sc in next dc] 3 times, ch 2, sc in same st (top of tch). Turn. (6 sc, 5 ch-2 sps = 16 sts.)
The center ch-2 sp (sp 3) will hold the next fan.
Row 3 (RS, fan row): Ch 3, dc in first ch-2 sp, ch 1, sc in next ch-2 sp, 9 dc in next ch-2 sp, sc in next ch-2 sp, ch 1, dc in last ch-2 sp, dc in last sc. Turn. (13 dc, 2 sc, 2 ch-1 sps = 17 sts.)
Row 4 (WS, arch row): Ch 1, (sc, ch 2, sc) in first dc, ch 2, sk next dc and ch-1 sp, sc in next sc, [ch 2, sk 1 dc, sc in next dc] 4 times, ch 2, sk last fan dc, sc in next sc, ch 2, sk ch-1 sp and next dc, (sc, ch 2, sc) in top of tch. Turn. (10 sc, 9 ch-2 sps = 28 sts.)
The arches over the fan land in fan dc 2, 4, 6, and 8, so the center sp (sp 5) sits directly over the middle of the fan.
Row 5 (RS, center fan row): Ch 3, 2 dc in first ch-2 sp, ch 1, sc in next sp, ch 2, sc in next sp, sk next sp, 13 dc in next (center) sp, sk next sp, sc in next sp, ch 2, sc in next sp, ch 1, 2 dc in last sp, dc in last sc. Turn. (19 dc, 4 sc, 2 ch-1 sps, 2 ch-2 sps = 29 sts.)
Mark the 7th dc of the 13-dc fan. This is the notch stitch, and neither arm is worked into it.
Checkpoint: 1.75 in (4.4 cm) wide, 1.25 in (3.2 cm) tall. Each half beside the notch has exactly 14 sts.
First Arm
Continue with the teal yarn from Row 5. You work over the 14 sts from the edge to the notch.
Row 6 (WS, arch row): Ch 1, sc in first dc, ch 2, sk next dc, sc in next dc, ch 2, sk ch-1 sp and sc, sc in ch-2 sp, ch 3, sk next sc and next fan dc, sc in next dc, [ch 2, sk 1 dc, sc in next dc] 2 times. Leave the marked notch dc unworked. Turn. (6 sc, 4 ch-2 sps, 1 ch-3 sp = 17 sts.)
Row 7 (RS, fan row): Ch 3, dc in first sp, ch 1, sc in next sp, 9 dc in ch-3 sp, sc in next sp, ch 1, dc in last sp, dc in last sc. Turn. (13 dc, 2 sc, 2 ch-1 sps = 17 sts.)
Row 8 (WS, arch row): Ch 1, sc in first dc, ch 2, sk next dc and ch-1 sp, sc in next sc, ch 2, sk 2 dc, sc in next dc, ch 3, sk 3 dc, sc in next dc, ch 2, sk 2 dc, sc in next sc, ch 2, sk ch-1 sp and next dc, sc in top of tch. Turn. (6 sc, 4 ch-2 sps, 1 ch-3 sp = 17 sts.)
The ch-3 arch spans fan dc 4–6, so each new fan sits centered over the one below.
Rows 9–13: Repeat Rows 7–8 twice, then work Row 7 once more. (4 fans on the arm; 17 sts per row.)
Row 14 (WS, top row): Ch 1, sc in each st across, working 1 sc in each ch-1 sp. (17 sc.) Fasten off.
Checkpoint: 1 in (2.5 cm) wide, 1.75 in (4.4 cm) long from Row 6 to Row 14.
Second Arm
Row 6 (WS): With WS facing, join teal in the fan dc right after the marked notch dc. Ch 1, sc in same dc, [ch 2, sk 1 dc, sc in next dc] 2 times, ch 3, sk last fan dc and next sc, sc in ch-2 sp, ch 2, sk next sc and ch-1 sp, sc in next dc, ch 2, sk next dc, sc in top of beg ch-3. Turn. (6 sc, 4 ch-2 sps, 1 ch-3 sp = 17 sts.)
This mirrors the first arm exactly, with the ch-3 arch still in the third sp.
Rows 7–14: Work as for the first arm. Fasten off.
Checkpoint: The arms rise from either side of the notch dc. Before blocking they may stand fairly upright; blocking opens them to the final V angle.
Flowers (Make 3)
Round 1: With pale yellow, make a magic ring, ch 1, 5 sc in ring, sl st to first sc. Pull ring closed. Fasten off. (5 sc.)
Round 2: Join rose pink with a sl st in any sc. *Ch 2, 2 dc in same sc, ch 2, sl st in same sc, sl st in next sc; repeat from * 4 more times, ending the last repeat in the joining sl st. (5 petals.) Fasten off, leaving a 6 in (15.2 cm) tail.
Each flower measures about 0.6 in (1.5 cm) across.
Leaves (Make 6)
With sage green, ch 5. Sl st in 2nd ch from hook, sc in next ch, hdc in next ch, sc in last ch. (4 sts.) Fasten off, leaving a 6 in (15.2 cm) tail.
Each leaf measures about 0.45 in (1.1 cm) long.
Border
Use cream. Border gauge: 2 rounds of sc = 0.25 in (0.6 cm) deep. Along row edges, work 2 sc in the side of each dc row and 1 sc in the side of each sc row.
Round 1 (RS): Join cream at the top outer corner of the first arm. Work around in this order:
- First arm top: 3 sc in first st, sc in each of next 15 sts, 3 sc in last st. (21 sc.)
- First arm inner edge (Rows 13–7): 2 sc per dc row, 1 sc per arch row. (4 dc rows x 2 + 3 arch rows x 1 = 11 sc.)
- Notch: sc3tog over the side of Row 6 of the first arm, the notch dc, and the side of Row 6 of the second arm. (1 st.)
- Second arm inner edge (Rows 7–13): (11 sc.)
- Second arm top: 3 sc in first st, sc in each of next 15 sts, 3 sc in last st. (21 sc.)
- Second outer edge (Rows 13–2): 6 dc rows x 2 + 6 arch rows x 1. (18 sc.)
- Bottom point: 2 sc in the side of Row 1, 3 sc in the foundation ch, 2 sc in the other side of Row 1. (7 sc.)
- First outer edge (Rows 2–13): (18 sc.)
Sl st to first sc. Total: 21 + 11 + 1 + 11 + 21 + 18 + 7 + 18 = 108 sts.
Row 14 gets no separate row-end sc because the 3-sc corner group already covers its side.
Round 2: Ch 1, sc in each st around. Work 3 sc in the center sc of each outward-pointing corner (the 4 arm-top corners and the bottom point), and work sc3tog centered on the notch st. Sl st to first sc. Fasten off.
Count: 108 sts worked 1 per st, + 10 extra sts at the 5 corners (2 each), − 2 sts at the notch = 116 sts.
Why the math works: Working 2 sc per dc row and 1 sc per sc row matches the height of each row, so the edges stay flat. Adding stitches only at the outward-pointing corners lets the border turn without cupping. The decrease at the inner notch keeps that point crisp instead of ruffled.
Checkpoint: 3.5 in (8.9 cm) x 3.5 in (8.9 cm).
Final Blocking
- Weave in all teal and cream ends along the WS of the border.
- Lightly mist the V until damp, not soaked.
- Pin the bottom point first. Then pin the arm tops so the outer corners sit 3.5 in (8.9 cm) apart and the piece is 3.5 in (8.9 cm) tall.
- Pin each arm straight along its outer edge so the V angle opens evenly.
- Ease each fan into a smooth arc with your fingertips.
- Let it dry completely, about 2–3 hours.
- Using the pink tails, sew one flower near the top outer corner of each arm and one just above the bottom point. Using the green tails, sew two leaves beside each flower, tucking their bases under the petals.
- Open the jump ring with two pliers, pass it through the notch st of the border, add the chain, and close it firmly.
Final Quality-Control Checklist
- The piece measures 3.5 in (8.9 cm) x 3.5 in (8.9 cm).
- Each arm has 4 fans, and each fan is centered over the arch below it.
- Both arms are the same length and width.
- Round 1 has 108 sts and Round 2 has 116 sts.
- The notch is sharp, and the border lies flat at every corner.
- All three flowers have 5 even petals and two leaves each.
- The jump ring is fully closed with no gap.
- No yarn ends show on the RS.
Troubleshooting
Fans cup upward: Your tension is tight. Loosen your dc or go up 0.25 mm.
Fans ruffle: There are too many sts for your tension. Go down 0.25 mm.
Arms are different lengths: Count your rows. Each arm ends with Row 14.
A fan drifts off center: Check the arch row before it. The ch-3 arch must always be the third sp.
Border waves: You added extra row-end sc. Stick to 2 per dc row and 1 per sc row.
Notch puckers: Make sure you worked sc3tog at the notch in both border rounds.
Arms stay too upright: Wet the piece again and pin the arm tops farther apart.
Care
Hand wash in cool water with mild soap, press out the water in a towel, and dry flat. If you can, remove the metal hardware before washing.
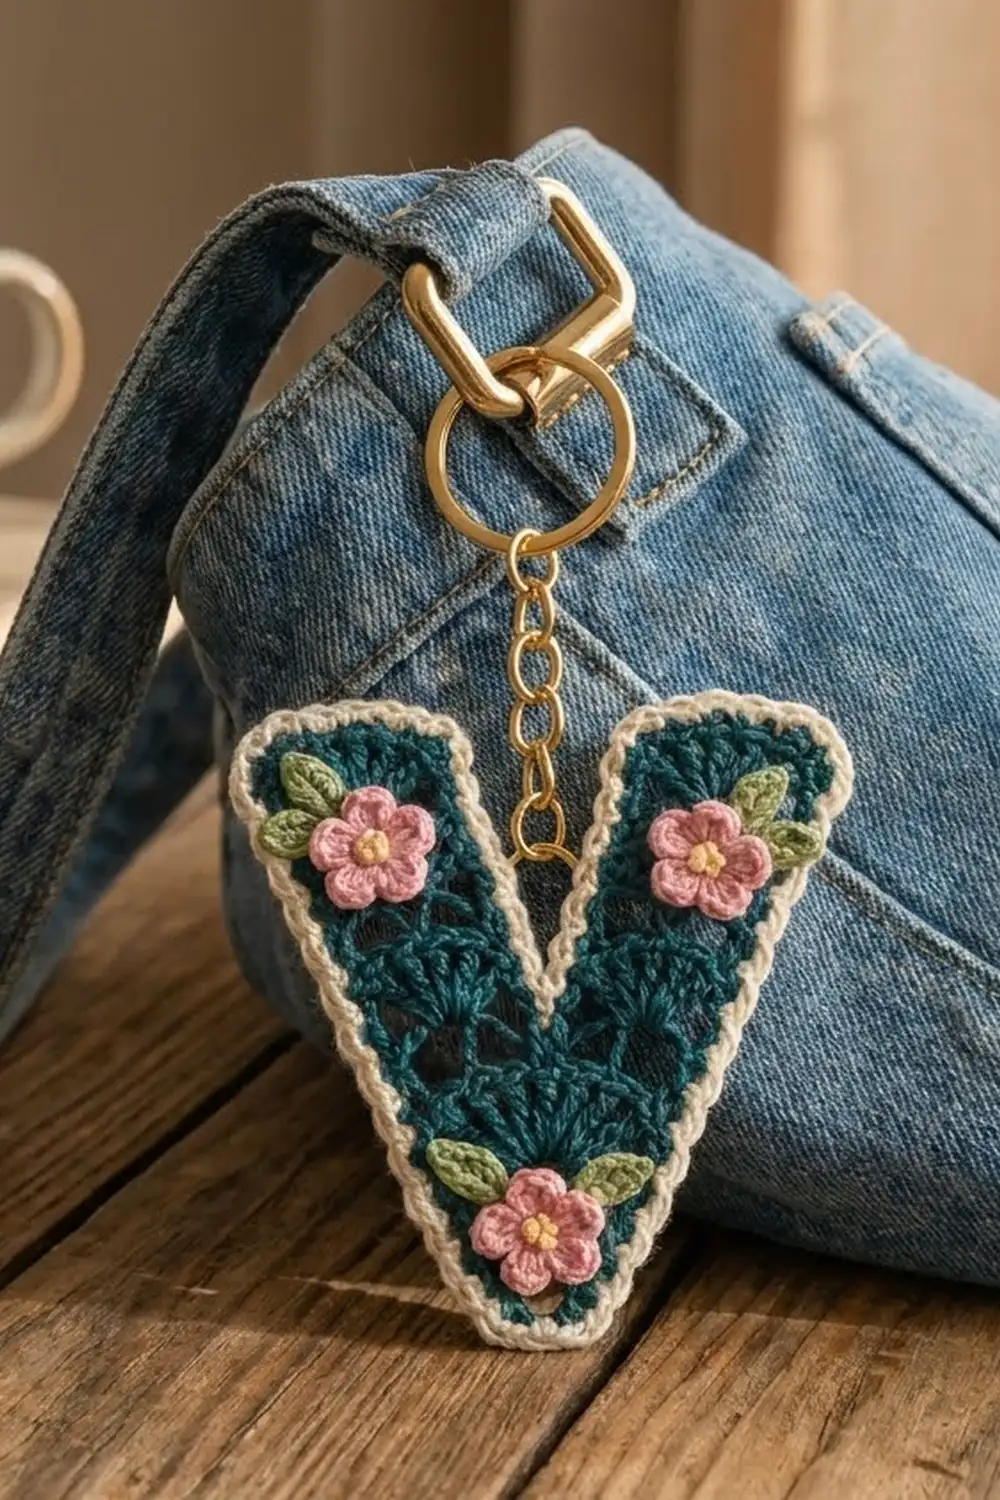
Final Notes
The measurement chain is short and easy to follow. Row 3 should be 1 in (2.5 cm) wide. Row 5 should be 1.75 in (4.4 cm) wide and 1.25 in (3.2 cm) tall. Each 17-st arm should be 1 in (2.5 cm) wide and 1.75 in (4.4 cm) long. The V should be 3 in (7.6 cm) square before the border. The two cream rounds, with 108 and 116 sts, bring it to 3.5 in (8.9 cm) square.
Once you’ve made one V, the same fan pattern is easy to adapt for other initials.
Happy crocheting!