
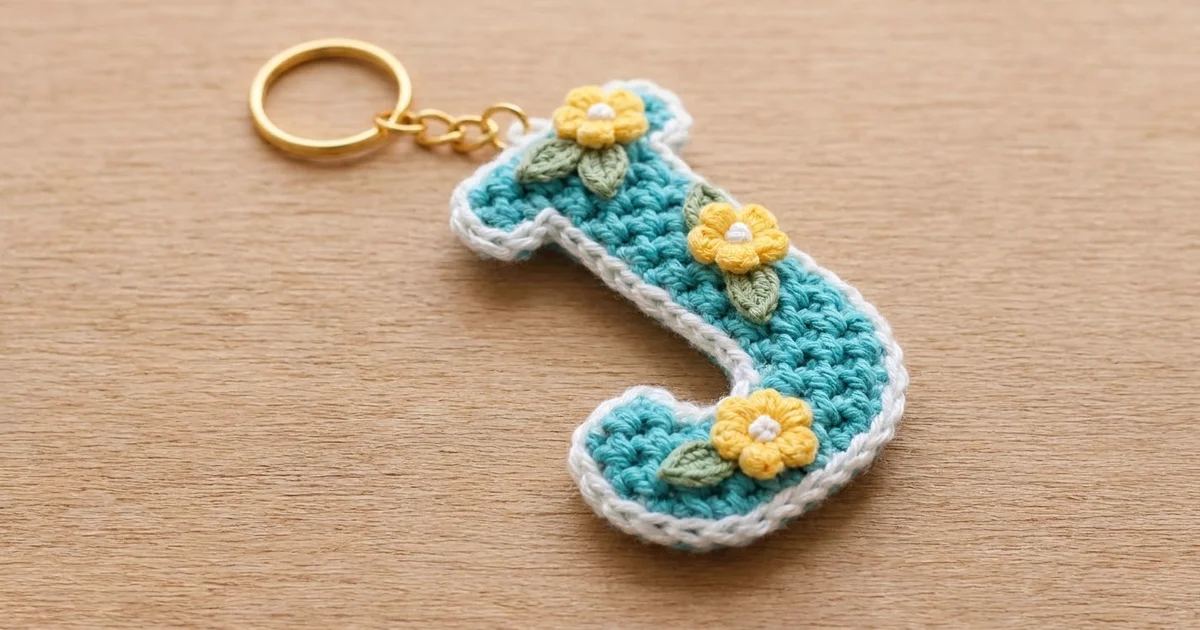
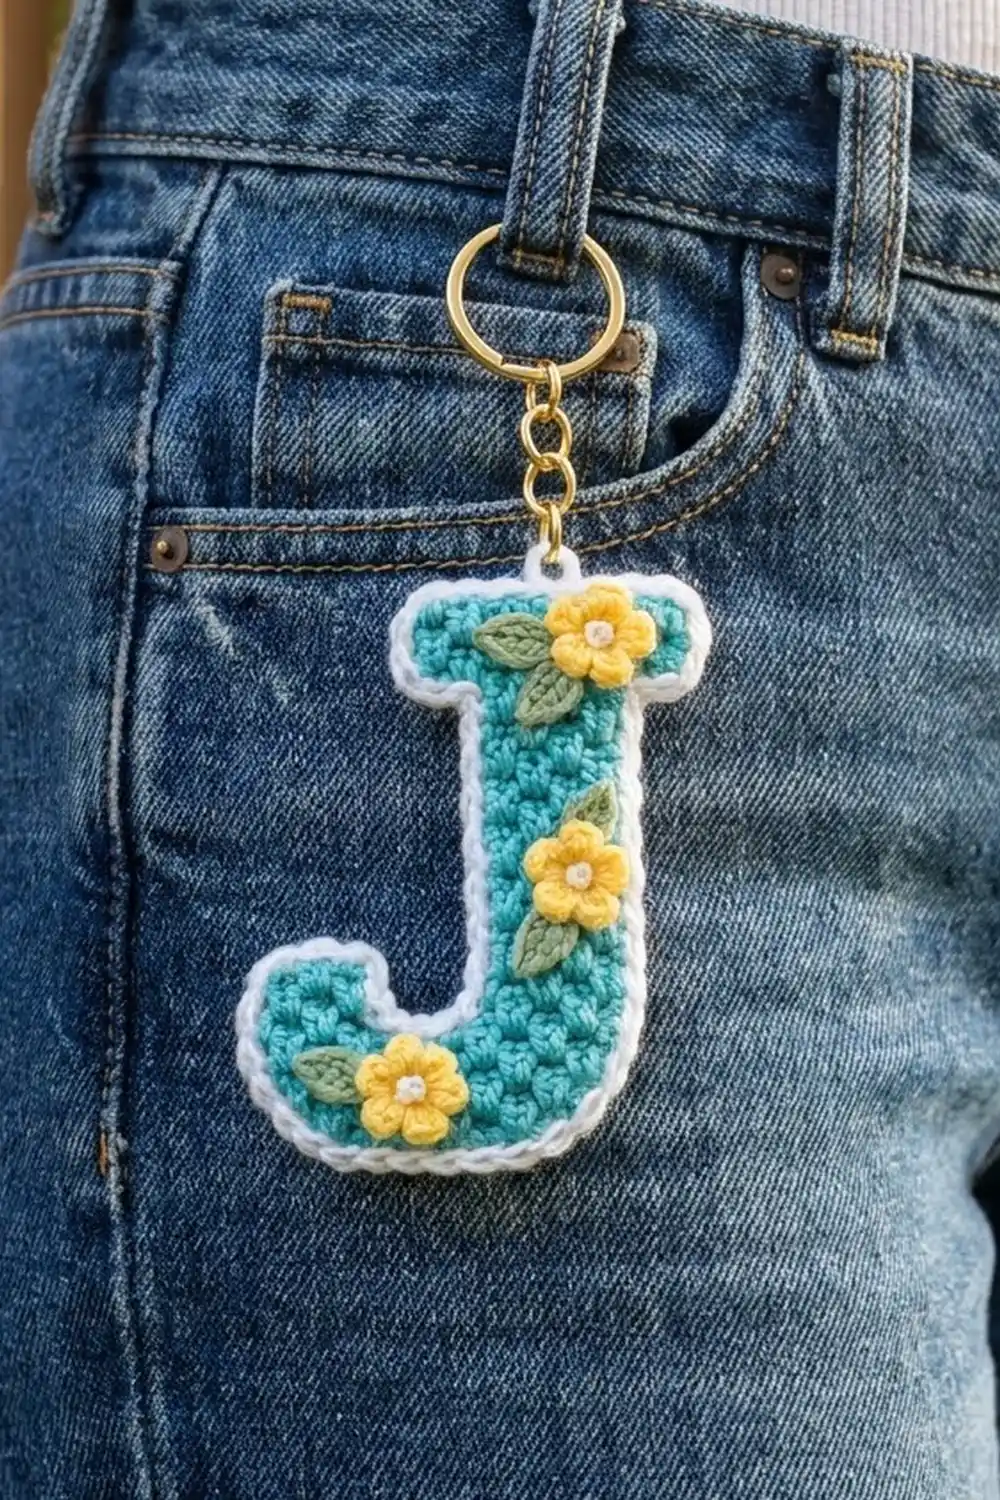
This little letter J is a quick, cheerful keychain. The body is crocheted in bright turquoise lemon peel stitch, which gives it a bumpy, staggered texture that looks almost woven. A crisp white rope-edge border outlines the letter, and three small yellow flowers with sage-green leaves trail down the front.
The colors are fresh and summery: turquoise, white, buttercup yellow, and sage green. From a distance the style looks clean and graphic, and up close it is detailed. Clip it to a belt loop, a bag strap, or your keys.
All instructions use US crochet terms. The finished letter measures 2.8 in (7.1 cm) wide by 3.4 in (8.6 cm) tall, not counting hardware. With the split ring and chain, the keychain hangs about 5.4 in (13.7 cm) long.
You crochet the J flat in rows from the bottom of the curve upward. Then you add the top bar with a chain extension and work the hook tip as a short separate section. A two-round white border follows the outline. Last, you sew on the flowers and leaves and attach the hardware.
Finished Size and Construction
- Finished size: 2.8 in (7.1 cm) wide x 3.4 in (8.6 cm) tall, plus about 2 in (5.1 cm) of hardware
- Skill level: Easy / advanced beginner
- Terminology: US crochet terms
- Yarn weight: DK / light (#3) cotton
- Hook: 3.25 mm (US D/3)
- Number of pieces: 1 letter body, plus 3 flowers and 5 leaves sewn on top
- Layout: one standing letter J, with the hook curving to the left
- Letter size before border: 2.4 in (6.1 cm) wide x 3 in (7.6 cm) tall
- Border depth: about 0.2 in (0.5 cm) on every edge
Materials
Use a smooth, mercerized or combed DK cotton. Cotton keeps the texture crisp and holds its shape on a keychain that gets handled every day. Avoid fuzzy or stretchy yarns, which blur the bumps and let the letter sag.
- Turquoise (body): 8 g, about 18 m
- White (border and flower centers): 3 g, about 7 m
- Yellow (flowers): 2 g, about 5 m
- Sage green (leaves): 1 g, about 2 m
These quantities include a small margin for checking gauge and weaving in ends.
Tools:
- 3.25 mm (US D/3) crochet hook
- Tapestry needle
- Stitch marker
- Scissors
- Gold-tone split keyring, 1 in (2.5 cm) across, with a chain about 0.75 in (1.9 cm) long
- One 8 mm jump ring and flat-nose pliers
- Pins and a foam blocking mat
Abbreviations (US Terms)
- ch = chain
- sl st = slip stitch
- sc = single crochet
- hdc = half double crochet
- dc = double crochet
- st(s) = stitch(es)
- rev sc = reverse single crochet (crab stitch)
- rep = repeat
Lemon peel stitch: Alternate sc and dc along each row, working each dc into a sc and each sc into a dc. This staggers the bumps. Every row has an odd number of stitches, so each row starts and ends with the same stitch, and each row tells you which one that is. The ch 1 at the start of a row never counts as a stitch. On increase rows the pattern shifts slightly at the edges, and the border hides this.
Reverse sc (crab stitch): Working from left to right, insert the hook into the next stitch to the right. Yarn over and pull up a loop, then yarn over and pull through both loops on the hook.
Front of the piece: Work every odd-numbered row with the front facing you. This keeps the J from coming out backward.
Gauge and Checkpoints
Gauge: 20 sts and 20 rows = 4 in (10.2 cm) in lemon peel stitch, so 5 sts and 5 rows = 1 in (2.5 cm).
The letter is small enough to be its own test piece. Work Rows 1–4 and measure before going on.
- After Row 4: 11 sts are 2.2 in (5.6 cm) wide, and the piece is 0.8 in (2.0 cm) tall.
- After Row 11: the piece is 2.2 in (5.6 cm) tall, and the stem is 1 in (2.5 cm) wide.
- After Row 15: the letter is 3 in (7.6 cm) tall and 2.4 in (6.1 cm) wide at its widest point.
- After the border: 2.8 in (7.1 cm) wide x 3.4 in (8.6 cm) tall.
Too big? Switch to a 3.0 mm hook. Too small? Switch to a 3.5 mm hook. Blocking can fix a difference of up to 0.1 in (0.3 cm) across the 2.2 in (5.6 cm) width.
Letter Body
Use turquoise. Rows 1–4 make the rounded bottom of the J.
Foundation: Ch 8.
Row 1 (front): Sc in 2nd ch from hook, *dc in next ch, sc in next ch; rep from * across. (7 sts)
Row 2: Ch 1, turn. (Dc, sc) in first st, dc in next st, sc in next st, dc in next st, sc in next st, dc in next st, (sc, dc) in last st. (9 sts, starting and ending with dc)
Row 3: Ch 1, turn. (Sc, dc) in first st, sc in next st, dc in next st, sc in next st, dc in next st, sc in next st, dc in next st, sc in next st, (dc, sc) in last st. (11 sts, starting and ending with sc)
Row 4: Ch 1, turn. Dc in first st, *sc in next st, dc in next st; rep from * across. (11 sts)
Check: 2.2 in (5.6 cm) wide, 0.8 in (2.0 cm) tall.
Stem
Work the stem over the last 5 sts of Row 4, which is the right edge when the front faces you.
Row 5 (front): Ch 1, turn. Sc in first st, dc in next st, sc in next st, dc in next st, sc in next st. Leave the other 6 sts unworked. (5 sts)
Row 6: Ch 1, turn. Dc in first st, sc in next st, dc in next st, sc in next st, dc in last st. (5 sts)
Rows 7–11: Repeat Rows 5 and 6 twice, then Row 5 once more. (5 sts in each row)
You are now at the left edge of the stem with the front facing you. Check that the piece is 2.2 in (5.6 cm) tall.
Top Bar
Row 12: Ch 4 (3 extension chains plus 1 turning ch), turn. Sc in 2nd ch from hook, dc in next ch, sc in next ch, dc in next st, sc in next st, dc in next st, sc in next st, (dc, sc) in last st. (9 sts: 3 on the chains + 4 + 2 in the last st)
This row adds 3 sts on the left of the stem and 1 st on the right, so the bar sticks out more on the left than on the right.
Row 13: Ch 1, turn. Dc in first st, *sc in next st, dc in next st; rep from * across. (9 sts)
Row 14: Ch 1, turn. Sc in first st, *dc in next st, sc in next st; rep from * across. (9 sts)
Row 15: Repeat Row 13. (9 sts) Fasten off.
The top bar measures 1.8 in (4.6 cm) wide by 0.8 in (2.0 cm) tall.
Hook Tip
Hold the piece with the front facing you and the curve at the bottom. In Row 4, the first 6 sts from the left edge are unworked.
Tip Row 5: Join turquoise with a sl st in the 3rd st from the left edge, then ch 1. Sc in same st, dc in next st, sc in last st. (3 sts)
Tip Row 6: Ch 1, turn. Dc in first st, sc in next st, dc in last st. (3 sts) Fasten off.
The 3 unworked sts of Row 4 form the inside of the hook. Before the border, this gap is 0.6 in (1.5 cm) wide, and the tip is 1.2 in (3.0 cm) tall. Weave in the turquoise ends on the back.
Border
Use white, with the front facing you. Follow these rules all the way around:
- Work 1 sc in each stitch along stitch edges.
- Work 1 sc in each row end along side edges.
- Work 3 sc in each outer corner.
- Add no extra stitches at inner corners.
Round 1: Join white with a sl st in the first st of Row 15 (top right corner), then ch 1. Work counterclockwise:
- Top edge: 3 sc in corner st, 1 sc in each of next 7 sts, 3 sc in last st. (13 sc)
- Left side of bar: 1 sc in the row ends of Rows 14 and 13. (2 sc)
- Underside of bar: In the free loops of the 3 extension chains, 3 sc in first ch, then 1 sc in each of next 2 ch. (5 sc)
- Inner stem side: 1 sc in each row end of Rows 11 through 5. (7 sc)
- Inside of hook: 1 sc in each of the 3 unworked sts of Row 4. (3 sc)
- Inner tip side: 1 sc in the row end of Tip Row 5. (1 sc)
- Top of tip: 3 sc in first st of Tip Row 6, 1 sc in next st, 3 sc in last st. (7 sc)
- Outer left side: 1 sc in the row ends of Tip Row 5 and Rows 4, 3, and 2. (4 sc)
- Bottom: In the free loops of the foundation chain, 3 sc in first ch, 1 sc in each of next 5 ch, 3 sc in last ch. (11 sc)
- Outer right side: 1 sc in each row end of Rows 2 through 14. (13 sc)
Join with a sl st to the first sc. (66 sc: 13 + 2 + 5 + 7 + 3 + 1 + 7 + 4 + 11 + 13)
Round 2: Ch 1, do not turn. Rev sc in each sc around. (66 rev sc) Join with a sl st and fasten off.
Why the math works: The body has 5 sts and 5 rows per inch. Working 1 sc per stitch or row end gives the border the same 5 sts per inch, so it lies flat without ruffling or pulling in. Three sc at each outer corner turn it smoothly, which rounds the bottom and the tip. Inner corners already have extra fabric, so added stitches there would make bumps. Crab stitch adds the rope texture without changing the count. Two rounds add about 0.2 in (0.5 cm) per side:
- Width grows from 2.4 in (6.1 cm) to 2.8 in (7.1 cm).
- Height grows from 3 in (7.6 cm) to 3.4 in (8.6 cm).
- The hook gap narrows to about 0.2 in (0.5 cm).
Flowers and Leaves
Flower (make 3, yellow)
Round 1: Make a magic ring, ch 1, work 5 sc in the ring. Pull it tight and join with a sl st to the first sc. (5 sc)
Round 2: *(Sl st, ch 2, dc, ch 2, sl st) in next sc; rep from * 4 more times. (5 petals) Fasten off, leaving a 6 in (15.2 cm) tail.
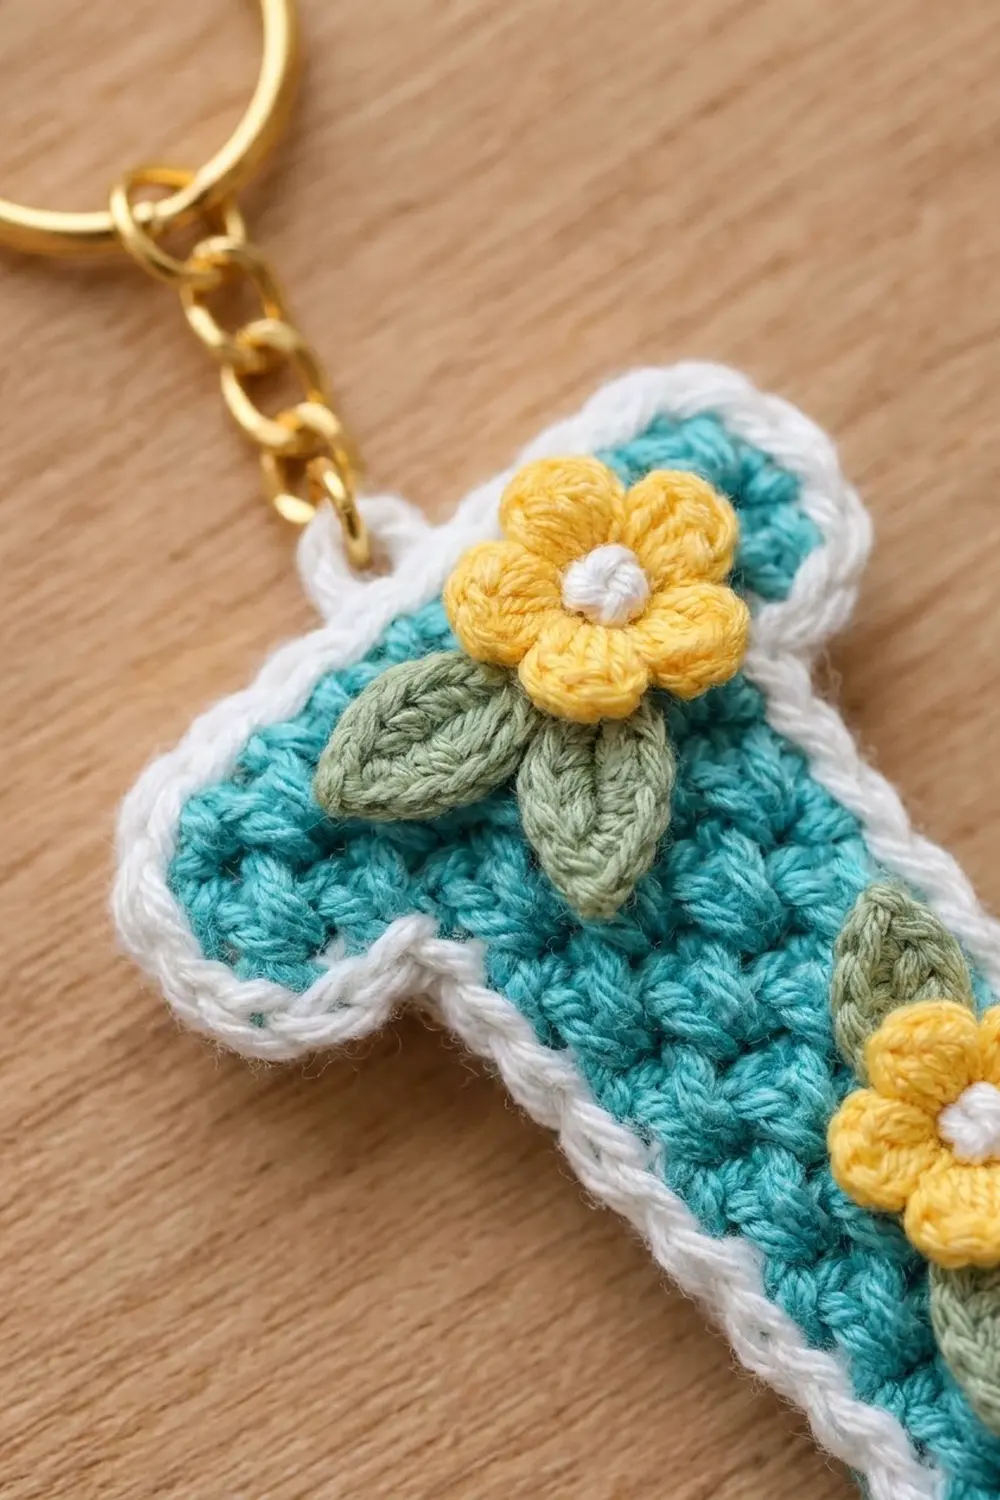
Each flower is about 0.6 in (1.5 cm) across. With white, work a French knot (wrap twice) in the center of each flower.
Leaf (make 5, sage green)
Ch 5. Working in the back bumps, sl st in 2nd ch from hook, sc in next ch, hdc in next ch, sc in last ch. Ch 1 for the tip. Then work along the other side of the chain: sc, hdc, sc, sl st. (8 sts plus the ch-1 tip) Fasten off, leaving a 6 in (15.2 cm) tail. Each leaf is about 0.5 in (1.3 cm) long.
Placement
- Top flower: on the right half of the top bar, with 1 leaf to its left and 1 angled down toward the stem.
- Middle flower: on the stem, 1.4 in (3.6 cm) above the bottom edge, with 1 leaf above it on the right and 1 below it on the left.
- Bottom flower: on the curve just right of center, with 1 leaf on its left.
Pin everything in place first. Sew the leaves on before the flowers so the petals cover the leaf bases. Stitch through the turquoise only and keep the white border clear.
Hardware
Open the jump ring with pliers and slip it through the border at the top-left corner of the top bar. Add the keyring chain and close the jump ring completely.
Final Blocking
- Before attaching hardware, mist the letter lightly with water.
- Lay it face down on the blocking mat.
- Pin it to 2.8 in (7.1 cm) wide and 3.4 in (8.6 cm) tall.
- Pin the top bar straight and the stem upright.
- Shape the rounded bottom and tip with your fingers.
- Let it dry completely, then unpin it.
- If needed, steam lightly from the back without pressing so the flowers stay puffy.
Final Quality-Control Checklist
- The J reads correctly, with the hook curving left when viewed from the front.
- The body is 2.4 in (6.1 cm) by 3 in (7.6 cm) before the border.
- Border Round 1 has exactly 66 sc.
- The corners are smooth and the inner corners lie flat.
- The flowers sit inside the white border.
- All ends are woven in on the back.
- The jump ring is fully closed.
Troubleshooting
- Edges ruffle: Too many border stitches. Recount each side against the counts above.
- Edges pull in or cup: Border tension is too tight. Go up 0.25 mm for Round 1 only.
- Bumps stack in columns: You put sc over sc. Recheck which stitch each row starts with.
- J is reversed: Odd rows were worked with the back facing you. Turn the piece over and use the other side as the front.
- Floppy letter: Use a smaller hook, or sew on a backing piece of felt cut to the same outline.
- Crab stitch looks messy: Keep the loops loose and insert the hook straight through, not at an angle.
Care
Hand wash in cool water with mild soap, press out the water in a towel, and dry flat. Take off the metal hardware before washing so it doesn’t tarnish.
Final Notes
The measurements build on each other. Gauge is 5 sts and 5 rows per inch. Row 4 is 2.2 in (5.6 cm) wide, Row 11 brings the piece to 2.2 in (5.6 cm) tall, and Row 15 completes the 2.4 in (6.1 cm) by 3 in (7.6 cm) letter. The 66-stitch, two-round border brings it to 2.8 in (7.1 cm) by 3.4 in (8.6 cm). If each checkpoint matches, the finished keychain will too.
Happy crocheting!