
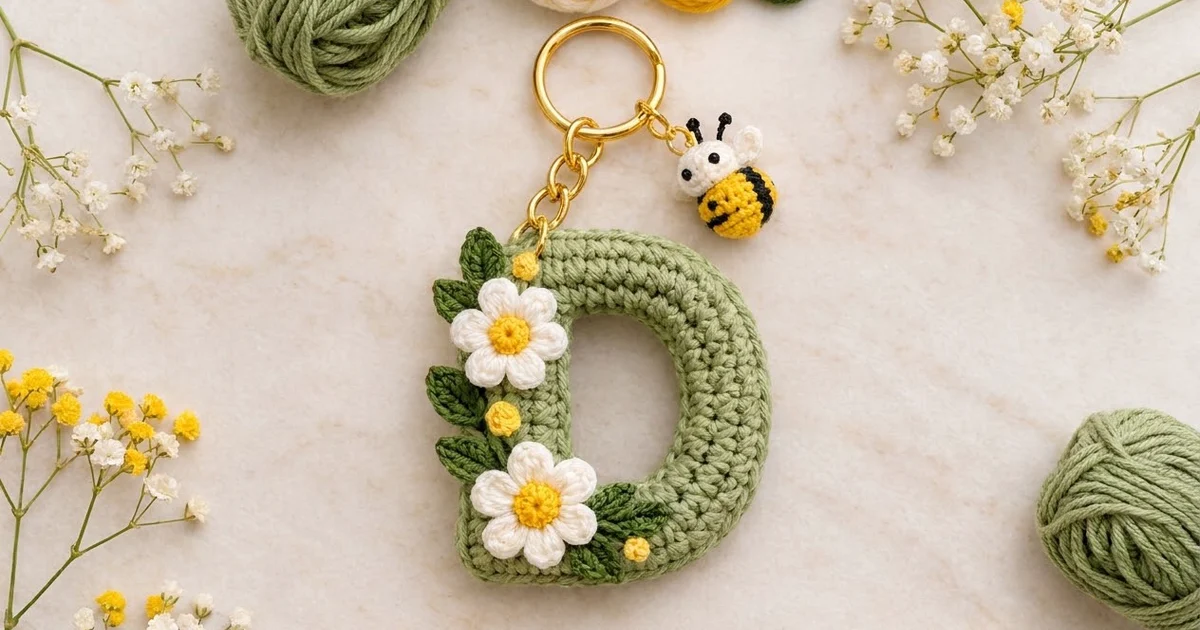
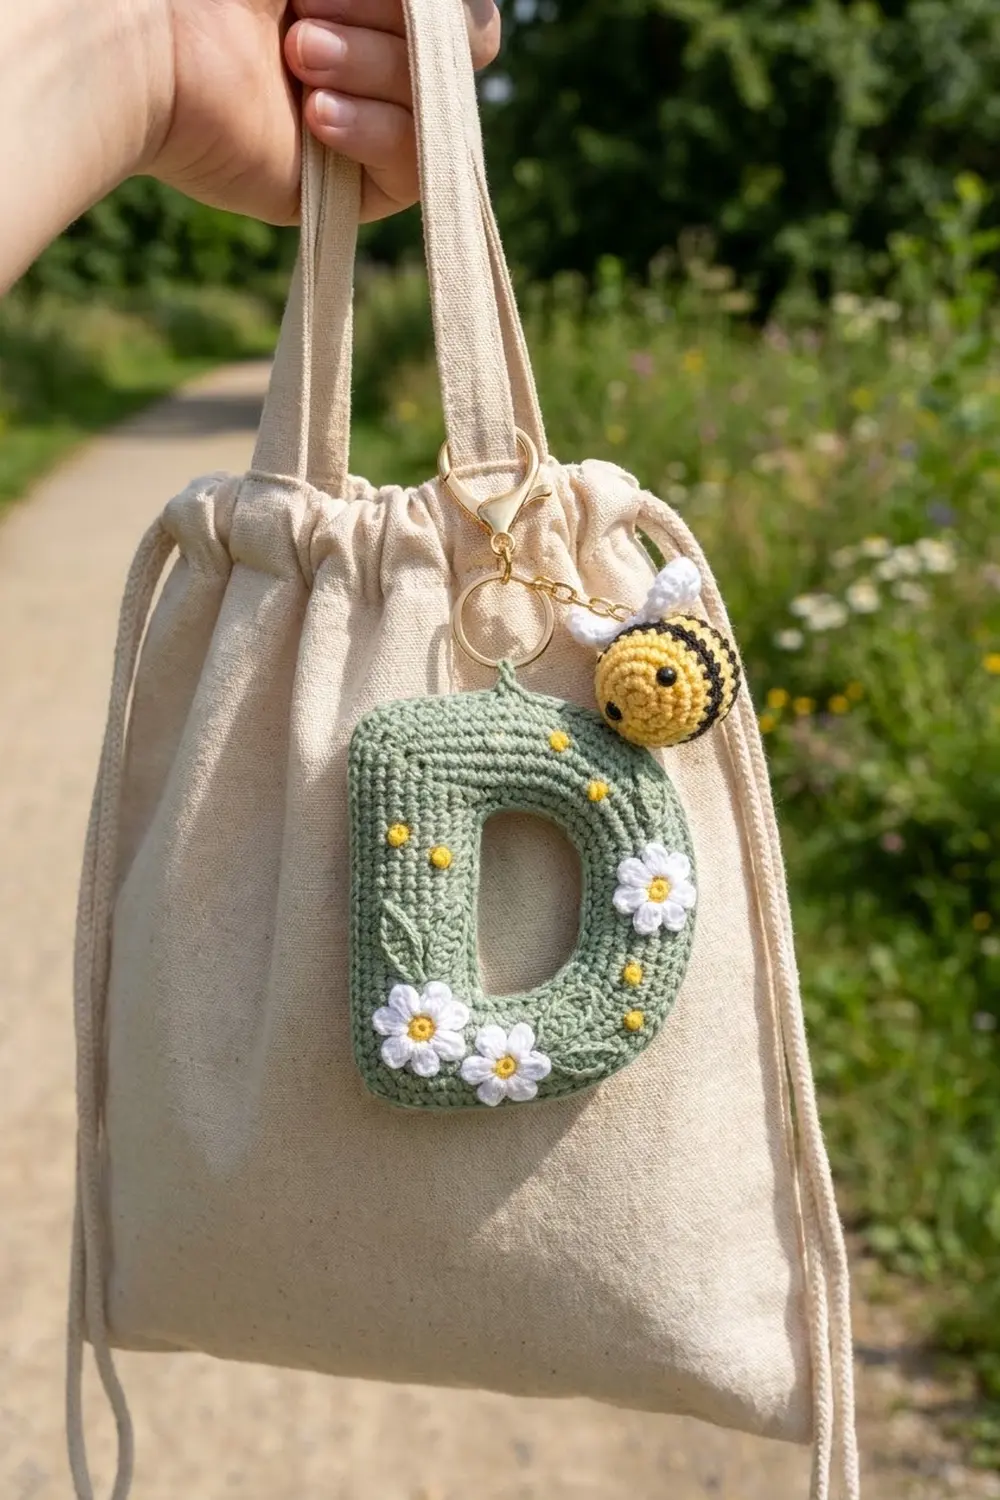
This sage-green letter D is a small, cushioned keychain dressed up with two white daisies, a few dark-green leaves, three yellow dots and a tiny bee charm that dangles beside it. It looks good on a tote, backpack or set of keys, and it makes a thoughtful personalized gift.
The palette is soft and springlike: sage green for the letter, white and sunny yellow for the flowers, deep forest green for the leaves, and a little black for the bee. The letter is worked tightly in single crochet, so it feels firm with a clean, even texture. All instructions use US crochet terms.
The finished letter measures 2.8 in (7.1 cm) wide by 3.2 in (8.1 cm) tall and about 0.4 in (1.0 cm) thick.
Construction is simple. You crochet two identical flat D layers in rows, splitting the work to leave the opening. Then you join the layers with a single crochet border, adding a little stuffing before you close it. Last, you sew on the flowers, leaves and dots, and add the hardware.
Finished Size and Construction
- Finished size: 2.8 in (7.1 cm) wide x 3.2 in (8.1 cm) tall x 0.4 in (1.0 cm) thick
- Skill level: Easy-intermediate
- Terminology: US crochet terms
- Yarn weight: DK cotton (weight 3)
- Hooks: 3.25 mm (US D/3) for the letter; 2.75 mm (US C/2) for the small pieces
- Number of pieces: 1 letter (2 layers joined into one piece), plus 2 daisies, 5 leaves, 3 dots and 1 bee
- Layout: Single piece, no grid
- Layer size before border: 2.6 in (6.6 cm) wide x 3 in (7.6 cm) tall
- Border depth: about 0.1 in (0.3 cm) per edge
Materials
Use a smooth, mercerized or combed DK cotton. It gives crisp stitch definition and holds its shape well on an object that gets handled a lot. Avoid fuzzy or very splitty yarns, because the small appliqués need clean edges.
- Sage green (letter): 12 g / about 28 m
- White (petals, bee head, wings): 3 g / about 7 m
- Yellow (daisy centres, dots, bee body): 3 g / about 7 m
- Dark green (leaves): 2 g / about 5 m
- Black (bee stripes, eyes, antennae): 1 g / about 2 m
The quantities include a comfortable margin for swatching and tails.
Tools:
– 3.25 mm (US D/3) and 2.75 mm (US C/2) hooks
– Polyester fiberfill, about 3 g
– Tapestry needle
– 2 stitch markers
– Scissors
– 1 in (2.5 cm) gold split keyring
– Gold chain, 1.25 in (3.2 cm) and 1 in (2.5 cm) lengths
– 3 gold jump rings, 6 mm
– Small flat-nose pliers
Abbreviations (US Terms)
- ch – chain
- sl st – slip stitch
- sc – single crochet
- hdc – half double crochet
- dc – double crochet
- inc – 2 sc in the same stitch
- sc2tog – single crochet 2 together
- MR – magic ring
- st(s) – stitch(es)
- RS – right side
Special stitch – Petal: (sl st, ch 2, 3 dc, ch 2, sl st) all in the same stitch.
Gauge and Checkpoints
Gauge: 10 sc x 12 rows = 2 in (5.1 cm) with the 3.25 mm hook, worked firmly.
Make one complete layer first and measure it before you start the second one. Use these checkpoints:
- After Row 5: 13 sts measure 2.6 in (6.6 cm) wide, and the work is about 0.83 in (2.1 cm) tall.
- After Row 13: the stem is 1 in (2.5 cm) wide, the bowl side is 0.8 in (2.0 cm) wide, and the opening is 0.8 in (2.0 cm) wide. The total height is about 2.17 in (5.5 cm).
- After Row 18: the layer measures 2.6 in (6.6 cm) x 3 in (7.6 cm), and the opening is 0.8 in (2.0 cm) x 1⅓ in (3.4 cm).
If your layer is more than 0.1 in (0.3 cm) too large, go down one hook size. If it is too small, go up one hook size. Keep your tension tight: gaps would let stuffing show through.
Letter Layers (Make 2)
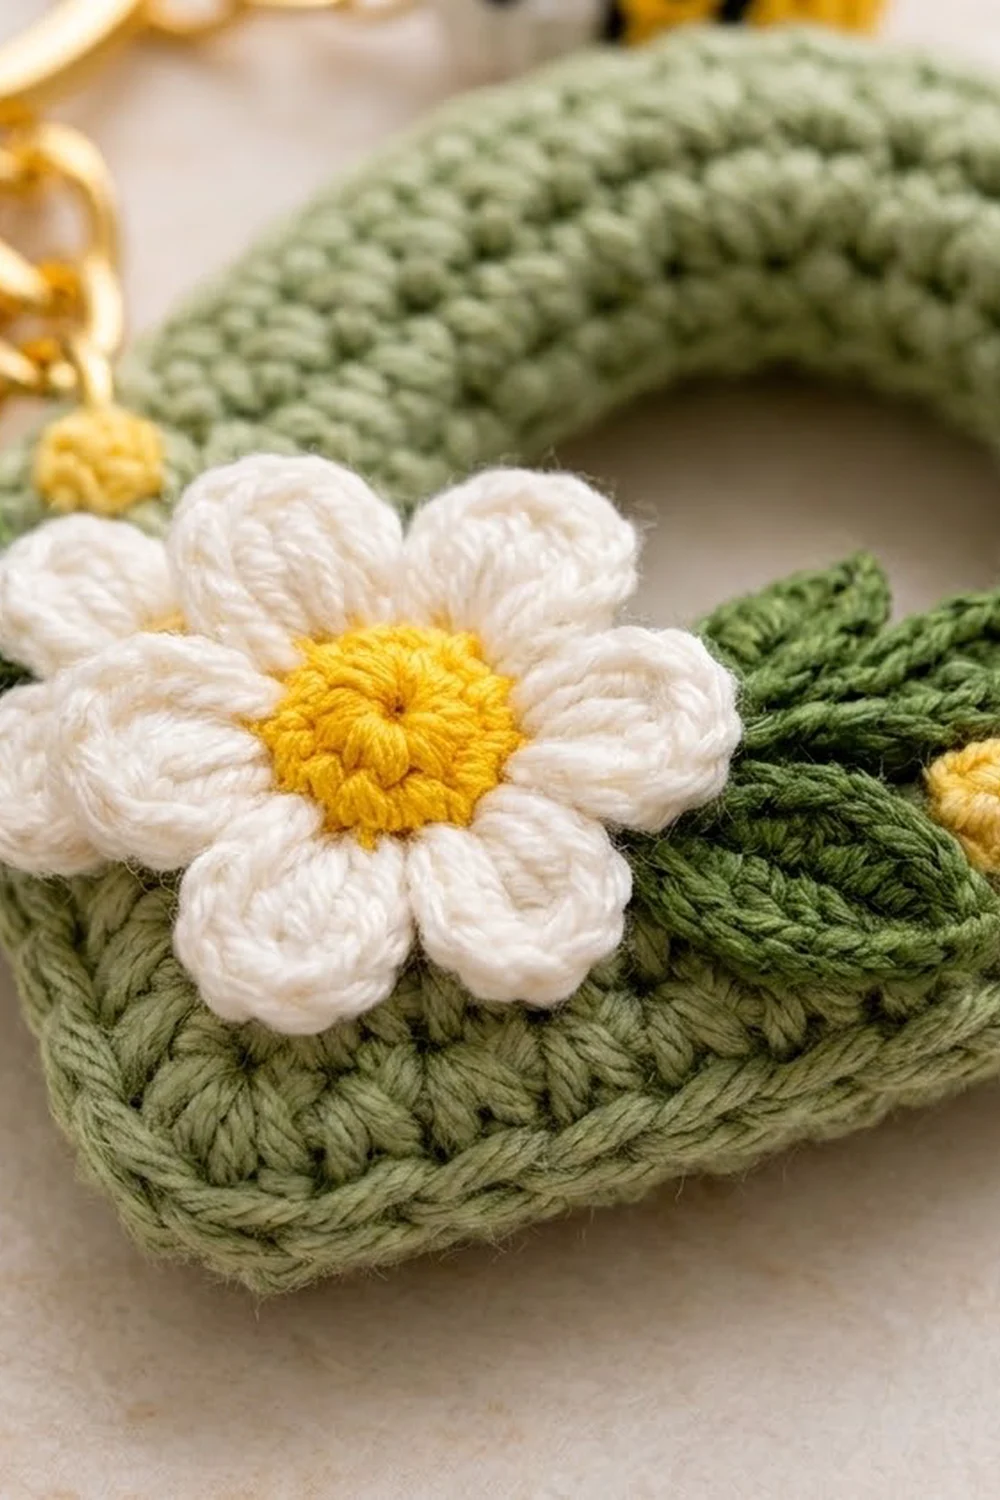
Use sage green and the 3.25 mm hook. The bowl edge is the edge where all the shaping happens. Even rows end at the bowl edge and odd rows begin there.
Row 1: Ch 11, sc in 2nd ch from hook and in each ch across, turn. (10 sts)
Row 2: Ch 1, sc in next 9 sts, 2 sc in last st, turn. (11 sts)
Row 3: Ch 1, 2 sc in first st, sc in next 10 sts, turn. (12 sts)
Row 4: Ch 1, sc in next 11 sts, 2 sc in last st, turn. (13 sts)
Row 5: Ch 1, sc in each st across, turn. (13 sts)
This completes the bottom bar. Row 5 ends at the stem edge.
Split for the Opening
Stem, Rows 6–13: Ch 1, sc in the first 5 sts only, turn. (5 sts) Repeat this row 7 more times, for 8 stem rows in total. Do not fasten off. Place a marker in the live loop and set the work aside.
Bowl side, Rows 6–13: Skip the next 4 unworked sts of Row 5; these form the bottom of the opening. Join yarn in the next st. Ch 1, sc in the same st and in the last 3 sts. (4 sts) Work 7 more rows of 4 sc, for 8 rows in total. Fasten off.
Rejoin and Top Bar
Row 14: Put the stem loop back on your hook. Ch 1, turn, sc in the 5 stem sts, ch 4, then sc in the 4 sts of the last bowl-side row, turn. (13 sts: 9 sc + 4 ch)
Row 15: Ch 1, sc in each sc and in each ch across, turn. (13 sts)
Row 16: Ch 1, sc in next 11 sts, sc2tog, turn. (12 sts)
Row 17: Ch 1, sc2tog, sc in next 10 sts, turn. (11 sts)
Row 18: Ch 1, sc in next 9 sts, sc2tog. (10 sts)
Fasten off. Leave a short tail on the first layer. On the second layer, leave the yarn attached for the border.
The top bar mirrors the bottom bar row for row (10, 11, 12, 13, 13 going up, then 13, 13, 12, 11, 10 at the top). That is why the bowl curves evenly at both ends.
Daisies (Make 2)
Use the 2.75 mm hook.
Round 1 (yellow): Make an MR, work 6 sc into the ring, then pull it tight. Sl st to the first sc. (6 sts) Fasten off yellow.
Round 2 (white): Join white in any st. Work 1 Petal in each st around. (6 petals) Fasten off, leaving an 8 in (20.3 cm) tail for sewing.
Each daisy measures about 0.9 in (2.3 cm) across. The tight yellow round puffs up slightly and forms the raised centre.
Leaves (Make 5)
Use dark green and the 2.75 mm hook.
Ch 7. Starting in the 2nd ch from the hook, work 1 st in each ch: sl st, sc, hdc, dc, hdc, sc. Ch 1 at the tip. Then work along the other side of the chain: sc, hdc, dc, hdc, sc, sl st. Sl st to the first sl st and fasten off, leaving a 6 in (15.2 cm) tail.
That gives 12 sts plus the tip ch. Each leaf measures about 0.75 in (1.9 cm) long and comes to a point.
Yellow Dots (Make 3)
Use yellow and the 2.75 mm hook. Make an MR, work 6 sc into the ring, then pull it fully closed. (6 sts) Fasten off, leaving a 6 in (15.2 cm) tail. Each dot is about 0.25 in (0.6 cm) across.
Bee Charm (Make 1)
Use the 2.75 mm hook and work in continuous rounds.
Round 1 (white): Make an MR, work 6 sc into the ring. (6 sts)
Round 2 (white): Inc in each st around. (12 sts)
Round 3 (yellow): Sc in each st around. (12 sts)
Round 4 (black): Sc in each st around. (12 sts)
Round 5 (yellow): Sc in each st around. (12 sts)
Stuff the bee firmly.
Round 6 (black): Sc2tog 6 times. (6 sts) Close the opening and weave in the ends.
Wings (make 2, white): Make an MR, ch 1, work 6 hdc into the ring, pull it tight, then sl st to the first hdc. (6 sts) Sew the wings to the top of Round 3.
Finishing the bee: Embroider two small black eyes on the white head. For the antennae, knot a 2 in (5.1 cm) piece of black yarn through the top and trim it short. Finally, sew a 6 mm jump ring through the top of the head. The finished bee is about 0.7 in (1.8 cm) tall.
Border
Border gauge: Work 1 sc into each stitch along the top and bottom edges and 1 sc into each row end along the sides. Along the sides this gives 6 sc per inch, which is slightly denser than the 5 sc per inch of the body. The border has to wrap around a stuffed edge 0.4 in (1.0 cm) deep, so it needs those extra stitches to lie flat instead of pulling the edges into a cup.
Stack the two layers with the RS facing out in the same orientation, so the D shapes line up exactly. Single crochet fabric looks the same on both sides, so either side can face outward.
Inner Round (opening): Use sage green and work through both layers together. Join in a corner of the opening, then sc around:
- 4 sc along the bottom edge of the opening (the 4 skipped sts of Row 5)
- 8 sc along the stem row ends
- 4 sc along the top edge (the 4 ch of Row 14)
- 8 sc along the bowl-side row ends
Sl st to the first sc. (24 sts) Fasten off.
Round 1 (outer edge): Use the attached yarn and work through both layers. Work 1 sc in each st or row end, with 3 sc in each of the 2 squared stem corners:
- Bottom edge: 10 sc, with 3 sc in the stem-corner st = 12 sts
- Stem side: 18 sc, 1 per row end
- Top edge: 10 sc, with 3 sc in the stem-corner st = 12 sts
- Bowl side: 18 sc, 1 per row end. Work no extra stitches at the bowl corners; they are already rounded by the shaping.
Before you finish the stem side, stuff the letter lightly and evenly, pushing small pieces into the bars and the bowl with the hook handle.
Count: 56 sts worked 1 per existing st or row end, plus 4 extra stitches from the 2 corners, for 60 sts total. Sl st to the first sc.
Round 2 (ridge): Sl st loosely in each st around. (60 sts: 60 worked 1 per st + 0 added) Fasten off and hide the tail inside the letter.
The 60 stitches follow the edge of the layer exactly, so the edge neither ruffles nor pulls. Each border round adds about 0.1 in (0.3 cm) per edge. That brings the letter from 2.6 x 3 in (6.6 x 7.6 cm) to 2.8 x 3.2 in (7.1 x 8.1 cm).
Assembly
Pin the pieces in place before sewing:
- Place one daisy over the top-left corner of the stem. Tuck 2 leaves behind its upper left edge.
- Place the second daisy over the bottom-left of the stem. Tuck 1 leaf behind it on the left edge and 2 leaves to its right, along the bottom bar.
- Sew each leaf down along its base only, so the tips can lift slightly.
- Sew each daisy through its yellow centre and the base of each petal. Leave the outer petal tips free.
- Sew the 3 dots in place: one above the upper daisy, one on the stem between the daisies, and one to the right of the lower daisy.
- Open a jump ring and pass it through the border stitches at the top-left corner of the stem. Attach the 1.25 in (3.2 cm) chain and close the ring.
- Use the third jump ring to connect the top of the chain to the split keyring.
- Attach the 1 in (2.5 cm) chain to the keyring, then hook the bee’s jump ring onto the end of that chain.
Final Blocking
- Lightly mist the letter with water. Do not soak it, because of the stuffing.
- Shape the bowl into a smooth curve with your fingers, and square off the stem corners.
- Lay it flat on a towel and let it dry completely.
- Gently fluff the daisy petals and press them flat, then let them air-dry.
- Check the size: it should be 2.8 x 3.2 in (7.1 x 8.1 cm).
Final Quality-Control Checklist
- Both layers measure 2.6 x 3 in (6.6 x 7.6 cm) before the border.
- The inner opening border has 24 sts and the outer border has 60 sts.
- No stuffing shows between the stitches.
- The stem corners are crisp and the bowl curve is smooth.
- Each daisy has 6 even petals and a raised yellow centre.
- All 5 leaves and 3 dots are securely stitched.
- The jump rings are fully closed with no gaps.
- All tails are hidden inside the letter.
Troubleshooting
- The opening is lopsided: Make sure the bowl side starts exactly 4 sts after the stem in Row 5.
- The bowl edge looks blocky: Check where your increases and decreases fall: the inc goes at the end of even rows and the start of odd rows.
- The border ruffles: Your border tension is too loose. Use the 2.75 mm hook for Round 1.
- The border cups: You may have skipped some row ends. Recount each side: 18 row ends.
- The petals curl: Steam them lightly and pin them flat.
- The bee leans: Add a little more stuffing before Round 6.
Care
Spot clean with a damp cloth and mild soap, then air-dry flat. Do not machine wash; it can tarnish the gold hardware and flatten the stuffing.
Final Notes
The measurement chain is simple. Gauge of 10 sc x 12 rows = 2 in (5.1 cm) gives a layer of 2.6 x 3 in (6.6 x 7.6 cm). The inner round of 24 sts and the outer border of 60 sts add 0.1 in (0.3 cm) per edge, for a finished letter of 2.8 x 3.2 in (7.1 x 8.1 cm). Check your measurements at each stage, and your D will come out neat and even, ready for its daisies and its little bee.
Happy crocheting!