
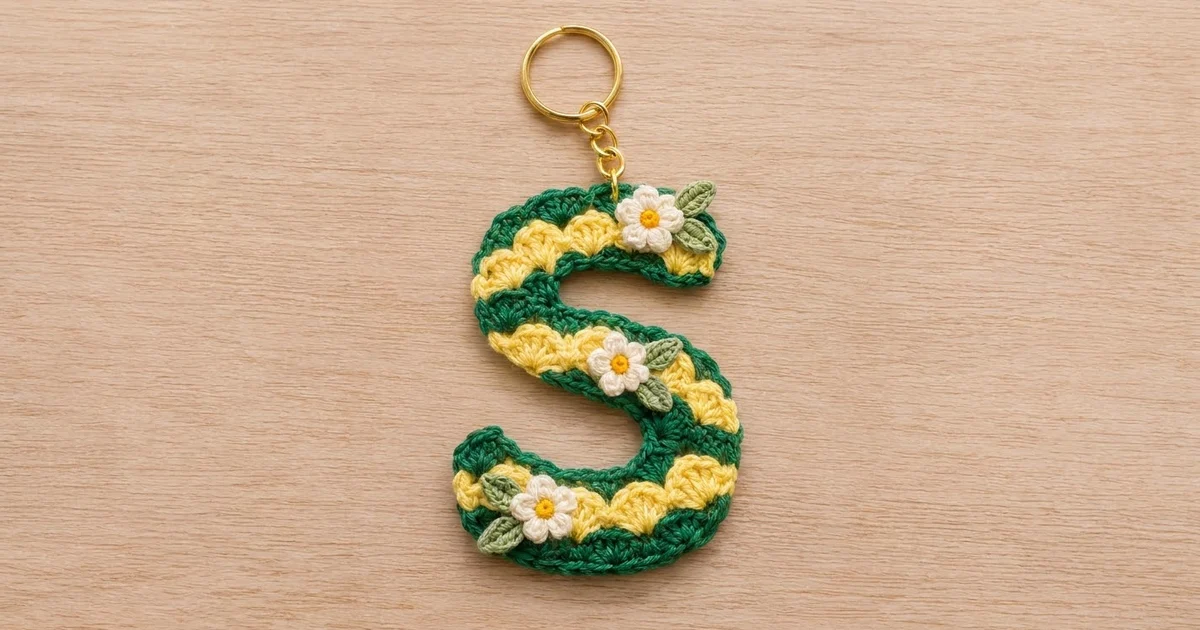
This Sunny Shell Letter S is a bright, chunky monogram charm made from a single striped strip that curves into a bold S. A band of butter-yellow shells runs down the middle of the letter, framed by deep forest-green fans and a smooth green edging, so the stripes follow every curve of the letter.
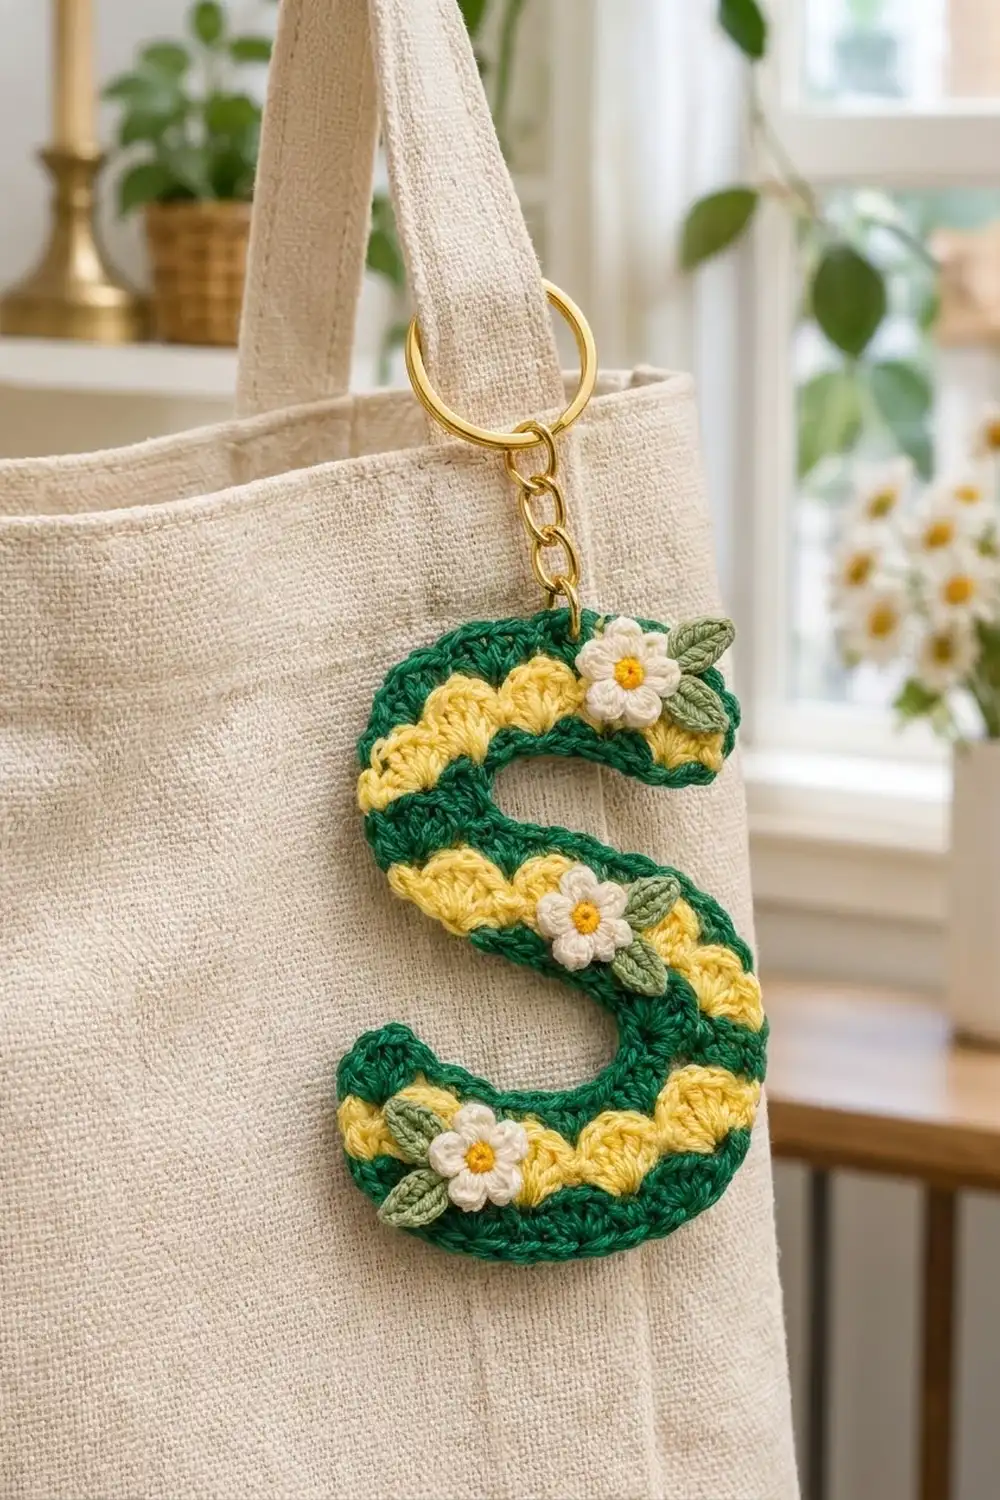
Three tiny cream five-petal flowers with yellow centers and sage-green leaves are sewn on top: one on the upper tip, one on the diagonal spine, and one on the lower tip. A gold split ring on a short chain turns the letter into a keychain or tote-bag charm.
The pattern uses US crochet terms. The finished letter measures about 6 in (15.2 cm) tall and 3.75 in (9.5 cm) wide, with a stroke width of 1.25 in (3.2 cm).
Construction is simple: you crochet one straight strip of three rows (green, yellow shells, green fans), then work one green edging round that adds stitches on outer curves and removes them on inner curves. The edging pulls the strip into an S, and blocking sets the shape. Flowers, leaves and hardware go on last.
Finished Size and Construction
- Finished size: about 6 in (15.2 cm) tall x 3.75 in (9.5 cm) wide
- Skill level: Easy / advanced beginner
- Terminology: US crochet terms
- Yarn weight: Sport weight (#2) cotton
- Hook: 2.75 mm (US C/2)
- Number of pieces: 1 main letter strip, plus 3 flowers and 6 leaves sewn on as decoration
- Layout: One strip curved into an S; no joining of main pieces
- Strip size before edging: 9.4 in (23.9 cm) long x 1 in (2.5 cm) wide
- Edging depth: 0.125 in (0.3 cm) per long edge, giving a 1.25 in (3.2 cm) stroke
Materials
Choose a smooth, mercerized sport-weight cotton. It shows stitch definition clearly, holds a curve after blocking and resists fuzzing on a bag that gets handled every day. Figures below assume about 150 m per 50 g.
- Forest green (main and edging): 8 g, about 24 m
- Butter yellow (shells and flower centers): 4 g, about 12 m
- Cream (petals): 2 g, about 6 m
- Sage green (leaves): 2 g, about 6 m
Tools:
- 2.75 mm (US C/2) crochet hook
- Tapestry needle
- 4 locking stitch markers
- Rust-proof pins and a foam blocking board
- Spray starch or fabric stiffener (optional, for a firmer letter)
- 1 in (2.5 cm) gold split key ring with a 1 in (2.5 cm) chain and a small jump ring
- Two pairs of flat-nose pliers
All quantities include a safety margin of roughly 25 percent.
Abbreviations (US Terms)
- ch – chain
- sl st – slip stitch
- sc – single crochet
- hdc – half double crochet
- dc – double crochet
- sc2tog – single crochet 2 together: (insert hook in next st, yo, pull up a loop) twice, yo, pull through all 3 loops
- st(s) – stitch(es)
- RS – right side
- yo – yarn over
Special stitch – Shell: 5 dc worked in the same stitch.
Gauge and Checkpoints
Gauge: 13 sc and 14 rows = 2 in (5.1 cm) in sc worked flat. One 6-stitch shell repeat measures about 0.9 in (2.3 cm).
Because this is a single small piece, the strip itself is your swatch. Work the foundation chain and Row 1, then measure before going further.
- After Row 1: 61 sc measure 9.4 in (23.9 cm).
- After Row 2: strip is about 0.6 in (1.5 cm) wide.
- After Row 3: strip is about 1 in (2.5 cm) wide.
- After edging: stroke is 1.25 in (3.2 cm) wide and the strip curls on its own.
- After blocking: letter is 6 in (15.2 cm) tall x 3.75 in (9.5 cm) wide.
If Row 1 is longer than 9.4 in (23.9 cm), go down a hook size, to 2.5 mm. If it is shorter than 9 in (22.9 cm), go up to 3 mm. Do not change the stitch counts, because the edging math depends on exactly 61 stitches per long edge.
Main Strip
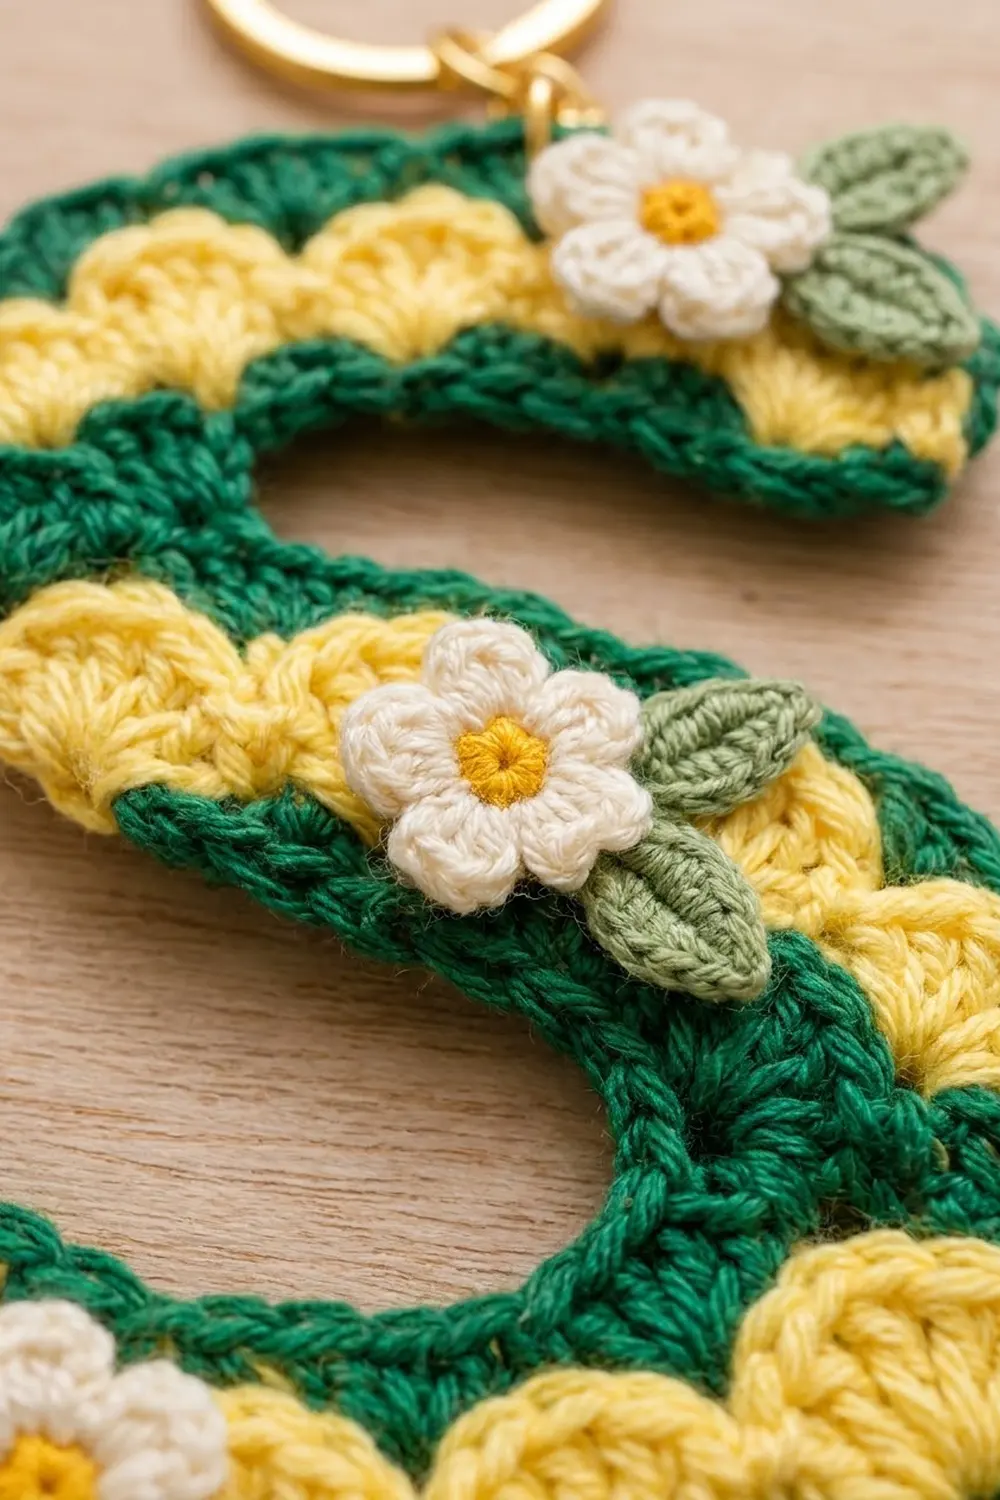
The strip is worked in rows. The yellow shells and green fans interlock, so each green fan fills the dip between two yellow shells.
Foundation: With forest green, ch 62.
Row 1 (green, RS): Sc in 2nd ch from hook and in each ch across, turn. (61 sc)
Place a marker in the 27th sc and another in the 35th sc, counting from the start of the row. Stitches 1–26 are Zone A (top bowl), 27–35 are the Spine, and 36–61 are Zone B (bottom bowl). Fasten off green, leaving a 6 in (15.2 cm) tail.
Row 2 (yellow): Join butter yellow in the first sc. Ch 3 (counts as dc), 2 dc in same st (half shell), *skip 2 sts, sc in next st, skip 2 sts, shell in next st; rep from * 8 more times, skip 2 sts, sc in next st, skip 2 sts, 3 dc in last st, turn.
Count: 3 + (9 shells x 5) + 10 sc + 3 = 61 sts.
Fasten off yellow, leaving a 6 in (15.2 cm) tail.
Row 3 (green): Join forest green in the first dc. Ch 1, sc in same st, *skip 2 dc, 5 dc in next sc, skip 2 dc, sc in center dc of next shell; rep from * 8 more times, skip 2 dc, 5 dc in next sc, skip 2 dc, sc in top of turning ch-3. Do not fasten off.
Count: 10 green fans x 5 dc + 11 sc = 61 sts.
Use your two spare markers on Row 3: put them in the stitches directly above the Row 1 markers, and leave the Row 1 markers in place. Both long edges now show the same three zones.
Checkpoint: a straight strip, 9.4 in (23.9 cm) x 1 in (2.5 cm), with a green row, a yellow shell band and a green fan band.
Edging (Border)
The edging is one round of green sc worked all the way around the strip. It does two jobs. It gives a smooth green frame, and it shapes the S by adding stitches on the outer edge of each curve and removing them on the inner edge.
Edging gauge: same as the main gauge, 6.5 sc per 1 in (2.5 cm).
Zone A curves toward the foundation edge, which makes the top bowl. Zone B curves toward the fan edge, which makes the bottom bowl. The spine stays straight.
Round 1 (green): Continue with the working loop at the end of Row 3. Rotate to work across the short end.
- Short end 1: 7 sc evenly across the end: 1 at the upper corner, 2 in the Row 3 end, 2 in the Row 2 end, 1 in the Row 1 end, 1 at the lower corner. (7 sc)
- Foundation edge, Zone A (inner curve): Working in the free loops of the foundation chain, sc2tog 13 times over the 26 Zone A sts. (13 sc)
- Foundation edge, Spine: Sc in each of the next 9 sts. (9 sc)
- Foundation edge, Zone B (outer curve): Sc in next st, 2 sc in next st; rep from * 13 times over the 26 Zone B sts. (39 sc)*
- Short end 2: 7 sc evenly across the end, placed as for Short end 1. (7 sc)
- Fan edge, Zone B (inner curve): Working in the Row 3 sts, sc2tog 13 times. (13 sc)
- Fan edge, Spine: Sc in each of the next 9 sts. (9 sc)
- Fan edge, Zone A (outer curve): Sc in next st, 2 sc in next st; rep from * 13 times. (39 sc)*
Join with sl st to the first sc. Round total: 136 sc.
Why the math works: each long edge starts with 61 sts. The inner curve turns 26 sts into 13, the spine keeps 9, and the outer curve turns 26 sts into 39. That gives 13 + 9 + 39 = 61 per long edge, so the strip keeps its overall length while each zone bends. Along the outer edge, 39 sc measure 6 in (15.2 cm); along the inner edge, 13 sc measure 2 in (5.1 cm). That 4 in (10.2 cm) difference across a 1.25 in (3.2 cm) stroke bends each bowl by about 180 degrees. The full round is 61 + 61 + 7 + 7 = 136 sc.
Fasten off, leaving a 12 in (30.5 cm) tail. You can use it to tack the inner curves to shape if needed.
Checkpoint: the strip should now curl into a loose S on its own, with the stroke 1.25 in (3.2 cm) wide.
Flowers (Make 3)
Round 1 (butter yellow): Make a magic ring, ch 1, 5 sc in ring, pull the ring closed and join with sl st to the first sc. Fasten off. (5 sc)
Round 2 (cream): Join cream in any sc. (Ch 2, 2 dc, ch 2, sl st) all in the same st, sl st in next st; rep from * 4 more times, ending the last repeat in the joining st. (5 petals)*
Fasten off, leaving an 8 in (20.3 cm) tail for sewing. Each flower measures about 0.75 in (1.9 cm) across.
Leaves (Make 6)
With sage green, ch 5. Sc in 2nd ch from hook, hdc in next ch, dc in next ch, sc in last ch, ch 1. Working along the other side of the chain: sc in first ch, dc in next ch, hdc in next ch, sc in last ch, sl st in tip.
Fasten off, leaving a 6 in (15.2 cm) tail. Each leaf is about 0.5 in (1.3 cm) long.
Assembly and Hardware
Block the letter (see below) before sewing on the flowers.
- Top flower: Sew it near the upper tip of the S, over the yellow band, with one leaf on each side.
- Middle flower: Sew it on the spine, slightly right of center, with one leaf on each side.
- Bottom flower: Sew it near the lower tip, with one leaf on each side.
- Tuck the leaf bases just under the petals and stitch them through the center of the flower so they lie flat.
- Open the jump ring with two pairs of pliers. Pass it through the edging at the highest point of the top bowl, catching two sc for strength. Add the chain and split ring, then close the jump ring fully.
Final Blocking
- Weave in all tails except the ones you need for sewing. Run each tail back through stitches of the same color.
- Wet the letter in cool water and press out the excess in a towel. Do not wring it.
- Lay it RS up on the blocking board and ease it into an S. The top bowl curls toward the foundation edge and the bottom bowl curls toward the fan edge.
- Pin the outer curves first, every 0.25 in (0.6 cm), spreading the 39-stitch edges evenly so they lie flat without ruffling.
- Pin the spine straight and check the size: 6 in (15.2 cm) tall x 3.75 in (9.5 cm) wide.
- Open each yellow shell with a pin tip so it fans out.
- Mist with spray starch if you want a firmer letter, then let it dry completely, ideally overnight.
Final Quality-Control Checklist
- Row 1, Row 2 and Row 3 each have 61 sts.
- There are 9 full yellow shells plus a half shell at each end.
- There are 10 green fans.
- The edging totals 136 sc: 7 + 13 + 9 + 39 + 7 + 13 + 9 + 39.
- The stroke is a consistent 1.25 in (3.2 cm) wide.
- The letter measures 6 in (15.2 cm) x 3.75 in (9.5 cm) after blocking.
- All three flowers have 5 even petals and 2 leaves each.
- The jump ring is closed with no gap and is anchored through 2 sc.
- No tails show on the RS.
Troubleshooting
The outer curve ruffles. Your tension is loose on the increases. Block again with more pins, or redo the zone with a 2.5 mm hook.
The inner curve puckers or cups. Work the sc2tog more loosely, or block with a pin pressed into each inner curve.
The S looks too open. Use the 12 in (30.5 cm) tail to tack the inner edge of each bowl with 2–3 hidden stitches.
The shells lean to one side. You skipped an uneven number of stitches. Each shell needs exactly 2 sts skipped on each side.
Row 3 ends with the wrong count. Check that each green fan sits in a yellow sc and each green sc sits in a shell’s center dc.
The flowers curl. Steam them lightly and pin them flat before sewing.
Care
Hand wash in cool water with mild soap, press dry in a towel and reshape flat. Remove the metal ring first if it might tarnish, and re-starch if the letter softens.
Final Notes
The measurement chain runs like this: 13 sc = 2 in (5.1 cm), so 61 sc give a 9.4 in (23.9 cm) strip. Three rows bring the width to 1 in (2.5 cm). The 136-stitch edging adds 0.125 in (0.3 cm) on each side, for a 1.25 in (3.2 cm) stroke. Its 13/9/39 zones bend the strip into a 6 in (15.2 cm) x 3.75 in (9.5 cm) S. Check the size at each stage and the letter will curve on its own, ready for its little flowers.
Happy crocheting!