
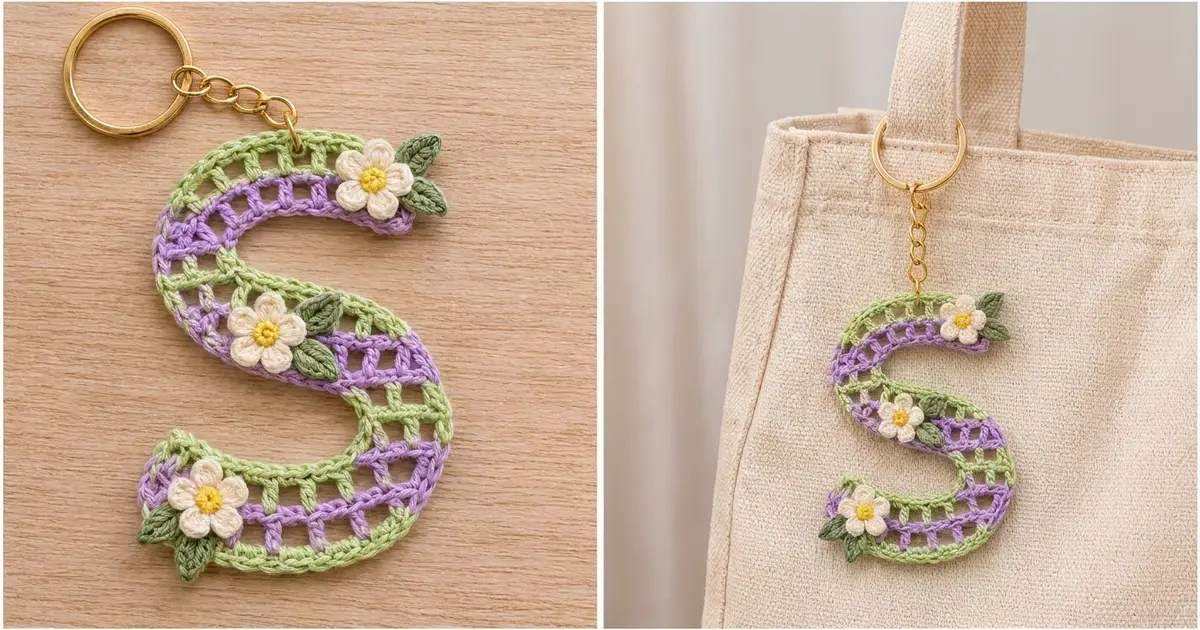
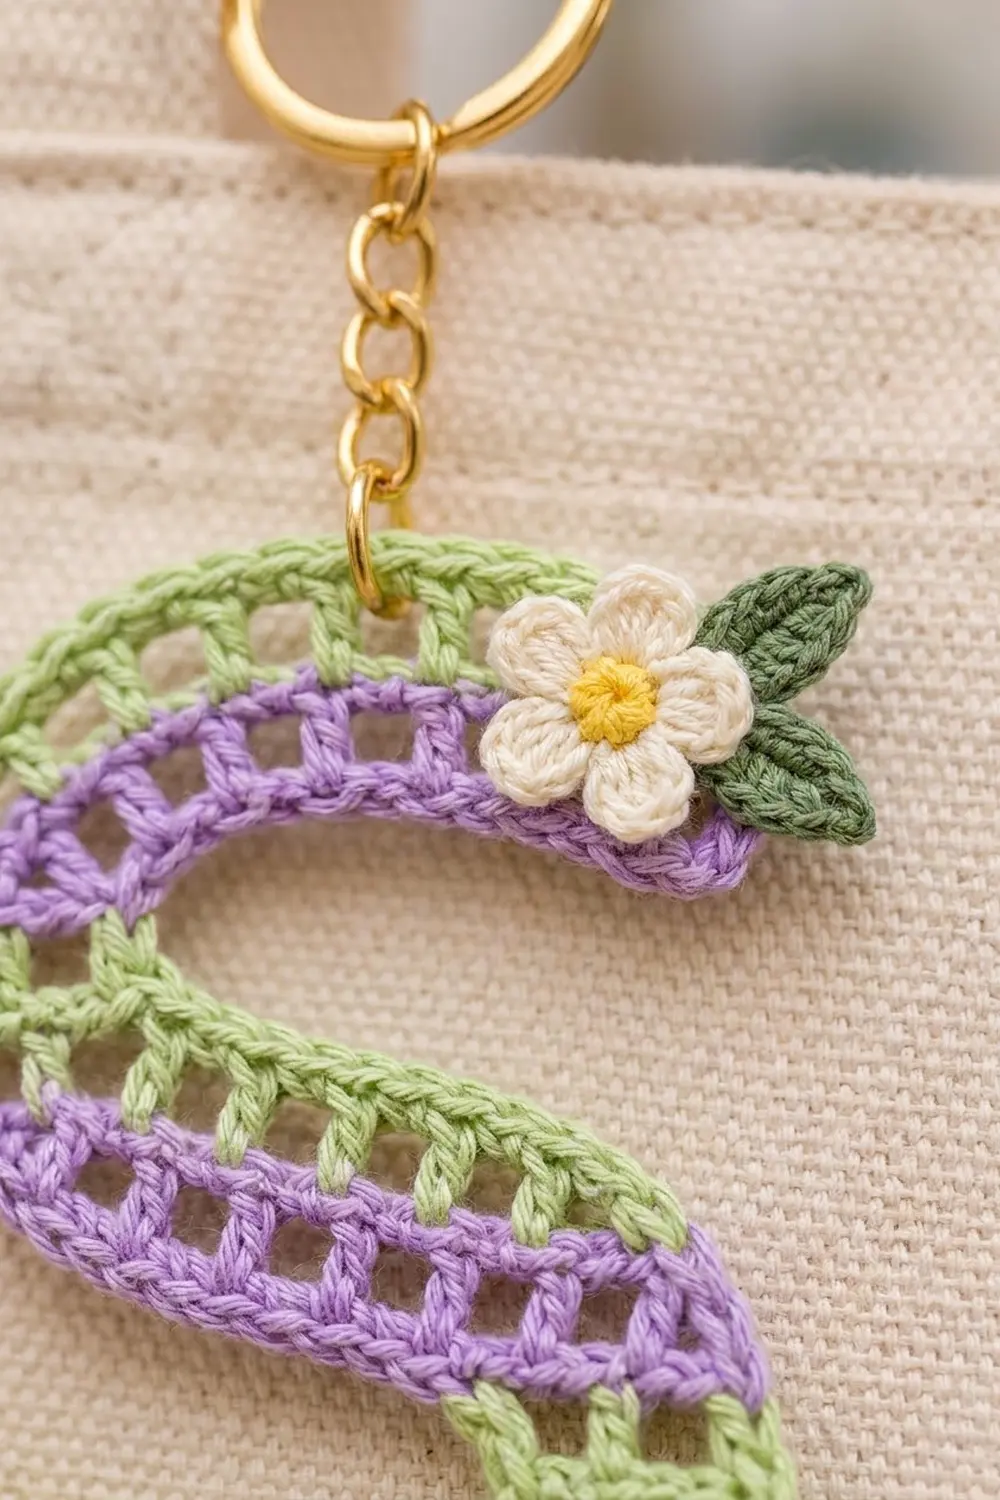
The Lavender Meadow Letter S Keychain is a small, cheerful monogram charm. It is one curved strip in fresh green and soft lavender. A row of open green filet mesh runs down the middle with a solid lavender band on each side, and a crisp green single crochet outline goes all the way around.
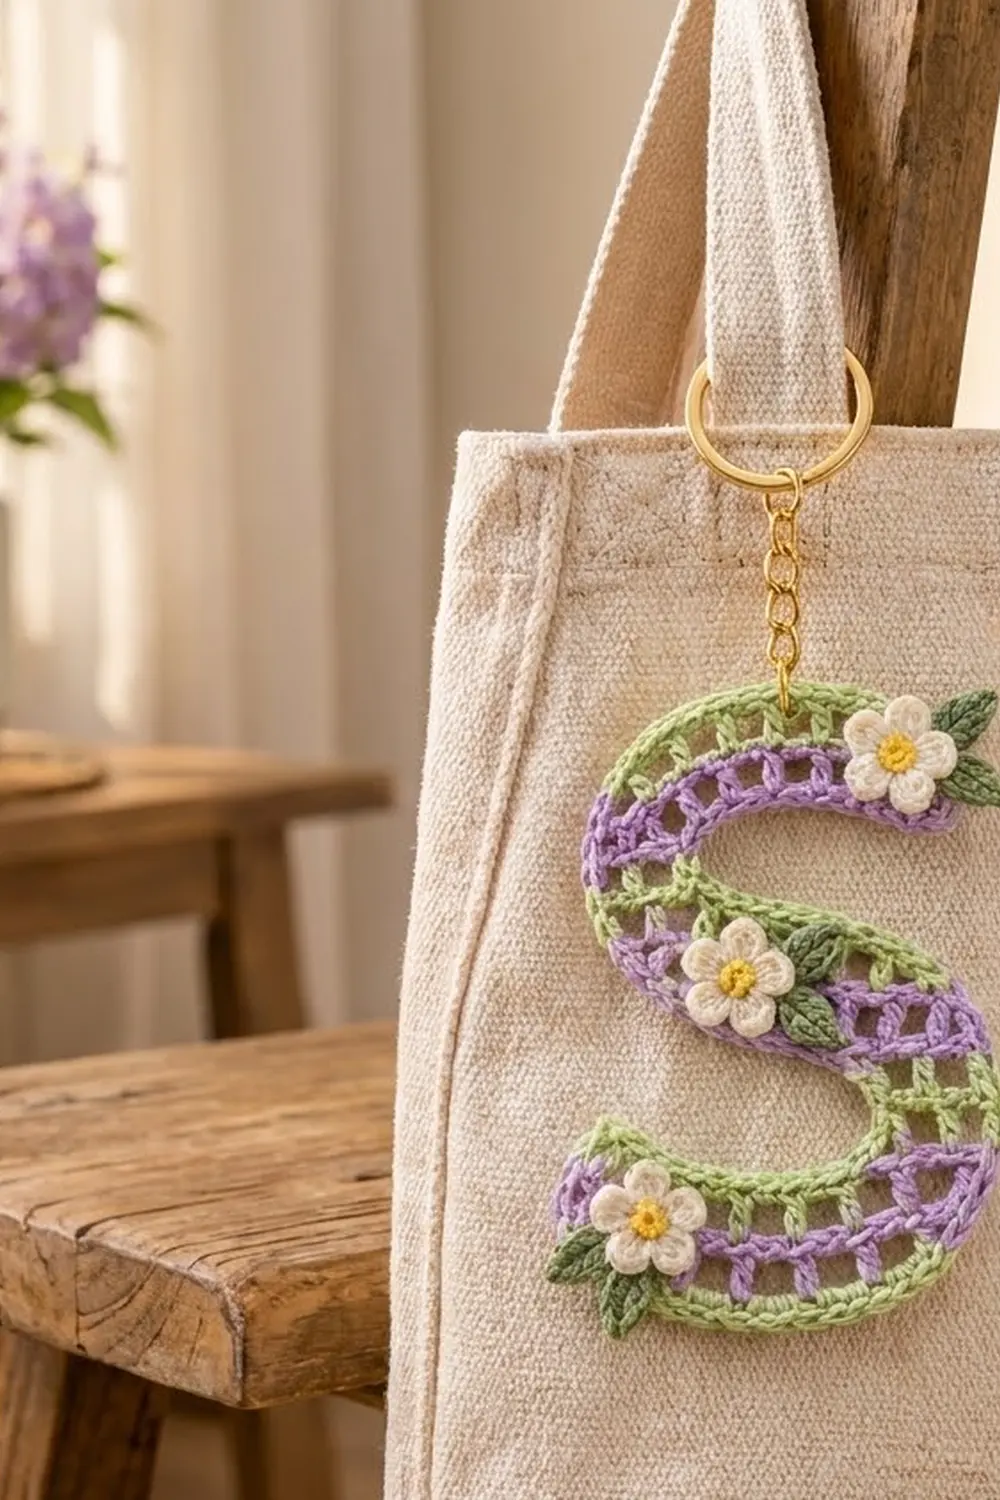
Three tiny cream flowers with sunny yellow centers sit on the letter, each with two dark green leaves. A gold split ring and a short chain turn it into a bag charm, a key fob or a personalized gift.
This pattern uses US crochet terms. The finished letter is 4.5 in (11.4 cm) tall and 3.25 in (8.3 cm) wide. The strip is 1.25 in (3.2 cm) wide, including the border.
Construction is simple. First you crochet a straight mesh row. Then you add a lavender row along each long edge. These rows are longer along some sections and shorter along others, so the strip curves into an S by itself. A green border, blocking, the flower appliqués and the hardware finish the piece.
Finished Size and Construction
- Finished size: 4.5 in (11.4 cm) tall x 3.25 in (8.3 cm) wide
- Skill level: Easy-intermediate (simple stitches, careful counting)
- Terminology: US crochet terms
- Yarn weight: Sport weight (#2) cotton
- Hook: 3.0 mm (US C/2–D/3)
- Number of pieces: 1 letter strip, plus 3 flowers and 6 leaves sewn on as appliqués
- Layout: Single piece, no joining
- Strip width before border: 0.85 in (2.2 cm)
- Letter size before border: about 4.1 in (10.4 cm) x 2.85 in (7.2 cm)
- Border depth: 0.2 in (0.5 cm) on every edge
- Finished strip width: 1.25 in (3.2 cm)
Materials
Choose a smooth mercerized cotton or cotton blend in sport weight. Cotton gives crisp stitch definition, keeps the mesh squares open and blocks into a curve that holds. Avoid fuzzy or very stretchy yarn, because the S will lose its shape.
- Color A, Spring Green: 4 g / 12 m (mesh row and border)
- Color B, Lavender: 4 g / 12 m (two solid bands)
- Color C, Cream: 2 g / 6 m (flower petals)
- Color D, Yellow: 1 g / 3 m (flower centers)
- Color E, Leaf Green (darker): 2 g / 6 m (leaves)
All quantities include extra yarn for swatching and weaving in ends. One small ball of each color is enough for several keychains.
Tools:
- 3.0 mm crochet hook
- Tapestry needle
- Scissors
- Stitch marker
- Rust-proof pins and a foam blocking mat
- Spray bottle with water
- 1 in (2.5 cm) gold split ring with about 1.25 in (3.2 cm) of chain attached
- 1 gold jump ring, 0.3 in (0.8 cm), and two pairs of flat-nose pliers
- Optional: a thin cardboard S cut to the finished size, to use as a blocking guide
Abbreviations (US Terms)
- ch – chain
- sl st – slip stitch
- sc – single crochet
- hdc – half double crochet
- dc – double crochet
- sp – space
- sk – skip
- st(s) – stitch(es)
- rep – repeat
- RS – right side
Special stitch: sc2tog over a space and a dc. Insert the hook in the next ch-1 sp, yarn over and pull up a loop. Insert the hook in the next dc (or the base of the next dc), yarn over and pull up a loop. Yarn over and draw through all 3 loops on the hook. This counts as 1 st and shortens the edge.
Gauge and Checkpoints
Gauge: 10 sc = 2 in (5.1 cm) in sport cotton with a 3.0 mm hook. One sc row is about 0.2 in (0.5 cm) tall. One dc row is about 0.45 in (1.1 cm) tall.
Test before you go further. Work the foundation chain and Row 1, then measure. This short row is your swatch.
Checkpoints:
- After Row 1: the mesh strip is 8.2 in (20.8 cm) long and 0.45 in (1.1 cm) tall when gently straightened.
- After Row 3: the strip is 0.85 in (2.2 cm) wide and already curves into a loose S. On each half, the long edge is about 5 in (12.7 cm) and the short edge is about 3 in (7.6 cm).
- After the border: the strip is 1.25 in (3.2 cm) wide.
- After blocking: the letter is 4.5 in (11.4 cm) tall x 3.25 in (8.3 cm) wide.
- One flower: 0.75 in (1.9 cm) across. One leaf: 0.6 in (1.5 cm) long.
If Row 1 is longer than 8.2 in (20.8 cm), change to a 2.75 mm hook. If it is shorter, change to a 3.25 mm hook. A difference of 0.5 in (1.3 cm) or more makes the letter noticeably taller or shorter, so start again rather than trying to fix it in blocking.
Letter Strip
The strip has 21 dc posts and 20 ch-1 spaces. One space plus the post after it is called a unit. Units 1–10 form the top curve of the S and units 11–20 form the bottom curve. Post 11 sits at the center of the spine.
Foundation and Row 1 (Color A, mesh)
With Color A, ch 44.
Row 1 (RS): Dc in 6th ch from hook. The 5 skipped ch count as the first dc, a ch-1 sp and 1 skipped ch. *Ch 1, sk next ch, dc in next ch; rep from * across.
Count: 21 dc posts and 20 ch-1 sps (41 sts). Post 1 is the turning chain at the start of the row. Post 21 is the last dc, at the slip-knot end.
Fasten off, leaving a 6 in (15.2 cm) tail. Put a stitch marker in post 11 so the center of the letter is easy to find.
Check Checkpoint 1.
Row 2 (Color B, top edge of Row 1)
With the RS facing, join Color B in the top of post 21.
Row 2: Ch 1, sc in same st (1 sc).
Bottom curve, inner edge (units 20–11): [Sc2tog over next ch-1 sp and next dc, sc in next ch-1 sp, sc in next dc] 5 times. 15 sts. You are now at post 11.
Top curve, outer edge (units 10–1): [2 sc in next ch-1 sp, sc in next dc, sc in next ch-1 sp, sc in next dc] 5 times. 25 sts. The last sc goes in the top of the turning chain (post 1).
Count: 1 + 15 + 25 = 41 sc. Fasten off.
Row 3 (Color B, foundation edge of Row 1)
Rotate the strip so the foundation chain is on top. With the RS facing, join Color B in the base of post 1.
Row 3: Ch 1, sc in same st (1 sc). In this row, “sp” means the skipped foundation chain under each space. “Base of next dc” means the foundation chain the post was worked into.
Top curve, inner edge (units 1–10): [Sc2tog over next sp and base of next dc, sc in next sp, sc in base of next dc] 5 times. 15 sts. You are now at the base of post 11.
Bottom curve, outer edge (units 11–20): [2 sc in next sp, sc in base of next dc, sc in next sp, sc in base of next dc] 5 times. 25 sts. The last sc goes in the base of post 21.
Count: 1 + 15 + 25 = 41 sc. Fasten off.
Why it curves: On the top curve, one edge has 25 sts and the other has 15. On the bottom curve, the long and short edges switch sides. In each half, the 20 mesh sts sit between those two edges. So the strip bends one way, crosses the spine at post 11, then bends the other way. Check Checkpoint 2.
Flowers (make 3)
Center: With Color D, make a magic ring. Ch 1, 5 sc in ring, sl st to first sc. Pull the ring tight. 5 sc. Fasten off.
Petals: Join Color C in any sc. *(Ch 2, 2 dc, ch 2, sl st) in same sc, sl st in next sc; rep from * 4 more times. On the last repeat, the final sl st goes into the first sc. 5 petals. Fasten off, leaving an 8 in (20.3 cm) tail for sewing.
Each flower is 0.75 in (1.9 cm) across.
Leaves (make 6)
With Color E, ch 6.
Leaf: Sc in 2nd ch from hook, hdc in next ch, dc in next ch, hdc in next ch, sc in last ch. Ch 1. Rotate and work along the other side of the foundation chain: sc in first ch, hdc in next, dc in next, hdc in next, sc in last. Sl st in first sc. 10 sts plus the ch-1 at one end.
Fasten off, leaving an 8 in (20.3 cm) tail. Each leaf is 0.6 in (1.5 cm) long.
Border
Border gauge: One round of sc in Color A, with 1 sc in each st along the long edges. It adds 0.2 in (0.5 cm) to every edge.
With the RS facing, join Color A in the first sc of Row 2 (above post 21).
Rnd 1:
- Long edge A (Row 2): Ch 1, 3 sc in first sc (corner), sc in each of next 39 sc, 3 sc in last sc (corner). 45 sc, including both 3-sc corner groups.
- Top end: 3 sc evenly across the side of post 1. 3 sc.
- Long edge B (Row 3): 3 sc in first sc (corner), sc in each of next 39 sc, 3 sc in last sc (corner). 45 sc, including both corner groups.
- Bottom end: 3 sc evenly across the side of post 21. 3 sc.
Sl st to first sc. Count: 45 + 3 + 45 + 3 = 96 sc. Fasten off, leaving a 10 in (25.4 cm) tail.
Why the math works: Each long edge has 41 sts. The first and last of these are corners, and each corner gets 3 sc, so 39 + 3 + 3 = 45. Working 1 sc in each st keeps the border exactly as long as the edge underneath, so the 25-and-15 curve shaping stays intact. Each end is only 0.85 in (2.2 cm) wide. The 3 sc across the end, plus the 2 extra sc from each corner group, round the end smoothly without ruffling.
Check Checkpoint 3: the strip is now 1.25 in (3.2 cm) wide.
Final Blocking
- Weave in all ends on the letter except the 10 in (25.4 cm) border tail, which you will use for the hardware.
- Mist the letter until it is damp all the way through but not dripping.
- Lay it RS up on the blocking mat. The short edges will sit naturally on the inside of each curve.
- Pin the spine first, with one pin at post 11 on each edge. Ease the top curve into a round bowl and the bottom curve into the opposite bowl. If you have a cardboard S guide, set it under the letter.
- Open each mesh square by pinning through the border between posts. The posts on the curves will fan slightly. That is correct.
- Measure the letter. Adjust the pins until it is 4.5 in (11.4 cm) tall and 3.25 in (8.3 cm) wide.
- Pin each flower flat with the petals evenly spaced. Pin each leaf out to a point.
- Let everything dry completely before you unpin it, about 4–6 hours.
Attach the appliqués. Place one flower on the upper tail of the S, one at the center of the spine and one on the lower tail. Tuck two leaves under each flower, angled outward. Sew each leaf down with small stitches along its center line. Then sew each flower through the yellow center and the base of each petal. Use the yarn tails, and catch only the back layer of the letter so no stitches show through the mesh.
Attach the hardware. Open the jump ring with the pliers. Pass it through the green border at the highest point of the top curve, then through the last link of the chain. Close it completely. For extra security, use the border tail to whipstitch a few times around the jump ring.
Final Quality-Control Checklist
- Row 1 has 21 posts and 20 ch-1 spaces.
- Rows 2 and 3 each have exactly 41 sc.
- The border has 96 sc: 45 per long edge (including corners) and 3 per end.
- The letter is 4.5 in (11.4 cm) x 3.25 in (8.3 cm).
- The strip is 1.25 in (3.2 cm) wide all along its length.
- The mesh squares are open and even, with no twisted posts.
- Each of the three flowers has 5 petals and is 0.75 in (1.9 cm) across.
- Each flower has two leaves, and every leaf is sewn down firmly.
- The jump ring is fully closed, and the S hangs upright.
- No yarn ends show on the front.
Troubleshooting
The strip twists instead of lying flat. The foundation chain was twisted. Lay the chain flat before you start Row 1 and work into the same loop of every chain.
The curves are too gentle. The sc2tog stitches may be loose. Tighten your tension on the short edges and pin the curves more firmly when blocking.
The outer edge ruffles. You may have worked 2 sc in every space. In each repeat, one space should get 2 sc and the next should get 1 sc.
The ends pucker. Work the 3 end stitches more loosely, or switch to a 3.25 mm hook for those stitches only.
The letter is too tall or too short. Your gauge is off. Measure Row 1 again against 8.2 in (20.8 cm) and change hook size.
The petals cup. Steam them lightly, or pin them flat while damp.
The keychain hangs crooked. Move the jump ring left or right along the top curve until the spine sits on a clean diagonal.
Care
Spot clean with mild soap and cool water, then reshape and lay flat to dry. If you need to soak it, take off the metal hardware first so it doesn’t tarnish.
Final Notes
The measurements build on each other in a short chain. Your gauge sets Row 1 at 8.2 in (20.8 cm). Rows 2 and 3, with their 25- and 15-stitch edges, bring the strip to 0.85 in (2.2 cm) wide and curve it into an S. The 96-stitch border brings the width to 1.25 in (3.2 cm). Blocking sets the finished letter at 4.5 in (11.4 cm) x 3.25 in (8.3 cm).
Once you see how edge length controls the curve, you can try other color pairs or add more flowers. The S itself stays the same.
Happy crocheting!