

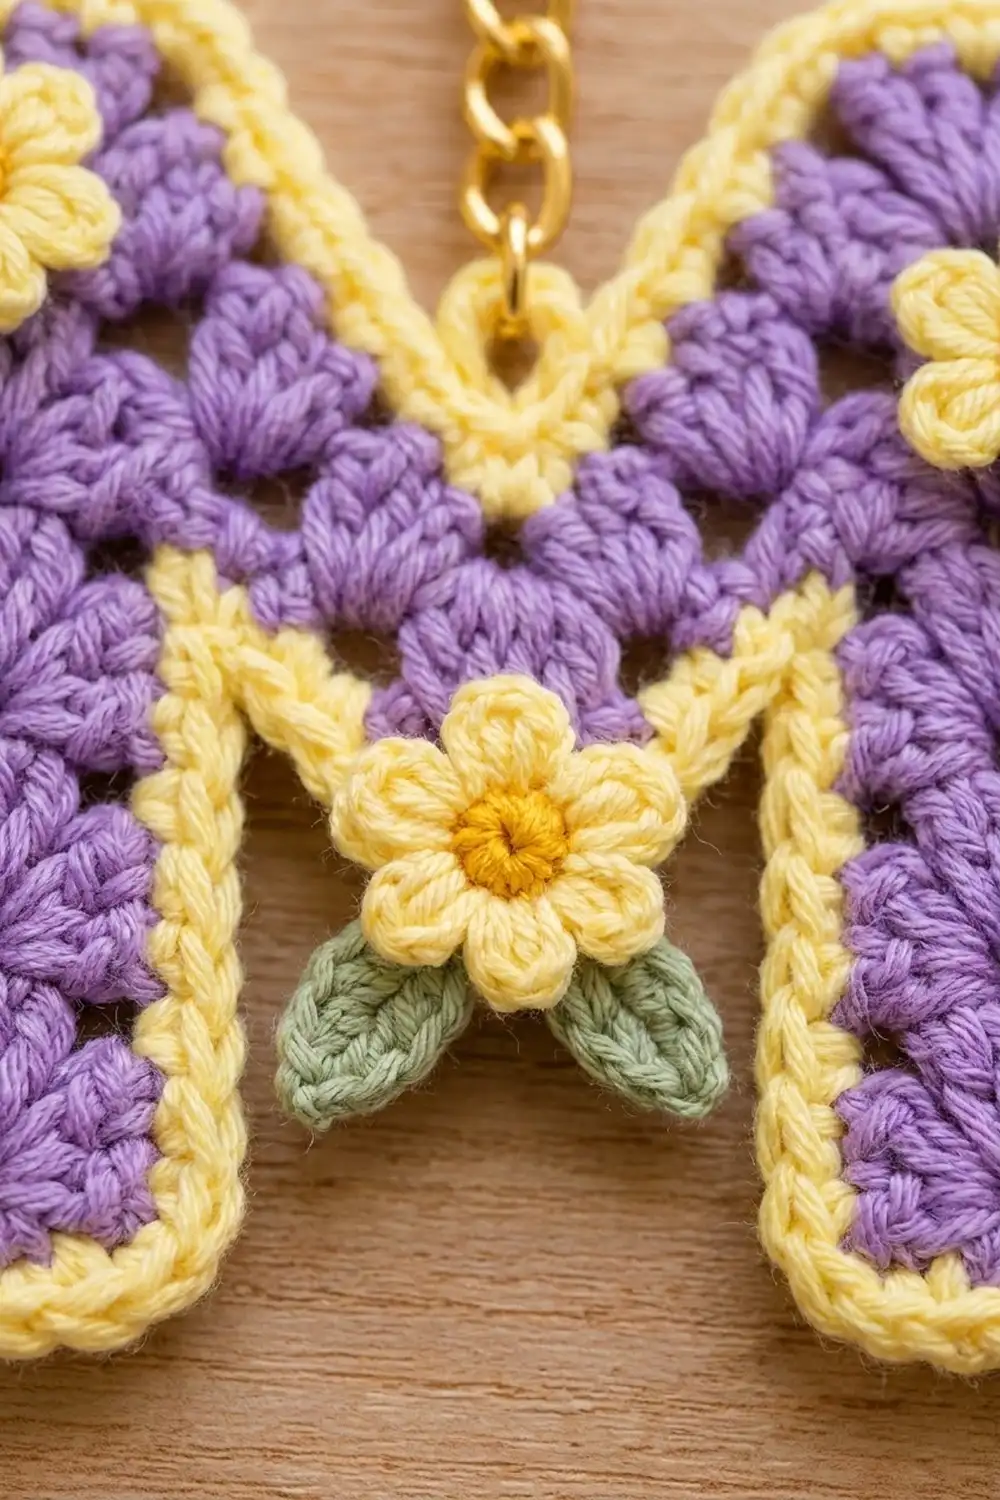
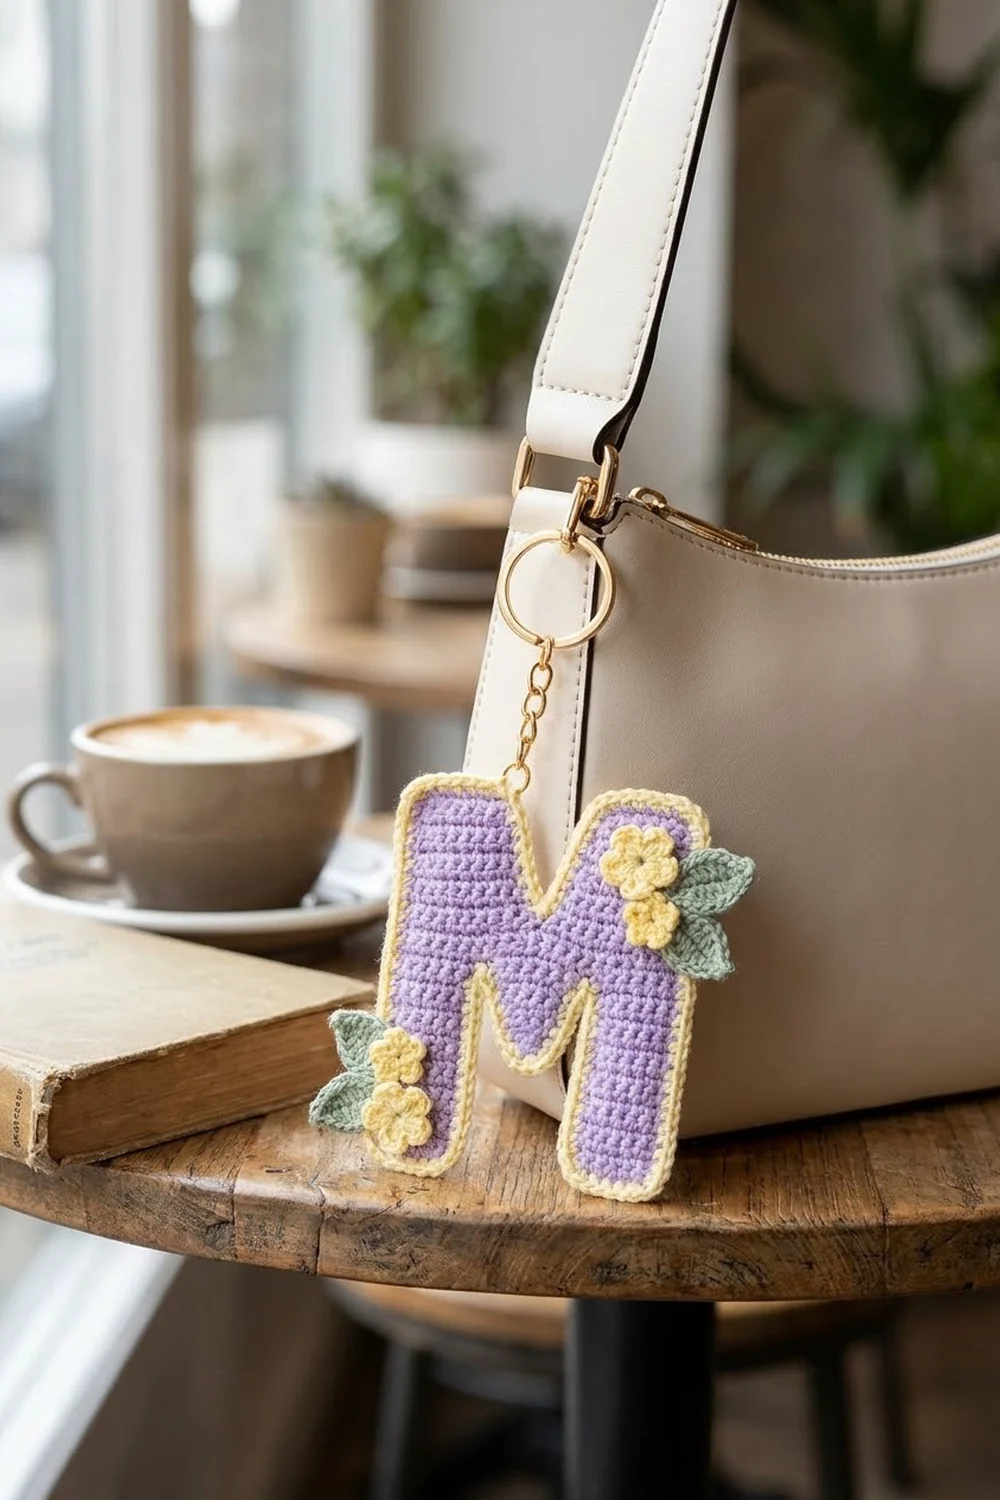
The Lavender Bloom Letter M is a small, textured initial keychain that works well as a bag charm. Rows of little lavender shells give the letter a fan-and-eyelet texture. A corded butter-yellow edge outlines it, and three tiny yellow flowers with golden centers and sage-green leaves sit on top.
The colors are soft and springlike: lavender for the body, pale butter yellow for the border and petals, golden yellow for the flower centers, and sage green for the leaves. A gold split ring and short chain hang from the notch at the top of the letter.
This pattern uses US crochet terms. The finished letter measures about 3.3 in (8.4 cm) wide × 2.55 in (6.5 cm) tall, not counting the hardware.
You start by working the two legs separately in rows. A chain bridge connects them, then one full-width row of shells runs across the whole letter. The top splits into two halves, and their stepped inner edges form the V notch. Two border rounds finish the outline. Last, you sew on the flowers and attach the keyring.
Finished Size and Construction
- Finished size: 3.3 in (8.4 cm) wide × 2.55 in (6.5 cm) tall
- Skill level: Easy-intermediate (shaping by rows, joining a chain bridge)
- Terminology: US crochet terms
- Yarn weight: Sport (#2) cotton
- Hook: 2.5 mm
- Number of pieces: 1 letter, plus 3 flower appliqués and 4 leaf appliqués
- Layout: Single letter M. Two legs, each 2 shells wide; a center section 3 shells wide
- Piece size before border: 2.9 in (7.4 cm) wide × 2.15 in (5.5 cm) tall
- Border depth: 0.2 in (0.5 cm) per side (2 rounds)
Materials
Use a smooth mercerized or combed cotton in sport weight, roughly 155 m per 50 g. Cotton keeps the shells crisp and stands up to life on a bag handle. Acrylic works too, but the letter will be softer and slightly larger.
- Lavender (body): 8 g, about 25 m
- Butter yellow (border and petals): 4 g, about 12 m
- Golden yellow (flower centers): 1 g, about 3 m
- Sage green (leaves): 1 g, about 3 m
These quantities include a margin of about 25% for swatching and weaving in ends.
Tools:
- 2.5 mm crochet hook
- Tapestry needle
- Scissors
- Stitch markers (2)
- Gold split keyring, 1 in (2.5 cm)
- Gold chain, 1.5 in (3.8 cm)
- 2 gold jump rings, 6 mm, and 2 pairs of flat-nose pliers
- Pins and a blocking mat
- Spray bottle
Abbreviations (US Terms)
- ch – chain
- sl st – slip stitch
- sc – single crochet
- hdc – half double crochet
- dc – double crochet
- sc2tog – single crochet 2 together
- rev sc – reverse single crochet (crab stitch)
- sk – skip
- sp – space
- st(s) – stitch(es)
- tch – turning chain
Shell: (2 dc, ch 1, 2 dc) in the same stitch or space. The ch-1 makes the small eyelet in the middle of each fan. A shell has 4 dc and 1 ch-1 sp.
Reverse sc: Work sc from left to right (for right-handed crocheters). Insert the hook into the next stitch to the right, yarn over, pull up a loop, yarn over, and pull through both loops. This makes a corded edge.
Gauge and Checkpoints
Gauge: 8 sc = 1 in (2.5 cm). 4 shell rows = 1 in (2.5 cm) tall.
The left leg is your test piece. Make it first, then measure it before you continue.
- Checkpoint 1 (one leg, Rows 1–4): 1 in (2.5 cm) wide × 0.9 in (2.3 cm) tall
- Checkpoint 2 (after Row 6): 2.9 in (7.4 cm) wide × 1.4 in (3.6 cm) tall
- Checkpoint 3 (after Row 9): 2.9 in (7.4 cm) wide × 2.15 in (5.5 cm) tall
- Checkpoint 4 (after border): 3.3 in (8.4 cm) wide × 2.55 in (6.5 cm) tall
If your leg is more than 0.1 in (0.3 cm) too wide, go down 0.25 mm in hook size. If it is too narrow, go up 0.25 mm. Every checkpoint after this one depends on the leg, so fix the size here.
Letter Body
Work with lavender. Ch 3 at the start of a row counts as a dc throughout.
Left Leg
Foundation: Ch 9.
Row 1: Sc in 2nd ch from hook and in each ch across. Turn. (8 sc)
Row 2: Ch 3, sk next sc, shell in next sc, sk next 2 sc, shell in next sc, sk next sc, dc in last sc. Turn. (10 dc and 2 ch-1 sps: 2 shells + 2 edge dc)
Rows 3–4: Ch 3, shell in ch-1 sp of each of the next 2 shells, dc in top of tch. Turn. (10 dc and 2 ch-1 sps)
Fasten off. Check Checkpoint 1 now.
Right Leg
Work as for the Left Leg, but do not fasten off after Row 4.
Lay both legs flat, foundation edges at the bottom and the same side facing up, with the Left Leg on the left. The working yarn should be at the outer (right) edge of the Right Leg. The last dc of the Left Leg’s Row 4 sits at its inner edge.
Bridge and Center
Row 5 (bridge): Ch 3, turn. Shell in each of the next 2 ch-1 sps, then dc in top of tch (inner edge of Right Leg). Ch 7. Dc in the last dc of Left Leg Row 4 (its inner edge). Shell in each of the next 2 ch-1 sps, dc in top of tch. Turn. (20 dc, 4 ch-1 sps, and one ch-7 bridge)
Row 6 (full width): Ch 3, shell in each of the next 2 ch-1 sps. Sk next dc. Working into the ch-7: sk 1 ch, shell in next ch, sk 1 ch, shell in next ch, sk 1 ch, shell in next ch, sk 1 ch. Sk next dc, shell in each of the next 2 ch-1 sps, dc in top of tch. Turn. (30 dc and 7 ch-1 sps: 7 shells + 2 edge dc)
Number the shells 1 to 7 from left to right. Shell 4 is the center shell. Check Checkpoint 2.
Right Half
Row 7: Ch 3, shell in ch-1 sp of Shells 7, 6, and 5. Sk next 2 dc, dc in next dc (the dc of Shell 4 closest to Shell 5). Turn. (14 dc and 3 ch-1 sps)
Row 8: Ch 3, shell in each of the next 3 ch-1 sps, dc in top of tch. Turn. (14 dc and 3 ch-1 sps)
Row 9: Ch 3, shell in each of the next 2 ch-1 sps, sk next 2 dc, dc in next dc. (10 dc and 2 ch-1 sps)
Fasten off. Row 9 covers only the leg, so the top of Shell 5 below it stays exposed and forms a step.
Left Half
Row 7: Join lavender with a sl st in the leftmost dc of Shell 4 in Row 6. Ch 3, sk next 2 dc, shell in ch-1 sp of Shells 3, 2, and 1, dc in top of tch. Turn. (14 dc and 3 ch-1 sps)
Two dc of Shell 4 and its ch-1 sp stay unworked. They form the bottom of the V notch.
Row 8: Ch 3, shell in each of the next 3 ch-1 sps, dc in top of tch. Turn. (14 dc and 3 ch-1 sps)
Row 9: Sl st in the first 3 dc, in the ch-1 sp, and in the next 2 dc (6 sl sts). Ch 3, shell in each of the next 2 ch-1 sps, dc in top of tch. (10 dc and 2 ch-1 sps)
Fasten off. Check Checkpoint 3. Weave in all lavender ends.
Counting all rows, the body has 39 shells: 12 in the legs, 4 in the bridge, 7 across the full row, 12 in Rows 7–8, and 4 in Row 9.
Flower and Leaf Appliqués
Flowers (make 3)
Center: In golden yellow, make a magic ring. Ch 1, then work 5 sc in the ring. Pull the ring closed and sl st to the first sc. (5 sc) Fasten off.
Petals: Join butter yellow with a sl st in any sc. [Ch 2, 2 dc, ch 2, sl st] in the same sc. *Sl st in next sc, [ch 2, 2 dc, ch 2, sl st] in same sc; repeat from * 3 more times. (5 petals) Fasten off and leave a 6 in (15.2 cm) tail for sewing.
Each flower measures about 0.8 in (2.0 cm) across.
Leaves (make 4)
In sage green, ch 5. Sl st in the 2nd ch from hook, sc in next ch, hdc in next ch, sc in last ch. Ch 1, then rotate to work along the other side of the foundation ch: sc in the same ch, hdc in next ch, sc in next ch, sl st in last ch. (8 sts) Fasten off and leave a tail for sewing.
Each leaf measures about 0.5 in (1.3 cm) long.
Border
Border gauge: 8 sts per 1 in (2.5 cm) on every edge. Each dc row is 0.25 in (0.6 cm) tall, so 2 sc per dc row-end gives 8 per inch. Each shell covers about 0.375 in (1.0 cm), so 3 sc per exposed shell keeps the same rate.
Exposed shell rule: Wherever a shell’s top is part of the edge, sk its first dc, sc in the next dc, sc in the ch-1 sp, sc in the next dc, and sk its last dc. (3 sc per shell)
Round 1 (butter yellow): With the right side facing, join with a standing sc in the side of Row 1 at the Right Leg’s outer edge. Work counterclockwise:
- Right outer side: 17 sc total (1 in the Row 1 end, 2 in each of the 8 dc row-ends)
- Top-right outer corner: 3 sc in the tch
- Right leg top: 6 sc (2 shells)
- Top-right inner corner: 3 sc in the edge dc
- Row 9 inner end: 2 sc
- Right step: 3 sc across the exposed part of Shell 5 (in the dc, ch-1 sp, and dc), then sk 1 dc
- Step corner: 3 sc in the Row 8 tch
- Notch wall, Rows 8–7: 4 sc
- Notch bottom: 3 sc in the 2 dc and ch-1 sp left unworked on Shell 4
- Notch wall, Rows 7–8: 4 sc
- Step corner: 3 sc in the Row 8 edge dc
- Left step: sk 1 sl st, then 3 sc in the next 3 sl sts
- Row 9 inner end: 2 sc
- Top-left inner corner: 3 sc in the tch
- Left leg top: 6 sc
- Top-left outer corner: 3 sc in the edge dc
- Left outer side: 17 sc
- Left leg bottom: 3 sc in the first foundation ch, sc in the next 6 ch, 3 sc in the last ch (12 sc)
- Left inner side: 9 sc (1 in the Row 1 end, 2 in each of Rows 2–5)
- Opening top: 7 sc, one in the underside of each bridge ch
- Right inner side: 9 sc
- Right leg bottom: 12 sc, worked like the left leg bottom
Sl st to the first sc. (134 sc)
Why the math works: The side edges get 2 sc per dc row-end and 1 sc per sc row-end. Shell tops get 3 sc per shell, and the bridge gets 1 sc per ch. That puts every straight edge at 8 sts per 1 in (2.5 cm). The 10 convex corners (8 at the top and steps, plus the 4 corners at the leg bottoms) get 3 sc so they turn flat. Concave corners (the notch bottom, the steps, and the top of the lower opening) get no extra stitches, so they stay sharp.
Round 2: Ch 1. Working left to right, rev sc in each sc around. Sl st to the first st and fasten off. (134 rev sc)
Reverse sc is worked 1-to-1, so it adds a corded edge without changing the outline. Check Checkpoint 4.
Final Blocking
- Weave in all ends on the back. Keep the flower and leaf sewing tails.
- Spray the letter until it is damp all through.
- Pin it to 3.3 in (8.4 cm) × 2.55 in (6.5 cm). Pin the four leg-bottom corners first, then the two top outer corners.
- Push the notch into a clean V and open up the lower opening. Pin the concave corners so they stay sharp.
- Let it dry completely, at least 4 hours.
- Sew one flower at the top of each leg, slightly toward the outer edge. Sew one leaf under the left flower, angled down-left, and one under the right flower, angled down-right.
- Sew the third flower over Shell 4 just below the notch. Sew the last two leaves under it, one angled down-left and one down-right, so they overlap the border at the top of the lower opening.
- Open a jump ring and pass it through the 3 border sts at the bottom of the notch. Add one end of the chain and close the ring. Use the second jump ring to connect the other end of the chain to the split ring.
Final Quality-Control Checklist
- Rnd 1 has 134 sc and Rnd 2 has 134 rev sc.
- Both legs are the same height and width: 1 in (2.5 cm) wide before the border.
- The notch is centered over Shell 4, with steps of equal size on both sides.
- The finished letter measures 3.3 in (8.4 cm) × 2.55 in (6.5 cm).
- The border lies flat, with no ruffling along the sides and no cupping at the corners.
- All flowers have 5 even petals and are sewn on securely.
- The jump rings are fully closed, and the letter hangs straight.
Troubleshooting
Middle shells crowd together in Row 6: Your ch-7 is too tight. Rework the bridge with a hook 0.5 mm larger for those 7 ch only.
The border ruffles along the sides: Work 3 sc over each pair of dc row-ends instead of 4. Keep the corner counts the same.
The border pulls in or cups: Go up 0.25 mm in hook size for Rnd 1, or add 1 extra sc at each top corner.
The concave corners pucker: Work sc2tog across the corner, with one leg in the last st of one edge and one in the first st of the next.
The notch leans to one side: Check that each half started at the correct dc of Shell 4. Two dc and a ch-1 sp must stay unworked.
The legs are different heights: Count the rows. Each leg needs Row 1 plus 3 shell rows before the bridge.
Care
Hand wash in cool water with mild soap, press out the water in a towel, and dry flat. Take the metal hardware off first so it doesn’t tarnish.
Final Notes
The measurements build on each other. Gauge (8 sc and 4 shell rows per 1 in, 2.5 cm) gives a leg of 1 in (2.5 cm) × 0.9 in (2.3 cm). The bridge and full row bring the letter to 2.9 in (7.4 cm) × 1.4 in (3.6 cm). The split halves bring it to 2.9 in (7.4 cm) × 2.15 in (5.5 cm). The border adds 0.2 in (0.5 cm) per side, for a finished letter of 3.3 in (8.4 cm) × 2.55 in (6.5 cm). If you match the leg in the first step, the rest of the sizes should follow.
Happy crocheting!