
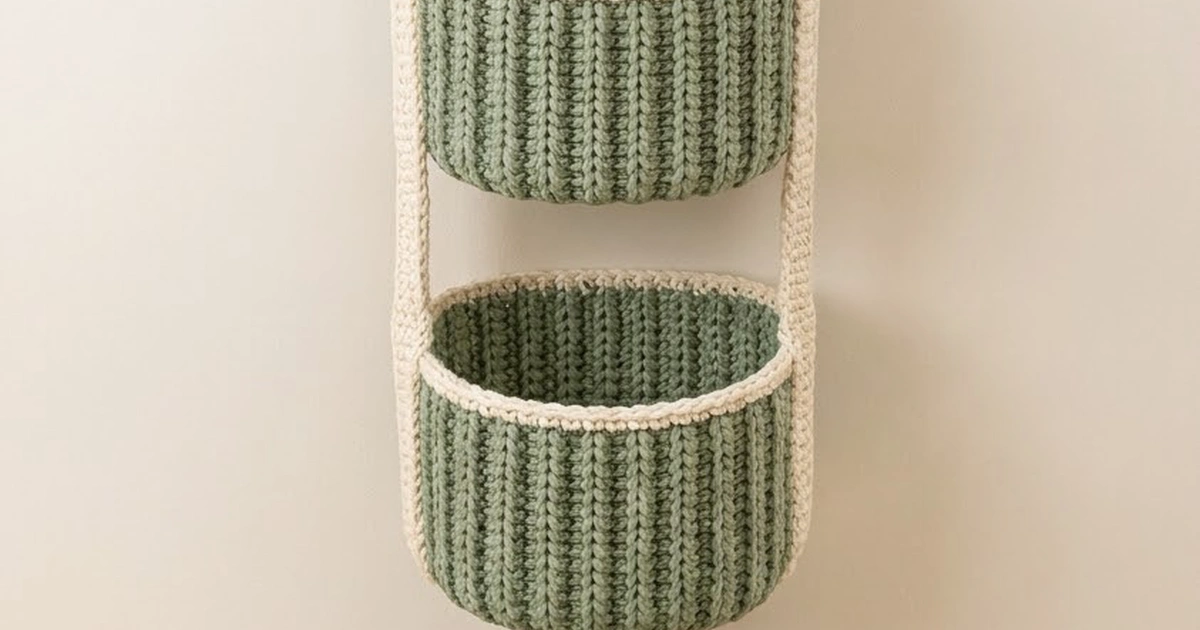
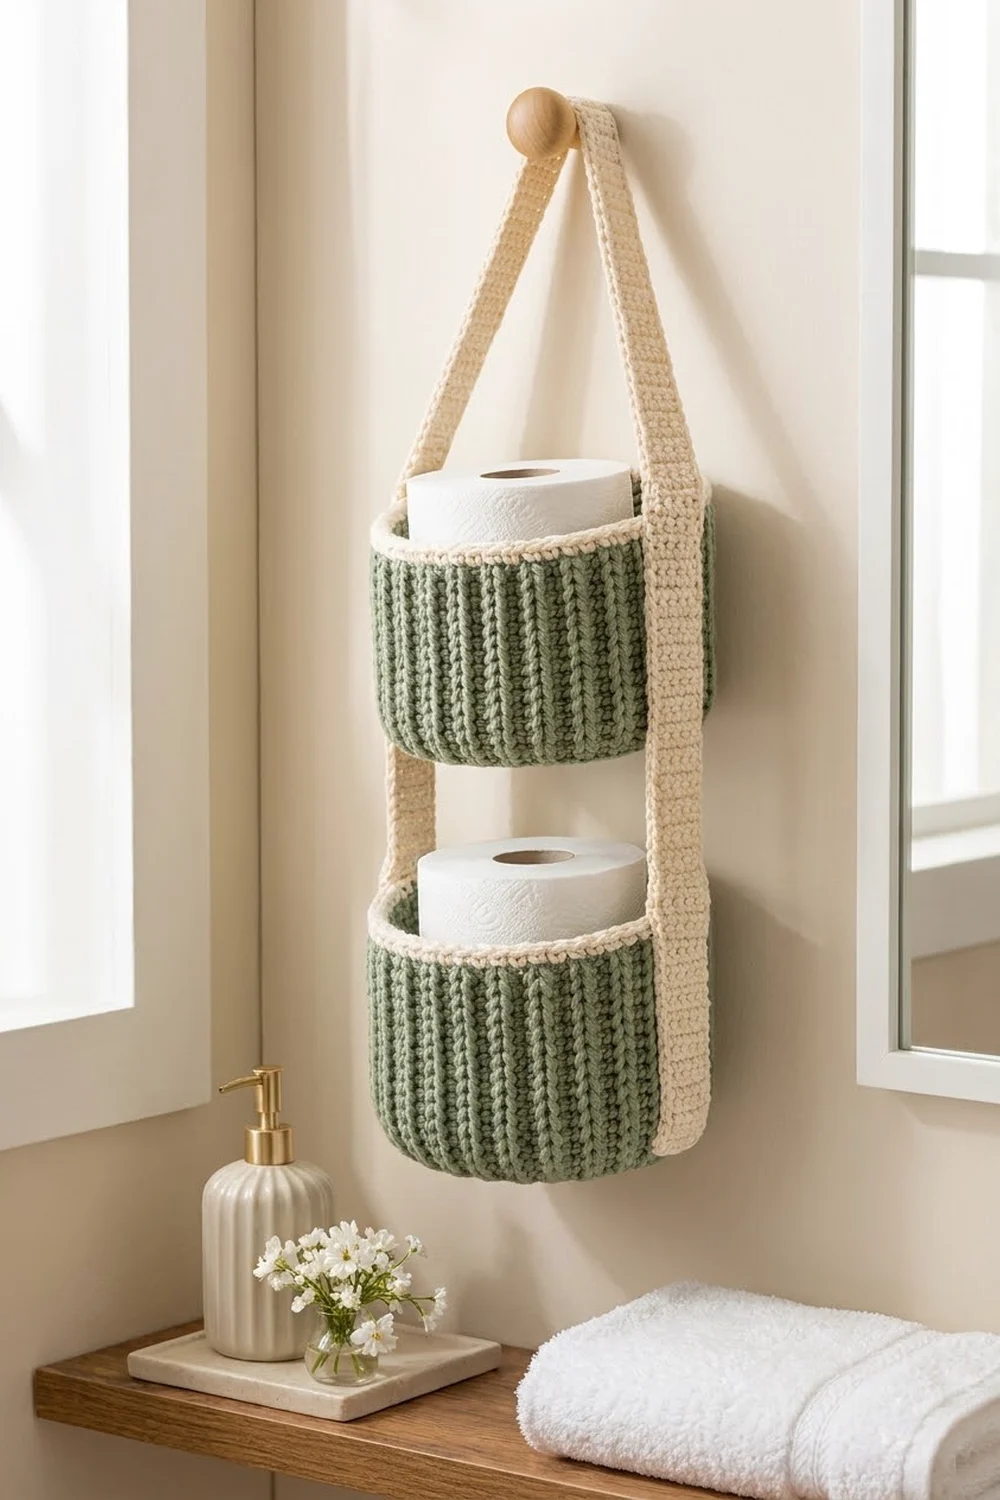
The Sage Ladder is a two-tier hanging basket for spare toilet paper rolls. It has two oval sage-green baskets with deep vertical ribs. Two cream straps carry both baskets and meet in a neat peak that hooks over a wall peg or towel hook.
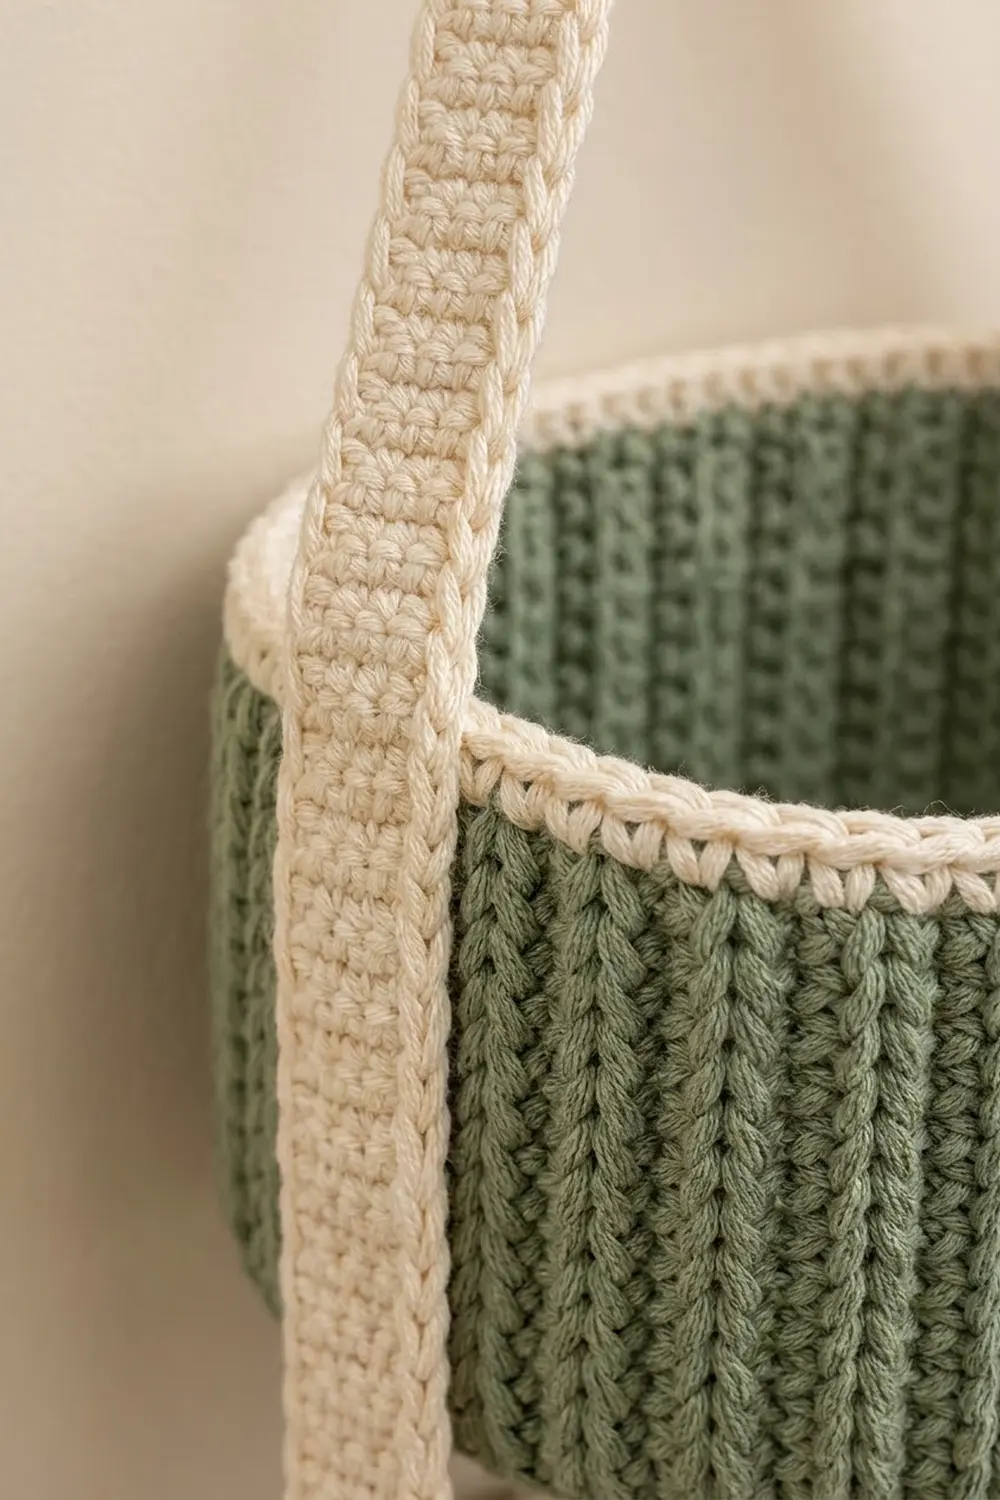
The colors stay soft and calm: a muted sage for the baskets and a warm cream for the rims and straps. The ribbed walls look like knitting, but they are just single crochet worked in the back loop only. Each cream rim ends in a round of reverse single crochet, which gives a corded edge.
This pattern uses US crochet terms. Each basket measures about 7.4 in x 4.9 in (18.8 cm x 12.4 cm) across the base and 5 in (12.7 cm) tall with the rim. Hanging, the whole piece is about 23.5 in (59.7 cm) from the bottom of the lower basket to the peak.
Construction is simple and modular. You make two oval bases in rounds and two ribbed wall panels in rows. Each panel is crocheted onto a base and closed into a basket. Then you add a cream rim to each basket, make two long straps, and sew the straps to the curved ends of both baskets.
Finished Size and Construction
- Finished size (each basket): 7.4 in x 4.9 in (18.8 cm x 12.4 cm) base, 5 in (12.7 cm) tall
- Overall hanging length: about 23.5 in (59.7 cm)
- Skill level: Easy / Advanced Beginner
- Terminology: US
- Yarn weight: Worsted (#4)
- Hook: 4.5 mm (US 7)
- Number of pieces: 6 (2 bases, 2 wall panels, 2 straps)
- Layout: 2 baskets stacked vertically on 2 shared straps
- Wall panel size: 21.5 in x 4.25 in (54.6 cm x 10.8 cm)
- Basket height before rim: 4.25 in (10.8 cm)
- Rim (border) depth: 0.75 in (1.9 cm)
- Strap size: 1.5 in x 24 in (3.8 cm x 61.0 cm)
Materials
Use a smooth, firm worsted-weight yarn. Cotton or a cotton-acrylic blend works best because it holds its shape and shows the ribs clearly. Avoid fuzzy or very stretchy yarns. They hide the texture, and the straps may sag over time.
- Sage green (A): 150 g / 275 m
- Cream (B): 75 g / 137 m
The amounts assume a yarn of about 183 m per 100 g and include a margin of roughly 30% for your gauge swatch and seams.
Tools:
- 4.5 mm (US 7) crochet hook
- 4 stitch markers
- Tapestry needle
- Measuring tape
- Scissors
- Rust-proof pins and a steamer or spray bottle
- Optional: a wooden peg or hook for hanging
Abbreviations (US Terms)
- ch – chain
- sc – single crochet
- sc blo – single crochet in back loop only
- sl st – slip stitch
- rev sc – reverse single crochet
- st(s) – stitch(es)
- rnd(s) – round(s)
- RS / WS – right side / wrong side
Special stitch – Reverse single crochet (rev sc): Work from left to right (right to left if you crochet left-handed). Insert the hook into the next stitch to the right, yarn over, and pull up a loop. Yarn over again and pull through both loops on the hook. This makes the corded rim edge.
Sc blo: Work a normal sc, but insert the hook under the back loop only. If you work sc blo on every row and turn each time, you get raised ridges on both faces of the fabric.
Gauge and Checkpoints
Base gauge (sc in rounds): 16 sts x 18 rnds = 4 in (10.2 cm), or 4 sts and 4.5 rnds per inch.
Panel gauge (sc blo rows): 16 sts x 16 rows = 4 in (10.2 cm), measured lying flat with the ribs gently opened.
Make one complete base and one panel before you start the second set. The panel’s row count must equal the base’s final stitch count, so check both.
Checkpoints:
- Base after Rnd 6: 56 sts. About 5.2 in x 2.7 in (13.2 cm x 6.9 cm).
- Base after Rnd 11: 86 sts. About 7.4 in x 4.9 in (18.8 cm x 12.4 cm).
- Panel after Row 16: 4 in (10.2 cm) long, 4.25 in (10.8 cm) tall.
- Panel after Row 86: 21.5 in (54.6 cm) long.
If your pieces come out too big, go down half a hook size. If they are too small, go up half a hook size. Don’t add stitches or rows instead. The 86-to-86 match between the base and the panel is what makes the wall stand straight.
Oval Base (make 2, color A)
Each round increases at 6 points, 3 at each curved end. The two straight sides always have 10 sts.
Rnd 1: Ch 13. Sc in 2nd ch from hook, sc in next 10 ch, 3 sc in last ch. Working along the other side of the chain, sc in next 10 ch, 2 sc in last ch (the same ch as the first sc). Join with sl st to first sc. (26 sts)
From here on, ch 1 at the start of each round (it does not count as a stitch) and join with sl st to the first sc at the end.
Rnd 2: 2 sc in first st, sc in next 10, 2 sc in each of next 3, sc in next 10, 2 sc in each of last 2. (32 sts)
Rnd 3: [Sc in next st, 2 sc in next] once, sc in next 10, [sc in next st, 2 sc in next] 3 times, sc in next 10, [sc in next st, 2 sc in next] twice. (38 sts)
Rnds 4–11: In each round, the increase repeat gets one stitch longer. On Rnd n, work: [sc in next (n − 2) sts, 2 sc in next] once, sc in next 10, [sc in next (n − 2) sts, 2 sc in next] 3 times, sc in next 10, [sc in next (n − 2) sts, 2 sc in next] twice.
| Round | Repeat | Total sts |
|---|---|---|
| 4 | sc 2, 2 sc | 44 |
| 5 | sc 3, 2 sc | 50 |
| 6 | sc 4, 2 sc | 56 |
| 7 | sc 5, 2 sc | 62 |
| 8 | sc 6, 2 sc | 68 |
| 9 | sc 7, 2 sc | 74 |
| 10 | sc 8, 2 sc | 80 |
| 11 | sc 9, 2 sc | 86 |
After Rnd 11, the stitches divide into 10 (straight) + 33 (curved end) + 10 (straight) + 33 (curved end) = 86 sts.
Optional, for rounder ends: On even rounds, work the 2 sc into the first stitch of each repeat instead of the last. The stitch counts stay the same.
Place a marker in stitch 38 of Rnd 11. This is the center of the second curved end, and the wall seam will sit here. Fasten off.
Ribbed Wall Panel (make 2, color A)
The panel is worked sideways. Its rows will stand vertically on the basket and form the ribs.
Foundation: Ch 18.
Row 1: Sc in 2nd ch from hook and in each ch across, turn. (17 sts)
Row 2: Ch 1 (does not count as a stitch), sc blo in each st across, turn. (17 sts)
Rows 3–86: Repeat Row 2. (17 sts per row, 86 rows)
You should have 43 raised ridges on each face. The panel measures 21.5 in x 4.25 in (54.6 cm x 10.8 cm). Fasten off, leaving a 12 in (30.5 cm) tail for the side seam.
Make All Pieces
- Color A (sage): 2 oval bases, 2 ribbed wall panels
- Color B (cream): 2 straps (plus the rims, which you work directly onto the baskets)
Layout, as it hangs:
            /\        <- strap peak (rows 105–108 overlapped)
           /  \
          |    |      <- free straps, rows 54–104
       [ BASKET 2 ]   <- strap rows 32–53
          |    |      <- gap, rows 23–31
       [ BASKET 1 ]   <- strap rows 1–22
Joining
Wall to base
With the base RS facing out, hold the panel against the base edge so the panel’s long row-end edge lines up with the base’s last round. Join A at the marked stitch 38, inserting your hook through both the base stitch and the panel’s Row 1 row-end.
Joining Rnd: Ch 1. Working through both layers, sc in each base st and the matching panel row-end all the way around. That is 1 base st to 1 row-end. Join with sl st. (86 sts)
The math works because the base has 86 sts and the panel has 86 rows. Every stitch has exactly one partner, so the wall neither ruffles nor pulls in.
Side seam
Fold the panel up into a wall. Line up the foundation-chain edge with Row 86 and sl st through both layers along the 17 sts, from the base to the top. Weave in the ends. The seam sits at the center of a curved end, and a strap will cover it later.
Tension advice: Keep the joining sc as loose as the base stitches. If they are tight, the base cups upward.
Size checkpoint: Each assembled basket should measure 21.5 in (54.6 cm) around and stand 4.25 in (10.8 cm) tall.
Straps (make 2, color B)
Foundation: Ch 7.
Row 1: Sc in 2nd ch from hook and in each ch across, turn. (6 sts)
Rows 2–108: Ch 1, sc in each st across, turn. (6 sts)
Each strap measures 1.5 in x 24 in (3.8 cm x 61.0 cm). Fasten off and leave a long tail.
Strap attachment (after both rims are finished)
- Lay one strap over the center of a curved end of Basket 1 (the lower basket). Line Row 1 up with the base edge. The 6 strap sts cover the center 6 sts of the end. On the seam end, they also cover the side seam.
- Whipstitch both long edges and the bottom edge of strap rows 1–22 to the wall and rim.
- Leave rows 23–31 free. This makes a 2 in (5.1 cm) gap.
- Sew rows 32–53 to the matching curved end of Basket 2 in the same way.
- Repeat steps 1–4 with the second strap on the opposite curved ends.
- Rows 54–104 stay free, about 11.3 in (28.7 cm) on each side.
- Bring both strap tops together without twisting them. Overlap rows 105–108, about 0.9 in (2.3 cm), and whipstitch around the overlapped square. This is your peak.
Border (Cream Rim)
Rim gauge: The same as the base, 4 sts per inch, so the rim’s 86 sts measure 21.5 in (54.6 cm). That matches the wall exactly.
Join B with sl st in the top row-end that sits right above the side seam.
Rnd 1: Ch 1, sc in each row-end around the top edge of the panel. Join. (86 sts: 10 straight + 33 end + 10 straight + 33 end)
Rnd 2: Ch 1, sc in each st around. Join. (86 sts: 10 + 33 + 10 + 33)
Rnd 3: Ch 1, rev sc in each st around. Join. (86 sts: 10 + 33 + 10 + 33)
Fasten off and weave in the ends. Repeat on the second basket.
Why the math works: The top edge has the same 86 row-ends as the bottom edge. One sc per row-end keeps the rim the same length as the wall, so it neither flares nor pinches. The section counts (10 / 33 / 10 / 33) line up with the base sections, so the straps center over the same 33-st curved ends from top to bottom.
Final Blocking
- Lightly dampen each basket with a spray bottle, or hover a steamer over it. Don’t press the iron down.
- Slide a form inside each basket, such as a small box or a towel-wrapped roll. Shape the walls so they stand straight with even ribs.
- Flatten the base on a table, and nudge the curved ends into smooth ovals.
- Steam the straps flat. Pin them to 1.5 in (3.8 cm) wide without stretching the length.
- Let everything dry completely, at least 12 hours, before you hang it.
Final Quality-Control Checklist
- Each base has 86 sts and measures 7.4 in x 4.9 in (18.8 cm x 12.4 cm).
- Each panel has 86 rows and 43 ridges per face.
- The walls stand 4.25 in (10.8 cm) tall without leaning.
- The rims have 86 sts per round and sit 0.75 in (1.9 cm) deep.
- The side seams are hidden under the straps.
- The straps are not twisted and are centered on the curved ends.
- Both baskets hang level, with a 2 in (5.1 cm) gap between them.
- All ends are woven in securely.
Troubleshooting
The base cups or curls up. Your increases are too tight. Go up half a hook size for the base only, or use the staggered-increase option.
The base ruffles. You may have extra stitches. Recount to 86, and check that you kept 10 sts on each straight side.
The panel is longer or shorter than the base edge. Check your row count first. If the count is right, your row gauge differs from your stitch gauge. Add or remove rows in pairs so the ribs stay balanced, and match the final count to the base.
The walls lean outward. The joining round was worked too loosely. Rework it with firmer tension.
The rim flares. You worked more than 1 sc per row-end. Rework Rnd 1 with exactly 86 sts.
The straps stretch under load. Use a firmer cotton yarn, or go down half a hook size for the straps.
The baskets tilt. One strap is sewn higher than the other. Re-align the strap rows on both sides.
Care
Hand wash in cool water with a mild detergent and gently press out the water. Reshape the baskets over a form and lay them flat to dry.
Final Notes
The whole design rests on one measurement chain. The 86-st base matches the 86-row panel, which matches the 86-st rim, which gives each basket 21.5 in (54.6 cm) around. Two 108-row straps hold both baskets with a 2 in (5.1 cm) gap and come to a peak about 23.5 in (59.7 cm) above the lower basket. Check your counts at each stage and the baskets will stand straight, hang level, and hold your rolls neatly.
Happy crocheting!