
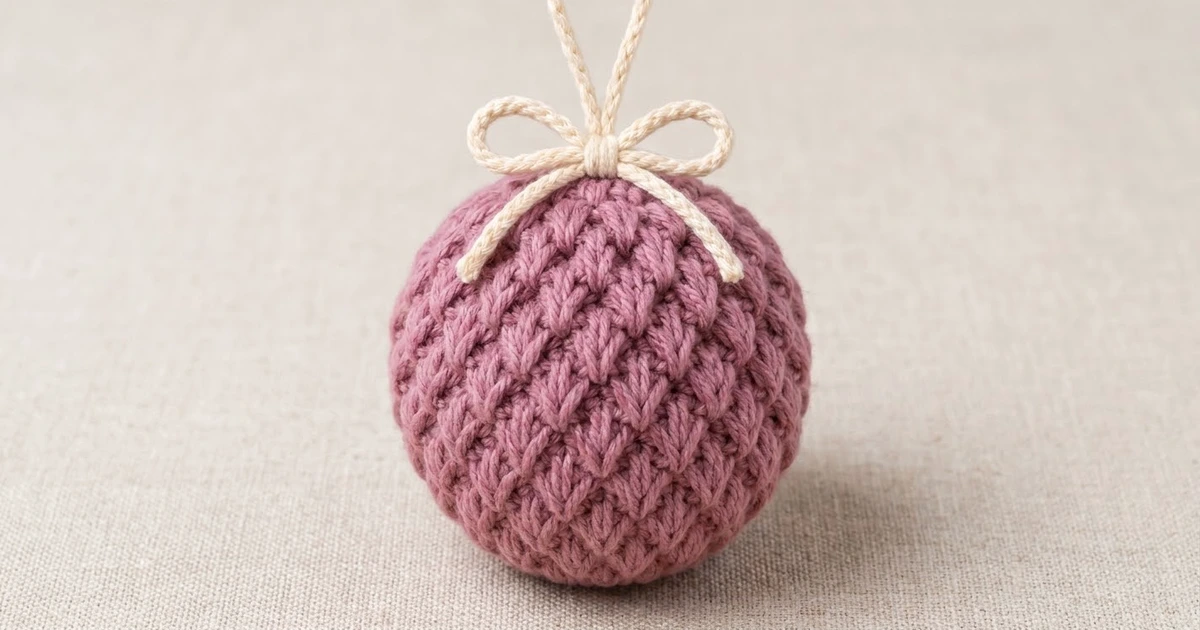
The Sugarplum Puff Ball is a small, round Christmas ornament covered in rows of raised puff stitches. The puffs are staggered from one round to the next, so they line up diagonally and make a lattice that looks a bit like a pine cone or a pineapple. A cream cord hanging loop with a small bow sits on top.
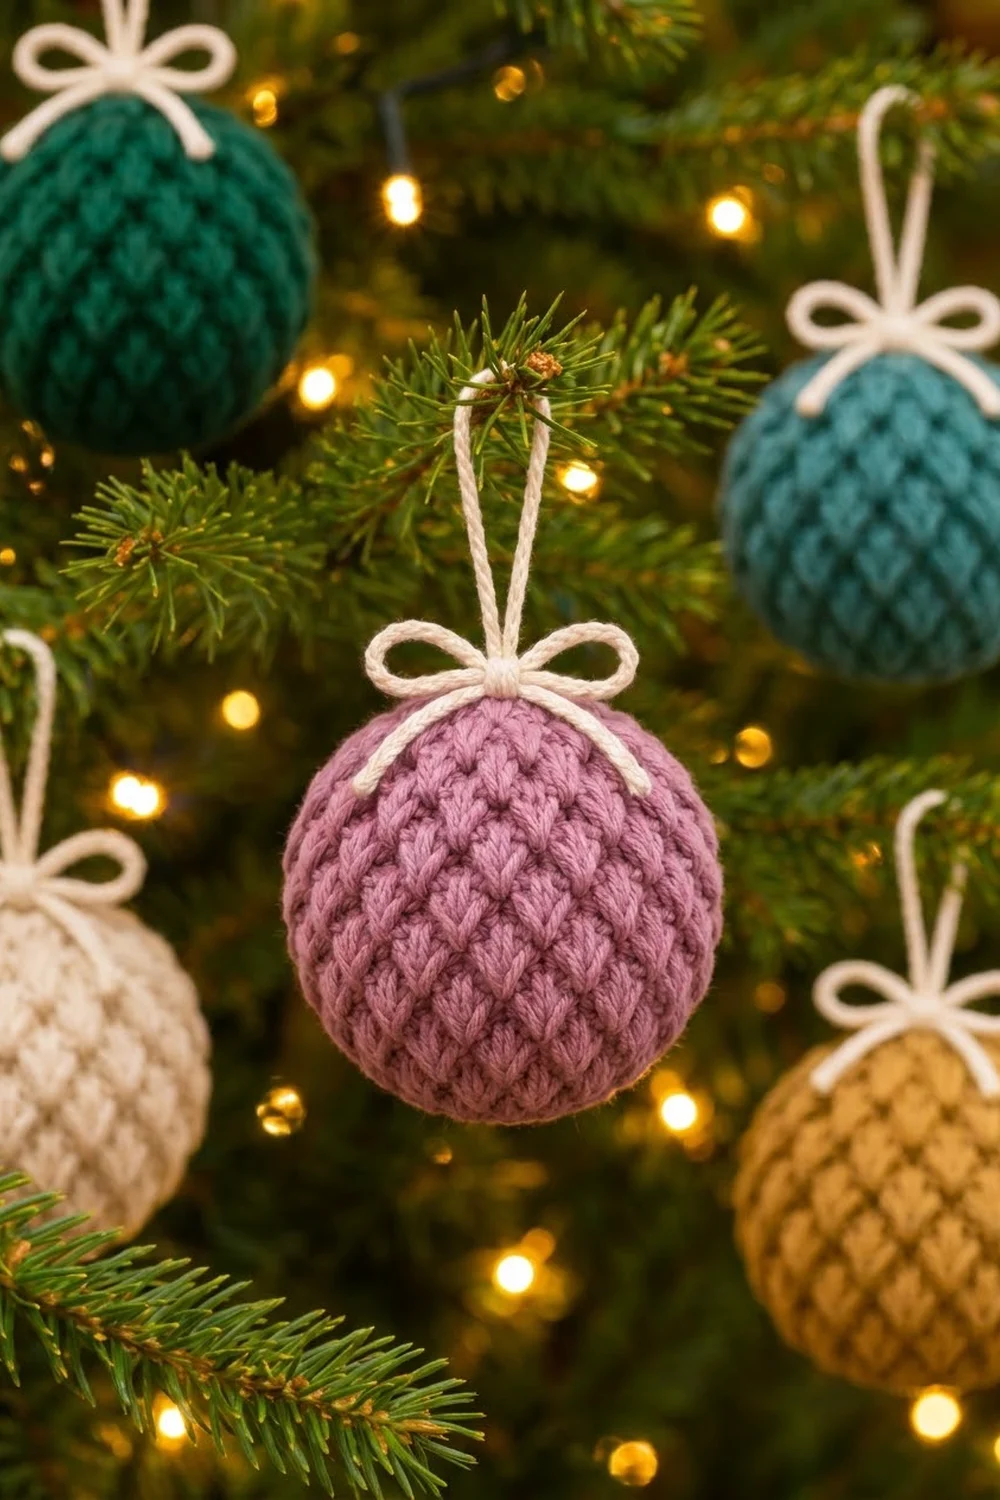
The sample is dusty mauve with a cream loop and bow. The texture also looks good in deep green, teal, cream, or mustard gold, so you can make a matching set from scraps. The overall style is classic and cozy, and the texture does the decorating for you.
This pattern uses US crochet terms. When stuffed, the ball is about 3 in (7.6 cm) across and about 9.5 in (24.1 cm) around. With the hanging loop, the ornament is about 6 in (15.2 cm) tall.
Here is how it’s built. You work the ball as one seamless piece from the bottom up. First you crochet a flat single crochet circle, then the textured sides, which rise into an open cup. A plain single crochet rim round finishes the texture. Then you stuff the ball and close it with decrease rounds. Last, you make two slip-stitched chain cords, one for the hanging loop and one for the bow, and attach them to the top.
Finished Size and Construction
- Finished size: about 3 in (7.6 cm) diameter, 9.5 in (24.1 cm) circumference
- Height with loop: about 6 in (15.2 cm)
- Skill level: Easy / Advanced Beginner
- Terminology: US crochet terms
- Yarn weight: #4 worsted
- Hook: 4.0 mm (G-6)
- Number of pieces: 1 ball body, plus 2 short cords (loop and bow)
- Layout: single ornament, worked in joined rounds
- Piece size: base circle 2.75 in (7.0 cm) across after Round 7
- Size before border: open cup about 2.4 in (6.1 cm) tall above the base after Round 17
- Border depth: one plain sc rim round, about 0.2 in (0.5 cm), followed by the closing decreases
Materials
Yarn: Use a smooth worsted weight cotton, cotton blend, or soft acrylic. A smooth, tightly plied yarn gives clear puffs. Fuzzy or very loosely plied yarns blur the lattice and make the puffs hard to pull through.
- Main color, dusty mauve: 20 g, about 40 m (44 yd)
- Contrast color, cream (loop and bow): 5 g, about 10 m (11 yd)
These quantities include a margin of about 25 percent, so you have enough for a gauge swatch and a little frogging.
Tools:
- 4.0 mm (G-6) crochet hook
- Polyester fiberfill, about 10 g
- Locking stitch marker
- Tapestry needle
- Scissors
- Measuring tape or ruler
Abbreviations (US Terms)
- ch – chain
- sl st – slip stitch
- sc – single crochet
- sc2tog – single crochet 2 together (invisible decrease is fine)
- st(s) – stitch(es)
- MR – magic ring
- PS – puff stitch (see below)
- ( ) – stitch count at the end of the round
Special stitch – Puff Stitch (PS): Yarn over, insert hook into the stitch, yarn over and pull up a loop to about 0.4 in (1.0 cm) tall; repeat from * to * 2 more times in the same stitch (7 loops on hook). Yarn over and pull through 6 loops, then yarn over and pull through the last 2 loops. Each PS counts as 1 stitch.
The final pull-through of 2 loops locks the puff, and it gives the PS a single clear top loop so the following sc round stays easy to count.
Gauge and Checkpoints
Gauge: 9 sc and 10 sc rounds = 2 in (5.1 cm) with a 4.0 mm hook. That is 4.5 stitches per inch.
Gauge on this ornament mostly affects how firm the fabric is and how big the ball turns out. Tight fabric is the goal, because loose stitches let the stuffing show through.
Think of the first base circle as your test piece. Work Rounds 1 to 7, then check it before going on.
Checkpoints:
- After Round 7: the flat circle has 42 sts and measures 2.75 in (7.0 cm) across.
- After Round 17: the open cup measures about 2.4 in (6.1 cm) tall above the base edge. Flattened, it is about 4.7 in (11.9 cm) wide, which is half of the 9.3 in (23.6 cm) circumference.
- Finished and stuffed: about 3 in (7.6 cm) across.
If your circle is too big (more than 3 in / 7.6 cm), go down to a 3.5 mm hook. If it’s too small (under 2.6 in / 6.6 cm), go up to a 4.5 mm hook. If the circle ruffles, you are crocheting too loosely. If it cups up, your tension is too tight.
Pattern
Join every round with a sl st to the first st. Start each round with ch 1, which does not count as a stitch. Joined rounds keep the puff columns staggered evenly. Keep the right side facing out the whole time, and do not turn your work.
Base Circle
With mauve, make a MR.
- Round 1: ch 1, 6 sc in MR, join. (6)
- Round 2: ch 1, 2 sc in each st around, join. (12)
- Round 3: ch 1, sc in next st, 2 sc in next st; repeat from * 6 times, join. (18)
- Round 4: ch 1, sc in next 2 sts, 2 sc in next st; repeat from * 6 times, join. (24)
- Round 5: ch 1, sc in next 3 sts, 2 sc in next st; repeat from * 6 times, join. (30)
- Round 6: ch 1, sc in next 4 sts, 2 sc in next st; repeat from * 6 times, join. (36)
- Round 7: ch 1, sc in next 5 sts, 2 sc in next st; repeat from * 6 times, join. (42)
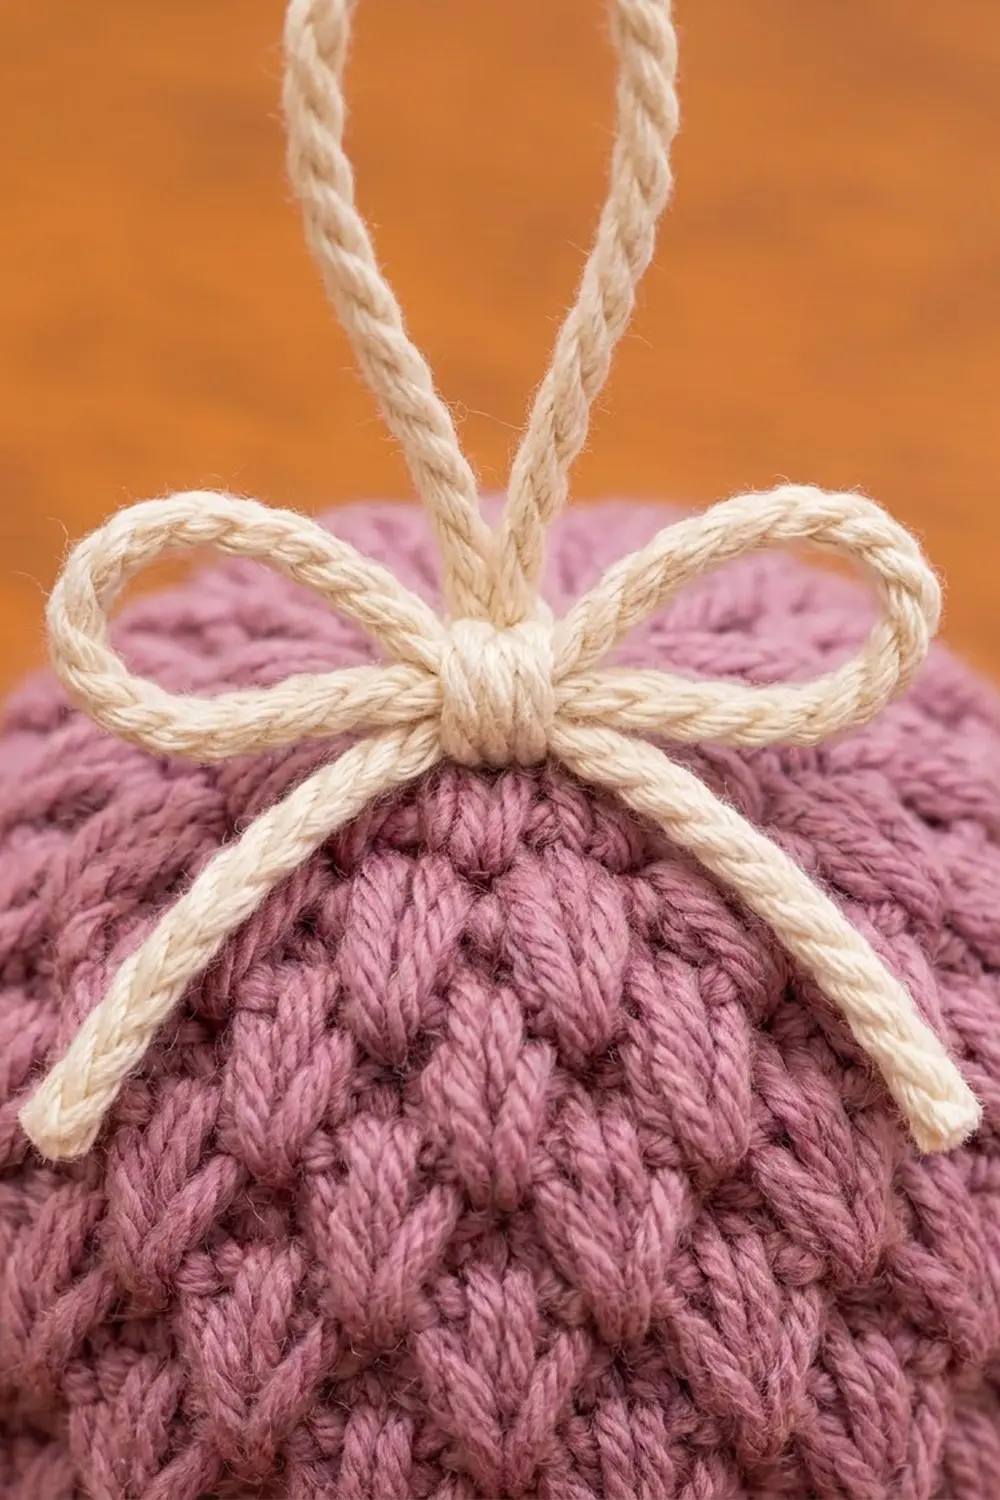
Pull the MR tail tight. Measure the circle: 2.75 in (7.0 cm) across. The six increase lines make a soft star in the center, as in the photo.
Textured Sides
Now you stop increasing. The 42 sts work straight up and the fabric turns up into the walls. The 42 sts divide into 21 two-stitch repeats.
- Round 8 (Puff A): ch 1, PS in next st, sc in next st; repeat from * 21 times, join. (21 PS + 21 sc = 42)
- Round 9: ch 1, sc in each st around (work into the top loop of each PS), join. (42)
- Round 10 (Puff B): ch 1, sc in next st, PS in next st; repeat from * 21 times, join. (21 sc + 21 PS = 42)
- Round 11: ch 1, sc in each st around, join. (42)
In Puff B, each puff lands above a sc from Puff A. This half-step shift gives the diagonal, staggered lattice.
- Round 12: Repeat Round 8. (42)
- Round 13: Repeat Round 9. (42)
- Round 14: Repeat Round 10. (42)
- Round 15: Repeat Round 11. (42)
- Round 16: Repeat Round 8. (42)
- Round 17: Repeat Round 9. (42)
That makes 5 puff rounds (8, 10, 12, 14, 16) and 5 plain rounds between and after them.
Checkpoint: the piece is now an open, slightly rounded cup, about 2.4 in (6.1 cm) tall above the base. Flattened, it is about 4.7 in (11.9 cm) wide. Before going on, count one puff round: it should have exactly 21 puffs.
Border: Top Rim and Closure
On this ornament, the “border” is the plain rim round followed by the closing decrease rounds that shape the top of the sphere.
Border gauge: same as the body, 4.5 sc per inch.
- Round 18 (rim): ch 1, sc in each st around, join. (42)
This round puts one smooth band above the last plain round and frames the texture. It is the neat rolled edge in the open-cup stage.
Closing decreases:
- Round 19: ch 1, sc in next 5 sts, sc2tog; repeat from * 6 times, join. (36)
- Round 20: ch 1, sc in next 4 sts, sc2tog; repeat from * 6 times, join. (30)
- Round 21: ch 1, sc in next 3 sts, sc2tog; repeat from * 6 times, join. (24)
Stuff the ball firmly now. Push the fiberfill into the base first, then mold the sides into a round shape with your hand.
- Round 22: ch 1, sc in next 2 sts, sc2tog; repeat from * 6 times, join. (18)
- Round 23: ch 1, sc in next st, sc2tog; repeat from * 6 times, join. (12)
Add a last bit of stuffing.
- Round 24: ch 1, sc2tog 6 times, join. (6)
Fasten off, leaving a 6 in (15.2 cm) tail. Thread the tail onto a tapestry needle and weave it through the front loop of each of the 6 sts. Pull tight to close, then bury the tail inside the ball.
Why the math works: 42 is a multiple of both 2 and 6. The 2-stitch puff repeat goes around exactly 21 times, so no round ends with a half repeat and the stagger stays even. The closing decreases take away 6 sts per round (42, 36, 30, 24, 18, 12, 6), which mirrors the 6 sts per round added in the base. That makes the top and bottom match, so the stuffed shape is a balanced sphere and not an egg.
Hanging Loop and Bow
Loop cord: With cream, leave a 6 in (15.2 cm) starting tail and ch 24 (about 6 in / 15.2 cm). Sl st in the back bump of the 2nd ch from the hook and in each ch across. (23 sl sts) Fasten off, leaving another 6 in (15.2 cm) tail. The sl st pass turns a flat chain into a firm, round cord, like the one in the photo.
Bow cord: With cream, ch 48 (about 12 in / 30.5 cm). Sl st in the back bump of the 2nd ch from the hook and in each ch across. (47 sl sts) Fasten off and weave in both ends.
Attach: Fold the loop cord in half to make a loop about 3 in (7.6 cm) tall. Thread both tails into the closed center of Round 24, bring them out 0.5 in (1.3 cm) away, knot them securely, and bury the ends inside the ball. Tie the bow cord around the base of the loop, right on top of the ball, in a simple bow. Leave the bow loops about 1 in (2.5 cm) wide and the tails about 1.5 in (3.8 cm) long, draping down over the puffs.
Final Blocking
- Roll the stuffed ball between your palms for about 30 seconds to spread the fiberfill evenly.
- Lightly mist the surface with water. Don’t soak it.
- With your fingertips, pinch each puff gently so it stands up and points upward into its V shape.
- Check the base. If it sits flat, push a little more stuffing down so it rounds out.
- Straighten the bow, shape the loops so they match, and lay the tails along the ball.
- Set the ornament in a small cup or egg carton, loop side up, and let it air-dry completely.
Final Quality-Control Checklist
- Ball is about 3 in (7.6 cm) across and about 9.5 in (24.1 cm) around.
- Each puff round has 21 puffs, and the puffs alternate cleanly round to round.
- The joining seam is a neat, slightly diagonal line. It doesn’t drift off sideways.
- Stuffing doesn’t show between stitches.
- The bottom center and top closure are both tight, with no holes.
- Hanging loop is about 3 in (7.6 cm) tall and firmly anchored.
- Bow is centered and both bow loops are the same size.
- All ends are woven in and hidden.
Troubleshooting
Puffs look flat or lumpy: Pull every loop up to the same height, about 0.4 in (1.0 cm), and keep the final locking pull-through snug.
Puffs line up in straight columns instead of diagonals: Rounds 8 and 10 got mixed up. Puff A starts with PS, and Puff B starts with sc.
Wrong stitch count after a puff round: The ch 1 at the start counted as a stitch, or a PS top was skipped in the next sc round. Use your marker on the first st of each round.
Ball is egg-shaped: You may have worked extra plain rounds, or the stuffing is uneven. Recount the rounds and remold the ball before closing.
Fabric is too loose and stuffing peeks through: Go down half a hook size, or use a fiberfill color closer to your yarn color.
Loop pulls out: Thread the tails deeper and knot them inside before you bury them.
Care
Spot clean with mild soap and cool water, then reshape the ornament and let it air-dry. Store it in a box with soft padding so the puffs don’t get crushed.
Final Notes
Here is the full measurement chain. With a gauge of 4.5 sc per inch, the 42-stitch base circle measures 2.75 in (7.0 cm) across. The walls are 21 even puff repeats and grow to about 2.4 in (6.1 cm) tall. One rim round and six matching decrease rounds close the top, and the stuffed ball comes out 3 in (7.6 cm) across. Add a 3 in (7.6 cm) loop and the ornament hangs about 6 in (15.2 cm) tall. Once your first ball meets these checkpoints, every ball in the set will match, whatever color you use.
Happy crocheting!