

The Starlit Bauble is a round, stuffed Christmas ornament covered in rows of small star stitch flowers. Each star is a tight cluster of pulled-up loops with a tiny “eye” at its center. The stars stagger neatly from round to round, so the surface looks like a field of blossoms.
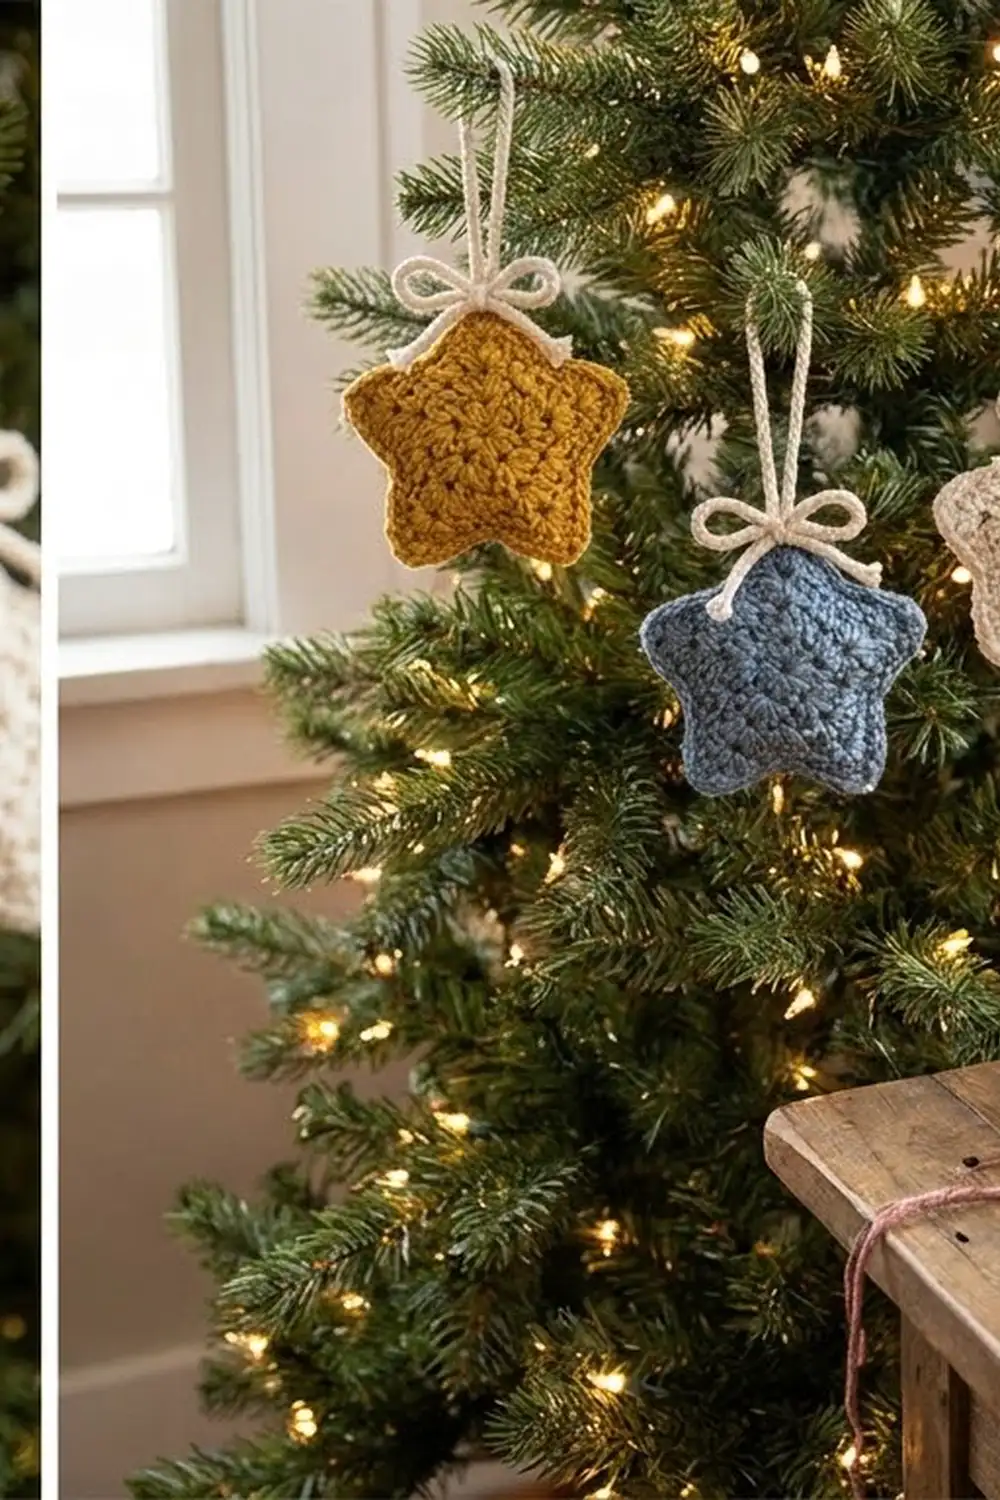
The sample is worked in dusty rose worsted yarn. A cream twisted cord makes the hanging loop and a small bow at the top. The design also looks lovely in mustard yellow, dusty blue, cream or terracotta, so you can make a matching set for the tree.
This pattern uses US crochet terms. The finished ornament is about 3 in (7.6 cm) across and about 9.5 in (24.1 cm) around the widest point once stuffed. The hanging loop stands about 3 in (7.6 cm) above the top.
The body is one piece worked in joined rounds. You start with a small single crochet disc at the base. Then you alternate half double crochet rounds and star stitch rounds to build the textured body. You stuff the cup-shaped piece and close the top with single crochet decreases. A cream twisted cord loop and bow finish the ornament.
Finished Size and Construction
- Finished size: about 3 in (7.6 cm) across, 9.5 in (24.1 cm) around
- Skill level: Intermediate (star stitch in the round)
- Terminology: US crochet terms
- Yarn weight: worsted (#4)
- Hook: 4.0 mm (G-6)
- Number of pieces: 1 crocheted body plus 2 twisted cords (loop and bow)
- Layout: one seamless piece worked in joined rounds, bottom to top
- Piece size: 3 in (7.6 cm) across when stuffed
- Size before border: an open cup about 2.5 in (6.4 cm) tall, with an opening 6 in (15.2 cm) around
- Border depth: 3 closing rounds, about 0.6 in (1.5 cm)
Materials
Choose a smooth, plied worsted yarn in cotton, acrylic or a cotton blend. Smooth yarn shows the star centers clearly. Fuzzy or loosely spun yarn hides them.
- Main color (MC), dusty rose: 14 g, about 28 m
- Contrast color (CC), cream: 3 g, about 6 m (for the cords)
- 4.0 mm (G-6) crochet hook
- Polyester fiberfill, about 10 g
- Stitch marker
- Tapestry needle
- Scissors
- Ruler or soft tape measure
All quantities include a safety margin of about 15 percent. One 100 g skein of MC makes six or more ornaments.
Abbreviations (US Terms)
- ch – chain
- sl st – slip stitch
- sc – single crochet
- hdc – half double crochet
- inc – 2 sc in the same stitch
- sc2tog – single crochet 2 together
- MR – magic ring
- st(s) – stitch(es)
- rnd(s) – round(s)
Star stitch (star): You pull up 5 loops, for 6 loops on the hook in total:
- Pull up a loop in the eye of the previous star.
- Pull up a loop in the back strand of the last loop of the previous star.
- Pull up a loop in the same stitch as the last loop of the previous star.
- Pull up a loop in each of the next 2 stitches.
Yarn over and draw through all 6 loops, then ch 1 to close the star. That ch-1 is the eye. Each star uses 2 new stitches and gives back 2 stitches (the star top plus the eye), so the count does not change.
First star of a round: Ch 3. Pull up a loop in the 2nd ch from the hook and in the 3rd ch from the hook. Then pull up a loop in each of the first 3 stitches of the round (6 loops on hook). Yarn over, draw through all 6, ch 1.
Last star of a round: Work it as usual, but put the final loop into the first stitch of the round, the same stitch where the first star began.
Gauge and Checkpoints
Star pattern gauge: 16 sts (8 stars) = 4 in (10.2 cm) wide. 4 rnds (2 star rnds + 2 hdc rnds) = 1.2 in (3.0 cm) tall.
Single crochet gauge: 18 sc = 4 in (10.2 cm).
Make one test body first. It’s a small project, and the body is the most honest gauge swatch you can make. Check these points as you go:
- After Rnd 4: the flat sc disc is 1.75 in (4.4 cm) across.
- After Rnd 7: the top edge is about 9 in (22.9 cm) around.
- After Rnd 10: the cup stands about 2 in (5.1 cm) tall.
- After Rnd 13: the opening is about 6 in (15.2 cm) around, and the cup stands about 2.5 in (6.4 cm) tall.
- Finished: 3 in (7.6 cm) across when stuffed.
If your piece is too big, go down to a 3.75 mm (F-5) hook. If it is too small, go up to a 4.5 mm (7) hook. Pull all the star loops to the same height, about the height of an hdc. Uneven loop heights distort the stars more than a hook change can fix.
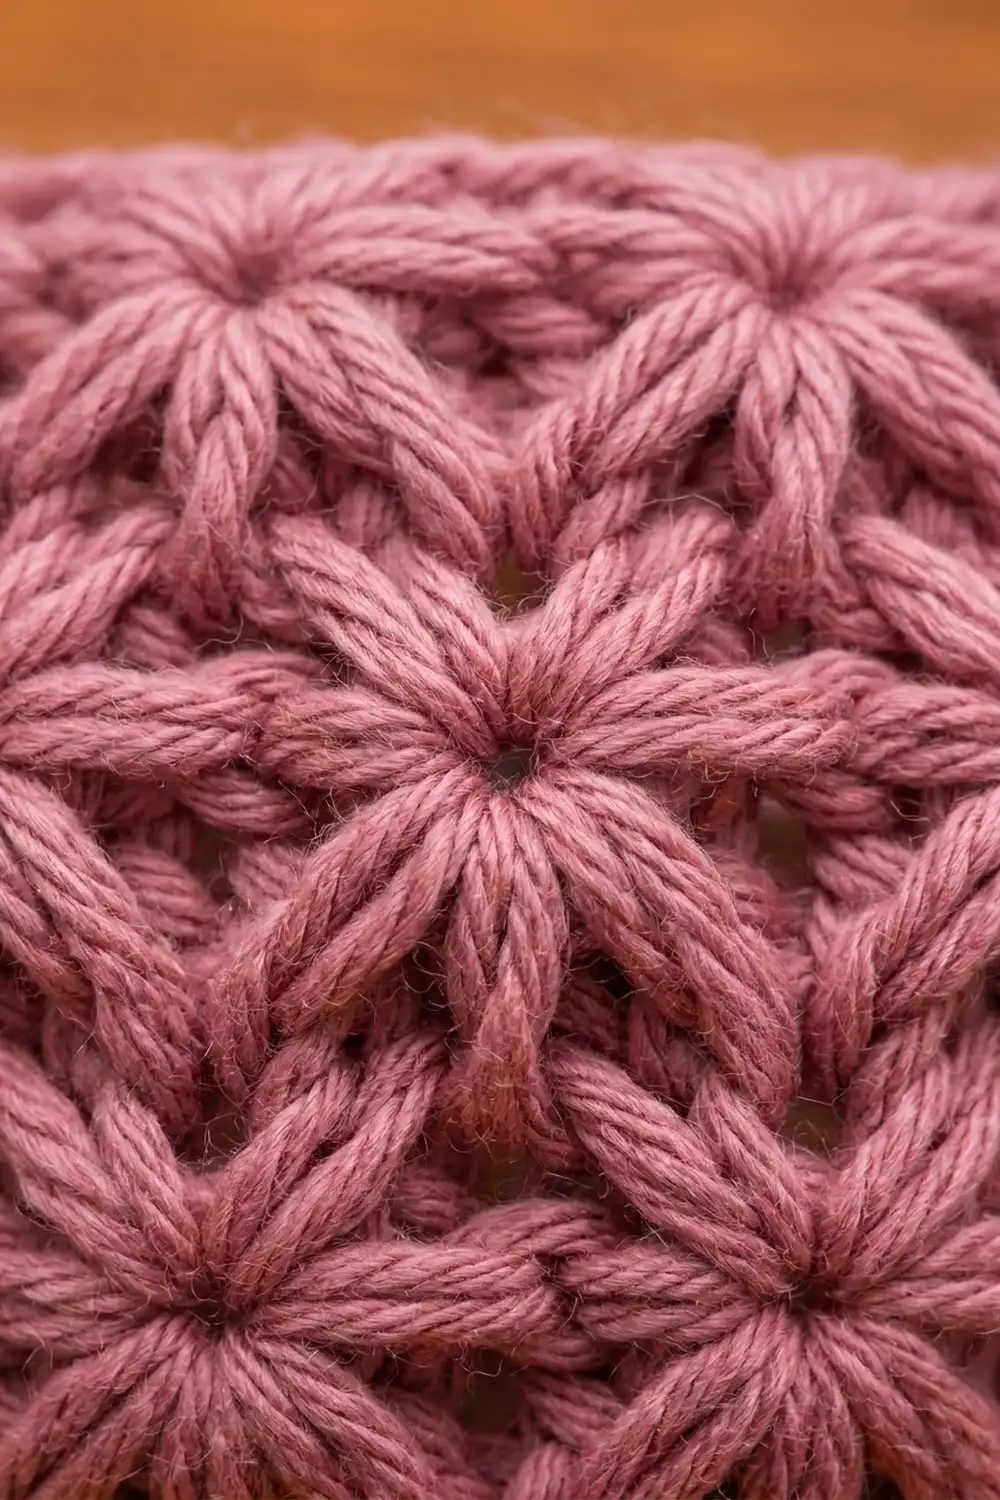
Ornament Body
Work in joined rounds and do not turn. Place a marker in the first stitch of each round and move it up as you go. The starting chains of hdc rounds and star rounds do not count as stitches.
Base Disc (MC)
Rnd 1: Make a MR, ch 1, 6 sc in the ring, sl st to first sc. (6 sts)
Rnd 2: Ch 1, inc in each st around, sl st to first sc. (12 sts)
Rnd 3: Ch 1, *sc in next st, inc in next st; rep from * 6 times, sl st to first sc. (18 sts)
Rnd 4: Ch 1, *sc in next 2 sts, inc in next st; rep from * 6 times, sl st to first sc. (24 sts)
Checkpoint: the disc lies flat and is 1.75 in (4.4 cm) across.
Star Body (MC)
Rnd 5 (hdc growth round): Ch 2, *hdc in next 3 sts, 2 hdc in next st; rep from * 6 times, sl st to top of first hdc. (30 sts)
Rnd 6 (star round): Work the first star, then work stars around. The last star ends in the first stitch of the round. Sl st to the top of the first star. (15 stars = 30 sts)
Rnd 7 (hdc growth round): Ch 2, *3 hdc in next eye, 2 hdc in each of next 2 eyes, 3 hdc in next eye, 2 hdc in next eye; rep from * 3 times, sl st to top of first hdc. (36 sts)
This round works into the 15 eyes only. Six eyes get 3 hdc and nine eyes get 2 hdc: 18 + 18 = 36.
Checkpoint: the edge is about 9 in (22.9 cm) around. The piece now curves up like a shallow bowl.
Rnd 8 (star round): Work stars around as in Rnd 6. (18 stars = 36 sts)
Rnd 9 (hdc even round): Ch 2, 2 hdc in each eye around, sl st to top of first hdc. (36 sts)
Rnd 10 (star round): Work stars around. (18 stars = 36 sts)
Checkpoint: the cup stands about 2 in (5.1 cm) tall. This is the widest part of the ball.
Rnd 11 (hdc decrease round): Ch 2, *2 hdc in each of next 2 eyes, 1 hdc in next eye; rep from * 6 times, sl st to top of first hdc. (30 sts)
Twelve eyes get 2 hdc and six eyes get 1 hdc: 24 + 6 = 30.
Rnd 12 (star round): Work stars around. (15 stars = 30 sts)
Rnd 13 (hdc decrease round): Ch 2, *2 hdc in next eye, 1 hdc in next eye, 2 hdc in next eye, 1 hdc in next eye, 2 hdc in next eye; rep from * 3 times, sl st to top of first hdc. (24 sts)
Nine eyes get 2 hdc and six eyes get 1 hdc: 18 + 6 = 24.
Checkpoint: the piece is an open, rounded cup about 2.5 in (6.4 cm) tall, with an opening about 6 in (15.2 cm) around. Do not fasten off.
Stuffing
Leave the hook in the working loop, or slip the loop onto a stitch marker. Push fiberfill into the cup in small tufts until it is firm and round but not stretched. The stars should sit side by side with no gaps showing the stuffing.
Border: Top Closure and Hanging Cord
A ball has no flat edge, so here the border is the closing section at the top plus the cream cord trim. Work the closing rounds in sc for a firm, tidy top that holds the cord securely.
Border gauge: the sc closing rounds use the same gauge as the sc base, 18 sc = 4 in (10.2 cm). Together, the 3 rounds add about 0.6 in (1.5 cm) of height.
Rnd 14: Ch 1, *sc in next 2 sts, sc2tog; rep from * 6 times, sl st to first sc. (18 sts)
Rnd 15: Ch 1, *sc in next st, sc2tog; rep from * 6 times, sl st to first sc. (12 sts)
Add more stuffing now, pushing it into the shoulders of the ball.
Rnd 16: Ch 1, sc2tog 6 times, sl st to first sc. (6 sts)
Fasten off, leaving an 8 in (20.3 cm) tail. Thread the tail through the front loop of each of the 6 sts and pull tight to close. Weave the end into the stuffing.
Why the math works: the top mirrors the base. The base grows 6, 12, 18, 24 in sc, and the top shrinks 24, 18, 12, 6 in sc. Each closing round removes exactly 6 sts, one per repeat. Because the decreases are spaced evenly, the top stays round instead of pointed. Every star round sits on an even count (30 or 36), so each round holds a whole number of stars with no partial star at the join.
Hanging Loop Cord (CC)
Cut 2 strands of CC, each 24 in (61.0 cm) long. Hold them together, knot both ends and twist tightly until the strands kink back on themselves. Fold the twisted length in half and let it twist together, then knot the loose ends. The cord should be about 8 in (20.3 cm) long.
Fold the cord in half. With the tapestry needle, pull both ends down through the center of the closed top, about 0.25 in (0.6 cm) apart, and out through the side of the ball. Adjust until the loop stands about 3 in (7.6 cm) tall. Tie the ends together inside with a short tail of MC, or stitch them firmly to the closing rounds, then trim.
Bow Cord (CC)
Cut 2 strands of CC, each 30 in (76.2 cm) long. Make a twisted cord the same way. The finished cord is about 10 in (25.4 cm) long.
Wrap the cord once around the base of the hanging loop and tie a bow. Shape the bow loops to about 1 in (2.5 cm) each and the tails to about 1.25 in (3.2 cm). Tack the bow’s knot to the top of the ball with 2 small CC stitches so it can’t twist away.
Final Blocking
- Roll the ornament gently between your palms to settle the stuffing and even out the shape.
- Measure around the widest point. It should be about 9.5 in (24.1 cm).
- Mist the surface lightly with cool water. Don’t soak a stuffed piece.
- Use your fingertips to nudge any crooked stars back into line so the rounds stagger evenly.
- Rest the ornament in a small cup or ring of fabric so it dries round, not flat on one side.
- Let it dry completely, usually 6 to 8 hours.
- Straighten the hanging loop and fluff the bow loops once dry.
Final Quality-Control Checklist
- The ball is 3 in (7.6 cm) across in every direction.
- Rnds 6 and 12 each have 15 stars. Rnds 8 and 10 each have 18 stars.
- Every star has a visible, open eye at its center.
- The join line runs straight up one side and isn’t twisted.
- No stuffing shows between the stars.
- The base and top are closed tight with no holes.
- The hanging loop is about 3 in (7.6 cm) tall and firmly anchored.
- The bow is centered and tacked in place.
Troubleshooting
Stars look squashed or uneven. Pull every loop to the same height before you yarn over through all 6. Loops that are too short pinch the star.
Wrong star count. Count the stitches in the previous round, since star rounds need an even count. If you are 1 short, you probably missed the first stitch of the round on the last star.
The ball looks like an egg. Your rounds are taller than gauge. Pull the loops up a little shorter, or go down a hook size.
The base ripples or the top is pointed. Check that the increases or sc2tog repeats are spaced evenly around the round.
Stuffing shows through. Use a smaller hook, or stuff a little less firmly so the fabric isn’t stretched.
The twisted cord unravels. Knot both ends before you cut, and twist more tightly next time.
The loop pulls out. Anchor the cord ends deeper inside the ball and stitch them to the closing rounds.
Care
Spot clean with a damp cloth and mild soap, then reshape and air dry. Store the ornaments in a box with tissue so the stars and bows don’t get crushed.
Final Notes
Here is the measurement chain:
- The sc disc reaches 24 sts and 1.75 in (4.4 cm) across.
- The star body grows to 36 sts and about 9 in (22.9 cm) around.
- It stays at 36 sts through the widest part, then decreases to a 24-st cup about 2.5 in (6.4 cm) tall.
- Three sc closing rounds finish a 3 in (7.6 cm) ball that is about 9.5 in (24.1 cm) around when stuffed.
- A 3 in (7.6 cm) cream loop and a small bow make it ready to hang.
Once your first ornament matches the checkpoints, make a matching set in rose, mustard, blue, cream and terracotta.
Happy crocheting!