

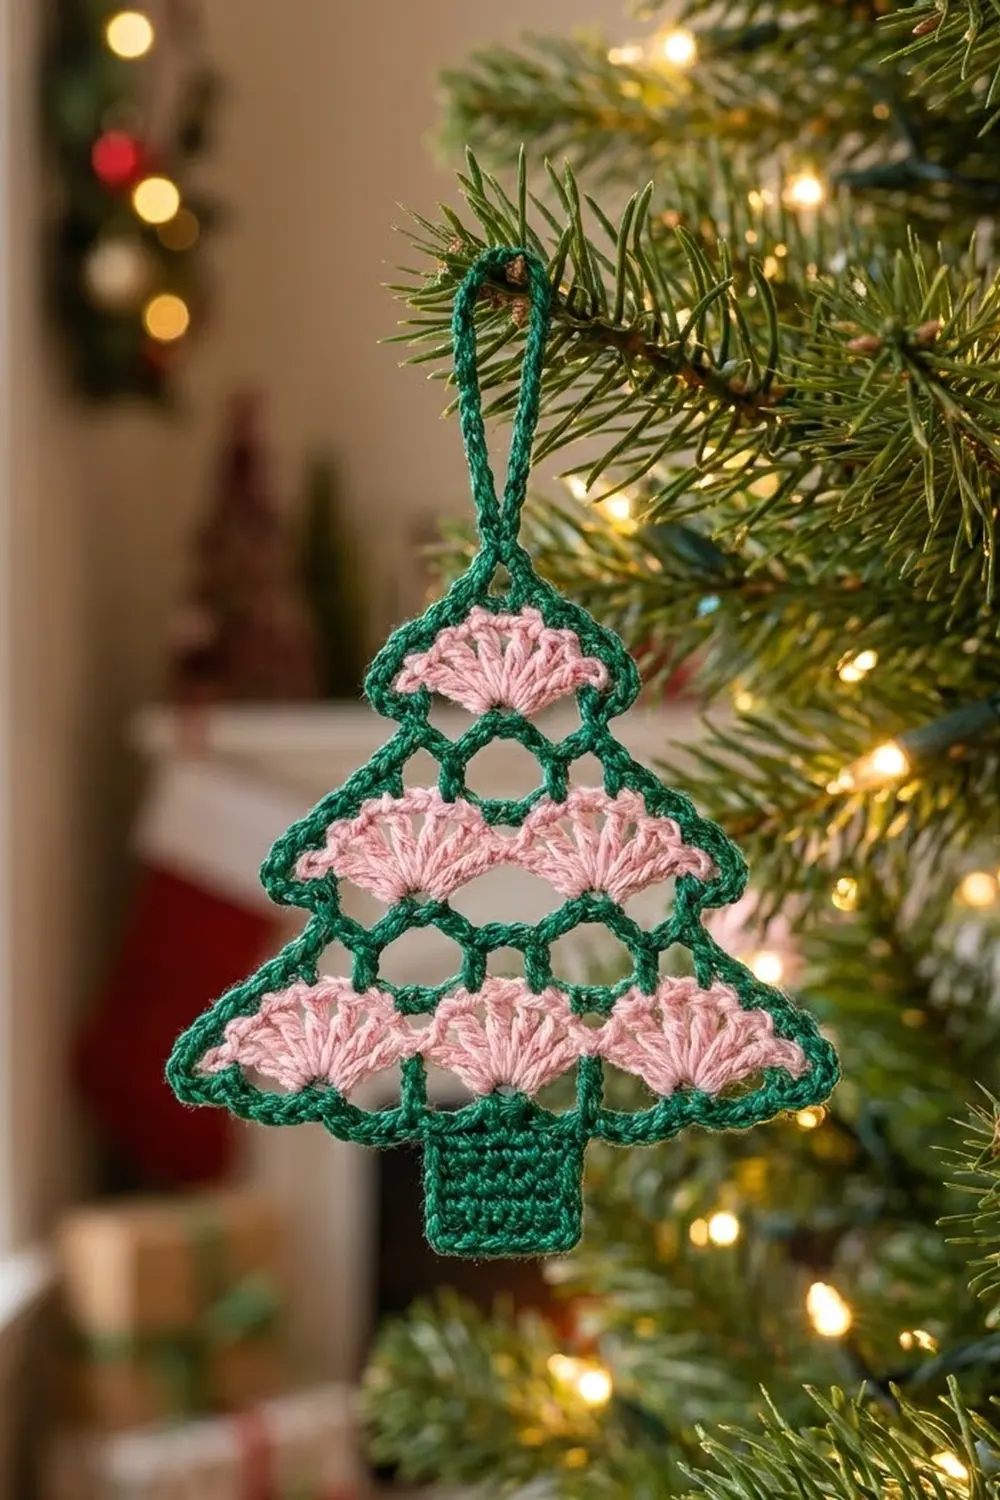
The Sugarplum Fan Tree is a small, lacy Christmas tree ornament. Rows of soft pink fans are stacked in three tiers and held in place by a crisp green outline. Open mesh between the fans lets the tree lights show through, so it looks light and delicate on a branch.
The color pairing is deep emerald green with blush pink. Green does the structural work: the base row, the mesh rows, the outline, the trunk and the hanging loop. Pink is used only for the fans, so each tier reads clearly from across the room.
This pattern uses US crochet terms. The finished ornament is 4 in (10.2 cm) wide and 3.75 in (9.5 cm) tall from the top point to the bottom of the trunk. The hanging loop adds another 2 in (5.1 cm), for an overall length of 5.75 in (14.6 cm).
Here is how it’s made. You work the tree body flat from the bottom up in six rows, always with the right side facing, and you change color every row. One green border round outlines the whole triangle and makes the hanging loop at the top. Last, you crochet a small trunk and sew it on.
Finished Size and Construction
- Finished size: 4 in (10.2 cm) wide × 3.75 in (9.5 cm) tall, not counting the loop
- Skill level: Easy–Intermediate
- Terminology: US
- Yarn weight: Sport (#2) cotton
- Hook: 3.0 mm
- Number of pieces: 1 ornament (tree body plus a small trunk sewn on)
- Layout: A triangle with 3 fan tiers (3, 2 and 1 fans), all worked bottom-up
- Tree body before border: 3.75 in (9.5 cm) wide × 2.5 in (6.4 cm) tall
- Border depth: 0.125 in (0.3 cm) on each edge
- Tree body after border: 4 in (10.2 cm) × 2.75 in (7.0 cm)
- Trunk: 1.25 in (3.2 cm) × 1 in (2.5 cm)
- Hanging loop: 2 in (5.1 cm) tall
Materials
Use a smooth, tightly plied sport-weight cotton, ideally mercerized. Cotton keeps the fans crisp and the mesh holes open, while acrylic tends to blur the stitch definition. Pick a green with enough depth that the outline stands out against both the pink and a real tree.
- Green: 10 g, about 30 m (33 yd)
- Pink: 5 g, about 15 m (16 yd)
Both quantities include a margin for swatching, weaving in ends, and the frequent color joins.
Tools
– 3.0 mm crochet hook
– Tapestry needle
– Scissors
– Rust-proof pins and a blocking mat or folded towel
– Spray bottle with water
– Optional: diluted fabric stiffener
Abbreviations (US Terms)
- ch – chain
- sc – single crochet
- tr – treble crochet
- sl st – slip stitch
- sk – skip
- st(s) – stitch(es)
- sp – space
- RS – right side
Special stitch – Fan: 7 tr worked into the same stitch. The 4th tr is the center tr. The 3 tr nearest the outer edge of the tree are called the outer 3 tr.
Color-change note: Every row is worked with the RS facing, from right to left (left-handed crocheters work left to right). Fasten off at the end of each row and join the next color at the starting edge.
Gauge and Checkpoints
Gauge: 11 sc and 12 sc rows = 2 in (5.1 cm). One 7-tr fan measures 1.25 in (3.2 cm) across its top and 0.8 in (2.0 cm) tall.
Make one complete tree body before you start a batch of ornaments, and measure it at each checkpoint:
- After Row 1: 3.5 in (8.9 cm) wide
- After Row 2: 3.75 in (9.5 cm) wide × 1 in (2.5 cm) tall
- After Row 4: 1.75 in (4.4 cm) tall
- After Row 6: 3.75 in (9.5 cm) wide × 2.5 in (6.4 cm) tall
- After the border: 4 in (10.2 cm) × 2.75 in (7.0 cm)
If Row 1 is wider than 3.5 in (8.9 cm), go down to a 2.75 mm hook. If it is narrower, go up to a 3.25 mm hook. If the width is right but the fans come out shorter than 0.8 in (2.0 cm), pull up a slightly taller first loop on each tr instead of changing hooks.
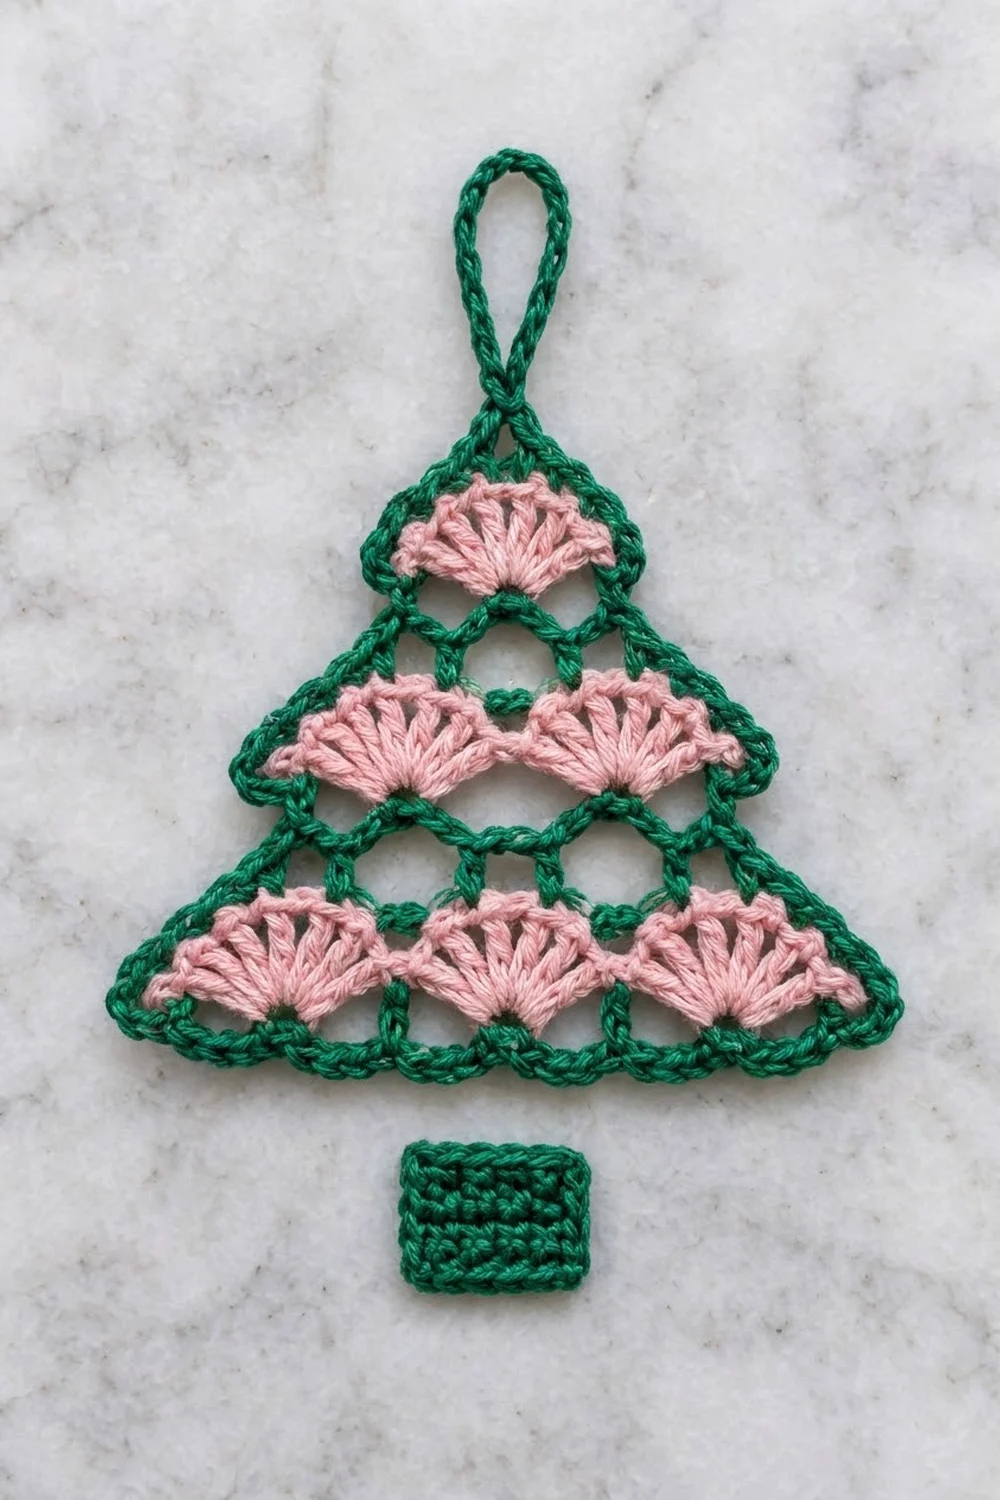
Tree Body
Row 1 (Green) – Base
With green, ch 20.
Sc in the 2nd ch from the hook and in each ch across. (19 sc) Fasten off.
Choose one side as the RS and keep it facing you for every row from now on.
Row 2 (Pink) – Bottom Tier
With the RS facing, join pink with a sc in the first sc at the right edge.
Sk 2 sts, Fan in the next st, sk 2 sts, sc in the next st. Repeat from * 2 more times. Fasten off.
Count: 3 Fans (21 tr) + 4 sc = 25 sts
The base repeat is 6 sts per fan. That gives 3 × 6 + 1 = 19, which matches Row 1.
Row 3 (Green) – First Mesh Row
Join green with a sc in the center tr of the first Fan.
Ch 4, tr in the sc between Fans (the sc sits down at Fan-base level). Ch 4, sc in the center tr of the next Fan. Repeat from * once more. Fasten off.
Count: 3 sc + 2 tr = 5 sts, plus 4 ch-4 sps
Each tr reaches down into the valley between two Fans. This splits the V-shaped gap into two triangular mesh holes, and the tops of all the stitches line up at the same height.
Row 4 (Pink) – Middle Tier
Join pink with a sc in the first sc.
Sk the ch-4 sp, Fan in the next tr, sk the ch-4 sp, sc in the next sc. Repeat from * once more. Fasten off.
Count: 2 Fans (14 tr) + 3 sc = 17 sts
These Fans grow out of the Row 3 tr, so each one sits directly above a gap in the bottom tier.
Row 5 (Green) – Second Mesh Row
Join green with a sc in the center tr of the first Fan. Ch 4, tr in the sc between the Fans, ch 4, sc in the center tr of the second Fan. Fasten off.
Count: 2 sc + 1 tr = 3 sts, plus 2 ch-4 sps
Row 6 (Pink) – Top Tier
Join pink with a sc in the first sc. Sk the ch-4 sp, Fan in the tr, sk the ch-4 sp, sc in the last sc. Fasten off.
Count: 1 Fan (7 tr) + 2 sc = 9 sts
Checkpoint: The body should now measure 3.75 in (9.5 cm) wide × 2.5 in (6.4 cm) tall. Weave in the pink ends now. They hide well under the green rows.
Trunk and Assembly
Trunk (Green)
With green, ch 8.
Row 1: Sc in the 2nd ch from the hook and in each ch across, turn. (7 sc)
Rows 2–6: Ch 1 (does not count as a st), sc in each st across, turn. (7 sc)
Fasten off, leaving a 10 in (25.4 cm) tail for sewing.
Checkpoint: The trunk should measure 1.25 in (3.2 cm) wide × 1 in (2.5 cm) tall.
You sew the trunk on after the border is finished (see “Attach the Trunk” below), so you have a firm green edge to stitch into.
Border
Border gauge: Same as the body, 11 sc = 2 in (5.1 cm). This one round adds 0.125 in (0.3 cm) to every edge.
The border round goes counterclockwise with the RS facing. That order is bottom edge, right side, top point and hanging loop, then left side. The corner ch-1s and the ch-sps along the sides are not counted as stitches. They only bridge the height of the tr Fans.
Bottom Edge
Turn the body so the foundation chain is at the bottom. Join green with a sc in the free loop of the first foundation ch at the bottom left. Sc in each remaining free loop across.
Bottom: 19 sc. Ch 1 for the corner.
Right Side (Working Upward)
Work one sc into each of these, in order:
- The side of Row 1 (1 sc)
- The end sc of Row 2 (1 sc), then ch 2
- The outer 3 tr of the Row 2 end Fan, working from the bottom up (3 sc), then ch 1
- The end sc of Row 4 (1 sc), then ch 2
- The outer 3 tr of the Row 4 end Fan (3 sc), then ch 1
- The end sc of Row 6 (1 sc), then ch 2
- The outer 3 tr of the top Fan (3 sc)
Right side: 13 sc + 5 ch-sps
Top Point and Hanging Loop
Sc in the center tr of the top Fan. This is the top point, 1 sc.
Ch 24, then sl st in the top-point sc to close the loop. Work 30 sc around the ch-24 loop, then sl st in the top-point sc again. Covering the loop with sc makes it thick and rope-like, the same as in the photo.
Left Side (Working Downward)
Work the mirror image of the right side:
- The remaining 3 tr of the top Fan, working down (3 sc), then ch 2
- The end sc of Row 6 (1 sc), then ch 1
- The outer 3 tr of the Row 4 end Fan (3 sc), then ch 2
- The end sc of Row 4 (1 sc), then ch 1
- The outer 3 tr of the Row 2 end Fan (3 sc), then ch 2
- The end sc of Row 2 (1 sc)
- The side of Row 1 (1 sc)
Left side: 13 sc + 5 ch-sps. Ch 1 for the corner, then sl st to the first sc. Fasten off.
Round total: 19 + 13 + 1 + 13 = 46 sc, plus 30 sc on the loop
Why the Math Works
- Bottom edge: The 19 sc match the 19 stitches of Row 1 one-for-one, so the bottom stays flat without flaring.
- Sides: Every Fan has 7 tr. The center tr is already covered by the sc of the row above it, so each end Fan has exactly 3 free outer tr. Each side then gets 1 sc for Row 1, plus 3 tiers × (1 end sc + 3 outer tr) = 1 + 12 = 13 sc.
- Chain spaces: The ch-2s climb the height of a Fan from its base sc, and the ch-1s step across from a Fan to the next row’s sc. Without them the sides would pucker. With them, the sides stay smooth and gently stepped.
Attach the Trunk
Count the 19 bottom-edge sc. Leave 6 sc free at each side and center the trunk’s top edge under sc 7 through 13, which is 7 sts and matches the trunk’s 7 sc (6 + 7 + 6 = 19). Whipstitch through both loops, one stitch to one stitch. Weave in all ends.
Checkpoint: The tree should be 4 in (10.2 cm) wide and 3.75 in (9.5 cm) tall from the top point to the bottom of the trunk.
Final Blocking
- Spray the ornament until it is evenly damp, but not dripping.
- Lay it RS up on the blocking mat.
- Pin the two bottom corners 4 in (10.2 cm) apart.
- Pin the top point 2.75 in (7.0 cm) above the bottom edge, centered.
- Open each Fan into an even half-circle and set a pin at its outer tr if needed.
- Push a pin through each mesh hole so the holes dry open.
- Square the trunk to 1.25 in (3.2 cm) × 1 in (2.5 cm).
- Pin the hanging loop straight up to its 2 in (5.1 cm) height.
- Optional: dab diluted stiffener onto the Fans for a crisper hold.
- Let it dry completely before you unpin it.
Final Quality-Control Checklist
- Row 1 has 19 sc, and the bottom edge has 19 border sc.
- The tiers have 3, 2 and 1 Fans, each with exactly 7 tr.
- Each Fan in an upper tier sits centered over a gap in the tier below.
- Each mesh row has a tr dropped into every valley between Fans.
- Each side of the border has 13 sc and 5 ch-sps.
- The hanging loop is fully covered with 30 sc and anchored at the top point.
- The trunk is 7 sc wide, centered with 6 border sc free on each side.
- All ends are woven into same-color stitches.
- The finished size is 4 in (10.2 cm) × 3.75 in (9.5 cm).
Troubleshooting
The Fans ruffle instead of lying flat. Your tension is loose on the tr. Go down a hook size for the pink rows only.
The mesh holes close up. The ch-4s are too tight. Loosen them, or pin each hole open while blocking.
The sides pucker. You’ve probably skipped a ch-2 bridge. Check that the right side has ch 2, 1, 2, 1, 2 in that order.
The tree leans to one side. You may have worked an upper Fan into the wrong tr. Check that each Row 3 and Row 5 tr sits exactly in the sc between Fans.
The trunk is off-center. Recount the bottom sc and resew so 6 sc are free on each side.
The hanging loop is limp. Work the 30 sc snugly, or add a little stiffener to the loop only.
Care
Hand wash in cool water with mild soap, roll it in a towel, and reshape it flat to dry. If you stiffened it, store it flat in tissue so the Fans and loop keep their shape.
Final Notes
The measurements build on each other. Row 1 is 19 sc at 3.5 in (8.9 cm), and the three Fans spread to 3.75 in (9.5 cm). Three tiers bring the body to 2.5 in (6.4 cm) tall. The border adds 0.125 in (0.3 cm) all around for a 4 in (10.2 cm) × 2.75 in (7.0 cm) body. The trunk adds 1 in (2.5 cm) for a total height of 3.75 in (9.5 cm), and the 2 in (5.1 cm) loop brings the full length to 5.75 in (14.6 cm). If you hit each checkpoint along the way, your Sugarplum Fan Tree will match.
Happy crocheting!