
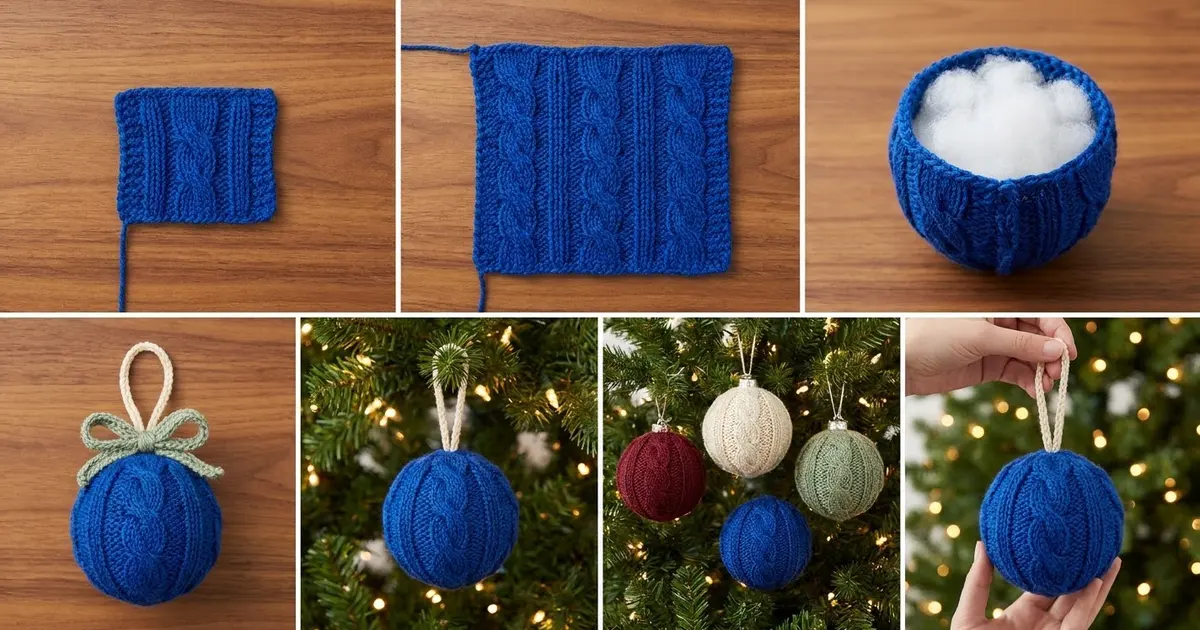
This Winter Rope ornament is a single stuffed crochet ball, about 3.5 in (8.9 cm) across. Six rope-twist cables run from the top to the bottom. Narrow ribbed bands separate the cables, so the ball looks like a tiny cable-knit sweater. The finished ornament has a cream hanging loop and a small sage green bow tied at the base of the loop.
The sample is royal blue with cream and sage trims. The same pattern works well in burgundy, cream, or sage, and a set of four colors looks lovely together on a tree. The style is classic and cozy. It suits a traditional tree, a gift topper, or a bowl of winter decorations.
This pattern uses US crochet terms. The finished ball is about 11 in (27.9 cm) around and 3.5 in (8.9 cm) in diameter. The hanging loop adds about 2.5 in (6.4 cm) above the ball.
Construction is simple. You work one flat rectangular cable panel in rows, then seam the short edges to make a tube. Next you add a two-round edging to the bottom and gather it closed. You stuff the ball, then edge and gather the top. Finally you make two slip-stitch cords: one for the loop and one for the bow.
Finished Size and Construction
- Finished size: about 3.5 in (8.9 cm) diameter, 11 in (27.9 cm) circumference
- Skill level: Intermediate (front and back post stitches, simple cable crosses)
- Terminology: US crochet terms
- Yarn weight: Worsted (#4)
- Hook: 4.5 mm (US 7)
- Number of pieces: 1 ornament body, plus 1 loop cord and 1 bow cord
- Layout: one flat panel seamed into a tube, gathered at both ends
- Panel size: 41 sts x 17 rows, about 11 in (27.9 cm) wide x 5.75 in (14.6 cm) tall
- Size before edging: 11 in (27.9 cm) around x 5.75 in (14.6 cm) tall as a tube
- Edging depth: 2 rounds, about 0.5 in (1.3 cm) at each end before gathering
Materials
Choose a smooth, tightly plied worsted yarn. Acrylic or a wool blend both work. Smooth yarn shows the cable twists clearly. Avoid fuzzy or very splitty yarns, because post stitches are hard to work into them. The quantities below assume yarn of about 180 m per 100 g (about 197 yd per 100 g).
- Main color (MC), royal blue: 25 g, about 45 m (49 yd)
- Color A, cream (loop): 5 g, about 9 m (10 yd)
- Color B, sage green (bow): 5 g, about 9 m (10 yd)
- Polyester fiberfill: about 10 g
All quantities include a margin of roughly 20 percent for your gauge check and tails.
Tools:
- 4.5 mm (US 7) crochet hook
- Tapestry needle
- 2 stitch markers
- Scissors
- Rust-proof pins and a small blocking mat
- Spray bottle with water
- Ruler or tape measure
Abbreviations (US Terms)
- ch – chain
- sl st – slip stitch
- sc – single crochet
- sc2tog – single crochet 2 together
- hdc – half double crochet
- FPdc – front post double crochet
- BPdc – back post double crochet
- FPtr – front post treble crochet
- st(s) – stitch(es)
- sk – skip
- RS / WS – right side / wrong side
Special stitch – Cable Cross (CC): Worked over 4 sts. Sk next 2 sts. FPtr around each of the next 2 sts. Then, working in front of the 2 sts you just made, FPtr around each of the 2 skipped sts. This makes one right-leaning twist. Repeating the same cross every 4th row builds the rope.
Post stitch note: Each post stitch replaces one stitch of the current row. Always skip the stitch behind it, so the count stays at 41.
Gauge and Checkpoints
Gauge in cable pattern, lightly blocked: 41 sts = 11 in (27.9 cm) wide and 17 rows = 5.75 in (14.6 cm) tall. This works out to about 15 sts and 12 rows per 4 in (10.2 cm).
Make the panel first and check it before seaming. The panel is your gauge swatch. If it measures correctly, the ball will be the right size.
Checkpoints:
- After Row 1: the hdc row measures about 11 in (27.9 cm) wide, relaxed.
- After Row 5: the panel is about 1.75 in (4.4 cm) tall, and the first cable cross is visible.
- After Row 9: about 3 in (7.6 cm) tall, with 2 crosses in each cable.
- After Row 17: about 5.75 in (14.6 cm) tall, with 4 crosses in each cable.
If your panel is too big: go down to a 4 mm (US G-6) hook and start again. If it is too small: go up to a 5 mm (US H-8) hook. A difference of 0.5 in (1.3 cm) in width is fine, because the stuffing will even it out. A difference of 1 in (2.5 cm) or more will noticeably change the ball’s size.
Cable Panel
With MC, ch 43.
Row 1 (WS): Hdc in 3rd ch from hook and in each ch across. Turn. (41 hdc)
The 2 skipped ch do not count as a stitch. In every row below, the ch 2 at the start does not count as a stitch either.
Row 2 (RS): Ch 2, hdc in first st. *FPdc around each of next 4 sts, hdc in next st, FPdc around next st, hdc in next st; repeat from * 4 more times. FPdc around each of next 4 sts, hdc in last st. Turn. (41 sts: 6 cables of 4 FPdc, 5 rib FPdc, 12 hdc)
Check the math: 1 edge hdc + (5 x 7 sts) + 4 cable sts + 1 edge hdc = 41.
Row 3 (WS): Ch 2, hdc in first st. *BPdc around each of next 4 sts, hdc in next st, BPdc around next st, hdc in next st; repeat from * 4 more times. BPdc around each of next 4 sts, hdc in last st. Turn. (41 sts)
Working BPdc on the wrong side keeps every post column raised on the right side.
Row 4 (RS, cross row): Ch 2, hdc in first st. *CC over next 4 sts, hdc in next st, FPdc around next st, hdc in next st; repeat from * 4 more times. CC over next 4 sts, hdc in last st. Turn. (41 sts, 6 crosses)
Row 5 (WS): Repeat Row 3. (41 sts)
Rows 6–17: Repeat Rows 2–5 three more times. (41 sts in every row)
Cable crosses fall on Rows 4, 8, 12, and 16. Row 17 is a WS row. Do not fasten off yet.
Each cable now shows 4 twists. Each rib band shows hdc, a raised center line, and hdc. The panel measures 11 in (27.9 cm) x 5.75 in (14.6 cm).
Seam
Cut the working yarn, leaving a 12 in (30.5 cm) tail. Pull it through the last loop.
Fold the panel with the RS facing out and bring the two short edges together. Use the tail and a tapestry needle to mattress stitch the edges, working through the edge hdc of each row. Match the rows one to one: 17 rows on the left edge to 17 rows on the right edge.
The two edge hdc sit side by side with the seam between them. Together they look like the hdc, raised center, hdc pattern of the other rib bands, so the seam hides in the sixth rib band. You now have a tube with 6 cables and 6 rib bands.
Pull the seam snug but not tight. The tube should lie flat, about 11 in (27.9 cm) around. Weave in the tail.
Edging and Gathering
The edging adds a neat sc ridge at each end and reduces the stitch count before gathering. It is worked in rounds, without turning.
Edging gauge: 41 sc = 11 in (27.9 cm) around. Each round is about 0.25 in (0.6 cm) tall.
Bottom Edging
Hold the tube with the foundation chain at the top and the RS facing out. Join MC with a sl st in the unused loop of the foundation ch at the seam.
Round 1: Ch 1, sc in each unused ch loop around. Join with sl st to first sc. (41 sc)
You work 1 sc into each of the 41 foundation loops, so no stitches are added or lost.
Round 2: Ch 1, sc2tog 20 times, sc in last st. Join with sl st to first st. (21 sts)
Check the math: 20 sc2tog use 40 sts, and the final sc uses 1 st, for 41 sts used. The result is 20 + 1 = 21 sts.
Fasten off, leaving an 8 in (20.3 cm) tail. Thread the tail through the front loop of each of the 21 sts. Pull firmly to close the hole. Secure it with 2 small knots on the WS, then weave the tail inside.
Stuff the Ball
Turn the tube so the closed end is at the bottom. Stuff it with about 10 g of fiberfill. Push the stuffing into the base first, then the sides. The ball should feel firm but still slightly springy. Overstuffing pulls the rib bands apart and flattens the cables.
Top Edging
Join MC with a sl st in the first st of Row 17 at the seam.
Round 1: Ch 1, sc in each st around. Join with sl st to first sc. (41 sc)
Round 2: Ch 1, sc2tog 20 times, sc in last st. Join with sl st to first st. (21 sts)
The top math matches the bottom: 41 sts used as (20 x 2) + 1, giving 21 sts.
Add a little more stuffing if needed. Fasten off, leaving an 8 in (20.3 cm) tail. Gather through the front loops of the 21 sts as you did for the bottom. Leave this tail hanging for now. You will use it to attach the loop.
Hanging Loop and Bow
Cord gauge: 5 sl sts = 1 in (2.5 cm).
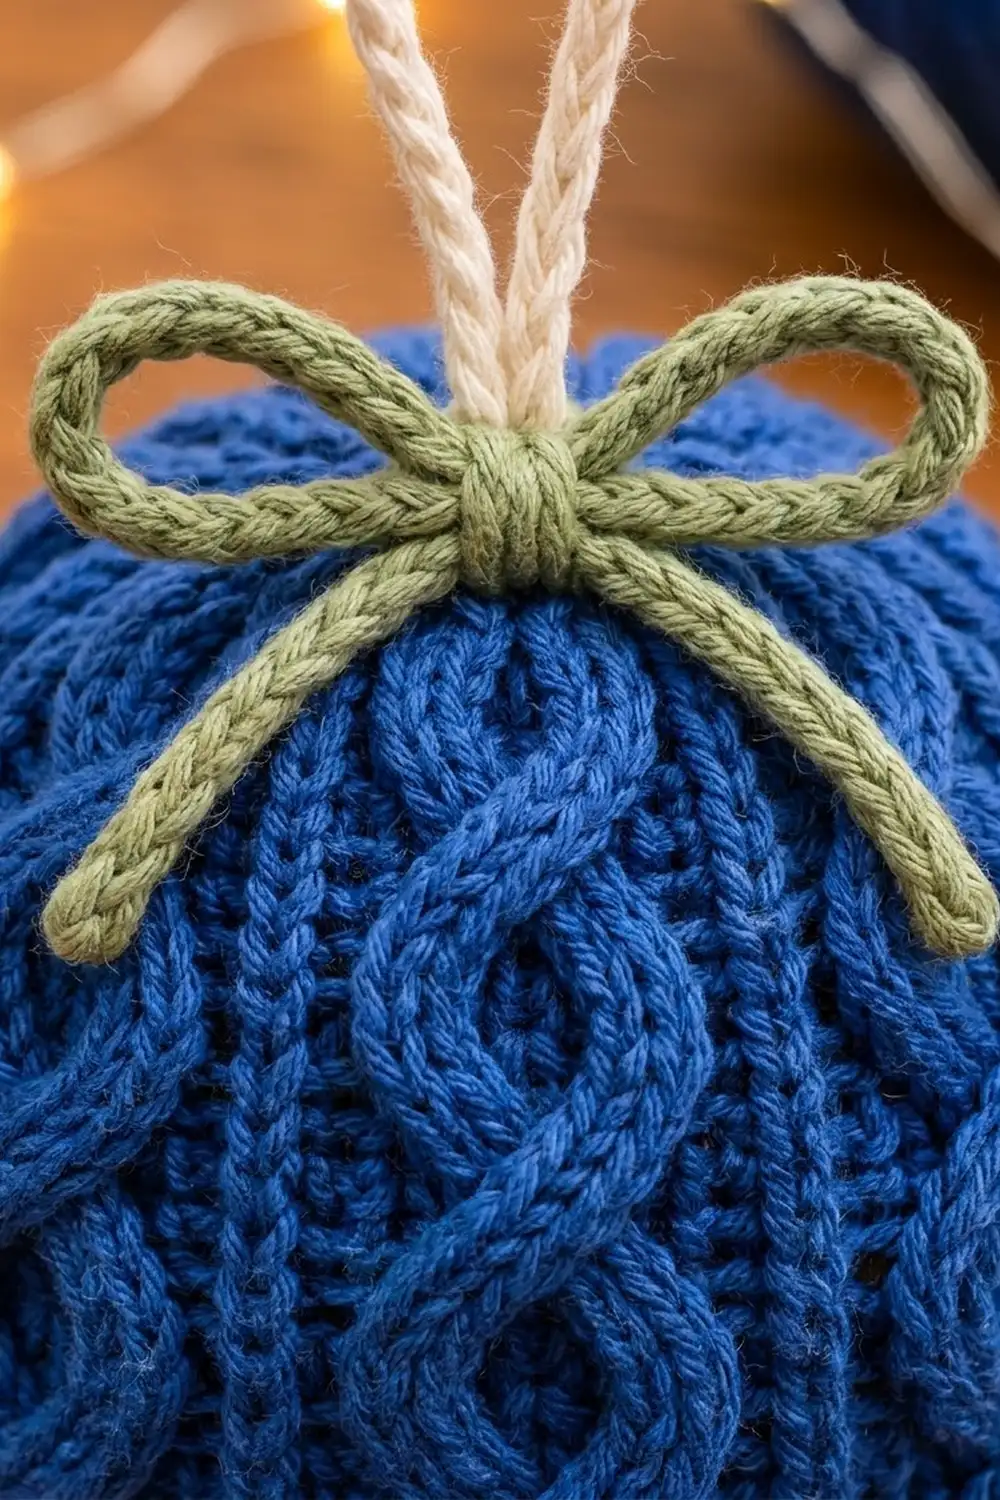
Hanging Loop: With A, ch 31. Sl st in the back bump of the 2nd ch from hook and in each ch across. (30 sl sts, about 6 in or 15.2 cm long)
Fold the cord in half. Use the MC tail to stitch both ends into the center of the top gather. The loop stands about 2.5 in (6.4 cm) above the ball.
Bow: With B, ch 61. Sl st in the back bump of the 2nd ch from hook and in each ch across. (60 sl sts, about 12 in or 30.5 cm long)
Wrap the bow cord once around the base of the loop, right at the top of the ball. Tie a bow with 2 loops, each about 1.25 in (3.2 cm) wide. Let the tails fall about 1.5 in (3.8 cm) down the sides. Add a hidden stitch through the knot to anchor it. Trim and weave in the ends.
Final Blocking
- Lightly spray the whole ornament with water until it is damp but not wet.
- Roll it gently between your palms to round out the shape.
- Straighten each cable with your fingertips so it runs from pole to pole.
- Check that the 6 rib bands are evenly spaced around the ball.
- Shape the bow loops. If they curl, pin them flat against the blocking mat.
- Let the ornament dry fully, resting on its base, for about 24 hours.
- Check the final size: about 3.5 in (8.9 cm) across and 11 in (27.9 cm) around.
Do not steam acrylic yarn. Heat can flatten the cables.
Final Quality-Control Checklist
- Every row of the panel has exactly 41 sts.
- There are 6 cables, each with 4 crosses on Rows 4, 8, 12, and 16.
- All crosses lean in the same direction.
- The seam sits in a rib band and can’t be seen from the front.
- Round 1 of each edging has 41 sc, and Round 2 of each edging has 21 sts.
- Both ends are tightly gathered, with no stuffing showing.
- The ball is about 3.5 in (8.9 cm) across.
- The loop is about 2.5 in (6.4 cm) tall and firmly attached.
- The bow is centered and anchored.
- All ends are woven in.
Troubleshooting
The stitch count drifts to 40 or 42. You probably worked into the stitch behind a post stitch, or skipped one. Count each row, and remember that the turning ch 2 never counts.
The cables look flat. Your tension on the post stitches is too tight. Pull up a slightly taller loop on each FPtr.
The crosses lean in different directions. Always work the second pair of FPtr in front of the first pair.
The fabric curls a lot. This is normal for a cable panel. It flattens once the tube is seamed and stuffed.
A hole remains at a gathered end. Thread the tail through the front loops a second time and pull firmly.
The ball looks lumpy. Pull out the stuffing, tease it apart into small fluffy pieces, and restuff in layers.
The seam is visible. Redo it with mattress stitch, working through one edge hdc on each side.
Care
Spot clean with a damp cloth and mild soap, then let it air dry. Store the ornament in tissue paper so the loop and bow keep their shape.
Final Notes
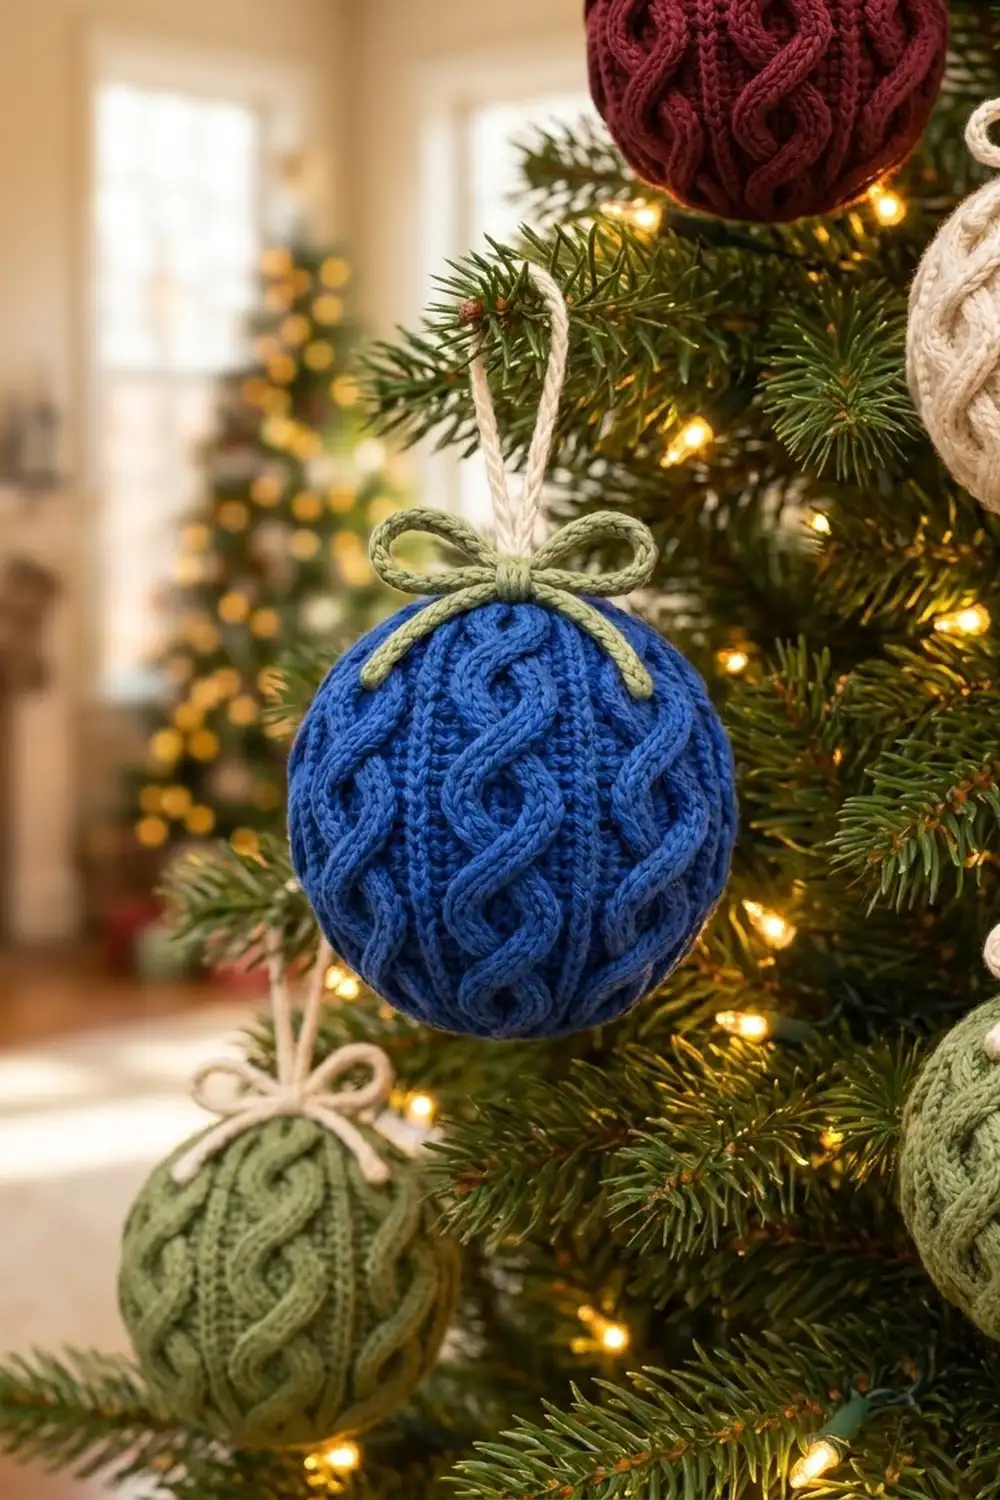
Every size in this ornament comes from one chain of measurements. The 41-st panel measures 11 in (27.9 cm) wide and 5.75 in (14.6 cm) tall. Seamed, it becomes a tube 11 in (27.9 cm) around. Each edging starts with 41 sc and reduces to 21 sts. Gathered and stuffed, the tube forms a ball about 3.5 in (8.9 cm) across. The 6 in (15.2 cm) loop and the 12 in (30.5 cm) bow cord finish it.
If your panel matches the gauge, every later step will fall into place. Make one in blue, then try burgundy, cream, and sage for a matching set.
Happy crocheting!