
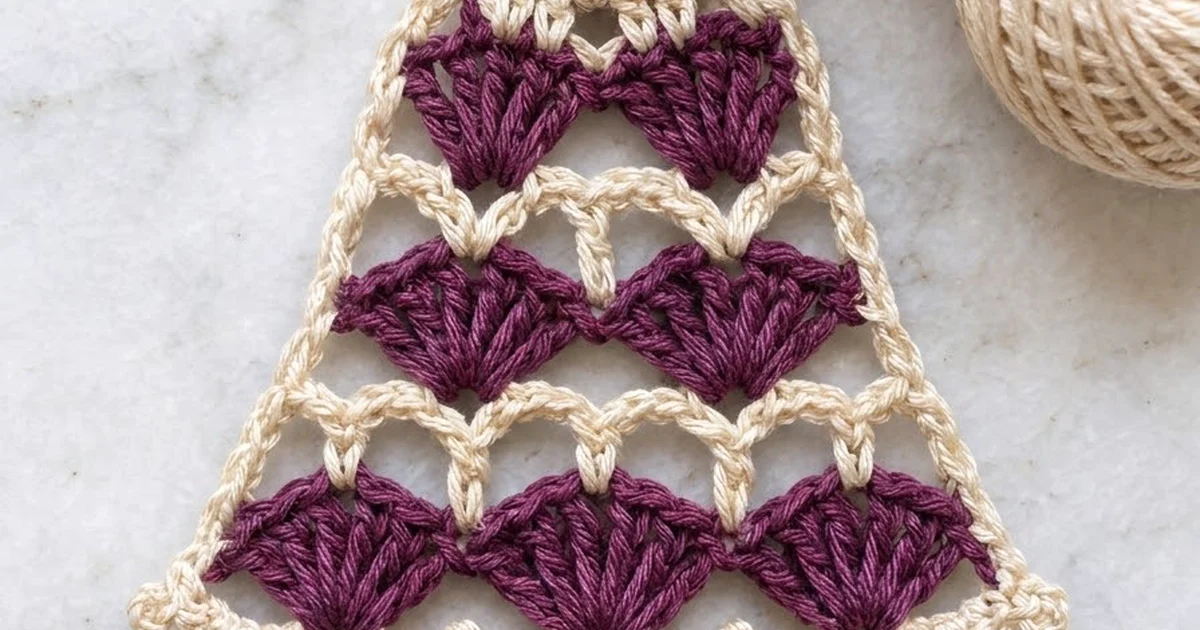
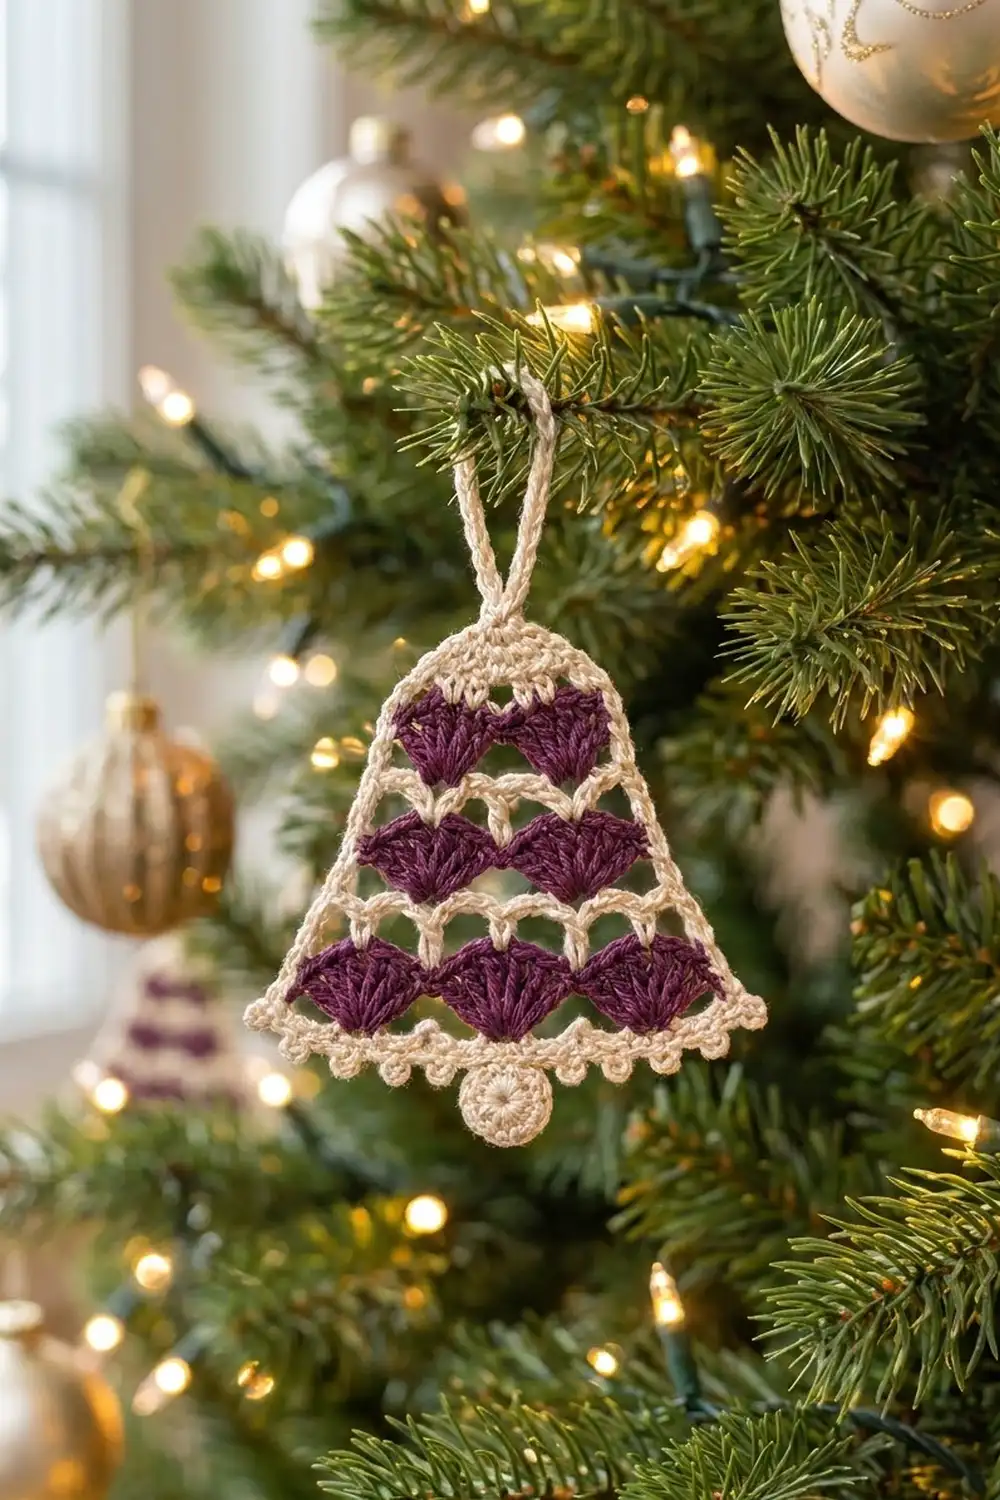
This little bell ornament pairs rich plum shells with soft cream lace. Three tiers of fan-shaped shells give it a bell silhouette. Openwork arches between the tiers let the tree lights shine through, and a picot edge and round clapper finish the bottom.
The palette is two colors: deep plum for the shells and warm cream for the arches, crown, edging, hanger, and clapper. It looks vintage and elegant. Lightly starched, it holds its shape on a branch, and it is also a lovely gift-topper.
This pattern uses US crochet terms. The finished bell measures about 3.75 in (9.5 cm) wide at the bottom and 3.25 in (8.3 cm) tall, not counting the loop or clapper. With the hanger and clapper, it hangs about 5.5 in (14.0 cm) long.
The bell is worked flat in rows from the bottom edge up, changing color for each shell row. The rows get narrower as you go, which makes the bell shape. A solid crown closes the top. Next, one border round outlines the bell, and a picot round trims the bottom. Last, you add a crocheted hanging loop and sew on a small round clapper.
Finished Size and Construction
- Finished size: 3.75 in (9.5 cm) wide × 3.25 in (8.3 cm) tall (bell body with border)
- Total hanging length: about 5.5 in (14.0 cm) with loop and clapper
- Skill level: Easy-intermediate
- Terminology: US crochet terms
- Yarn weight: Size 3 mercerized cotton crochet thread (Lace / fingering-thin, category 0–1)
- Hook: 2.25 mm (US B-1)
- Number of pieces: 1 bell, plus 1 small clapper sewn on
- Layout: Single piece; no assembly grid
- Bell size before border: 3.5 in (8.9 cm) wide × 3 in (7.6 cm) tall
- Border depth: about 0.25 in (0.6 cm) at the bottom, 0.125 in (0.3 cm) at the sides
- Clapper: 0.75 in (1.9 cm) diameter
Materials
Mercerized cotton thread works best. It has a crisp stitch definition that shows off the shells, and it takes starch well. Choose a plum dark enough to stand out clearly against the cream.
- Color A, Plum: 5 g (about 16 m)
- Color B, Cream: 7 g (about 22 m)
These amounts include a margin for gauge swatching and weaving in ends. One ball of each color will make many bells.
Tools:
– 2.25 mm (US B-1) crochet hook
– Tapestry needle
– Scissors
– Stitch marker
– Blocking board or foam mat and rustproof pins
– Fabric stiffener or spray starch (optional)
Abbreviations (US Terms)
- ch – chain
- sl st – slip stitch
- sc – single crochet
- dc – double crochet
- sc2tog – single crochet 2 together
- sk – skip
- sp – space
- st(s) – stitch(es)
- RS / WS – right side / wrong side
Special stitches
- Shell: Work the stated number of dc (7, 5, or 3) into the same stitch.
- Picot: Ch 3, then sl st into the 3rd ch from the hook.
Gauge and Checkpoints
Gauge: 7 sc = 1 in (2.5 cm), so 14 sc = 2 in (5.1 cm).
Your first bell is your test piece. Check these measurements as you work:
- After Row 1: 25 sc measure about 3.5 in (8.9 cm) across.
- After Row 2: The piece is about 0.6 in (1.5 cm) tall.
- After Row 7: The piece is about 2.25 in (5.7 cm) tall, and the top row is about 2 in (5.1 cm) wide.
- After Row 11: The piece is about 3 in (7.6 cm) tall, and the top is about 1 in (2.5 cm) wide.
If your bell is too big, go down to a 2.0 mm hook. If it is too small, go up to a 2.5 mm hook. Small differences are fine for an ornament. Just keep the stitch counts exact so the shells line up.
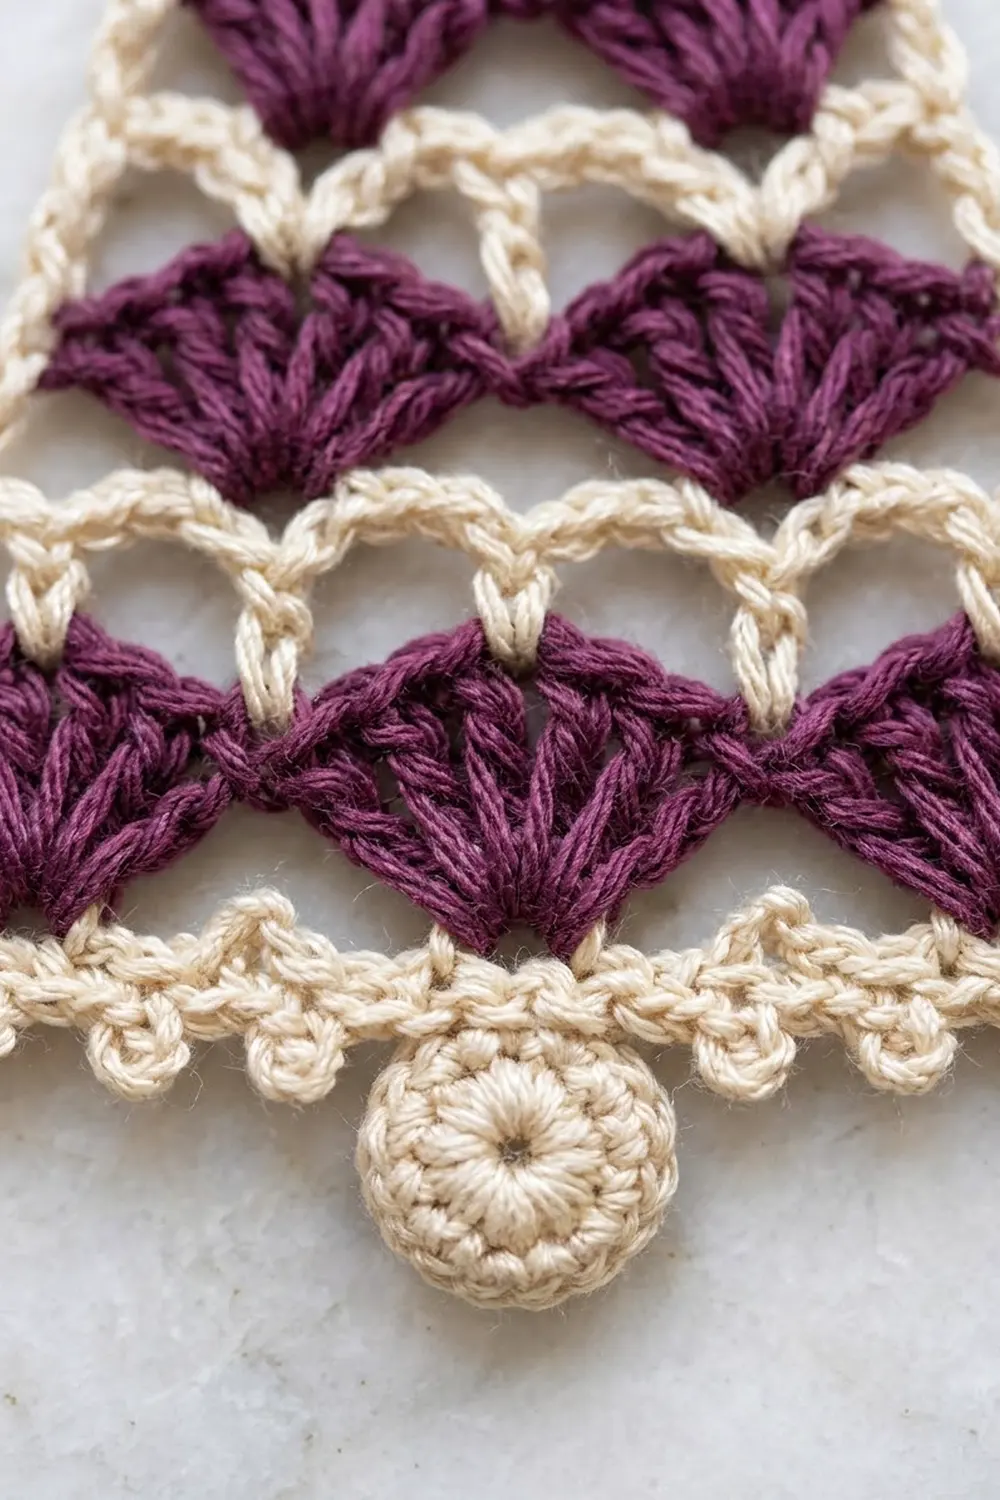
Bell Body
Turn at the end of every row. Fasten off each plum row after you finish it. Rejoin cream for each arch row. All tails sit at the side edges, where the border will hide them.
Row 1 (Cream): Ch 26. Sc in the 2nd ch from the hook and in each ch across. (25 sc)
Fasten off cream, leaving a 4 in (10.2 cm) tail.
Row 2 (Plum, Tier 1 shells): Turn the piece and join plum in the first sc. Ch 1, sc in the same st. Sk 3 sts, 7 dc in the next st (shell made), sk 3 sts, sc in the next st. Repeat from * to * 2 more times. Fasten off. (3 shells, 4 sc = 25 sts)
This makes three fans that flare upward from the base row.
Row 3 (Cream, arches): Turn the piece and join cream in the first sc. Ch 1, sc in the same st. Ch 3, sc in the 4th (center) dc of the next shell, ch 3, sc in the next sc. Repeat from * to * 2 more times. Fasten off. (7 sc, 6 ch-3 sps = 25 sts)
Row 4 (Plum, Tier 2 shells): Turn the piece and join plum in the first sc. Ch 2 (does not count as a st), 3 dc in the same sc for a half shell. Sk the ch-3 sp, sc in the next sc, sk the ch-3 sp, 5 dc in the next sc. Repeat from * to * once more. Sk the ch-3 sp, sc in the next sc, sk the ch-3 sp, 3 dc in the last sc for a half shell. Fasten off. (3 + 1 + 5 + 1 + 5 + 1 + 3 = 19 sts)
The two full shells sit above the gaps between the Tier 1 shells, so the tiers are offset. Because the chain spaces are skipped, the bell starts to narrow here.
Row 5 (Cream, arches): Turn the piece and join cream in the first dc. Ch 1, sc in the same dc. Ch 2, sk 2 dc, sc in the next sc. Ch 2, sk 2 dc, sc in the 3rd dc of the shell, ch 2, sk 2 dc, sc in the next sc. Repeat from * to * once more. Ch 2, sk 2 dc, sc in the last dc. Fasten off. (7 sc, 6 ch-2 sps = 19 sts)
Number the 7 sc of Row 5 as positions 0–6 from right to left. You will use these numbers in Row 6.
Row 6 (Plum, Tier 3 shells): Turn the piece and join plum in the first sc (position 0). Ch 1, sc in the same st. Sk the ch-2 sp, the next sc (position 1), and the next ch-2 sp. Work 5 dc in the next sc (position 2). Sk the ch-2 sp, sc in the next sc (position 3, the center), sk the ch-2 sp, 5 dc in the next sc (position 4). Sk the ch-2 sp, the next sc (position 5), and the next ch-2 sp. Sc in the last sc (position 6). Fasten off. (1 + 5 + 1 + 5 + 1 = 13 sts)
The two shells meet at the center sc, which gives them their heart shape.
Row 7 (Cream, arches): Turn the piece and join cream in the first sc. Ch 1, sc in the same st. Ch 2, sk 2 dc, sc in the 3rd dc. Ch 2, sk 2 dc, sc in the center sc. Ch 2, sk 2 dc, sc in the 3rd dc. Ch 2, sk 2 dc, sc in the last sc. Do not fasten off. (5 sc, 4 ch-2 sps = 13 sts)
Crown
Continue with cream.
Row 8 (conversion row): Ch 1, turn. Sc in the first sc. 2 sc in the ch-2 sp, sc in the next sc. Repeat from * to * 3 more times. (5 sc worked in sc + 8 sc worked in spaces = 13 sc)
Row 9: Ch 1, turn. Sc2tog, sc in the next 9 sts, sc2tog. (11 sc)
Row 10: Ch 1, turn. Sc2tog, sc in the next 7 sts, sc2tog. (9 sc)
Row 11: Ch 1, turn. Sc2tog, sc in the next 5 sts, sc2tog. Do not fasten off. (7 sc)
Checkpoint: The bell should be about 3.5 in (8.9 cm) wide at the bottom and 3 in (7.6 cm) tall, with a 1 in (2.5 cm) wide crown.
Border
Border gauge: Work 1 sc in the end of each sc or arch row, and 2 sc in the end of each plum shell row (a dc row is about two sc tall). The bottom gets 1 sc per foundation ch, with 3 sc in each corner ch.
Rnd 1 (Cream): Ch 1. Do not turn; rotate the piece to work down the side edge.
- Side 1: Work 14 sc down the side. That is 1 sc in the end of each of Rows 11, 10, 9, 8, and 7, then 2 sc in the end of Row 6, 1 in Row 5, 2 in Row 4, 1 in Row 3, 2 in Row 2, and 1 in Row 1 (5 + 2 + 1 + 2 + 1 + 2 + 1 = 14).
- Bottom: Work 3 sc in the first foundation ch, 1 sc in each of the next 23 ch, and 3 sc in the last ch. That makes 29 sc, including both corners.
- Side 2: Work 14 sc up the side, using the same distribution in reverse.
- Top: Sc in each of the 7 sts of Row 11.
Join with a sl st to the first sc. (14 + 29 + 14 + 7 = 64 sc)
Rnd 2 (Cream): Ch 1. Sl st in each of the 14 side sts.
Along the bottom: (sc, picot) in the next st, sc in the next st. Repeat from * to * 13 more times, then work (sc, picot) in the last bottom st. (29 sc, 15 picots)
Sl st in each of the 14 sts of Side 2 and the 7 top sts. Join with a sl st to the first sl st. Fasten off. (35 sl st + 29 sc + 15 picots)
Why the math works: The bottom has an odd count of 29. The alternating picot repeat therefore starts and ends with a picot, which keeps the trim symmetrical. The center (15th) bottom stitch also gets a picot, and that is where the clapper goes. The slip stitches on the sides add an outline without making the border deeper, so the sides stay crisp and slanted.
Hanging loop: Join cream in the 4th (center) st of the top. Ch 25, then sl st in the same st to form a loop. Sc in each of the 25 ch, and sl st in the base st. Fasten off. (25 sc) The loop stands about 1.75 in (4.4 cm) tall.
Clapper
With cream, make a magic ring.
Rnd 1: Ch 1, 6 sc in the ring. Join with a sl st to the first sc. (6 sc)
Rnd 2: Ch 1, 2 sc in each st. Join. (12 sc)
Rnd 3: Ch 1, sc in the next st, 2 sc in the next st. Repeat from * to * 5 more times. Join. (18 sc)
Fasten off, leaving an 8 in (20.3 cm) tail. The clapper should measure 0.75 in (1.9 cm) across.
Place the clapper behind the bell so that its top quarter overlaps the bottom center, behind the 15th border stitch. About 0.5 in (1.3 cm) of the clapper should hang below the picot edge. Whipstitch it to the back of the border with small stitches.
Final Blocking
- Weave in all the ends along the side edges, under the border stitches.
- Wet the bell with cool water, or dip it in diluted fabric stiffener. Gently squeeze out the extra.
- Lay it flat on a blocking mat, RS up.
- Pin the bottom corners 3.75 in (9.5 cm) apart. Pin the crown center so the body is 3.25 in (8.3 cm) tall.
- Pin out each picot. Open up each arch so the gaps between the shells are clear.
- Shape each shell into an even fan, and pin the loop straight up.
- Let it dry completely, which takes at least 12 hours. Then unpin it.
Final Quality-Control Checklist
- Tier 1 has 3 full shells, Tier 2 has 2 full shells plus 2 half shells, and Tier 3 has 2 shells meeting at the center.
- The tiers are offset, and all fans flare upward.
- The bell measures 3.75 in (9.5 cm) wide × 3.25 in (8.3 cm) tall.
- Both sides of the bell slant evenly.
- There are 15 evenly spaced picots, with one at each bottom corner.
- The clapper is centered and the loop is upright.
- No tails show on the RS.
Troubleshooting
- The shells curl or ruffle: Your tension is too loose on the dc. Go down a hook size for the plum rows only.
- The bell pulls in too sharply: Your arch chains are tight. Work the chains a little looser, but keep the counts the same.
- The sides look wavy: You may have put too many stitches in the row ends. Recount to 14 per side.
- The picots are uneven at the corners: Make sure each corner has exactly 3 sc in Rnd 1.
- The bell leans to one side: Check that Row 6 has the center sc exactly at position 3.
- The clapper flips forward: Sew it higher on the back and add a second tack stitch.
Care
Hand-wash gently in cool water and lay flat to dry. Re-starch and re-block if the bell softens after storage.
Final Notes
The measurement chain is short and reliable. Twenty-five foundation sc give a 3.5 in (8.9 cm) base. Three shell tiers narrow to a 1 in (2.5 cm) crown at a body height of 3 in (7.6 cm). The border brings the bell to 3.75 in (9.5 cm) × 3.25 in (8.3 cm), and the loop and clapper bring the full hanging length to about 5.5 in (14.0 cm). Make one bell, check it, and then make a whole set for the tree.
Happy crocheting!