

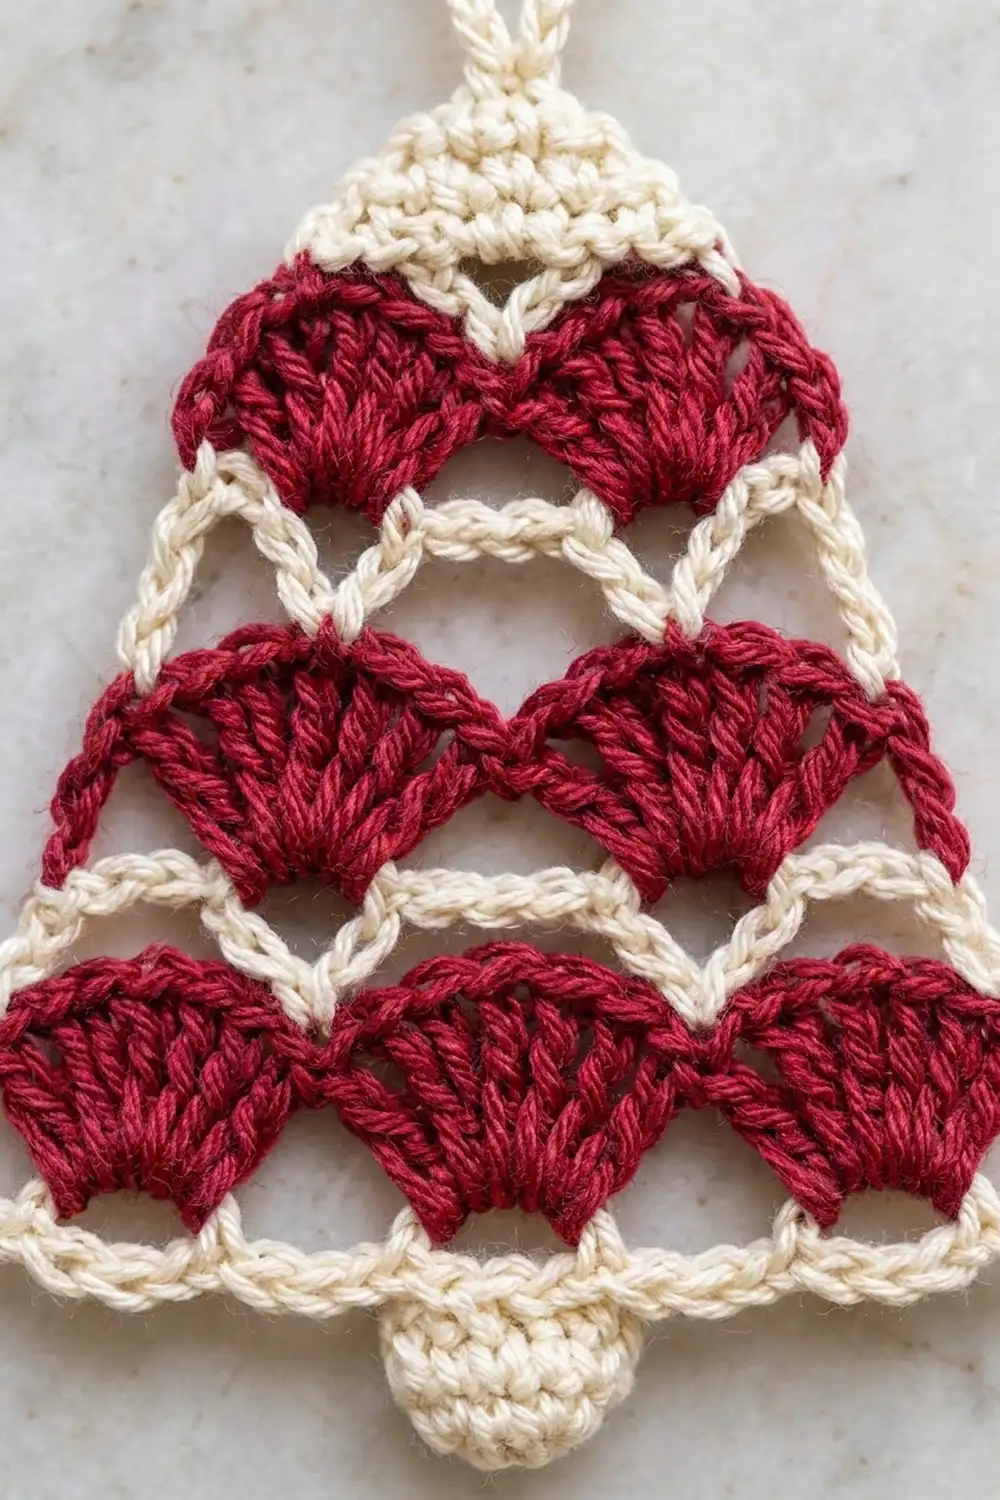
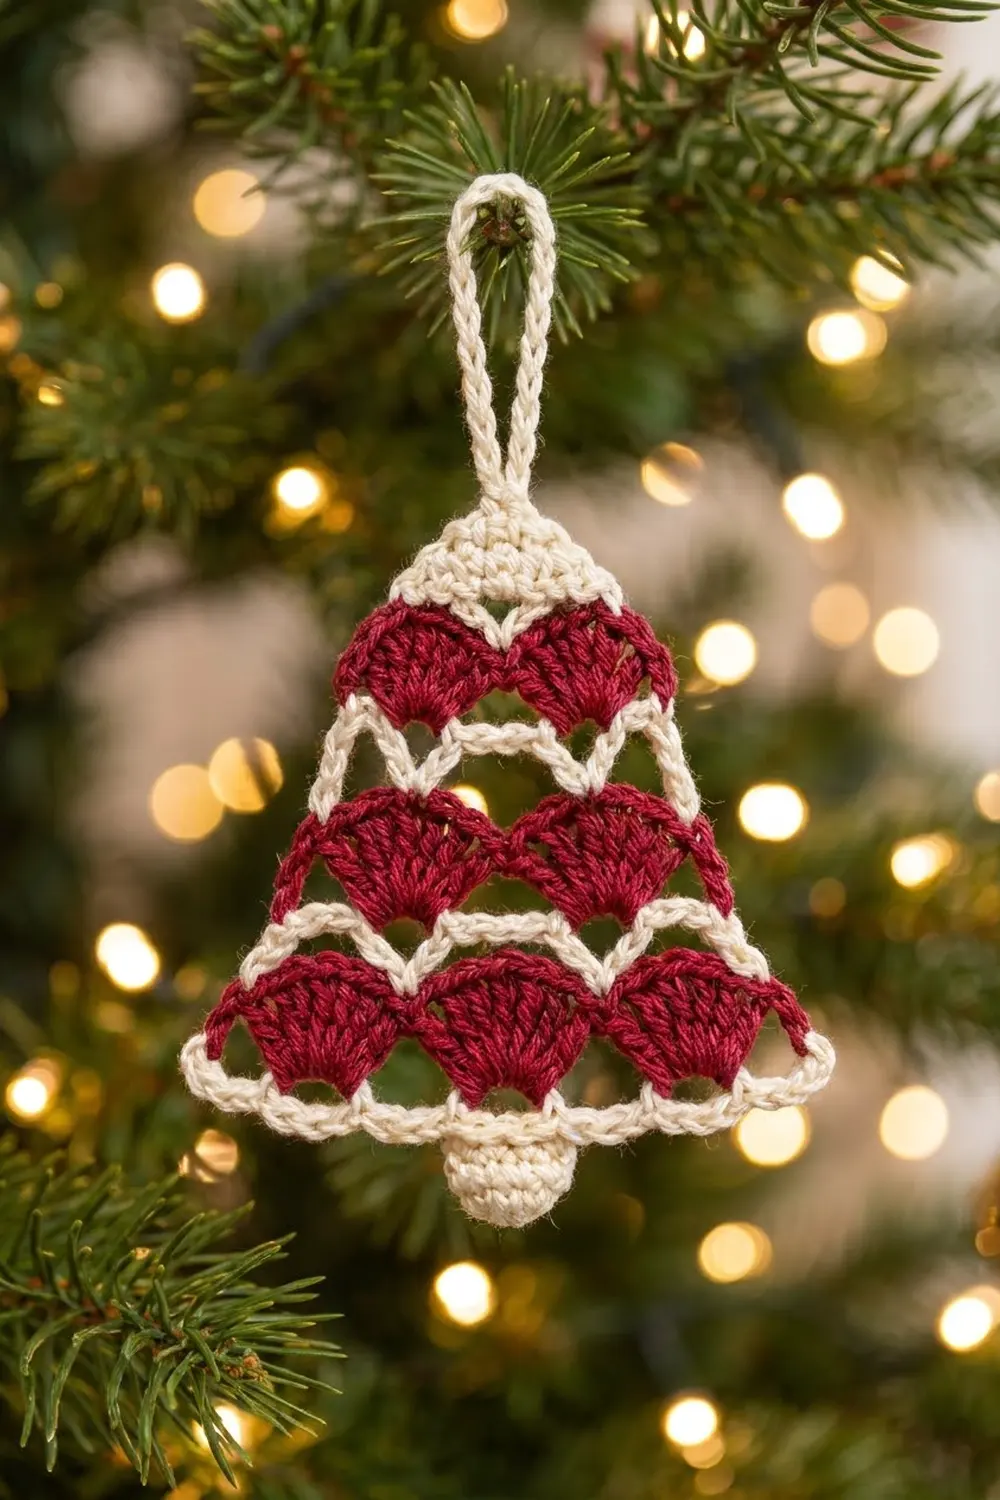
This little bell is a classic Christmas ornament with a lacy twist. Bands of cranberry red fan shells are stacked inside a cream openwork frame. A solid cream crown and a chain loop sit on top, and a tiny round clapper hangs from the bottom.
The palette is just two colors, deep cranberry red and soft cream, so it suits both farmhouse and traditional décor. Make one for a gift tag or a whole set for the tree.
This pattern uses US crochet terms. The finished ornament measures about 4.75 in (12.1 cm) wide at the bottom edge and 4 in (10.2 cm) tall from the bottom arches to the top of the crown. With the hanging loop and clapper, the total length is about 6.25 in (15.9 cm).
The bell is worked flat in rows from the bottom up. The colors change with every band, and the shaping happens in the cream rows, which start and end inside the shells below. A cream border then smooths the outline. Last, you make a tiny clapper and sew it on.
Finished Size and Construction
- Finished size: 4.75 in (12.1 cm) wide × 4 in (10.2 cm) tall, not counting the loop and clapper
- Total length with loop and clapper: about 6.25 in (15.9 cm)
- Skill level: Easy-intermediate
- Terminology: US
- Yarn weight: Sport / fine (#2) cotton
- Hook: 3.0 mm (US C/2–D/3)
- Number of pieces: 1 bell body plus 1 small clapper, sewn on
- Layout: A single ornament; nothing is joined to other motifs
- Size before border: 4.5 in (11.4 cm) wide × 3.75 in (9.5 cm) tall
- Border depth: about 0.125 in (0.3 cm) on the sides; the bottom arches add about 0.25 in (0.6 cm)
Materials
Use a smooth mercerized or matte cotton in sport weight. Cotton gives crisp shells and holds its shape well when blocked. Acrylic also works, but the ornament will be a little softer.
- Color A, cranberry red: about 5 g / 16 m (17.5 yd)
- Color B, cream: about 6 g / 19 m (20.8 yd), including the clapper
These quantities include a margin of about 20% for tails and swatching.
Tools:
– 3.0 mm crochet hook
– Tapestry needle
– Scissors
– A small pinch of cream yarn scraps (or fiberfill) to stuff the clapper
– Rustproof pins and a blocking mat or folded towel
– Spray bottle with water (or a little fabric stiffener, if you like)
Abbreviations (US Terms)
- ch – chain
- sl st – slip stitch
- sc – single crochet
- dc – double crochet
- sc2tog – single crochet 2 together
- sp – space
- st(s) – stitch(es)
- MR – magic ring
- RS / WS – right side / wrong side
Special stitch – Shell: Work 7 dc into the same stitch. The fan is narrow at the base and wide at the top. The 4th dc is the center dc.
Half shell: Work 4 dc into the same stitch. When it opens a row, the ch 3 counts as the first dc.
Gauge and Checkpoints
Gauge: 11 sc = 2 in (5.1 cm) in sc worked into a foundation chain. Gauge is not critical for an ornament, but it controls the final size.
Treat the first bell as your test piece. Measure at each of these stages:
- After Row 1: 4.5 in (11.4 cm) wide
- After Row 2: 0.75 in (1.9 cm) tall at the shell tops
- After Row 4: 1.75 in (4.4 cm) tall
- After Row 6: 2.75 in (7.0 cm) tall
- After Row 11: 3.75 in (9.5 cm) tall
- After the border: 4.75 in (12.1 cm) wide × 4 in (10.2 cm) tall
Too big? Go down to a 2.75 mm hook, or tighten how you pull up the dc loops.
Too small? Go up to a 3.25 mm hook. Don’t switch to a thicker yarn, because the shells will crowd together.
Bell Body
Fasten off at the end of each band unless the pattern says otherwise. Work over the tails as you go wherever you can. The border will hide the rest.
Row 1 (cream, RS)
With B, ch 26.
Sc in 2nd ch from hook and in each ch across. Turn. (25 sc)
Fasten off B.
Row 2 (red shell band, 3 shells)
Join A in the first sc. Ch 1, sc in same st.
Skip 3 sts, Shell in next st, skip 3 sts, sc in next st. Repeat from * 2 more times. Fasten off.
Count: 3 shells and 4 sc = 21 dc + 4 sc = 25 sts.
The shells sit on Row 1 sts 5, 13, and 21. The sc land on sts 1, 9, 17, and 25.
Row 3 (cream V row, shaping)
Turn the work. Join B with a sc in the center dc of the first shell.
Ch 3, dc in next sc, ch 3, sc in center dc of next shell. Repeat from * once more.
Count: 3 sc + 2 dc + 12 ch = 17 sts.
This row starts and ends at the center of the two edge shells, so it is half a shell narrower on each side. That is what creates the bell’s taper. For later rows, call the five main stitches of this row A (sc), B (dc), C (sc), D (dc), and E (sc).
Fasten off.
Row 4 (red shell band, half shell + 2 shells + half shell)
Turn. Join A in st A (the first sc).
- Ch 3 (counts as dc), 3 dc in same sc. [half shell, 4 dc]
- Sc in next ch-3 sp.
- Shell in st B (the dc).
- Skip next ch-3 sp, sc in st C (the sc), skip next ch-3 sp.
- Shell in st D (the dc).
- Sc in next ch-3 sp.
- 4 dc in st E (the last sc). [half shell]
Count: 4 + 1 + 7 + 1 + 7 + 1 + 4 = 25 sts.
Fasten off. The two half shells form the straight slanted edges of the middle band.
Row 5 (cream V row, shaping)
Turn. Join B with a sc in the center dc of the first full shell.
Ch 3, dc in next sc, ch 3, sc in center dc of next full shell.
Count: 2 sc + 1 dc + 6 ch = 9 sts.
Fasten off. Call these three main stitches F (sc), G (dc), and H (sc).
Row 6 (red shell band, 2 shells)
Turn. Join A in st F.
- Ch 3 (counts as dc), 6 dc in same sc. [Shell, 7 dc]
- Skip ch-3 sp, sc in st G (the dc), skip ch-3 sp.
- Shell in st H.
Count: 7 + 1 + 7 = 15 sts.
Fasten off. The two shells meet over the center dc, which makes the cream V at the top of the bell.
Crown (cream, Rows 7–11)
Work Rows 7–11 without fastening off between them.
Row 7: Turn. Join B with a sc in the center dc of the first shell. Sc in the next 3 dc, sc in the sc, then sc in the first 4 dc of the next shell. Turn. (4 + 1 + 4 = 9 sc)
Row 8: Ch 1, sc2tog, sc in next 5 sts, sc2tog. Turn. (7 sc)
Row 9: Ch 1, sc in each st across. Turn. (7 sc)
Row 10: Ch 1, sc2tog, sc in next 3 sts, sc2tog. Turn. (5 sc)
Row 11 and hanging loop: Ch 1, sc in the next 2 sts. In the center st, sc, then ch 20 and sl st into the sc you just made. Sc in the last 2 sts. (5 sc + 1 ch-20 loop)
Fasten off. The crown should be about 1.6 in (4.1 cm) wide at Row 7 and about 0.9 in (2.3 cm) wide at Row 11. The loop stands about 1.5 in (3.8 cm) tall.
Checkpoint: The body should measure 4.5 in (11.4 cm) wide × 3.75 in (9.5 cm) tall.
Border
Border gauge: Along the sides, 3 sc over the edge of one dc row is about 5 sc per inch (2 sc per cm). That is close to the body gauge of 5.5 sts per inch, so the edges lie flat. The chain bridges span the open steps, where a row starts inside a shell.
Border Round (cream, RS facing)
Hold the bell with the RS facing you and the foundation chain at the bottom. Join B with a sc in the underside of the first foundation ch at the bottom-left corner.
Bottom edge: Ch 5, skip 3 ch, sc in next ch. Repeat from * 5 more times.
Count: 7 sc (on foundation ch 1, 5, 9, 13, 17, 21, 25) + 6 ch-5 arches = 37 sts.
Right side, working upward:
- 2 sc over the end of Row 1.
- 2 sc over the end sc of Row 2.
- Ch 4, sc in the end sc of Row 3.
- 3 sc along the post of the edge dc of Row 4’s half shell.
- Ch 3, sc in the end sc of Row 5.
- 3 sc along the post of the edge dc of Row 6’s shell.
- Ch 2, then 1 sc in the end of each of Rows 7–11.
Count: 17 sc + 9 ch = 26 sts.
Top: Sc in each of the 5 sts of Row 11. Fold the loop toward you so it stays free. (5 sc)
Left side, working downward: Work the right side in reverse.
- 1 sc in the end of each of Rows 11–7.
- Ch 2.
- 3 sc along Row 6’s edge dc.
- Sc in the end sc of Row 5, ch 3.
- 3 sc along Row 4’s edge dc.
- Sc in the end sc of Row 3, ch 4.
- 2 sc over Row 2, then 2 sc over Row 1.
Count: 17 sc + 9 ch = 26 sts.
Join with a sl st to the first sc. Round total: 37 + 26 + 5 + 26 = 94 sts.
Why the math works:
– The bottom edge uses all 25 foundation ch: 7 sc anchors plus 6 skips of 3 (7 + 18 = 25).
– The center anchor, foundation ch 13, sits directly under the middle shell. That is where the clapper goes.
– Each side’s chain bridges match the inward steps from Rows 3, 5, and 7. Each of those rows starts at a shell center, so you don’t add extra stitches that would ruffle the edge.
– The two sides mirror each other, so the bell stays symmetrical.
Fasten off.
Clapper
With B, make a MR.
- Rnd 1: 6 sc in ring. Pull the ring closed. (6)
- Rnd 2: 2 sc in each st. (12)
- Rnd 3: Sc in each st. (12)
- Rnd 4: Sc2tog 6 times. (6)
Stuff lightly with cream scraps. Leave a 6 in (15.2 cm) tail, thread it through the front loops of the last 6 sts, and pull tight.
The clapper should be about 0.6 in (1.5 cm) across. Use the tail to sew it to the bottom-center sc (on foundation ch 13) so that about 0.5 in (1.3 cm) of it hangs below the arches.
Final Blocking
- Weave in all remaining ends along stitches of the same color.
- Mist the bell until it is damp but not soaked.
- Pin it flat to 4.75 in (12.1 cm) across the bottom and 4 in (10.2 cm) tall.
- Pin each bottom arch into an even curve.
- Open each shell into a smooth fan and press the cream Vs into sharp points.
- Straighten both side edges so they slant evenly.
- Pin the loop into a narrow upright oval.
- Let it dry completely, at least 6 hours. For a stiffer hanger, brush on diluted fabric stiffener before drying.
Final Quality-Control Checklist
- Row stitch counts are 25, 25, 17, 25, 9, 15, 9, 7, 7, 5, and 5.
- The bell has 3 shell bands of 3, 2 + 2 halves, and 2.
- The border totals 94 sts, and both sides have 26 sts.
- There are 6 even bottom arches.
- The clapper is centered under the middle bottom shell.
- The loop is centered and firmly anchored.
- All ends are hidden on the back.
- The finished size is 4.75 in (12.1 cm) × 4 in (10.2 cm).
Troubleshooting
Shells cup or curl. Your dc are too tight. Loosen them, or go up a hook size for the red rows only.
The V rows pull the shells inward. Lengthen each ch-3 slightly, or block more firmly.
The bell leans to one side. Check that Rows 3 and 5 started and ended in the center (4th) dc of a shell.
Side edges ripple. You have too many border sc. Keep to 3 sc per dc row edge.
Side edges pucker. Lengthen the chain bridges by 1 ch on both sides equally, and add the same number of chains to both sides.
Gaps at the color changes. Pull the joining tails snug before you work over them.
Care
Hand wash in cool water with mild soap, press out the water in a towel, and dry flat. Reblock if needed, and store flat between seasons.
Final Notes
The size of this bell comes from a short chain of measurements:
- The 25-st foundation sets the 4.5 in (11.4 cm) bottom width.
- Each shell band adds about 0.6 in (1.5 cm), and each V row adds about 0.4 in (1.0 cm).
- The crown brings the body to 3.75 in (9.5 cm).
- The border finishes it at 4.75 in (12.1 cm) × 4 in (10.2 cm).
If your gauge matches at Row 1, the rest will follow. Make one in cranberry and cream, then try other color pairs for a whole tree of bells.
Happy crocheting!