

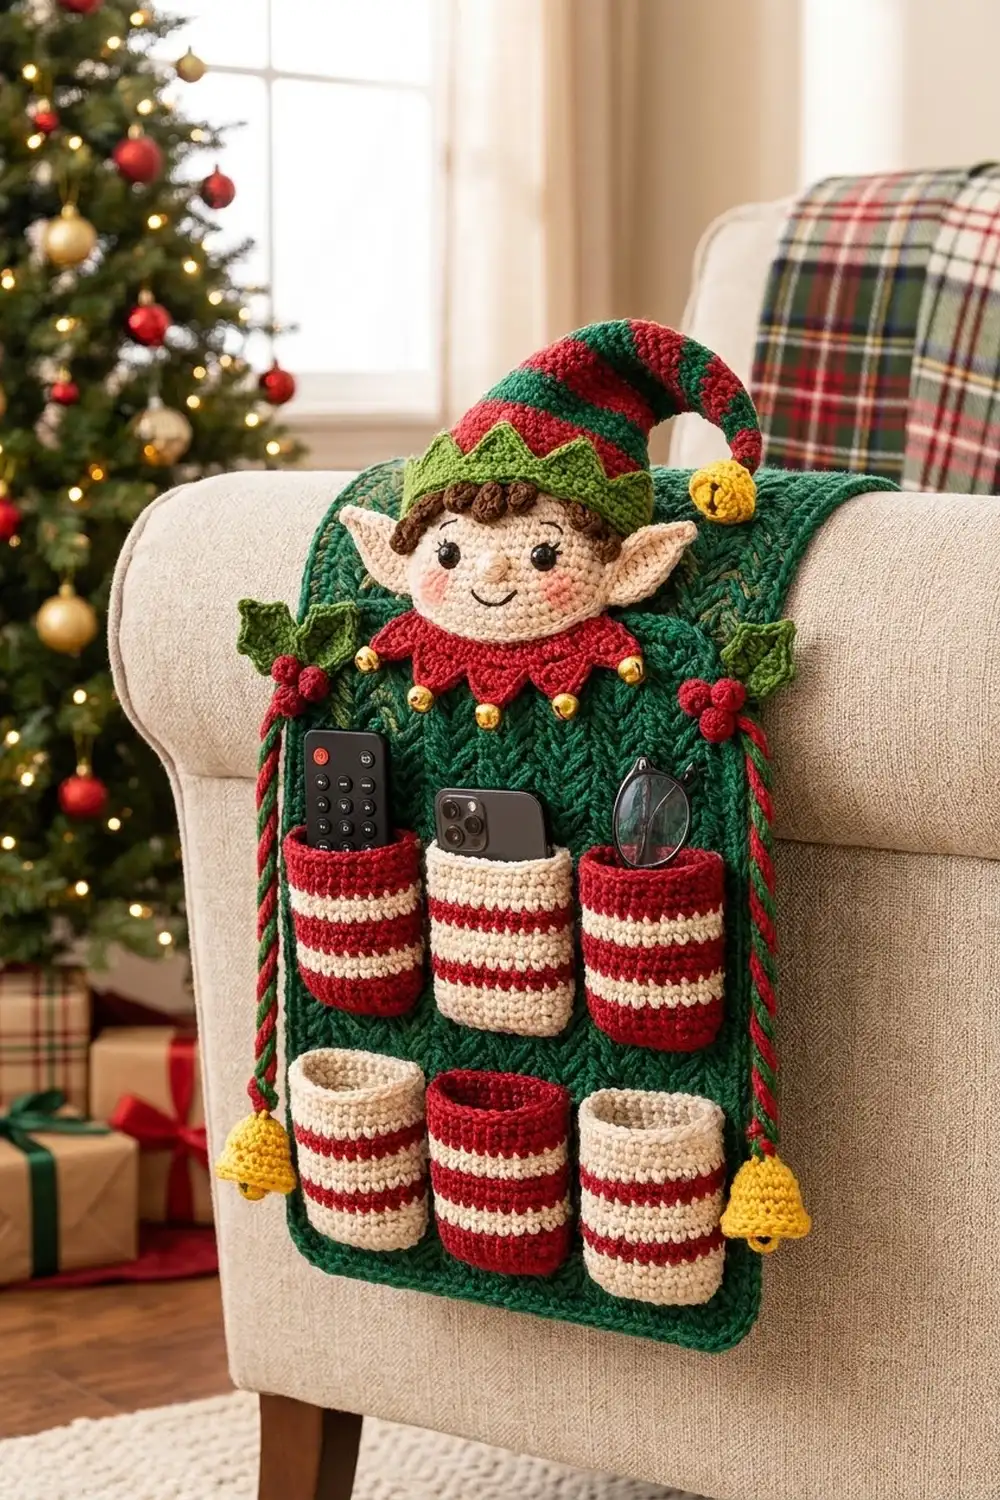
This cheerful caddy hangs over the arm of a sofa or armchair and keeps the remote, your phone and your reading glasses close by. A smiling elf peeks over the top. Six candy-striped pockets are lined up below him, and a jingle bell hangs from each side.
The palette is classic Christmas: deep forest green for the panel, cherry red and warm cream for the pockets, leaf green for the hat brim and holly, brown curls and sunny yellow bells. The panel uses a knit-look single crochet texture, so it looks like stacked knit columns but stays firm enough to carry weight.
The pattern uses US crochet terms. The finished caddy measures 12.5 x 15.5 in (31.8 x 39.4 cm) without the elf head and cords.
Construction is simple. You crochet one flat panel in rows and six pockets in the round. You sew the pockets on, work a 3-round border around the panel, and then add the elf, the holly and the hanging cords.
Finished Size and Construction
- Finished panel size: 12.5 x 15.5 in (31.8 x 39.4 cm)
- Panel size before border: 11 x 14 in (27.9 x 35.6 cm)
- Border depth: 0.75 in (1.9 cm) on each side
- Pocket size (flattened): 3 x 4 in (7.6 x 10.2 cm)
- Skill level: Intermediate
- Terminology: US
- Yarn weight: Worsted (#4)
- Hook: 5.0 mm (H-8)
- Number of pieces: 37 (1 panel, 6 pockets, 1 face, 2 ears, 1 hat, 1 brim, 1 collar, 9 curls, 4 leaves, 6 berries, 2 cords, 3 bells)
- Pocket layout: 2 rows of 3 in a checkerboard
Materials
Use a smooth acrylic or acrylic-blend worsted yarn. It holds the stitch definition and stands up to daily handling. A yarn with roughly 200 m per 100 g matches the amounts below.
- Dark green: 200 g / 400 m (panel, border, hat stripes, cords)
- Red: 100 g / 200 m (pockets, hat stripes, collar, berries, cords)
- Cream: 100 g / 200 m (pockets, face, ears)
- Leaf green: 50 g / 100 m (brim, holly leaves)
- Yellow: 25 g / 50 m (bells)
- Brown: 15 g / 30 m (curls)
- Black and pink scraps: 5 g / 10 m each (face details)
All quantities include a safety margin of about 15%.
Tools: 5.0 mm hook, tapestry needle, stitch markers, scissors, pins, a small amount of fiberfill, 6 small gold jingle bells about 10 mm across, and two 9 mm safety eyes (or black yarn to embroider them).
Abbreviations (US Terms)
- ch – chain
- sl st – slip stitch
- sc – single crochet
- hdc – half double crochet
- dc – double crochet
- MR – magic ring
- st(s) – stitch(es)
- rnd – round
- BLO – back loop only
- MC / CC – main color / contrast color
Special stitch: knit stitch single crochet (ksc). Insert your hook through the center of the stitch below, between its front and back vertical legs (not under the top loops). Yarn over, pull up a loop, then yarn over and pull through both loops. When you work it on right-side rows, the panel builds stacked V columns.
Picot: ch 3, sl st in 3rd ch from hook.
Gauge and Checkpoints
Gauge: 16 sts x 16 rows = 4 in (10.2 cm) in the panel’s ksc/sc row pattern. Single crochet in the round for the pockets gives the same 16 sts x 16 rnds = 4 in (10.2 cm).
Test one piece first. Make one pocket before you start the panel. Flattened, it should measure 3 x 4 in (7.6 x 10.2 cm).
Checkpoints:
– Pocket after Rnd 16: 3 x 4 in (7.6 x 10.2 cm)
– Panel after Row 16: 11 in (27.9 cm) wide, 4 in (10.2 cm) tall
– Panel after Row 56: 11 x 14 in (27.9 x 35.6 cm)
– Panel after the border: 12.5 x 15.5 in (31.8 x 39.4 cm)
If your pieces are too big, go down a hook size (4.5 mm). If they are too small, go up to 5.5 mm. Ksc tightens easily, so keep your loops relaxed on right-side rows.
Backing Panel
Use dark green.
Ch 45.
Row 1 (WS): sc in 2nd ch from hook and in each ch across, turn. (44 sc)
Row 2 (RS): ch 1, ksc in each st across, turn. (44 sts)
Row 3 (WS): ch 1, sc in each st across, turn. (44 sts)
Rows 4–55: repeat Rows 2–3 another 26 times. (44 sts each row)
Row 56 (RS): repeat Row 2. (44 sts) Do not turn or fasten off.
The panel should now measure 11 x 14 in (27.9 x 35.6 cm). Leave the loop on a stitch marker. You’ll sew the pockets on before working the border.
Pockets
Make 3 red pockets (MC red, CC cream) and 3 cream pockets (MC cream, CC red).
Each pocket starts with an oval base chain, so the bottom is closed with no seam. Join every round with a sl st to the first sc and ch 1. The ch 1 does not count as a stitch. To change color, complete the joining sl st with the new color and carry the unused color up inside the pocket.
With MC, ch 13.
Rnd 1: sc in 2nd ch from hook and in the next 11 chs. Rotate and work along the other side of the chain: sc in each of the 12 chs. Join. (24 sc)
Rnds 2–16: sc in each st around. Join. (24 sc each round)
Color sequence:
– Rnds 1–3: MC
– Rnds 4–5: CC
– Rnds 6–7: MC
– Rnds 8–9: CC
– Rnds 10–11: MC
– Rnds 12–13: CC
– Rnds 14–16: MC
This gives three CC stripes and a solid MC band at the top.
Fasten off, leaving a 24 in (61.0 cm) tail in MC for sewing. Flatten the pocket so the base chain sits along the bottom edge. Each layer has 12 sts, giving 3 in (7.6 cm) across.
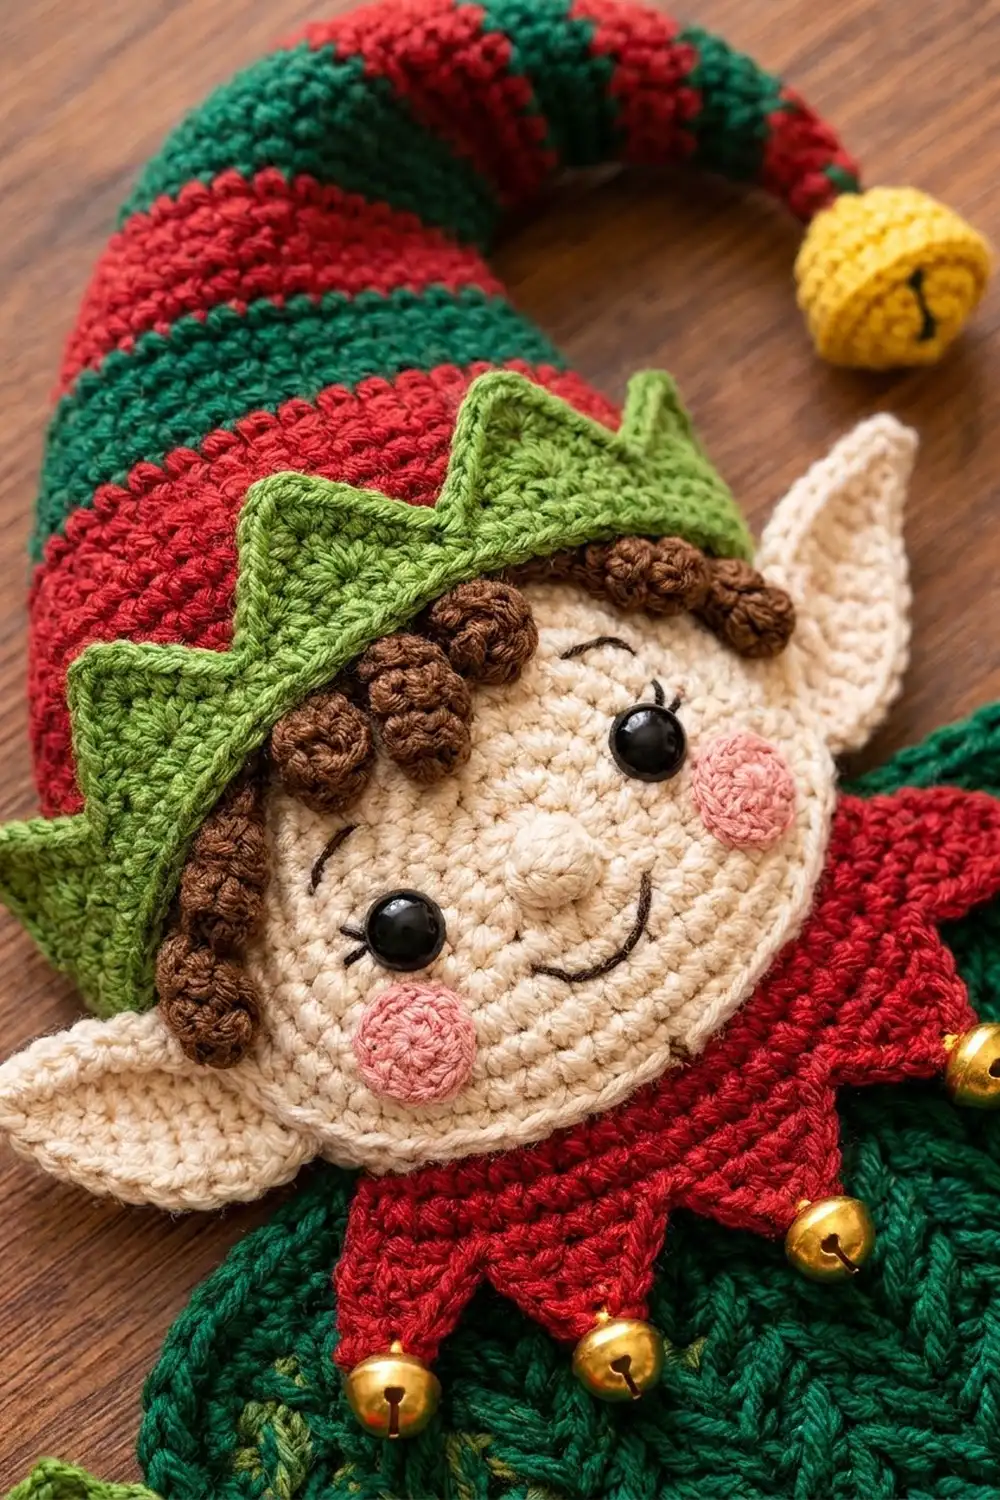
Elf Head and Appliqués
Face (cream)
Work in continuous rounds.
- Rnd 1: 6 sc in MR. (6)
- Rnd 2: 2 sc in each st. (12)
- Rnd 3: (sc, 2 sc in next) x 6. (18)
- Rnd 4: (sc in next 2, 2 sc in next) x 6. (24)
- Rnd 5: (sc in next 3, 2 sc in next) x 6. (30)
- Rnd 6: (sc in next 4, 2 sc in next) x 6. (36)
- Rnd 7: (sc in next 5, 2 sc in next) x 6. (42)
- Rnd 8: (sc in next 6, 2 sc in next) x 6. Sl st to the next st. (48)
The face is about 4 in (10.2 cm) across.
Fit the safety eyes between Rnds 4 and 5, 6 sts apart. For the nose, make a 3-dc cluster in cream just below the eyes. Use black to embroider a small smile and pink to stitch rosy cheeks.
Ears (cream, make 2)
- Row 1: ch 2, 2 sc in 2nd ch from hook, turn. (2)
- Row 2: ch 1, sc in first st, 2 sc in last st, turn. (3)
- Rows 3–6: ch 1, sc in each st to the last st, 2 sc in last st, turn. (4, 5, 6, 7)
Each ear is a pointed triangle about 1.5 in (3.8 cm) long.
Hat (dark green and red)
Work in continuous rounds, changing color every 2 rounds. Start with dark green (Rnds 1–2), then red (Rnds 3–4), and keep alternating. Rnds 21–22 are dark green.
- Rnd 1: 6 sc in MR. (6)
- Rnd 2: sc around. (6)
- Odd Rnds 3–21: increase 3 sts evenly in each round. (9, 12, 15, 18, 21, 24, 27, 30, 33, 36)
- Even Rnds 4–22: sc around with no increases. Each round keeps the count of the round before it.
Rnd 22 ends with 36 sts. The hat is 5.5 in (14.0 cm) tall, and flattened it is 18 sts, or 4.5 in (11.4 cm), across. Stuff the tip lightly. Bend the top 2 in (5.1 cm) toward the right and tack it in place.
Brim (leaf green)
- Row 1: ch 19, sc in 2nd ch from hook and in each ch across, turn. (18)
- Row 2 (points): *ch 4, sl st in 2nd ch from hook, sc in next ch, hdc in next ch, skip 2 sts on Row 1, sl st in next st*. Repeat from * to * 6 times.
That gives 6 points. Each repeat uses 3 base sts (6 x 3 = 18).
Collar (red)
- Row 1: ch 19, sc in 2nd ch from hook and in each ch across, turn. (18)
- Row 2: ch 1, (sc in next 2, 2 sc in next) x 6, turn. (24)
- Row 3 (points): *ch 5, sl st in 2nd ch from hook, sc in next ch, hdc in next ch, dc in next ch, skip 3 sts on Row 2, sl st in next st*. Repeat from * to * 6 times.
That gives 6 points. Each repeat uses 4 base sts (6 x 4 = 24). Sew a gold jingle bell to each tip.
Curls (brown, make 9)
Ch 7, 2 sc in 2nd ch from hook and in each ch across. (12 sc) The strip twists into a corkscrew.
Holly Leaves (leaf green, make 4)
Ch 8.
- First side: sc in 2nd ch from hook, hdc in next ch, (dc, picot) in next ch, dc in next ch, (dc, picot) in next ch, hdc in next ch, 3 sc in last ch.
- Second side: working along the other side of the chain, hdc, (dc, picot), dc, (dc, picot), hdc, sc.
Sl st to the first sc. Each leaf is about 2 in (5.1 cm) long and has 4 spikes.
Berries (red, make 6)
Work 5 sc in MR, pull the ring tight, and stuff the berry with its own tail. Sew the opening closed.
Bells (yellow, make 3)
- Rnd 1: 6 sc in MR. (6)
- Rnd 2: 2 sc in each st. (12)
- Rnds 3–5: sc around. (12)
- Rnd 6: (sc, 2 sc in next) x 6. (18)
- Rnd 7: sc around. (18)
- Rnd 8: (sc in next 2, 2 sc in next) x 6. (24)
- Rnd 9: sl st in BLO around.
Stuff the top lightly. Each bell is about 1.25 in (3.2 cm) tall.
Cords (make 2)
Hold 1 strand of red and 1 strand of dark green together and ch 41. Sl st in the back bump of the 2nd ch from hook and in each ch across. (40 sl st)
The cord measures 10 in (25.4 cm). Sew a bell to one end.
Make All Pieces
- Dark green: 1 panel, plus hat stripes and cords
- Red: 3 red pockets, plus collar, berries, hat stripes and cords
- Cream: 3 cream pockets, plus face and 2 ears
- Leaf green: brim and 4 leaves
- Yellow: 3 bells
- Brown: 9 curls
Pocket layout (front view):
Top row:     [ RED ]  [ CREAM ]  [ RED ]
Bottom row:  [ CREAM ] [ RED ]  [ CREAM ]
Joining
Method: whipstitch with the MC tail of each pocket, going through the outer pocket loops and the panel stitches underneath.
Stitch-to-stitch logic: the panel is 44 sts wide. Across that width, the layout is:
- 2-st margin
- 12-st pocket
- 2-st gap
- 12-st pocket
- 2-st gap
- 12-st pocket
- 2-st margin
That adds up to 2 + 12 + 2 + 12 + 2 + 12 + 2 = 44 sts.
Vertically:
- Rows 1–2: bottom margin
- Rows 3–18: bottom pockets
- Rows 19–20: gap
- Rows 21–36: top pockets
- Rows 37–56: 5 in (12.7 cm) of open panel for the elf
The 12 base sts of each pocket match 12 panel sts, and the 16 pocket rounds match 16 panel rows. Each stitch on the pocket edge therefore lines up with exactly one panel stitch or row.
Place markers, then pin each pocket in place. Sew down one side, across the bottom and up the other side. Leave the top open so the front layer can bow out into a curved cup.
Tension: pull each stitch just snug. Overtight seams pucker the panel and shrink the pocket opening.
Size checkpoint: the panel should still measure 11 x 14 in (27.9 x 35.6 cm) and lie flat.
Border
Border gauge: 4 sc per in and 4 rnds per in (2.5 cm).
Return the live loop to your hook with the RS facing.
Rnd 1: ch 1. Work the edges in this order, then join to the first sc:
- Left side: working down the row ends, sc in the end of Rows 55 through 2. (54 sc)
- Bottom-left corner: 3 sc in the first foundation ch.
- Bottom: sc in the next 42 foundation chs.
- Bottom-right corner: 3 sc in the last foundation ch.
- Right side: sc in the end of Rows 2 through 55. (54 sc)
- Top-right corner: 3 sc in the first st of Row 56.
- Top: sc in the next 42 sts.
- Top-left corner: 3 sc in the last st of Row 56.
Total: 204 sts. Counting both corner center sts on every side, the top and bottom have 46 sts each and the sides have 58 sts each.
Rnd 2: ch 1, sc in each st, with 3 sc in each corner center st. Join.
Total: 212 sts. Top and bottom 48 each, sides 60 each.
Rnd 3: repeat Rnd 2.
Total: 220 sts. Top and bottom 50 each, sides 62 each. Fasten off.
Why the math works: each round adds 2 sts to every side, one at each corner. At 4 sts per in, those 2 sts add 0.5 in (1.3 cm) of length. That matches the 0.25 in (0.6 cm) of depth each round adds at both ends of the side. After 3 rounds:
- Top and bottom: 50 sts ÷ 4 = 12.5 in (31.8 cm)
- Sides: 62 sts ÷ 4 = 15.5 in (39.4 cm)
Those are the target dimensions.
Attach the appliqués:
- Hat and brim: sew the flattened hat base across the top of the face. Sew the brim over the join so its points face down.
- Curls and ears: tuck the curls under the brim along the forehead. Sew the ears behind the face at Rnds 6–8 so they angle outward.
- Elf head: center the head on the panel so the bottom 1 in (2.5 cm) of the face overlaps the top border. Sew around the overlap.
- Collar: sew the collar’s Row 1 edge just under the chin, with the points falling onto the panel.
- Holly: sew 2 leaves and 3 berries over each top corner.
- Cords: tuck the plain end of each cord under its holly cluster and stitch it securely. Let the cord hang beside the side edge. Sew the large tip bell to the hat.
Final Blocking
- Lightly mist the whole caddy with water.
- Lay it RS up on a blocking mat.
- Pin the panel to 12.5 x 15.5 in (31.8 x 39.4 cm), with pins every 2 in (5.1 cm).
- Shape each pocket opening into a gentle curve and slip a folded cloth inside to hold it.
- Smooth the brim and collar points flat.
- Let it dry completely, then unpin.
Final Quality-Control Checklist
- [ ] The panel measures 12.5 x 15.5 in (31.8 x 39.4 cm)
- [ ] The border counts are 50 sts on the top and bottom and 62 sts on each side
- [ ] All 6 pockets measure 3 x 4 in (7.6 x 10.2 cm) and follow the checkerboard
- [ ] The pocket seams are secure and every top edge is open
- [ ] The elf head is centered and the collar bells are firmly attached
- [ ] The cords hang straight and the bells are secure
- [ ] All yarn ends are woven in
Troubleshooting
- Panel is curling: your ksc is too tight. Loosen it, or go up a hook size for the RS rows only.
- V columns are hard to see: make sure you insert the hook between the two legs of the stitch, not under the top loops.
- Stripes have jogs: join every round with a sl st, and change color on the joining sl st.
- Pocket sags under a phone: add a second line of whipstitch along the bottom edge.
- Border ruffles: you have extra sts on a side. Recount against 46/58, 48/60 and 50/62.
- Hat tip won’t stay bent: add one more tack stitch where the tip touches the hat.
Care
Spot clean, or hand wash in cool water. Lay flat to dry and reshape the pockets while damp.
Final Notes
The measurement chain is:
- Gauge: 16 sts and 16 rows per 4 in (10.2 cm)
- Panel before border: 44 sts x 56 rows = 11 x 14 in (27.9 x 35.6 cm)
- Pockets: six 12-st x 16-rnd pockets at 3 x 4 in (7.6 x 10.2 cm), matched stitch for stitch to the panel
- Border: 3 rounds adding 0.75 in (1.9 cm) per side, for 12.5 x 15.5 in (31.8 x 39.4 cm)
If every checkpoint matches, the elf will sit neatly on top and the caddy will hang straight over the chair arm.
Happy crocheting!