
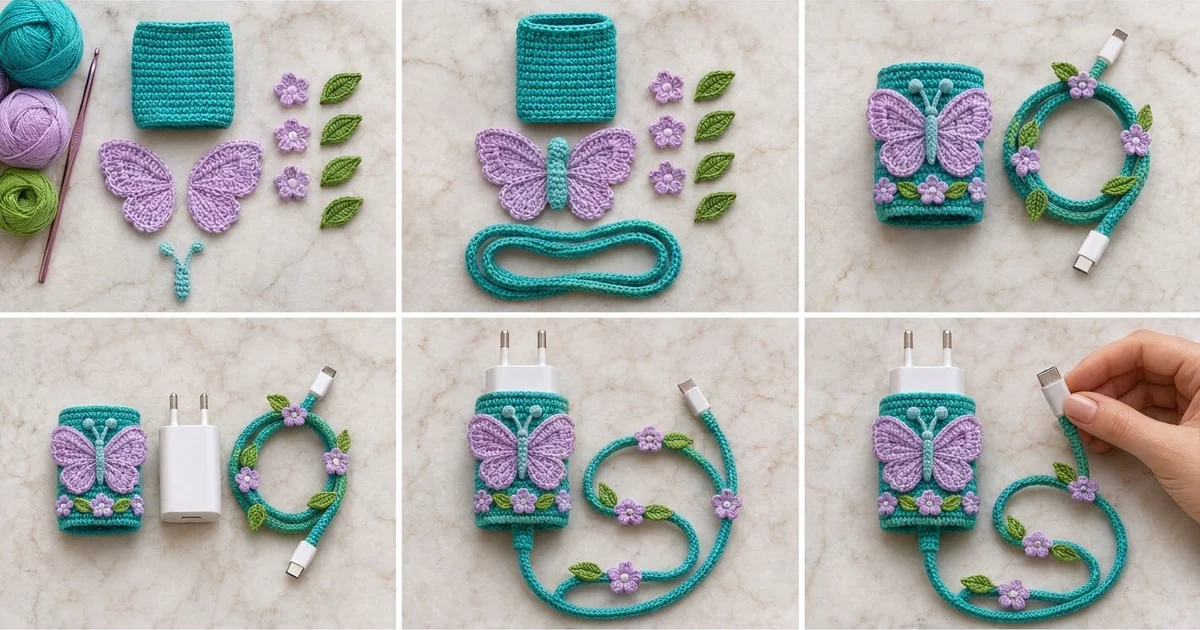
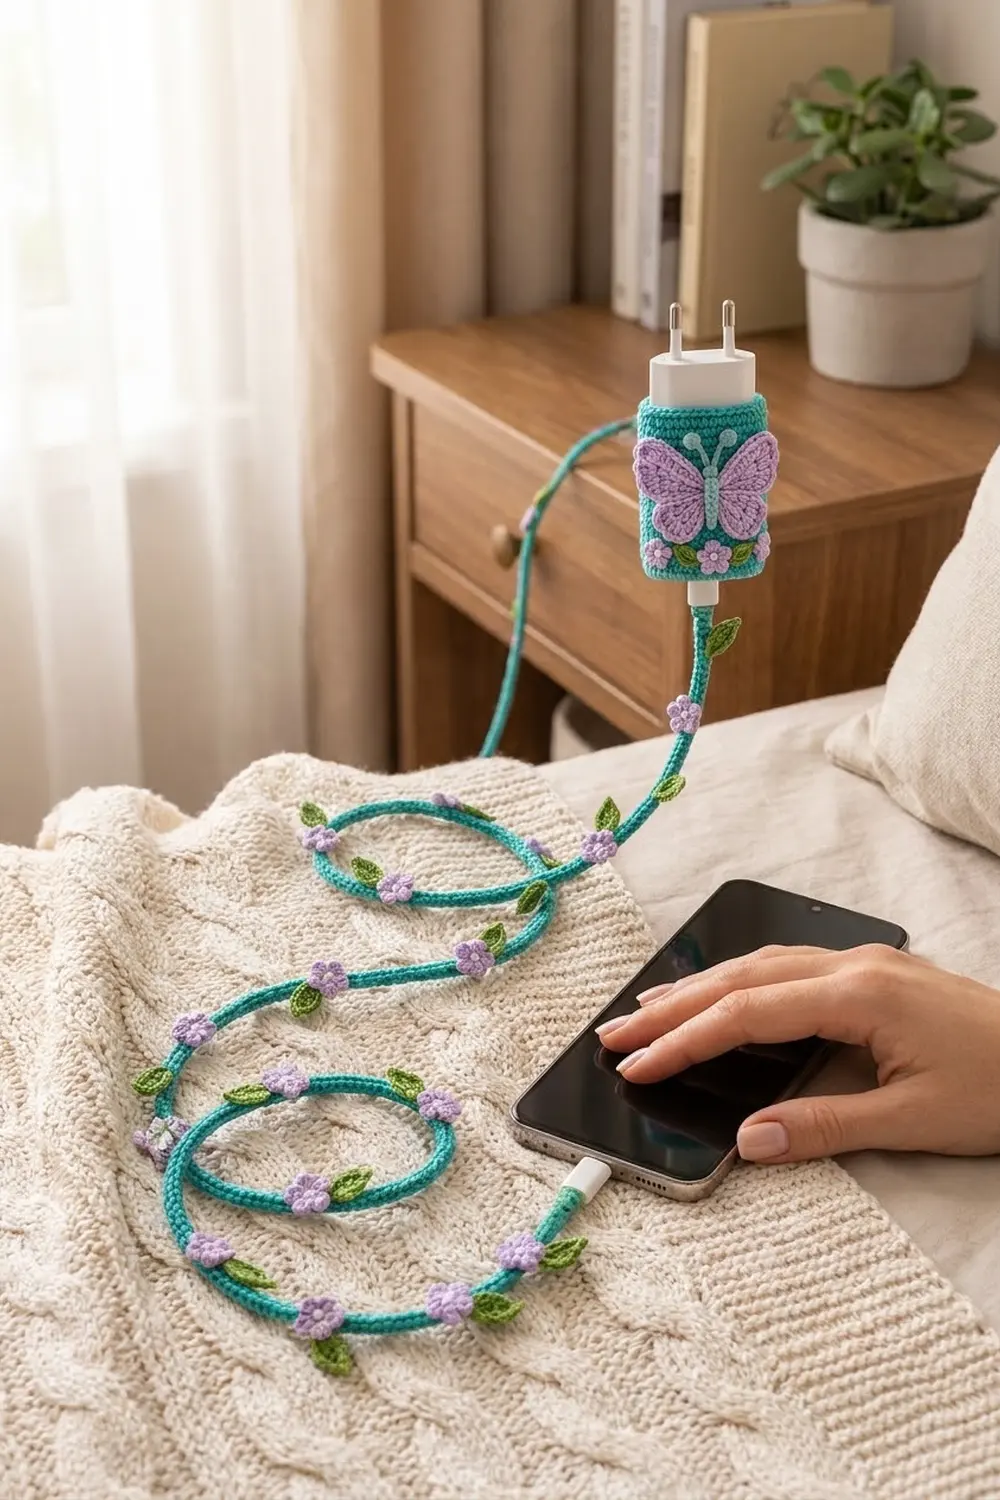
The Lilac Flutter set turns a plain white wall charger and its cable into a little garden. A dense teal sleeve fits snugly around the charger body, and a raised lilac butterfly spreads across the front. A row of tiny flowers and leaves runs along the bottom. A matching teal cover wraps the USB-C cable, with more flowers and leaves sewn along its length.
The colors are teal, lilac, light aqua, white, and leaf green. The style is soft and three-dimensional: firm single crochet for the base, fanned stitches for the wings, and small appliqués that sit on top.
This pattern uses US crochet terms. The finished sleeve is 3 in (7.6 cm) wide laid flat, 3 in (7.6 cm) tall and 6 in (15.2 cm) around. The cable cover is 36 in (91.4 cm) long.
You crochet the sleeve as a tube in joined rounds and add a border at both openings. Next you crochet the cable cover directly around the cable and make the appliqués. Finally you sew everything in place using a stitch-based layout.
Finished Size and Construction
- Sleeve size: 3 in (7.6 cm) wide flat x 3 in (7.6 cm) tall; 6 in (15.2 cm) around
- Cable cover: 36 in (91.4 cm) long, about 0.3 in (0.8 cm) thick
- Skill level: Advanced beginner
- Terminology: US
- Yarn weight: Sport (2), cotton
- Hook: 2.75 mm (US C-2)
- Number of pieces: 23 (sleeve, cable cover, 2 wings, 1 body, 2 antennae, 8 flowers, 8 leaves)
- Layout: butterfly centered on the sleeve front, flower row below it, five flower clusters on the cable
- Sleeve before border: 3 in (7.6 cm) wide flat x 2.5 in (6.4 cm) tall
- Border depth: 0.25 in (0.6 cm) at each opening
- Butterfly: 2.75 in (7.0 cm) wide x 2 in (5.1 cm) tall
Materials
Use a smooth, mercerized sport-weight cotton with about 155 m per 50 g. Cotton holds its shape, doesn’t fuzz much with daily handling, and shows stitches clearly.
- Teal (main): 20 g / 62 m
- Lilac (wings, petals): 8 g / 25 m
- Light aqua (body, antennae): 2 g / 6 m
- White (flower centers): 2 g / 6 m
- Leaf green (leaves): 4 g / 12 m
All quantities include extra yarn for a gauge test and sewing tails.
Tools: 2.75 mm (US C-2) hook, tapestry needle, 4 stitch markers, scissors, tape measure, rust-proof pins, and your wall charger with a USB-C cable about 1 m long.
Abbreviations (US Terms)
- ch – chain
- sl st – slip stitch
- sc – single crochet
- hdc – half double crochet
- dc – double crochet
- tr – treble crochet
- rev sc – reverse single crochet (crab stitch)
- st(s) – stitch(es)
- rnd(s) – round(s)
Puff stitch (puff): (Yo, insert hook in st, yo, pull up a loop) 3 times in the same st, yo, pull through all 7 loops.
Cable wrap stitch (cws): Hold the cable horizontally with the working yarn behind it. Bring the hook over the top of the cable to the back, yo, and draw the loop under the cable to the front (2 loops on hook). Yo and pull through both loops. Each cws wraps the cable once.
Gauge and Checkpoints
Gauge: 24 sc and 24 rnds = 4 in (10.2 cm) in sc worked in the round, or 6 sts and 6 rnds per 1 in (2.5 cm).
Make the sleeve first. It is the piece that has to fit, and its first rounds will show whether your gauge is right.
- After Rnd 1: the ring laid flat is 3 in (7.6 cm) wide.
- After Rnd 6: height is 1 in (2.5 cm).
- After Rnd 15: height is 2.5 in (6.4 cm).
- After the border: height is 3 in (7.6 cm).
- Cable cover: 8 cws = 1 in (2.5 cm).
If too big: start again with a 2.5 mm hook. If too small: start again with a 3 mm hook. Don’t change the stitch count to fix gauge, because the appliqué layout is mapped to 18 sts across the front.
Fit check: a 6 in (15.2 cm) sleeve fits chargers 5.5 to 6 in (14.0 to 15.2 cm) around. To resize, add or remove sts in multiples of 2.
Sleeve
Worked in teal in joined rounds. The join seam sits at the center back.
Foundation: Ch 36 loosely. Sl st in the first ch to form a ring, making sure the chain isn’t twisted.
Rnd 1: Ch 1, sc in each ch around, sl st in first sc. (36 sc)
Rnds 2–15: Ch 1, sc in each st around, join. (36 sc each rnd)
Don’t fasten off. Go to the Border section to finish the top opening.
Lay the tube flat with the seam at center back. The front face is 18 sts wide and 15 rnds tall.
Butterfly Wings (Make 2)
Worked in lilac. Each wing is one piece: an upper lobe and a lower lobe that meet at a narrow base point.
Upper lobe: Ch 7. Sc in 2nd ch from hook, hdc in next ch, dc in next 2 ch, tr in next ch, 7 tr in last ch. Working along the opposite side of the chain: tr in next ch, dc in next 2 ch, hdc in next ch, sc in last ch. Sl st in first sc. (17 sts: 5 + 7 + 5)
This sl st is the base point.
Lower lobe: Ch 5. Work 6 dc in 2nd ch from hook (the tip), dc in next ch, hdc in next ch, sc in last ch, sl st in base point. Ch 1. Working along the opposite side of the same 3 ch toward the tip: sc, hdc, dc, then sl st in the first tip dc. (12 sts: 3 + 6 + 3)
Edging rnd: Ch 1. Work 2 sc in each tip st and 1 sc in each side st around both lobes, with a sl st into the base point each time you pass it.
- Lower lobe: 3 + 12 + 3 = 18 sc
- Upper lobe: 5 + 14 + 5 = 24 sc
- Total: 42 sc
Fasten off, leaving a 10 in (25.4 cm) tail. Each wing is 1.25 in (3.2 cm) wide x 2 in (5.1 cm) tall. Flip the second wing over to make the mirror image.
Butterfly Body and Antennae
Body (light aqua): Ch 11.
Row 1: Sc in 2nd ch from hook and each ch across. (10 sc)
Rows 2–3: Ch 1, turn, sc across. (10 sc each row)
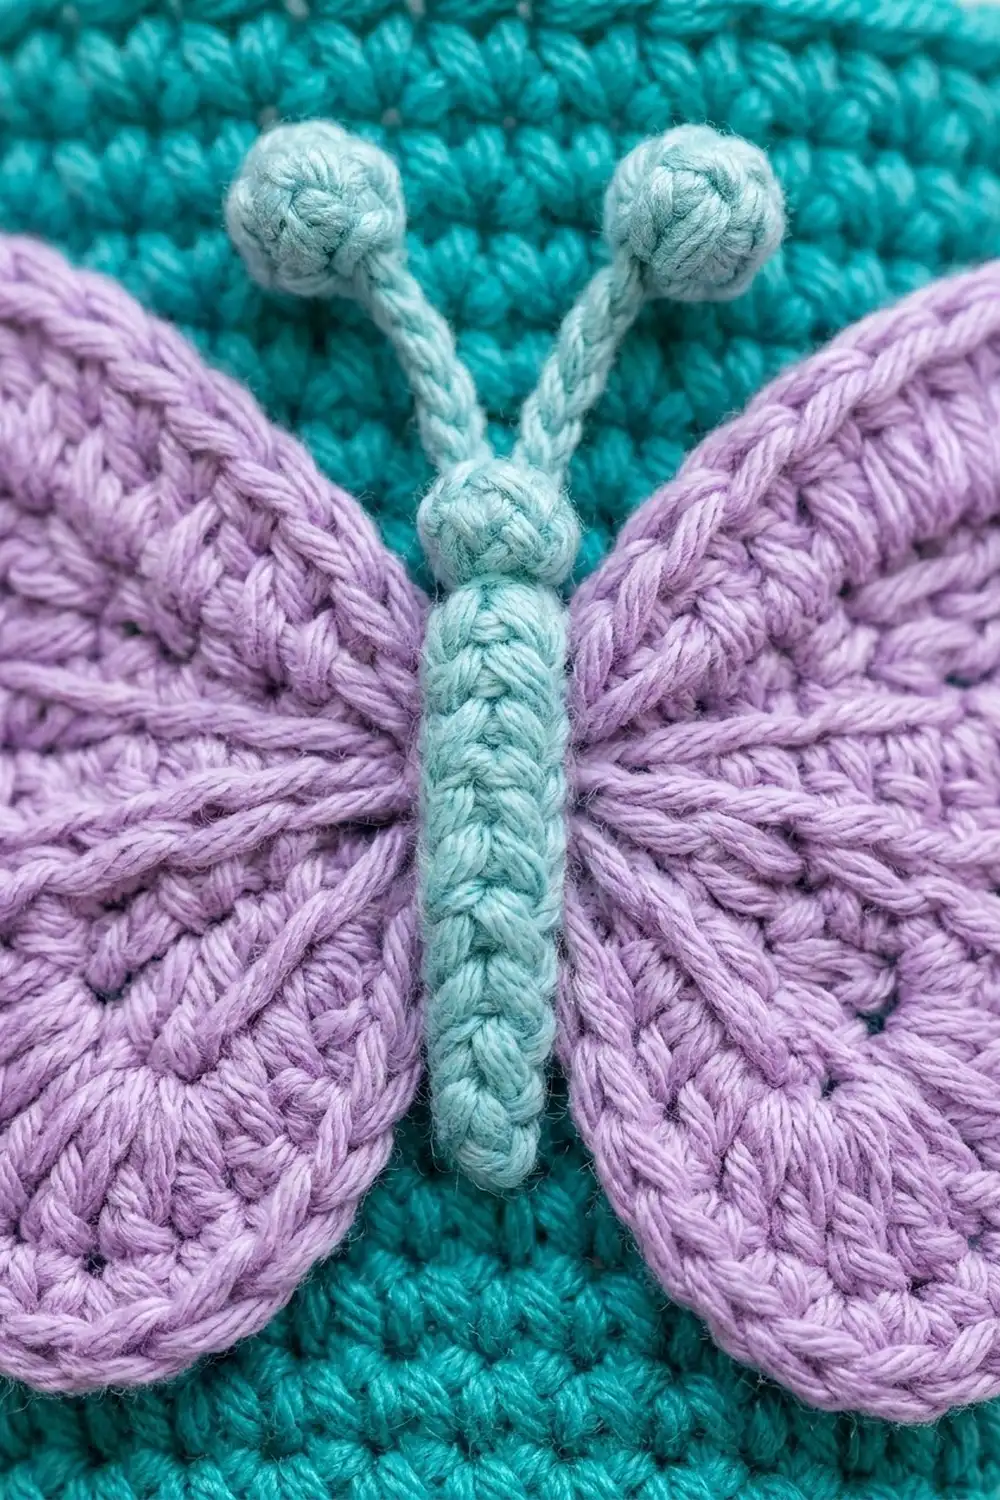
Fasten off, leaving a 12 in (30.5 cm) tail. Roll the strip lengthwise and whipstitch the long edges together to make a firm tube about 1.75 in (4.4 cm) long. Wrap the tail tightly around the body at 3 evenly spaced points to make the segments. Round off one end with two small stitches for the head.
Antennae (light aqua, make 2): Ch 5, puff in 2nd ch from hook, sl st in each of next 3 ch. (1 puff + 3 sl st) Each antenna is about 0.5 in (1.3 cm) long.
Flowers (Make 8)
Rnd 1 (white): In a magic ring: ch 1, 5 sc, sl st in first sc. (5 sc) Pull closed and fasten off.
Rnd 2 (lilac): Join lilac with a sl st in any sc. *(Ch 2, 2 dc, ch 2, sl st) in same sc, sl st in next sc; rep from * 4 more times. (5 petals, 10 dc)
Fasten off, leaving an 8 in (20.3 cm) tail. Each flower is 0.6 in (1.5 cm) across.
Leaves (Make 8)
Worked in leaf green. Ch 6. Sc in 2nd ch from hook, hdc, dc, hdc, sc in last ch. (5 sts) Ch 2 for the base. Working along the opposite side of the chain: sc, hdc, dc, hdc, sc. (5 sts) Ch 1, sl st in first sc for the pointed tip. (10 sts)
Fasten off, leaving an 8 in (20.3 cm) tail. Each leaf is 0.75 in (1.9 cm) long x 0.4 in (1.0 cm) wide.
Cable Cover
Worked in teal directly around the cable. Start 0.75 in (1.9 cm) from the charger-end connector so the plug still goes all the way in.
Put a slip knot on the hook and lay the yarn tail along the cable so the first stitches cover it. Work cws along the cable. Every 10 sts, slide the stitches together so no cable shows. The chain spine will twist into a gentle spiral on its own; let it.
- Checkpoint: every 48 cws = 6 in (15.2 cm).
- Total: 288 cws = 36 in (91.4 cm).
Stop 0.75 in (1.9 cm) from the other connector. Fasten off, weave the tail back through the last 6 sts of the spine, and secure it with two small stitches.
Make All Pieces
| Color | Pieces |
|---|---|
| Teal | 1 sleeve, 1 cable cover |
| Lilac | 2 wings, petals of 8 flowers |
| Light aqua | 1 body, 2 antennae |
| White | 8 flower centers |
| Leaf green | 8 leaves |
Sleeve front layout (18 sts wide, bottom to top):
Top border    | ..antenna.. | ........ | ..antenna.. |
Rnds 9-15     | upper wing  | body     | upper wing  |
Rnds 5-8      | lower wing  | body     | lower wing  |
Rnds 1-4      | leaf | flower | flower | flower | leaf |
Sts:            1 ....... 8 | 9-10 | 11 ....... 18
Cable layout (measured from the charger end of the cover):
- 8 in (20.3 cm), cws 64: flower + leaf
- 14 in (35.6 cm), cws 112: leaf + flower + leaf
- 20 in (50.8 cm), cws 160: flower + leaf
- 26 in (66.0 cm), cws 208: leaf + flower
- 32 in (81.3 cm), cws 256: flower + leaf
The sleeve gets 3 flowers and 2 leaves and the cable gets 5 flowers and 6 leaves, for 8 of each.
Joining
Sew each appliqué on with its own tail, using small whipstitches around the outer edge. Catch only the surface of the sleeve or the spine of the cable cover so the stitches don’t show on the other side.
Placement on the sleeve, stitch by stitch:
- Slide the sleeve onto the charger or a rolled sock of the same size.
- Body: centered over sts 9–10, head on Rnd 14, tail on Rnd 5.
- Wings: base points tucked under the body at Rnd 9. The left wing covers sts 1–8 and the right wing covers sts 11–18. Upper lobes reach the top border, and the lower lobe tips stop at Rnd 5.
- Antennae: ends tucked under the head, puffs angled outward onto the top border.
- Flowers: centers on Rnd 2 or 3, at st 5, between sts 9 and 10, and at st 14.
- Leaves: bases under the outer flowers, tips angled outward over sts 1–2 and 17–18.
On the cable: sew each flower through the spine on both sides, with the leaf bases tucked under the petals.
Tension: sew snugly but don’t pull. If the fabric puckers, take the stitches out and sew again more loosely.
Size checkpoint: the sleeve still lies flat at 3 in (7.6 cm) wide, and the butterfly measures 2.75 in (7.0 cm) across.
Border
Border gauge: same as the body, 6 sts per 1 in (2.5 cm).
Top opening (continue from Rnd 15):
- Rnd A (trim): Ch 1, sc in each st, join. (36 sc = 36 worked 1-per-stitch + 0 added) Front face 18, back face 18.
- Rnd B: Ch 1, rev sc in each st, join. (36 rev sc) Front face 18, back face 18.
Bottom opening: Join teal in the opposite loops of the foundation chain at center back.
- Rnd A (trim): Ch 1, sc in each foundation ch, join. (36 sc = 36 worked 1-per-stitch + 0 added) Front face 18, back face 18.
- Rnd B: Ch 1, rev sc in each st, join. (36 rev sc)
Fasten off and weave in the ends.
Why the math works: the tube has no corners. The fold lines fall between stitches, so each face is exactly 18 sts and no corner stitches are added. The border keeps all 36 sts, so it matches the 6 in (15.2 cm) body and doesn’t flare or pull in. Each border adds 0.25 in (0.6 cm), so the 2.5 in (6.4 cm) body becomes 3 in (7.6 cm) tall.
Final Blocking
- Lightly mist the sleeve and appliqués with water.
- Slide the sleeve over a rolled cloth 3 in (7.6 cm) wide.
- Pin each wing tip flat and shape the upper lobes into smooth curves.
- Press the petals open with your fingertips.
- Let everything dry for at least 6 hours, away from heat.
- Let the cable cover dry lying straight. Don’t flatten the spiral.
- Remove the pins and measure again.
Final Quality-Control Checklist
- Every sleeve round has 36 sts, with 15 body rnds and 2 border rnds at each end.
- Sleeve is 3 in (7.6 cm) wide and 3 in (7.6 cm) tall, with the seam at center back.
- Each wing has 42 edging sc and is 1.25 x 2 in (3.2 x 5.1 cm).
- Body is centered over sts 9–10.
- All eight flowers and eight leaves are sewn securely.
- Cable cover has 288 cws over 36 in (91.4 cm) with no gaps.
- Both connector ends are clear by 0.75 in (1.9 cm).
Troubleshooting
- Sleeve too loose or too tight: change the hook size, or remove or add 2 sts per round.
- Foundation edge is tight: make the chain with a hook one size larger.
- Wings curl: check that you worked 2 sc in every tip st, then pin flat while blocking.
- Cable shows between stitches: push the stitches together more often.
- Flowers look flat: pull the magic ring tighter before working the petals.
Care
Hand wash in cool water and lay flat to dry. Unplug the charger before putting on or removing the sleeve, and never let yarn cover the prongs or block any vents.
Final Notes
Every measurement in this set follows from the gauge. At 6 sts per 1 in (2.5 cm), the 36-st ring is 6 in (15.2 cm) around and lies flat at 3 in (7.6 cm). Fifteen rounds give 2.5 in (6.4 cm), and the two 0.25 in (0.6 cm) borders bring the sleeve to 3 in (7.6 cm) tall. The 18-st front face holds the 2.75 in (7.0 cm) butterfly and a row of three flowers. On the cable, 8 cws per 1 in (2.5 cm) gives 288 cws for 36 in (91.4 cm).
Happy crocheting!