
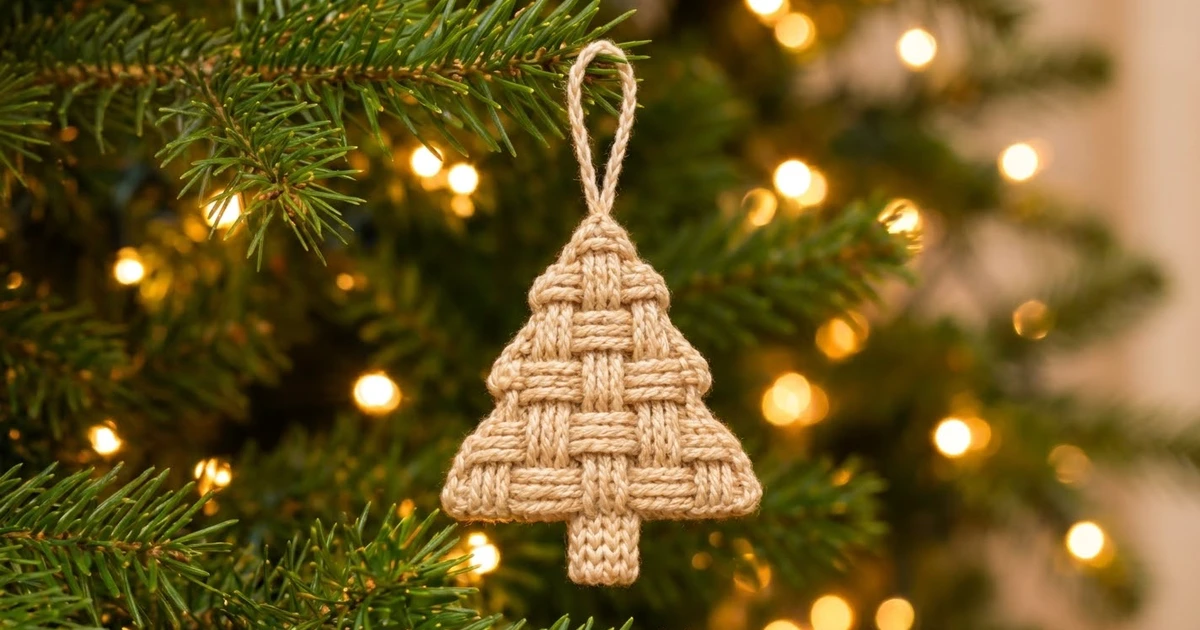
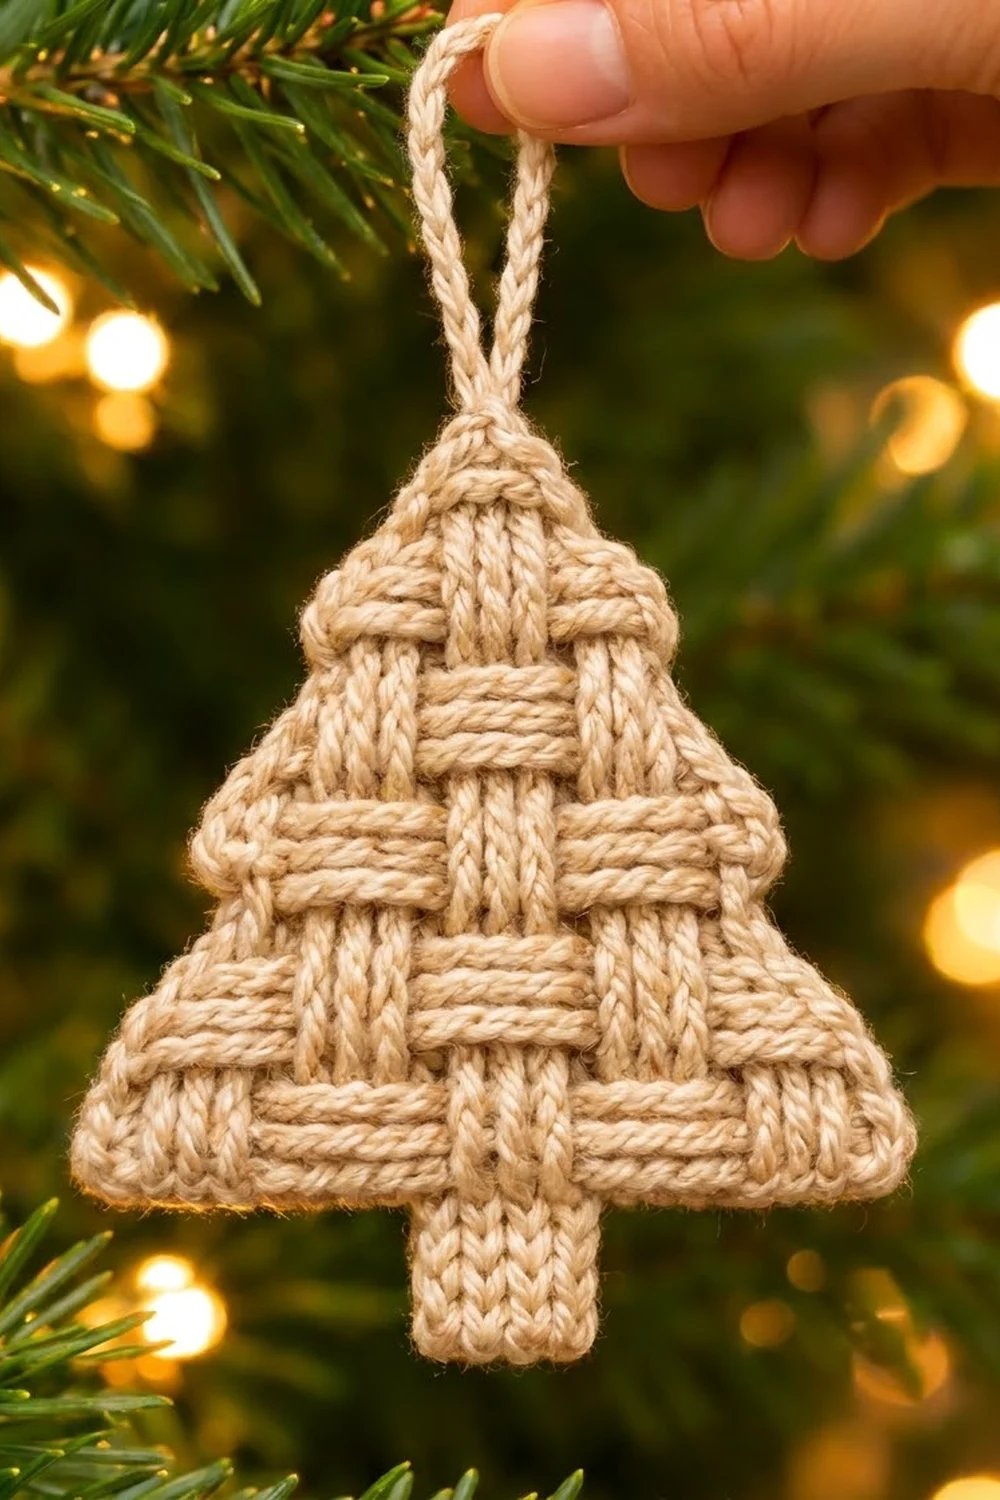
This ornament is a small, textured Christmas tree worked as one solid piece. Raised post-stitch columns weave over and under recessed blocks, so it looks like a tiny woven basket shaped like a tree. A neat trunk and a slim hanging loop finish it off.
The sample is a single cream/oatmeal shade, which keeps the woven texture as the focus. It fits rustic, Scandinavian and farmhouse holiday decor. It also works well as a gift-tag topper. Any light neutral will show the stitch shadows well.
The pattern uses US crochet terms. The finished ornament measures 3.8 in (9.7 cm) wide by 5.2 in (13.2 cm) tall without the loop. The hanging loop adds about 2 in (5.1 cm).
You work the tree body flat from the base up in front and back post double crochet. The sides are shaped with edge decreases every two rows. After that, you work the trunk downward into the foundation chain, add one round of single crochet edging, and chain the hanging loop from the tip. No sewing is needed.
Finished Size and Construction
- Finished size: 3.8 in (9.7 cm) wide x 5.2 in (13.2 cm) tall, plus a 2 in (5.1 cm) loop
- Skill level: Intermediate (post stitches, edge decreases)
- Terminology: US
- Yarn weight: DK / light worsted (#3)
- Hook: 3.5 mm (E-4)
- Number of pieces: 1
- Layout: Single tree, worked flat, no joining
- Tree body before edging: 3.6 in (9.1 cm) wide x 4.0 in (10.2 cm) tall
- Trunk: 0.8 in (2.0 cm) wide x 1.0 in (2.5 cm) tall
- Size before edging: 3.6 in (9.1 cm) x 5.0 in (12.7 cm)
- Edging depth: 0.1 in (0.3 cm) per side, one round
Materials
Yarn: Choose a smooth, plied DK yarn with good stitch definition. Cotton or a cotton-acrylic blend makes the crispest basketweave, and wool blends give a softer look. Avoid fuzzy or very loosely plied yarns, because they blur the woven blocks.
- Cream / oatmeal: 15 g, approximately 35 m (38 yd)
This quantity includes a margin of about 25% for your gauge swatch and tails.
Tools:
- 3.5 mm (E-4) crochet hook
- Tapestry needle
- Scissors
- 2 stitch markers
- Rust-proof pins and a small blocking mat or folded towel
- Spray bottle with cool water
Abbreviations (US Terms)
- ch – chain
- sl st – slip stitch
- sc – single crochet
- dc – double crochet
- FPdc – front post double crochet: yo, insert hook from front to back to front around the post of the stitch, complete as a dc
- BPdc – back post double crochet: yo, insert hook from back to front to back around the post of the stitch, complete as a dc
- sc2tog / sc3tog – single crochet 2 or 3 together
- st(s) – stitch(es)
- RS / WS – right side / wrong side
- yo – yarn over
Special stitches
- dc3tog (edge decrease): [Yo, insert hook in next st, yo, pull up a loop, yo, draw through 2 loops] 3 times, yo, draw through all 4 loops on hook. This turns 3 sts into 1.
- Waistcoat stitch (wst): Insert hook between the front and back legs of the sc below (through the center of the “V”, not under the top loops), yo, pull up a loop, yo, draw through both loops. It stacks into vertical V columns that look knitted.
Turning chains: The ch-2 and ch-1 at the start of rows do not count as stitches.
Gauge and Checkpoints
Gauge in basketweave: 5 sts = 1 in (2.5 cm), and 5 dc rows = 2 in (5.1 cm), which is 2.5 rows per inch.
Test first: Work the foundation and Rows 1–3 of the tree body. Before you continue, measure:
- Width: 3.6 in (9.1 cm) across 18 sts
- Height: 1.2 in (3.0 cm) across 3 rows
Checkpoints through the piece:
- After Row 9: 3.6 in (9.1 cm) tall
- After Row 11 (tip): 4.0 in (10.2 cm) tall
- After trunk: 5.0 in (12.7 cm) total height
- After edging: 3.8 in x 5.2 in (9.7 cm x 13.2 cm)
If your piece is too big (more than about 3.8 in / 9.7 cm wide at Row 3), go down to a 3.25 mm hook. If it is too small (under about 3.4 in / 8.6 cm), go up to a 3.75 mm hook. Post stitches tend to tighten as you go, so keep your yarn overs relaxed.
Tree Body
You work the body in rows from the base up. Each “band” of the basketweave is 2 rows tall. The first row of every band from Band B onward decreases 2 sts at each edge, which removes 4 sts per band. Because each band loses half a block on each side, the blocks in each band sit half a block offset from the band below, and that offset creates the woven look.
Every row has one plain edge st at each end. The other sts are pattern sts in blocks of 4.
Foundation: Ch 20.
Row 1 (WS): Dc in 3rd ch from hook and in each ch across, turn. (18 sts)
Place a marker in the free loop of the 8th and 11th foundation ch, counting from the start of the row. You will work the trunk between the markers later.
Band A (18 sts, 4 blocks)
Row 2 (RS): Ch 2, dc in first st, FPdc in next 4 sts, BPdc in next 4 sts; rep from * once, dc in last st, turn. (18 sts: 1 edge + 16 pattern + 1 edge)*
Row 3 (WS): Ch 2, dc in first st, FPdc in next 4 sts, BPdc in next 4 sts; rep from * once, dc in last st, turn. (18 sts)*
On the WS, an FPdc pushes its post toward the WS, so the sts that were recessed on Row 2 stay recessed on the RS. The BPdc sts push forward, so they stack onto the raised columns. With an even number of blocks, the WS row wording matches the RS row.
Checkpoint: 3.6 in (9.1 cm) wide x 1.2 in (3.0 cm) tall.
Band B (14 sts, 3 blocks)
Row 4 (RS): Ch 2, dc3tog over first 3 sts, BPdc in next 4 sts, FPdc in next 4 sts, BPdc in next 4 sts, dc3tog over last 3 sts, turn. (14 sts: 1 + 12 + 1)
Row 5 (WS): Ch 2, dc in first st, FPdc in next 4 sts, BPdc in next 4 sts, FPdc in next 4 sts, dc in last st, turn. (14 sts)
Band C (10 sts, 2 blocks)
Row 6 (RS): Ch 2, dc3tog over first 3 sts, FPdc in next 4 sts, BPdc in next 4 sts, dc3tog over last 3 sts, turn. (10 sts: 1 + 8 + 1)
Row 7 (WS): Ch 2, dc in first st, FPdc in next 4 sts, BPdc in next 4 sts, dc in last st, turn. (10 sts)
Band D (6 sts, 1 block)
Row 8 (RS): Ch 2, dc3tog over first 3 sts, FPdc in next 4 sts, dc3tog over last 3 sts, turn. (6 sts: 1 + 4 + 1)
Row 9 (WS): Ch 2, dc in first st, BPdc in next 4 sts, dc in last st, turn. (6 sts)
The top block is a raised column on the RS, which gives the tree a strong center peak.
Checkpoint: 3.6 in (9.1 cm) tall from the foundation.
Tip
Row 10 (RS): Ch 1, sc2tog 3 times, turn. (3 sts)
Row 11 (WS): Ch 1, sc3tog. (1 st)
Fasten off and weave in the end.
Checkpoint: Body measures 4.0 in (10.2 cm) tall and 3.6 in (9.1 cm) wide at the base.
Stitch-count summary: 18, 18, 18, 14, 14, 10, 10, 6, 6, 3, 1.
Trunk
You work the trunk downward into the free loops of the foundation chain, centered under the tree.
Row T1: With the RS facing and the foundation edge at the top, join yarn in the marked free loop (8th ch). Ch 1, sc in same loop and in next 3 free loops, ending at the second marker, turn. (4 sts) Remove the markers.
Rows T2–T5: Ch 1, wst in each st across, turn. (4 sts)
Fasten off at the end of Row T5.
That leaves 7 free loops on each side of the trunk (7 + 4 + 7 = 18, which matches the foundation).
Checkpoint: The trunk measures 0.8 in (2.0 cm) wide x 1.0 in (2.5 cm) tall. The total piece measures 5.0 in (12.7 cm) tall.
Edging and Hanging Loop
Edging gauge: 5 sc = 1 in (2.5 cm). Each dc row is 0.4 in (1.0 cm) tall, so it takes 2 sc per dc row end. Each sc or wst row end takes 1 sc.
In the counts below, corner groups are listed once and not repeated in the side counts.
Round 1 (RS): With the RS facing, join yarn in the tip st (top of the sc3tog). Ch 1 and work:
- Tip: 3 sc in the tip st. (3)
- Left slope: 1 sc in each of the 2 sc row ends (Rows 11 and 10), then 2 sc in each of the 9 dc row ends (Rows 9–1). (20)
- Left base corner: 3 sc in the first foundation free loop. (3)
- Base, left of trunk: 1 sc in each of the next 6 free loops. (6)
- Trunk left side: 1 sc in each of the 5 trunk row ends. (5)
- Trunk bottom: 3 sc in the first st, 1 sc in each of the next 2 sts, 3 sc in the last st. (8)
- Trunk right side: 1 sc in each of the 5 row ends. (5)
- Base, right of trunk: 1 sc in each of the next 6 free loops. (6)
- Right base corner: 3 sc in the last foundation free loop. (3)
- Right slope: 2 sc in each of the 9 dc row ends, then 1 sc in each of the 2 sc row ends. (20)
Sl st to the first sc. (79 sc total)
Why the math works: Each slope rises 4.0 in (10.2 cm). At 5 rows per 2 in, the 9 dc rows equal 3.6 in (9.1 cm), and 2 sc per dc row end gives 18 sc. That is exactly 5 sc per inch. The 2 tip sc rows add 0.4 in (1.0 cm) and get 2 sc.
Along the base, each section gets 1 sc per free loop. With 6 loops on each side plus the corner loops, every one of the 7 + 7 outer foundation loops is covered once. Because the slopes are slightly longer than their vertical rise, the 20 sc are a little snug. This is intentional: it pulls the stepped decrease edges into a smooth straight line.
Checkpoint: 3.8 in (9.7 cm) wide x 5.2 in (13.2 cm) tall.
Hanging loop: Sl st into the center sc of the 3-sc tip group. Ch 24, then sl st into the same center sc. Turn the loop and sl st into the back bump of each of the 24 ch. Sl st into the tip again. (24 sl st)
The second pass of slip stitches gives the chain its firm, twisted cord look. The loop hangs about 2 in (5.1 cm) tall. Fasten off and weave in all ends along the edging.
Final Blocking
- Lightly mist the ornament with cool water until it is damp but not soaked.
- Lay it RS up on the blocking mat.
- Pin the two base corners 3.8 in (9.7 cm) apart.
- Pin the tip so the height from the base edge to the tip is 4.2 in (10.7 cm). With the 1.0 in (2.5 cm) trunk, that gives the 5.2 in (13.2 cm) total.
- Pin the trunk straight and square, centered under the tip.
- Use your fingertips to nudge the raised columns upright and the recessed blocks flat. Don’t press or iron, because that would flatten the texture.
- Pin the loop straight up so it dries without a kink.
- Let it dry completely before you unpin it.
Final Quality-Control Checklist
- The stitch counts were 18, 14, 10 and 6 for the four bands.
- Each band’s blocks sit half a block offset from the band below.
- The top block is a raised column on the RS.
- Both slopes are the same length and have matching edging (20 sc each).
- The trunk is centered, with 7 base sts on each side.
- The edging round totals 79 sc and lies flat without ruffling.
- The finished size is 3.8 in x 5.2 in (9.7 cm x 13.2 cm).
- The loop is firm, centered and about 2 in (5.1 cm) tall.
- All ends are woven in invisibly.
Troubleshooting
The blocks don’t alternate. All the columns look raised. On the WS rows you probably mirrored the stitches instead of following the written sequence. Check Rows 3, 5, 7 and 9 against the pattern.
The piece curls or cups. Post stitches pull the fabric in. Go up a hook size for the post rows only, or loosen your yarn overs.
The edges are too jagged after the decreases. Make sure each dc3tog is worked over the edge st plus the next 2 sts, not just 2 sts. The edging smooths out small steps.
The edging ruffles. You may be working 3 sc into some dc row ends. Stick to exactly 2 per dc row end.
The edging pulls in or puckers. Work the edging round with a hook half a size larger.
The trunk is off-center. Count the free loops: there should be exactly 7 on each side of the trunk.
The loop is floppy. Work the second sl st pass firmly, or add a third pass.
Care
Hand wash in cool water with a mild soap, gently press the water out in a towel, and reshape it to dry flat. Store it flat or hanging so the texture doesn’t get crushed.
Final Notes
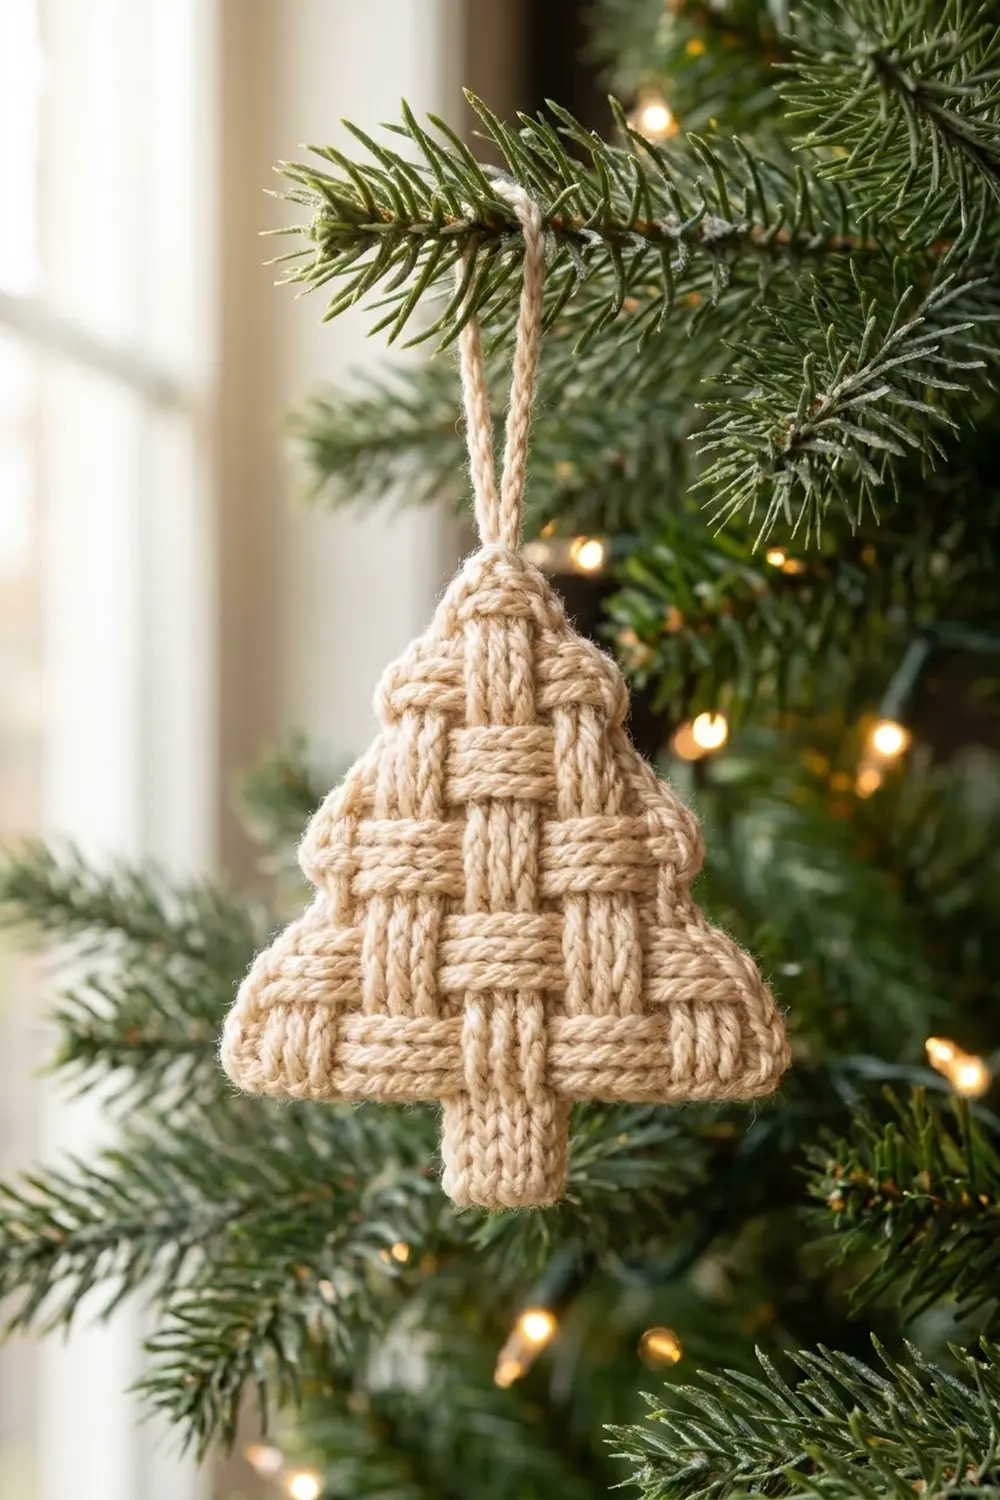
The size of this ornament depends on one chain of measurements. Gauge gives 18 sts = 3.6 in (9.1 cm). The four bands and the tip build a 4.0 in (10.2 cm) body. The trunk adds 1.0 in (2.5 cm), and one round of edging brings the piece to 3.8 in x 5.2 in (9.7 cm x 13.2 cm). Check each measurement as you go and the finished tree will match. Make one for your own tree, tie one onto a gift, or make a whole forest in different neutrals.
Happy crocheting!