

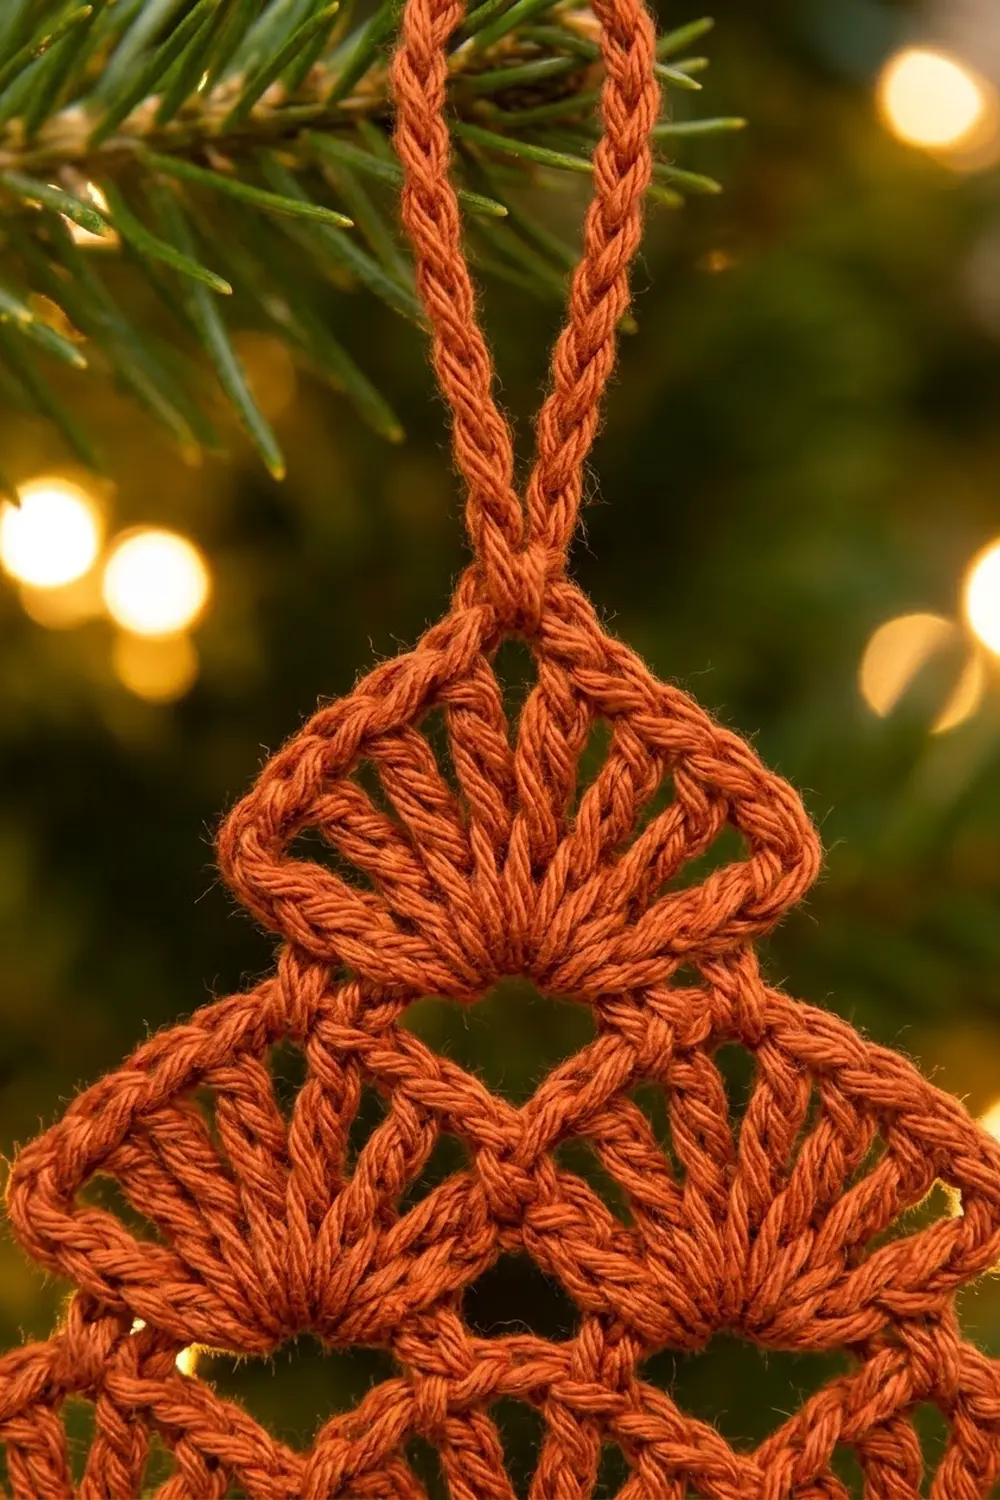
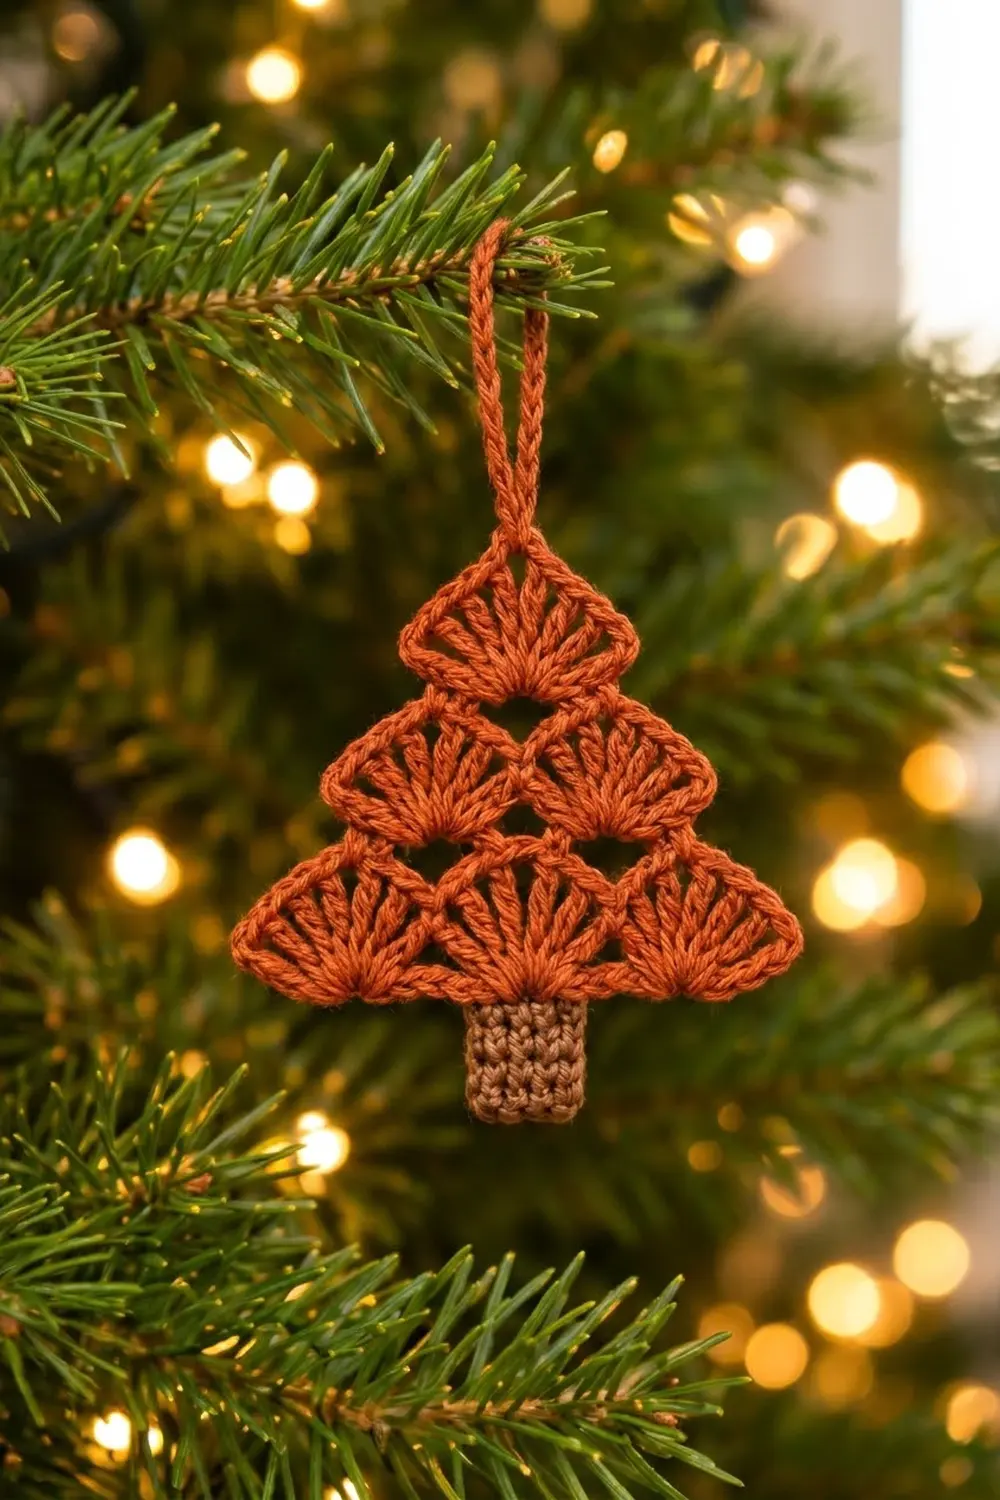
The Ember Fan Tree is a small, flat Christmas tree ornament made from stacked shell stitches. Three tiers of fans make a neat triangle: three at the bottom, two in the middle and one at the top. A solid little trunk sits underneath, and a chain loop at the tip lets it hang straight on a branch.
The colors are warm and simple: a rust or burnt-orange tree with a light brown trunk. It has a rustic, natural look that suits wooden decor, kraft paper gift wrap and warm white tree lights.
This pattern uses US crochet terms. The finished ornament measures about 3.75 in (9.5 cm) wide and 4.25 in (10.8 cm) tall. The hanging loop adds about 1.75 in (4.4 cm), so the total hanging length is about 6 in (15.2 cm).
It works up quickly. You crochet the trunk first in rows of single crochet. Next you make a rust foundation chain and attach it to the trunk as you work the first arch row. Then you build the three tiers upward in rows of chain arches and 9-dc shells. A slip stitch loop finishes the tip, and a slip stitch outline sharpens the edges.
Finished Size and Construction
- Finished size: 3.75 in (9.5 cm) wide x 4.25 in (10.8 cm) tall, not counting the loop
- Hanging loop: about 1.75 in (4.4 cm) above the tip
- Skill level: Easy / advanced beginner
- Terminology: US crochet terms
- Yarn weight: Worsted (#4), cotton or cotton blend
- Hook: 4.0 mm (US G-6)
- Number of pieces: 1 (a single flat piece, no joining)
- Layout: A triangle of 3 + 2 + 1 shells over a centered trunk
- Piece size before border: 3.75 in (9.5 cm) wide x 4.2 in (10.7 cm) tall
- Border depth: about 1/16 in (0.2 cm), added only along the top edges, so the width doesn’t change
Materials
Choose a smooth worsted-weight cotton or cotton blend. Cotton holds shell stitches crisply and blocks flat, which is what you want for a hanging ornament. Avoid fuzzy or very soft acrylics, because they blur the outlines of the fans.
- Rust / burnt orange (tree): about 8 g, roughly 16 m (17.5 yd)
- Light brown (trunk): about 2 g, roughly 4 m (4.4 yd)
These amounts include extra yarn for your gauge check and the yarn tails, so you won’t run short.
Tools:
- 4.0 mm (US G-6) crochet hook
- Tapestry needle
- Scissors
- Stitch marker
- Ruler or tape measure
- Pins and a blocking mat or folded towel
- Spray bottle with water
Abbreviations (US Terms)
- ch – chain
- sl st – slip stitch
- sc – single crochet
- dc – double crochet
- sk – skip
- st(s) – stitch(es)
- sp – space
- RS – right side
Special stitch – Shell: Work 9 dc in the same ch-5 arch. The 5th dc of a shell is its center dc. The next tier’s arches are anchored there.
Gauge and Checkpoints
Gauge: 18 sc and 20 rows = 4 in (10.2 cm) in sc with the 4.0 mm hook.
Shell gauge: One 9-dc shell worked into a ch-5 arch is about 1.25 in (3.2 cm) wide. Each tier (an arch row plus a shell row) adds about 1 in (2.5 cm) of height.
Because this is one small piece, the ornament itself is your test. Make the trunk, check its size, and continue only if it matches.
Checkpoints:
- Trunk (after Row 6): 1.3 in (3.3 cm) wide x 1.2 in (3.0 cm) tall.
- Tier 1 (after Row 2 of the tree): 3.75 in (9.5 cm) wide.
- Tier 2 (after Row 4): 2.5 in (6.4 cm) wide across its two shells.
- Tier 3 (after Row 6): The top shell is 1.25 in (3.2 cm) wide. The tree section is about 3 in (7.6 cm) tall, and the whole piece, including the trunk, is 4.2 in (10.7 cm) tall.
If your piece is too big, go down to a 3.75 mm (US F-5) hook. If it’s too small, go up to a 4.5 mm (US 7) hook. Change the hook, not the stitch counts. The shells and arches need exact counts to stay symmetrical.
Trunk
With light brown, leave a 12 in (30.5 cm) tail. You’ll use it later to sew the top of the trunk in place.
Foundation: Ch 7.
Row 1: Sc in 2nd ch from hook and in each ch across, turn. (6 sc)
Rows 2–6: Ch 1, sc in each st across, turn. (6 sc)
Fasten off and leave the starting tail hanging. The trunk should measure 1.3 in (3.3 cm) wide x 1.2 in (3.0 cm) tall.
Lay the trunk flat with Row 6 at the top. Number the Row 6 stitches 1 to 6 from right to left. You’ll attach the tree at st 6 and st 1.
Tree
Work the whole tree in rust.
Foundation: Ch 20.
Row 1 (arch row, joins the trunk): Sc in 2nd ch from hook (ch 2). Ch 5, sk 5 ch, sc in next ch. Repeat from * 2 more times. Your sc are now in ch 2, ch 8, ch 14 and ch 20. (4 sc + 3 ch-5 arches)
You join the trunk during this row. For the sc in ch 8, insert your hook through that chain and through st 6 of trunk Row 6. For the sc in ch 14, insert your hook through the chain and st 1 of the trunk. The trunk now hangs centered under the middle arch, with the 5 skipped chains (ch 9–13) above trunk sts 2–5.
Row 2 (Tier 1 shells): Ch 1, turn. Sc in first sc. Shell in next ch-5 arch, sc in next sc. Repeat from * 2 more times. (3 shells: 27 dc + 4 sc = 31 sts)
Checkpoint: 3.75 in (9.5 cm) wide.
Row 3 (arch row for Tier 2): Turn, but don’t chain. Sl st in first sc and in next 5 dc. You’re now in the center dc of the first shell. Ch 1, sc in same dc. Ch 5, skip the next 4 dc, the sc and the next 4 dc, then sc in center dc of next shell. Repeat from * once more. Leave the remaining sts unworked. (3 sc + 2 ch-5 arches)
Each new arch spans from one shell’s center to the next. This places the Tier 2 shells over the joins below and leaves the open triangular gaps.
Row 4 (Tier 2 shells): Ch 1, turn. Sc in first sc. Shell in next ch-5 arch, sc in next sc. Repeat from * once more. (2 shells: 18 dc + 3 sc = 21 sts)
Checkpoint: 2.5 in (6.4 cm) across Tier 2.
Row 5 (arch row for Tier 3): Turn. Sl st in first sc and in next 5 dc (center dc). Ch 1, sc in same dc. Ch 5, skip the next 4 dc, the sc and the next 4 dc, then sc in center dc of next shell. (2 sc + 1 ch-5 arch)
Row 6 (Tier 3 shell): Ch 1, turn. Sc in first sc, shell in ch-5 arch, sc in last sc. (1 shell: 9 dc + 2 sc = 11 sts)
Checkpoint: The tree section is about 3 in (7.6 cm) tall, and the full piece is 4.2 in (10.7 cm) tall.
Row 7 (hanging loop): Turn. Sl st in first sc and in next 5 dc (center dc of top shell). Ch 16, sl st in same center dc. Turn the loop and sl st in each of the 16 ch, working back along the loop. Sl st in the center dc again. (16 ch + 16 sl st)
Slip stitching back along the chain makes the loop firm and gives it a twisted-cord look. Fasten off and weave in the end.
Secure the trunk: Thread the brown tail onto your needle. Whipstitch trunk sts 2–5 to the back of foundation ch 9–13 so the top of the trunk lies flat with no gap. Weave in the end.
Border (Slip Stitch Outline)
The border is a single row of slip stitches along both slanted sides and the top shell. It gives each fan the crisp, raised outline you see on the finished tree. The bottom edge and the trunk are left plain.
Border gauge: Keep the sl sts at the same tension as the tops of your dc, about 9 sl sts per 1.25 in (3.2 cm) across a shell. If they pull tighter, the shells will cup.
Outline row: With RS facing, join rust with a sl st in the end sc of Row 2 at the bottom right corner. This sl st counts as the first stitch.
Right slope: Sl st in each of the 4 outermost dc of the Tier 1 end shell. Sl st in the end sc of Row 4. Sl st in each of the 4 outermost dc of the Tier 2 end shell. Sl st in the end sc of Row 6. (11 sl sts, including the join)
Top: Sl st in each of the 9 dc of the top shell. At the center dc, work through the base of the hanging loop. (9 sl sts)
Left slope: Sl st in the other end sc of Row 6. Sl st in each of the 4 outermost dc of the Tier 2 shell, then in the end sc of Row 4. Sl st in each of the 4 outermost dc of the Tier 1 shell, then in the end sc of Row 2. (11 sl sts)
Total: 11 + 9 + 11 = 31 sl sts. Fasten off and weave in.
On one side, the slip stitches from Rows 3 and 5 already sit on top of the outer dc. Work your outline sl sts into those slip stitches and keep the same count.
Why the math works: Every shell has 9 dc. On an outer shell, the center dc (the 5th) is covered by the next tier’s anchor sc. The 4 dc past the center on the inner side sit under the next tier’s arch. That leaves exactly 4 exposed dc on the outer side (9 − 1 − 4 = 4). Each slope has 3 end sc plus 2 sets of 4 dc, so 3 + 8 = 11. The top shell is fully exposed and takes all 9. Both slopes have the same count, so the triangle stays symmetrical.
Final Blocking
- Weave in all ends through stitches of the same color, so no brown shows on the rust.
- Mist the ornament lightly until it’s damp but not soaked.
- Lay it face up on a blocking mat or a folded towel.
- Pin the bottom edge straight to 3.75 in (9.5 cm).
- Pin the tip so the ornament measures 4.25 in (10.8 cm) from the bottom of the trunk to the top of the top shell.
- Pin out the curved top of each fan, and open the triangular gaps between the tiers evenly.
- Square the trunk to 1.3 in (3.3 cm) wide.
- Lay the hanging loop straight up, about 1.75 in (4.4 cm) long.
- Let it dry completely before you take out the pins.
Final Quality-Control Checklist
- The tiers have 3, 2 and 1 shells, and every shell has 9 dc.
- The upper shells are centered over the joins between the shells below.
- The open gaps between tiers are even on both sides.
- The trunk is centered and flat, with no gap at its top.
- The outline has 11 sl sts on each slope and 9 across the top.
- The ornament measures 3.75 in (9.5 cm) x 4.25 in (10.8 cm).
- The loop is centered at the tip, so the tree hangs straight.
- All ends are secure and hidden.
Troubleshooting
Shells ruffle or wave: Your dc are too loose for the ch-5 arch. Go down a hook size, or work the arch chains a little looser.
Shells cup or curl: The arches or the outline are too tight. Loosen the ch-5 arches and the border sl sts.
Tree leans to one side: Each arch row must start in the center dc (the 5th) of the first shell. Recount your sl sts.
Trunk is off-center: It was attached at the wrong chains. The joins belong at ch 8 and ch 14 of the foundation.
Ornament twists when hanging: The loop isn’t anchored in the center dc. Re-anchor it and block again.
Gaps between tiers look closed: The arch in Row 3 or Row 5 is too short. Check that it’s exactly ch 5, and stretch the gaps open when you block.
Care
Hand wash in cool water. Press the water out with a towel and dry flat, reshaping as needed. Store the ornament flat or hang it by its loop, away from heat.
Final Notes
Here are the measurements in order. The trunk is 1.3 in (3.3 cm) x 1.2 in (3.0 cm). Tier 1 is 3.75 in (9.5 cm) wide, Tier 2 is 2.5 in (6.4 cm) and Tier 3 is 1.25 in (3.2 cm). The piece is 4.2 in (10.7 cm) tall before the border, and the outline brings it to 4.25 in (10.8 cm). The hanging loop adds 1.75 in (4.4 cm). If every checkpoint matches, the finished ornament will match too.
Make one in rust, or try a few in cream, sage or deep red for a matching set on your tree.
Happy crocheting!