
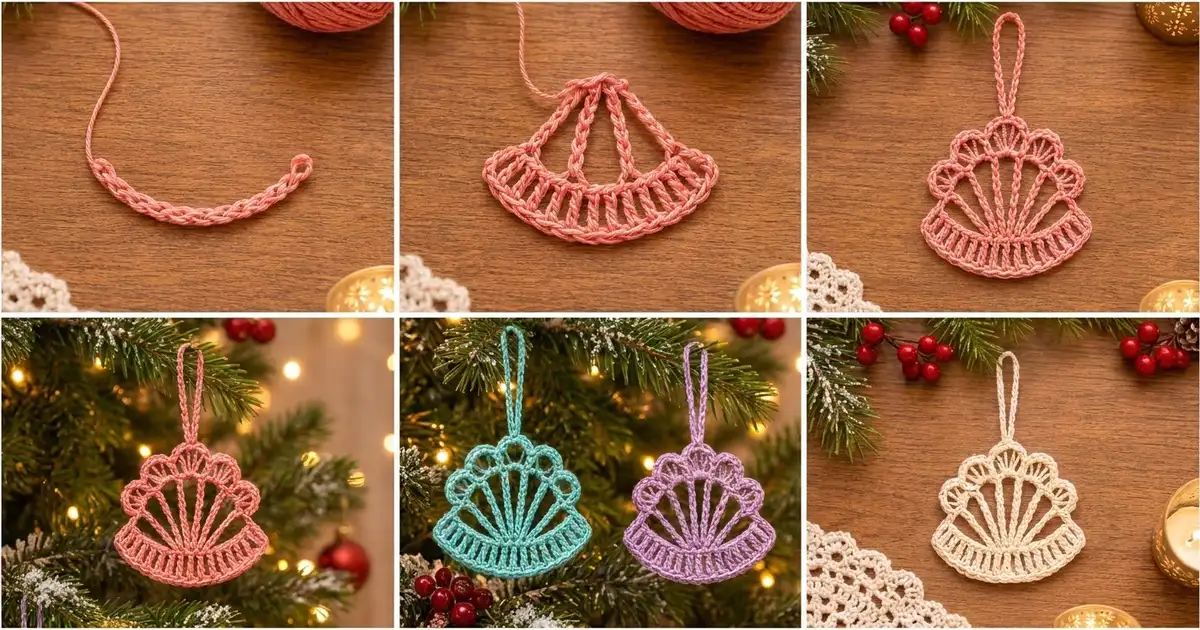
The Coral Fan Shell Ornament is a small, lacy fan-shaped decoration for the tree. It has a curved ladder band along the bottom, seven braided chain spokes that rise to a tiny hub ring at the top center, and a scalloped edge of open arches around the upper outline. A braided chain loop at the top makes it ready to hang.
The sample is made in soft coral sport-weight cotton. The same design also looks good in aqua, lilac, or cream, and a mix of colors makes a nice set for gifts. The style is light, open, and a little vintage, like a seashell or a small bell.
This pattern uses US crochet terms. The finished ornament measures about 4 in (10.2 cm) wide and 3.5 in (8.9 cm) tall, not counting the hanging loop. The loop adds about 2 in (5.1 cm), so the total hanging length is about 5.5 in (14.0 cm).
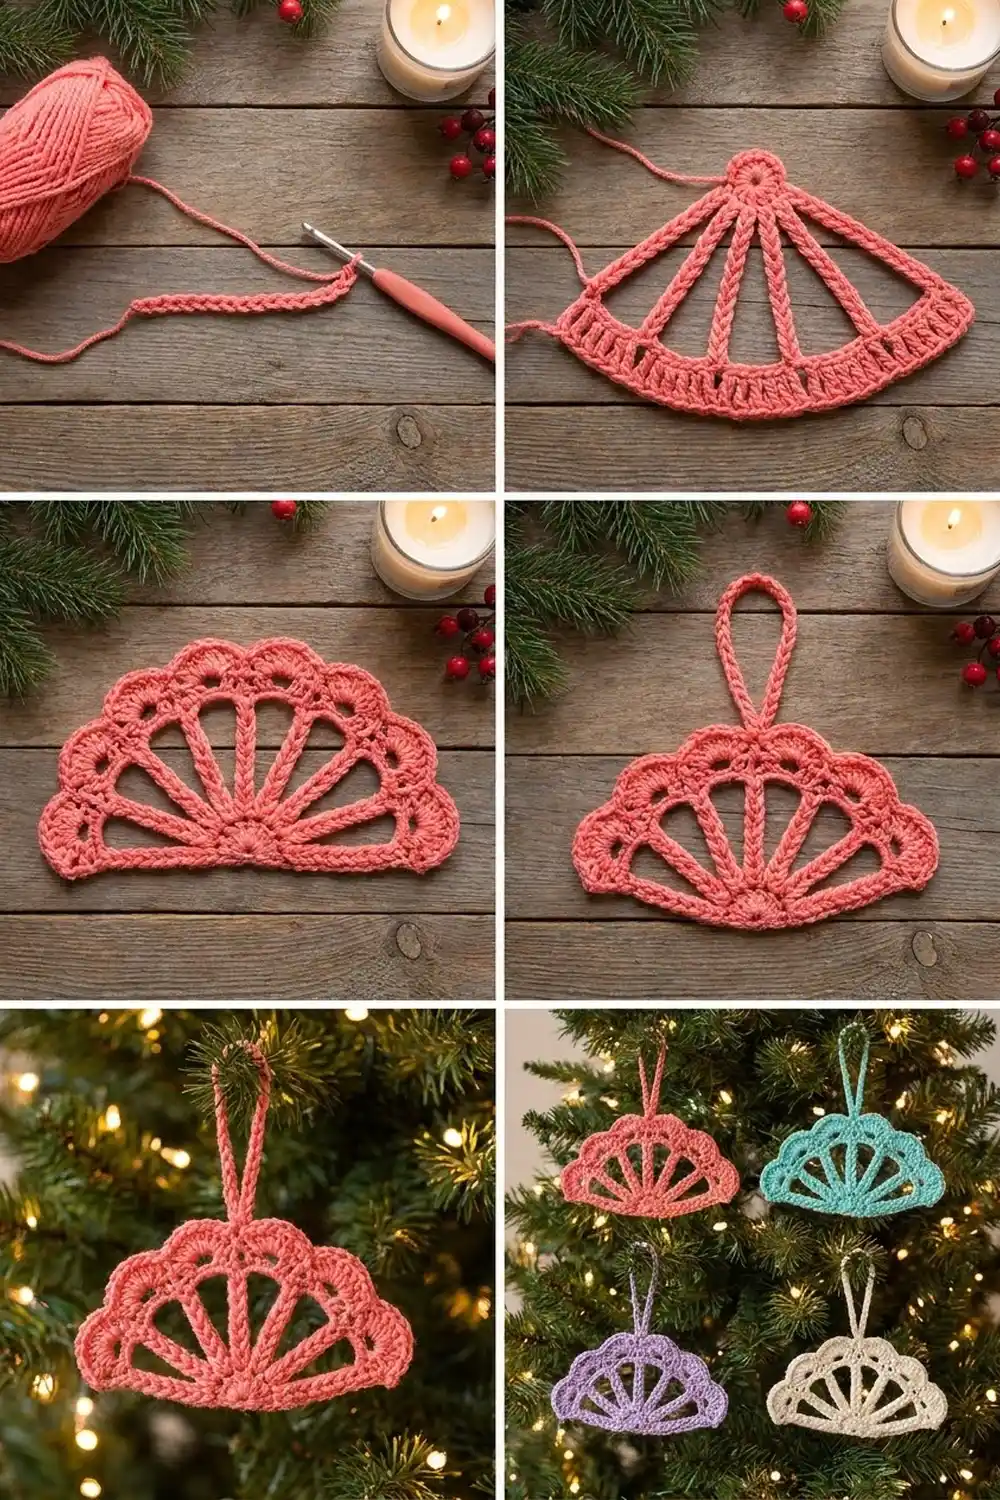
The ornament is worked flat in one piece. First you make the ladder band. Next you work chain spokes up to a central hub, then chain arches across the spokes, then open scallops over the arches. A single sc edging row finishes the bottom of the band, and the hanging loop goes on last. There is no sewing and no joining.
Finished Size and Construction
- Finished size: 4 in (10.2 cm) wide x 3.5 in (8.9 cm) tall, plus a 2 in (5.1 cm) loop
- Skill level: Easy-intermediate
- Terminology: US
- Yarn weight: Sport (#2) cotton
- Hook: 3.0 mm (US C/2 or D/3)
- Number of pieces: 1
- Layout: Single fan-shaped motif, worked flat in rows
- Piece size: Ladder band 4 in (10.2 cm) wide x 0.6 in (1.5 cm) tall
- Size before border: 4 in (10.2 cm) wide x 3.25 in (8.3 cm) tall
- Border depth: 0.25 in (0.6 cm), added along the bottom of the band only
Materials
Choose a smooth, mercerized or soft cotton in sport weight, about 150 m per 50 g. Cotton holds the open arches crisply and blocks well. Avoid fuzzy yarns, because the chain spokes and scallops would lose their definition.
- Main color (Coral): 8 g, about 25 m
- Optional colorways (Aqua, Lilac, Cream): 8 g, about 25 m each, one color per ornament
Quantities include a margin of about 25% for the gauge swatch, the long tails, and any frogging.
Tools:
- 3.0 mm crochet hook
- Tapestry needle
- Scissors
- Stitch markers (at least 7)
- Rust-proof pins and a foam blocking mat
- Spray bottle with water, or a light fabric stiffener (optional)
Abbreviations (US Terms)
- ch – chain
- sl st – slip stitch
- sc – single crochet
- dc – double crochet
- sk – skip
- sp – space
- st(s) – stitch(es)
- RS – right side
Special technique – braided spoke: Chain the stated number, attach the far end as directed, then work 1 sl st into each ch back toward the band. The second line of loops sits beside the chain and gives the spoke its thick, braided look.
Anchor point: On each spoke, the anchor point is the 9th ch counting down from the hub. When the pattern says to sc into the anchor point, insert the hook under both strands of the braided spoke at that ch.
Gauge and Checkpoints
Gauge matters here because the arches and scallops need the right amount of slack. Make one complete ornament as your test piece and measure it at each stage.
- Base gauge: 8 ch = 1 in (2.5 cm), unstretched.
- Checkpoint 1 (after Row 2): The band is 4 in (10.2 cm) wide and 0.6 in (1.5 cm) tall when laid flat.
- Checkpoint 2 (after Row 3): The center spoke, from band to hub, is about 1.75 in (4.4 cm) long. The piece measures about 2.25 in (5.7 cm) from the bottom of the band to the hub.
- Checkpoint 3 (after Row 5): The piece is 4 in (10.2 cm) wide and 3.25 in (8.3 cm) tall.
- Checkpoint 4 (after the border): The piece is 4 in (10.2 cm) wide and 3.5 in (8.9 cm) tall.
If your band comes out wider than 4 in (10.2 cm), go down to a 2.75 mm hook. If it’s narrower than 4 in (10.2 cm), go up to a 3.25 mm hook. Keep the chains even. Tight chains make the spokes too short, and the band then cups instead of curving softly.

Pattern
Row 1 (Ladder Band)
Ch 36.
Dc in the 6th ch from the hook. The 5 skipped ch count as 1 dc, 1 ch-1 sp, and 1 skipped ch. Ch 1, sk next ch, dc in next ch. Repeat from * to * 14 more times, for 15 repeats in total.
Stitch count: 17 dc and 16 ch-1 sps.
Row 2 (Band Top Edge)
Ch 1 and turn. Sc in the first dc. Sc in the next ch-1 sp, sc in the next dc. Repeat from * to * across. Work the last sc into the 4th ch of the skipped beginning ch.
Stitch count: 33 sc (17 sc worked 1 per dc + 16 sc added, 1 per ch-1 sp).
Don’t fasten off. For Row 3, number these sc 1 to 33, starting with the sc you just made as sc 1. Place markers in sc 1, 6, 12, 17, 22, 28, and 33. These are the 7 spoke positions. The gaps between them are 5, 6, 5, 5, 6, and 5 sts, for a total of 32 sts from sc 1 to sc 33.
Row 3 (Braided Spokes and Hub)
Don’t turn. Keep the RS facing.
Spoke 1 (at sc 1): Ch 22. Sl st in the 4th ch from the hook to form the hub ring. Sl st in each of the remaining 18 ch, then sl st in sc 1.
Spoke 2: Sl st in each of the next 5 sc, ending at sc 6. Ch 16, sl st in the hub ring, sl st in each of the 16 ch back down, sl st in sc 6.
Spoke 3: Sl st in each of the next 6 sc, ending at sc 12. Ch 15, sl st in the hub ring, sl st in each of the 15 ch, sl st in sc 12.
Spoke 4 (center): Sl st in each of the next 5 sc, ending at sc 17. Ch 14, sl st in the hub ring, sl st in each of the 14 ch, sl st in sc 17.
Spoke 5: Sl st in each of the next 5 sc, ending at sc 22. Ch 15, sl st in the hub ring, sl st in each of the 15 ch, sl st in sc 22.
Spoke 6: Sl st in each of the next 6 sc, ending at sc 28. Ch 16, sl st in the hub ring, sl st in each of the 16 ch, sl st in sc 28.
Spoke 7: Sl st in each of the next 5 sc, ending at sc 33. Ch 18, sl st in the hub ring, sl st in each of the 18 ch, sl st in sc 33.
Count check: There are 7 spokes. The hub ring holds 7 joins: the ring closure on Spoke 1, plus 6 sl sts. Spoke chains total 18 + 16 + 15 + 14 + 15 + 16 + 18 = 112 ch.
The outer spokes are a little short for a straight band. That’s intentional. They pull the band ends upward into the soft smile curve. Mark the anchor point (9th ch below the hub) on every spoke.
Row 4 (Chain Arches)
Don’t turn. Ch 11 and sc into the anchor point of Spoke 7. This forms the first side arch along the outer edge.
Ch 5, sc into the anchor point of the next spoke. Repeat from * to * 5 more times, ending at Spoke 1.
Ch 11 and sl st in sc 1 of Row 2. This forms the second side arch.
Count: 8 arches (2 ch-11 side arches + 6 ch-5 center arches) and 7 sc anchors.
Row 5 (Open Scallops)
Ch 1 and turn.
Side arch: Work (sc, ch 1, [dc, ch 1] 7 times, sc) in the ch-11 arch. That’s 17 sts: 2 sc, 7 dc, and 8 ch-1 sps.
Center arches: In each of the next 6 ch-5 arches, work (sc, ch 1, [dc, ch 1] 4 times, sc). That’s 11 sts per arch: 2 sc, 4 dc, and 5 ch-1 sps.
Second side arch: Work (sc, ch 1, [dc, ch 1] 7 times, sc) in the last ch-11 arch. Sl st in sc 33 of Row 2.
Row total: 16 sc, 38 dc (7 + 24 + 7), and 46 ch-1 sps (8 + 30 + 8). This makes 8 open scallops in all: a larger one down each side and 6 across the top. The hub ring sits at the top center, between the two middle scallops.
Check that your piece matches Checkpoint 3.
Border
Border gauge: 33 sc = 4 in (10.2 cm), or about 8.25 sc per inch (3.25 sc per cm).
Border Row (bottom edging): Don’t turn. Keep the RS facing, with the hook at the sc 33 corner.
- Side 1: Work 3 sc down the side of the band: 1 sc in the side of the Row 2 sc and 2 sc around the post of the end dc. 3 sc.
- Bottom: Work 1 sc in the base of each dc and 1 sc in each ch-1 sp along the foundation chain. 33 sc (17 + 16).
- Side 2: Work 3 sc up the other side, in the same way as Side 1. 3 sc.
Sl st in sc 1 of Row 2.
Total: 39 sc (3 + 33 + 3).
Why the math works: The bottom of the band now has exactly 33 sc, the same as the 33 sc of Row 2 along its top. With equal counts on both edges, the band stays flat. It doesn’t ruffle or pull tight, and the spokes give it its curve. The 3 sc on each short side match the band height of 0.6 in (1.5 cm) at about 5 sts per inch on row-ends. This keeps the corners square without flaring. The border adds 0.25 in (0.6 cm), so the height goes from 3.25 in (8.3 cm) to 3.5 in (8.9 cm). The width stays at 4 in (10.2 cm).
Hanging Loop
Fasten off, leaving a 6 in (15.2 cm) tail. Join the yarn with a sl st in the hub ring. Ch 30, sl st in the hub ring, then sl st in each of the 30 ch to braid the loop. Sl st in the hub ring and fasten off, leaving an 8 in (20.3 cm) tail. The loop hangs about 2 in (5.1 cm) above the top scallops.
Final Blocking
- Weave in all the ends along the band or the spokes, but don’t trim them yet.
- Wet the ornament fully. Gently press out the water in a towel.
- Lay the ornament RS up on the blocking mat.
- Pin the band into a gentle curve 4 in (10.2 cm) wide from end to end.
- Pin the hub so it sits 2.25 in (5.7 cm) above the bottom of the band at the center.
- Straighten each spoke so the 7 spokes fan out evenly.
- Pin the tip of each of the 8 scallops so it is round and open, with a total height of 3.5 in (8.9 cm).
- Pin the hanging loop straight up.
- If you want a stiffer ornament, mist it with fabric stiffener.
- Let it dry completely, then unpin it and trim the ends.
Final Quality-Control Checklist
- Band has 17 dc and 16 ch-1 sps, with a 33 sc top edge
- 7 braided spokes, all joined in the single hub ring
- 8 arches anchored at matching heights on the spokes
- 8 open scallops: 2 large side scallops with 7 dc, and 6 center scallops with 4 dc
- 39 sc in the bottom border
- Finished size 4 in (10.2 cm) x 3.5 in (8.9 cm), plus a 2 in (5.1 cm) loop
- The ornament hangs straight from the loop without tilting
- All ends are woven in and invisible from the RS
Troubleshooting
The band cups upward too much. The spokes are too tight. Chain more loosely, or add 1 ch to each outer spoke.
The band is straight and doesn’t curve. The spokes are too loose. Remove 1 ch from Spokes 1 and 7.
The scallops ruffle. Your dc are too tall or the arches too long. Use a smaller hook for Row 5.
The scallops pucker or look flat. The ch-5 arches are too short. Work them with a looser tension, or use ch 6 and keep the same scallop sts.
The hub ring is crowded. Work the hub sl sts loosely, or insert the hook through the ring rather than into individual chains.
The ornament hangs crooked. The loop isn’t centered. Move it so it sits in line with Spoke 4.
Care
Hand wash the ornament in cool water and lay it flat to dry. Reshape and re-pin it if needed. Store it flat or hanging so the scallops keep their shape.
Final Notes
The measurement chain is short and easy to check. The band is 4 in (10.2 cm) wide and 0.6 in (1.5 cm) tall. The center spoke rises 1.75 in (4.4 cm) to the hub. The arches and scallops bring the height to 3.25 in (8.3 cm), and the border finishes the ornament at 3.5 in (8.9 cm) tall, with a 2 in (5.1 cm) hanging loop. If each checkpoint matches, the finished shell will match too. Make one in coral, then try aqua, lilac, and cream for a full set on the tree.
Happy crocheting!