
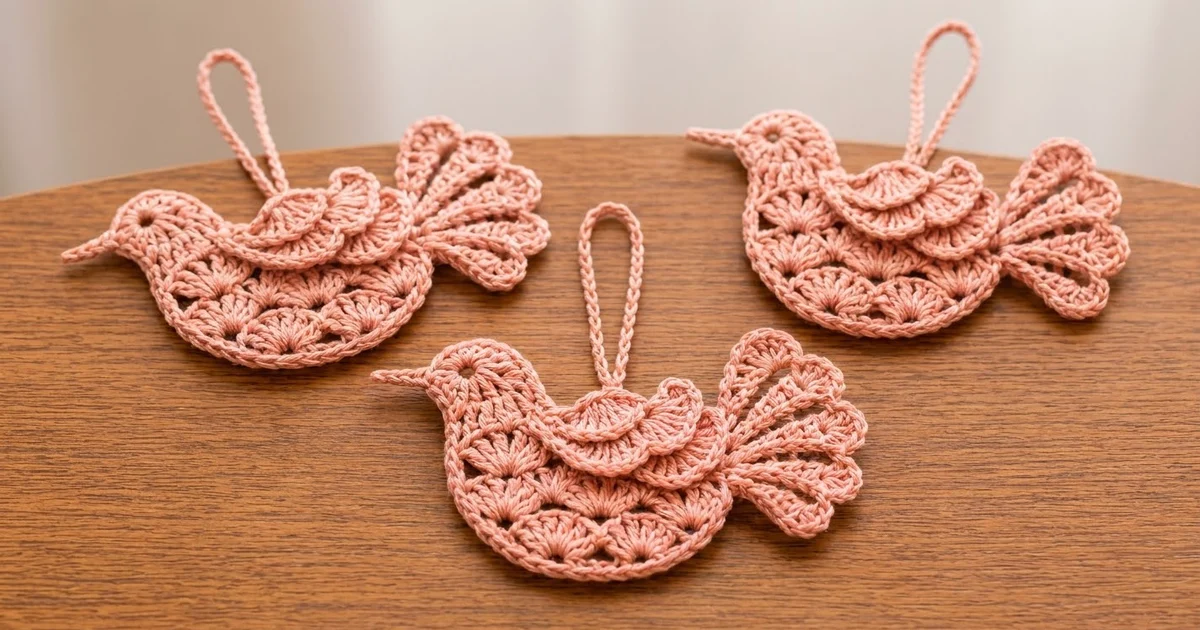
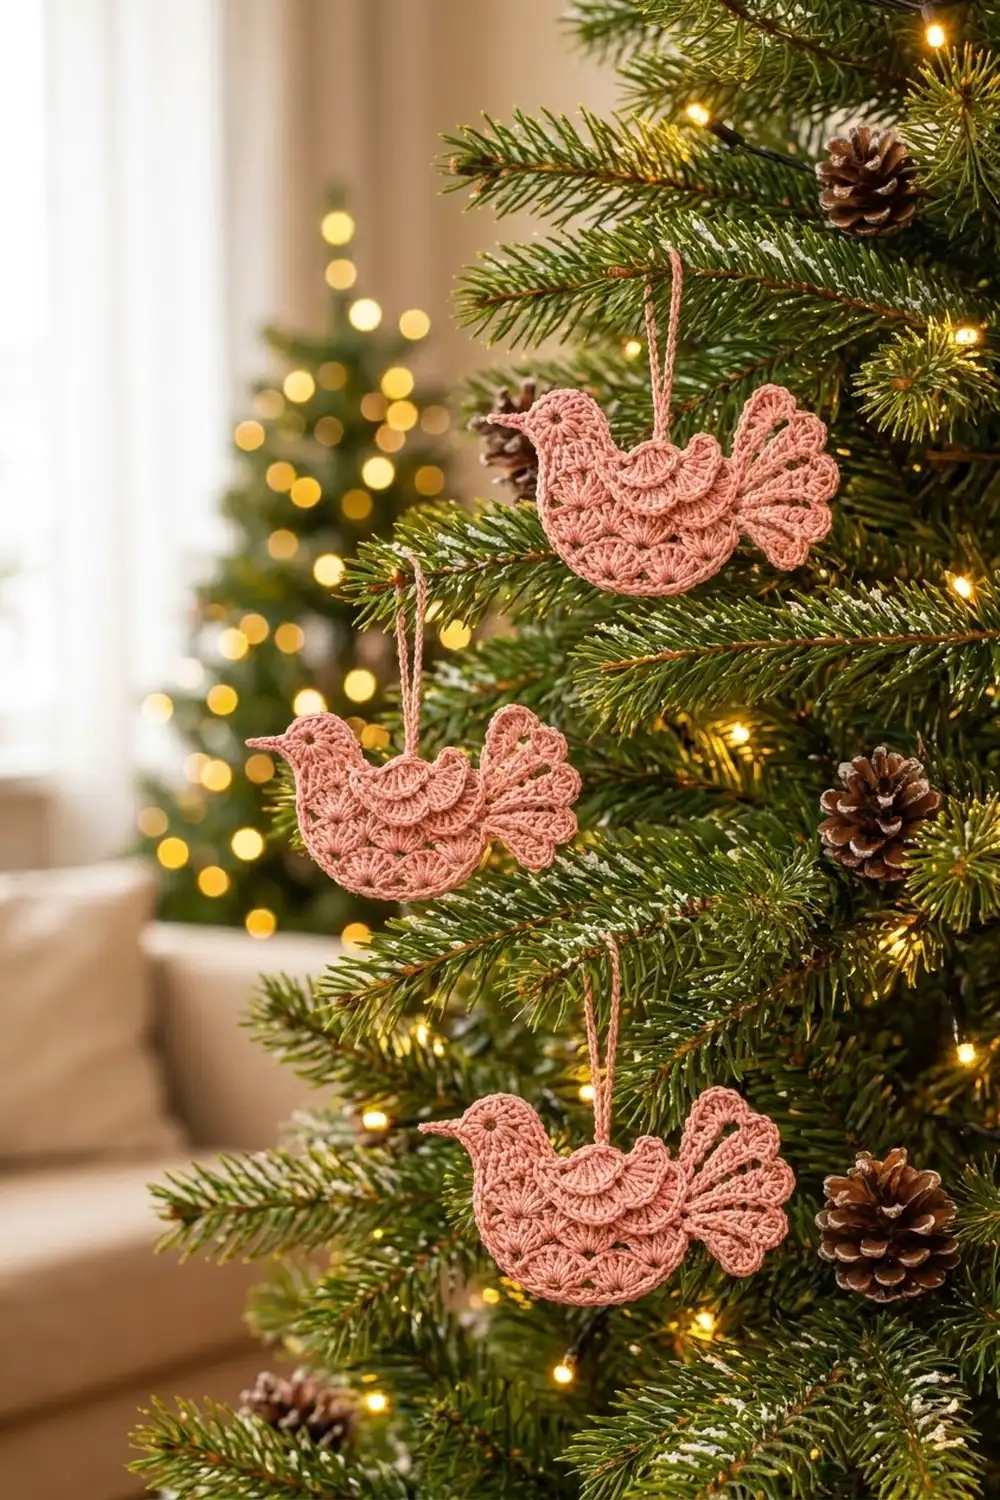
This little bird is a flat, lacy ornament with a shell-stitch body, a fanned tail, and a raised wing that sits on top like an appliqué. It hangs from a slim chain loop, ready for a tree, a window, or a gift package.
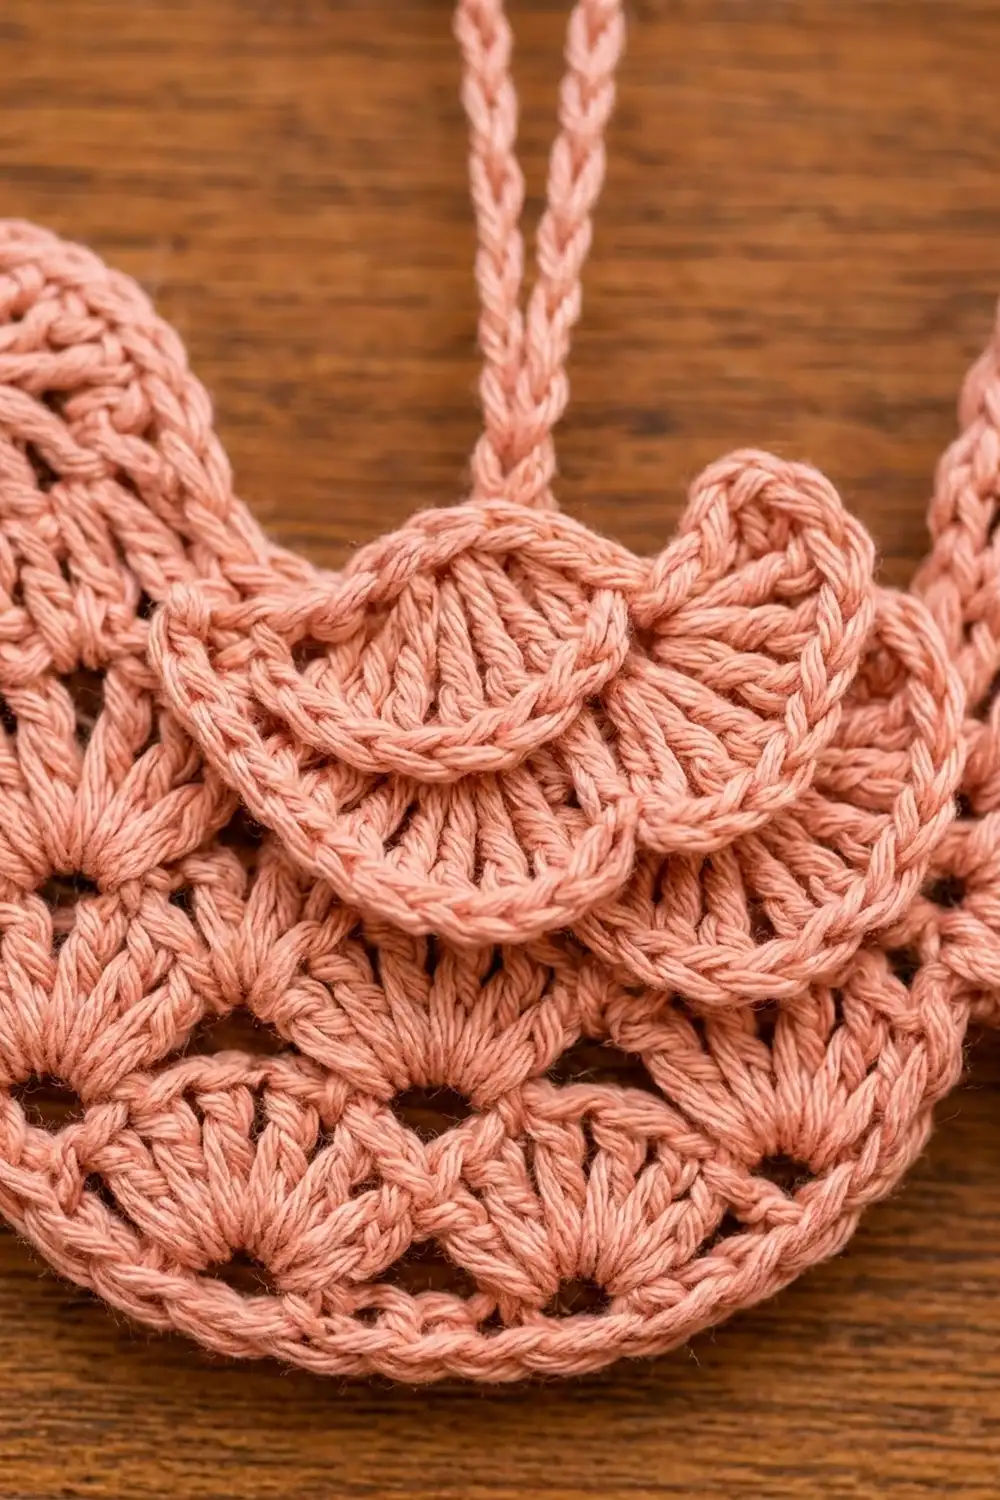
The sample uses one soft salmon-pink cotton. A single color shows off the texture best: tiered shell fans, an open eyelet eye, a pointed beak, and three scalloped tail lobes. A rope-like reverse single crochet edge outlines the body and head.
The pattern uses US crochet terms. The finished bird measures about 5.5 in (14.0 cm) wide from beak tip to tail edge and 3.0 in (7.6 cm) tall, not counting the loop.
You crochet the body in rows from the back line down to the belly. Then you work the head into the foundation chain and edge everything with one sc round. Next, the tail is worked off that round and a reverse sc round finishes the outline. The wing is made separately and sewn on.
Finished Size and Construction
- Finished size: 5.5 in (14.0 cm) wide x 3.0 in (7.6 cm) tall, plus a 3 in (7.6 cm) loop
- Skill level: Easy-Intermediate
- Terminology: US
- Yarn weight: Sport (2) cotton
- Hook: 3.0 mm
- Number of pieces: 1 bird plus 1 wing appliqué
- Layout: single ornament, no joining
- Body before border: 3.2 in (8.1 cm) wide x 1.5 in (3.8 cm) tall
- Body and head before border: 3.2 in (8.1 cm) wide x 2.4 in (6.1 cm) tall
- Border depth: 0.3 in (0.8 cm), 2 rounds
- Wing: 2.4 in (6.1 cm) wide x 1.2 in (3.0 cm) tall
Materials
Choose a smooth sport-weight cotton or cotton blend. Cotton gives crisp shells and holds its blocked shape. Avoid fuzzy or stretchy yarns, which blur the fans and let the tail droop.
- Salmon pink: 10 g, about 31 m (34 yd) per ornament
Quantities include a margin for a gauge swatch and weaving in ends. One 50 g ball makes at least four birds.
Tools:
- 3.0 mm crochet hook
- Tapestry needle
- Scissors
- Stitch markers (2 or 3)
- Blocking mat and rustproof pins
- Spray bottle with water
- Optional: fabric stiffener
Abbreviations (US Terms)
- ch – chain
- sl st – slip stitch
- sc – single crochet
- hdc – half double crochet
- dc – double crochet
- tr – treble crochet
- sc2tog – single crochet 2 together
- sk – skip
- sp – space
- st(s) – stitch(es)
- RS / WS – right side / wrong side
Special stitches:
- Shell: 5 dc in the same stitch.
- Reverse sc (crab stitch): Work from left to right (right-handed). Insert the hook into the next stitch to the right, yarn over, and pull up a loop. Yarn over and pull through both loops. This makes the corded edge.
Gauge and Checkpoints
Gauge: 6 sc and 6 sc rows = 1 in (2.5 cm) with a 3.0 mm hook.
Make one bird before starting a batch. On a piece this small, a gauge error usually shows up as a floppy tail or a cupped body.
Checkpoints:
- Body Row 1 (19 sc): 3.2 in (8.1 cm) wide.
- Body complete: 1.5 in (3.8 cm) tall at the center.
- Head complete: total height 2.4 in (6.1 cm).
- Tail complete: reaches 1.1 in (2.8 cm) beyond the body edge.
- Finished: 5.5 in (14.0 cm) x 3.0 in (7.6 cm).
If your bird is too big: use a 2.75 mm hook. If it is too small or stiff: use a 3.25 mm hook. Being off by 0.2 in (0.5 cm) either way is fine.
Body
Each shell row starts and ends at the center of a shell from the row before, so the body narrows into a rounded belly.
Foundation: Ch 20.
Row 1 (WS): Sc in 2nd ch from hook and in each ch across, turn. (19 sc)
Checkpoint: 3.2 in (8.1 cm) wide.
Row 2 (RS): Ch 1, sc in first sc, sk 2 sc, shell in next sc, sk 2 sc, sc in next sc; repeat from * 2 more times, turn. (3 shells and 4 sc = 19 sts)*
Row 3: Sl st in first sc and in each of next 3 dc. You are now in the center dc of the first shell. Ch 1, sc in same dc, shell in next sc, sc in center dc of next shell; repeat from * once more, turn. Leave the remaining 3 sts unworked. (2 shells and 3 sc = 13 sts)*
Row 4: Sl st in first sc and in each of next 3 dc. Ch 1, sc in same dc, 7 dc in next sc, sc in center dc of next shell. Leave the remaining 3 sts unworked. (7 dc and 2 sc = 9 sts) Fasten off.
Checkpoint: a rounded half-moon, 3.2 in (8.1 cm) wide along the top and 1.5 in (3.8 cm) tall at the center.
Head
Hold the body with RS facing and the straight foundation edge at the top. The left end is the head end, and the tail goes on the right.
Row 1 (RS): Join yarn with a sl st in the free loop of the first foundation ch at the left corner. Ch 1, sc in same loop and in next 5 loops, turn. (6 sc)
Row 2: Ch 1, 2 sc in first sc, sc in next 4 sc, 2 sc in last sc, turn. (8 sc)
Row 3 (eye row): Ch 1, sc in first 2 sc, ch 1, sk 1 sc, sc in next 5 sc, turn. (7 sc and 1 ch-1 sp = 8 sts) The ch-1 sp sits near the front of the head and forms the eyelet eye.
Row 4: Ch 1, sc2tog, sc in next 3 sc, sc in ch-1 sp, sc2tog, turn. (6 sts)
Row 5: Ch 1, sc2tog, sc in next 2 sts, sc2tog. (4 sts) Fasten off.
Checkpoint: the head is 1.3 in (3.3 cm) at its widest and adds 0.9 in (2.3 cm) of height, for 2.4 in (6.1 cm) total.
Wing Appliqué
Row 1: Make a magic ring. Ch 3 (counts as dc), 6 dc in ring, pull the ring tight, turn. Do not join. (7 dc)
Row 2: Ch 3 (counts as dc), dc in same st, 2 dc in each of next 5 dc, dc in top of turning ch, turn. (13 dc)
Row 3: Ch 1, sc in first dc, sk 1 dc, shell in next dc, sk 1 dc, sc in next dc; repeat from * 2 more times. (3 shells and 4 sc = 19 sts)* Fasten off, leaving a 10 in (25.4 cm) tail for sewing.
Checkpoint: 2.4 in (6.1 cm) across the straight edge and 1.2 in (3.0 cm) tall.
Border
Border gauge: the edging uses the main gauge, 6 sc = 1 in (2.5 cm). Each round adds about 0.15 in (0.4 cm) on every side, for 0.3 in (0.8 cm) total.
Rnd 1 (sc outline)
With RS facing, join yarn with a sl st in the first free foundation loop next to the head (loop 7). Work around in this order:
- Back: ch 1, sc in same loop and in each remaining free loop to the tail corner. (13 sc)
- Tail-end side: 7 sc evenly down the stepped edge: 1 in the end of Row 1, 2 around the end of Row 2, 2 over the Row 3 step, and 2 over the Row 4 step. (7 sc)
- Belly: sc in each st across Row 4, working 2 sc in the center (4th) dc of the 7-dc fan. (10 sc)
- Head-end side: 7 sc evenly up the stepped edge, mirroring the other side. (7 sc)
- Front of head: 1 sc in the end of each head row. (5 sc)
- Beak: ch 5, sl st in 2nd ch from hook and in next ch, sc in next ch, hdc in last ch. Don’t count the beak in the stitch total.
- Head top: sc in each st of head Row 5. (4 sc)
- Back of head: 1 sc in the end of each head row. (5 sc)
Join with a sl st to the first sc. (51 sc)
Why the math works: The back gets the 19 foundation loops minus the 6 used by the head, so 13. Each side gets 1 + 2 + 2 + 2 = 7 sc, with one or two per row end depending on row height. The belly gets Row 4’s 9 sts plus 1 increase to round the point, so 10. The head gets one sc per row end (5 + 5) plus one per Row 5 stitch (4). Total: 13 + 7 + 10 + 7 + 5 + 4 + 5 = 51.
Tail
On the tail-end side, the 3rd sc from the top (Rnd 1 stitch 16) is the tail base. Mark it.
Row 1: Join yarn with a sl st in the marked sc. Ch 4 (counts as tr), [ch 2, tr] 6 times in same sc, turn. (7 tr and 6 ch-2 sps) The tr fan out from the body edge in a half circle.
Row 2: Ch 1, sc in first tr, 3 sc in next ch-2 sp, sc in next tr; repeat from * 5 more times. Work the last sc in the 4th ch of the turning ch, then turn. (25 sc)*
Row 3: Ch 1, sc in first sc, sk 3 sc, 9 dc in next sc, sk 3 sc, sc in next sc; repeat from * 2 more times. (3 lobes of 9 dc and 4 sc = 31 sts)* Fasten off.
Checkpoint: the tail extends 1.1 in (2.8 cm) beyond the body edge, with three even lobes.
Rnd 2 (reverse sc edge)
Join yarn in any back sc of Rnd 1. Ch 1, then reverse sc in each sc around. Do not work into the beak chain. Skip the tail-base sc, which the tail covers. Join with a sl st. (51 − 1 = 50 reverse sc) Fasten off.
The back still has 13 sts. Mark the 7th one, which is the center.
Hanging Loop and Wing Placement
Loop: Join yarn with a sl st in the marked center back stitch. Ch 36, then sl st in the same stitch. Fasten off and weave the end back through the chain. The folded loop is about 3 in (7.6 cm) long.
Wing: Center the wing on the upper body with its straight edge horizontal, 0.4 in (1.0 cm) below the back edge, and the scalloped curve pointing up. Whipstitch along the straight edge and the lower third of the curve. Leave the scallops free so they stand above the back line. Tack the middle scallop to the loop base with one small stitch so the wing doesn’t tip forward.
Final Blocking
- Weave in all ends on the WS.
- Mist the bird until it is damp but not dripping.
- Pin it RS up so the body is 3.8 in (9.7 cm) wide, including the border, and the whole bird is 5.5 in (14.0 cm) x 3.0 in (7.6 cm).
- Pin each of the 7 tr tail ribs straight, then pin the tip of each lobe.
- Pin the beak to a sharp point and open the eyelet with the hook tip.
- Curve the wing scallops up slightly with your fingers. Don’t flatten them.
- For a firmer ornament, brush on diluted stiffener now.
- Let the bird dry for at least 6 hours before unpinning.
Final Quality-Control Checklist
- Body rows count 19, 19, 13, and 9 sts.
- Head rows count 6, 8, 8, 6, and 4 sts, and the eyelet sits near the beak.
- Border Rnd 1 has 51 sc and Rnd 2 has 50 reverse sc.
- Tail rows count 7 tr, 25 sc, and 31 sts.
- Wing rows count 7, 13, and 19 sts.
- The finished bird is 5.5 in (14.0 cm) x 3.0 in (7.6 cm).
- The loop is centered and the bird hangs level.
- All ends are hidden on the WS.
Troubleshooting
Body cups: The shells are too tight. Go up a hook size or loosen your dc.
Belly ruffles after Rnd 1: There are too many sc over the steps. Recount: 7 per side and 10 across the belly.
Gaps at the steps: Space the 7 side sc evenly over the step corners instead of bunching them at the row ends.
Tail droops: Tighten your tr, block firmly, or add stiffener.
Uneven tail lobes: Make sure Row 2 has exactly 25 sc and that you skipped 3 sc on each side of every lobe.
Bird hangs tilted: Move the loop one stitch toward the tail, which is the heavier side.
Eye closes up: Stretch the ch-1 sp open with the hook tip while the bird is damp.
Care
Hand wash in cool water with mild soap. Press out the water in a towel and dry flat, reshaping the bird. If you used stiffener, reapply it after washing.
Final Notes
Row 1 sets the 3.2 in (8.1 cm) width, and the shell rows bring the body to 1.5 in (3.8 cm) tall. The head adds 0.9 in (2.3 cm), for 2.4 in (6.1 cm) total. The border adds 0.3 in (0.8 cm) on every side, making the body 3.8 in (9.7 cm) wide. The beak and tail bring the finished bird to 5.5 in (14.0 cm) x 3.0 in (7.6 cm). If every checkpoint matches, your whole batch will match.
Happy crocheting!