
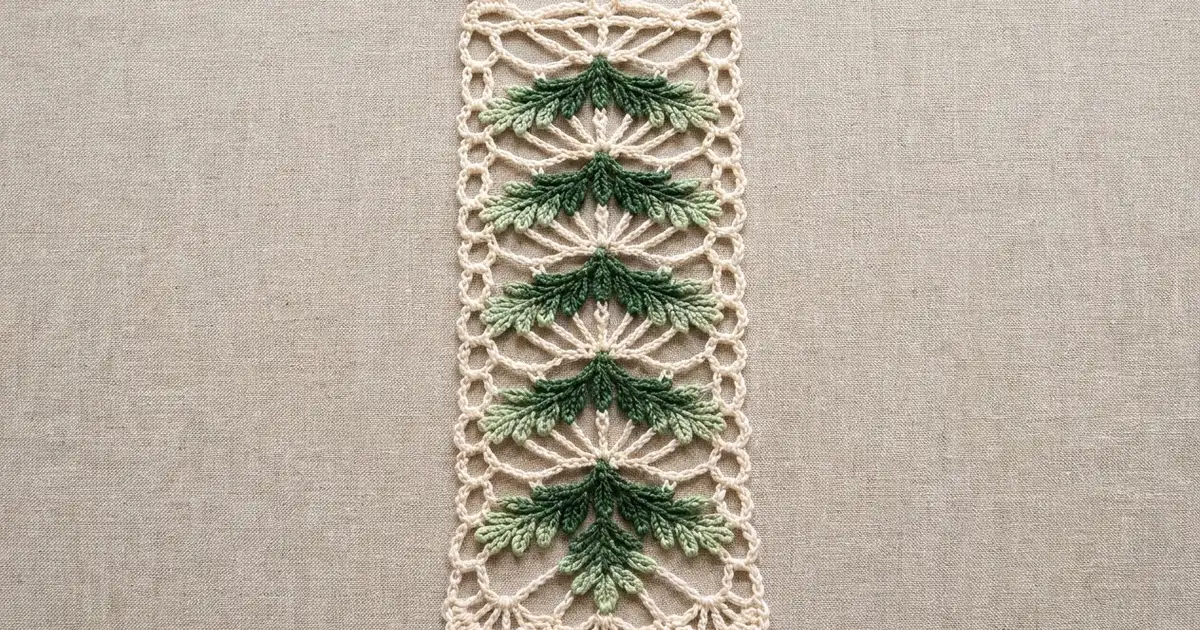
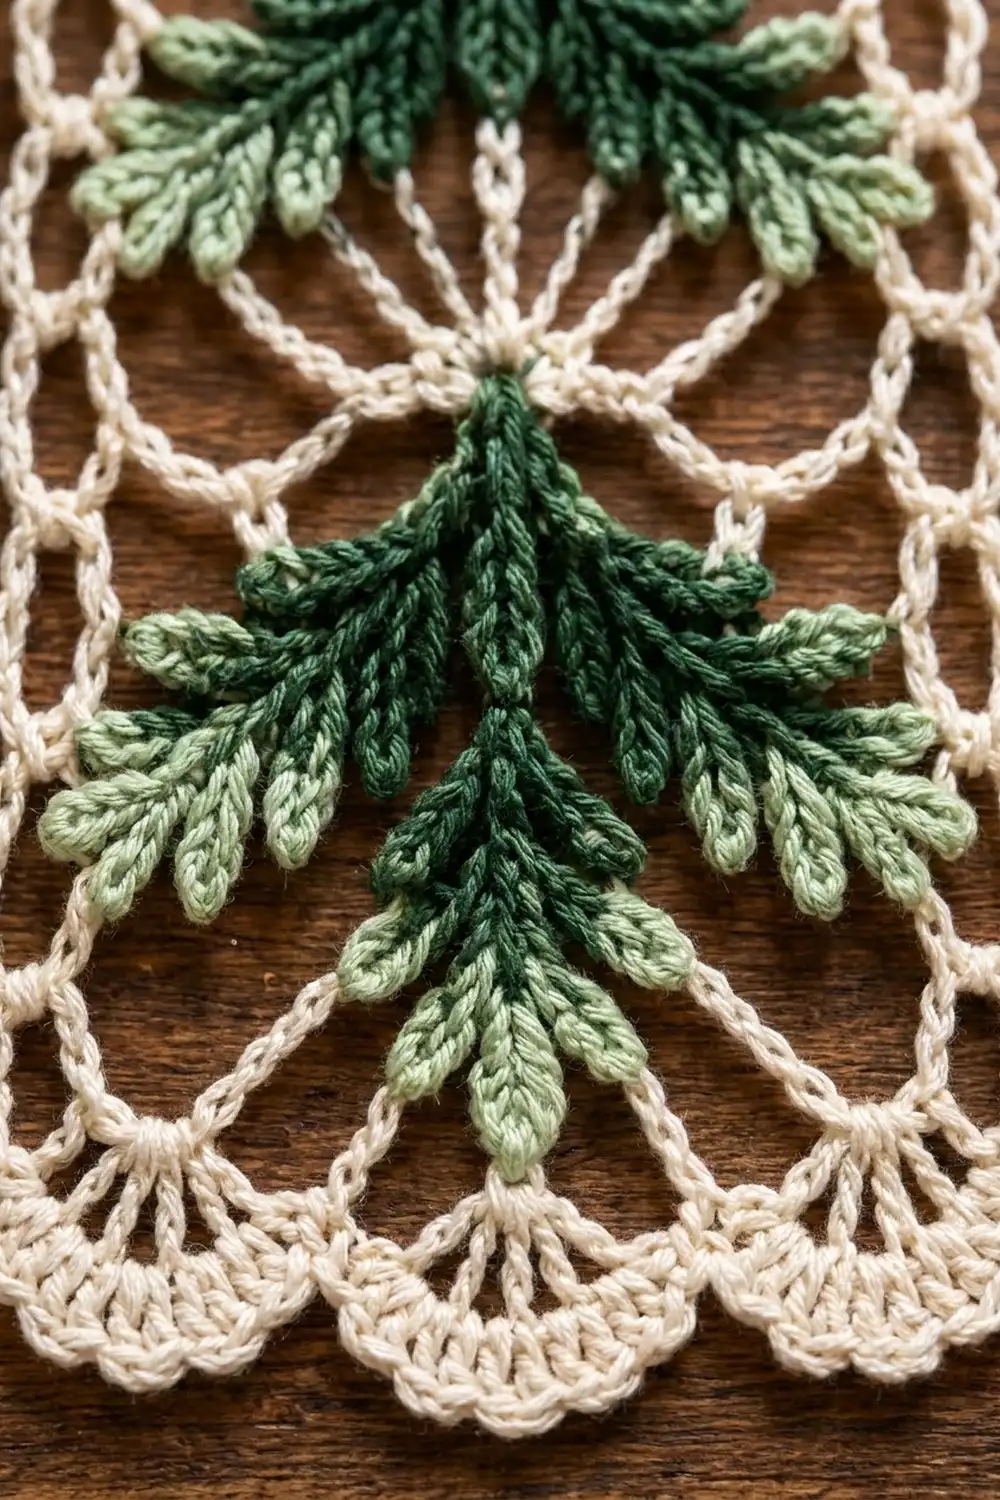
This lacy cream strip has a column of pine boughs running down its center. Each bough is two layers of crocheted leaves: a pale sage frond behind and a deep forest-green frond on top. They sit at the point of an openwork fan, so each branch looks as if it is hanging over a burst of light.
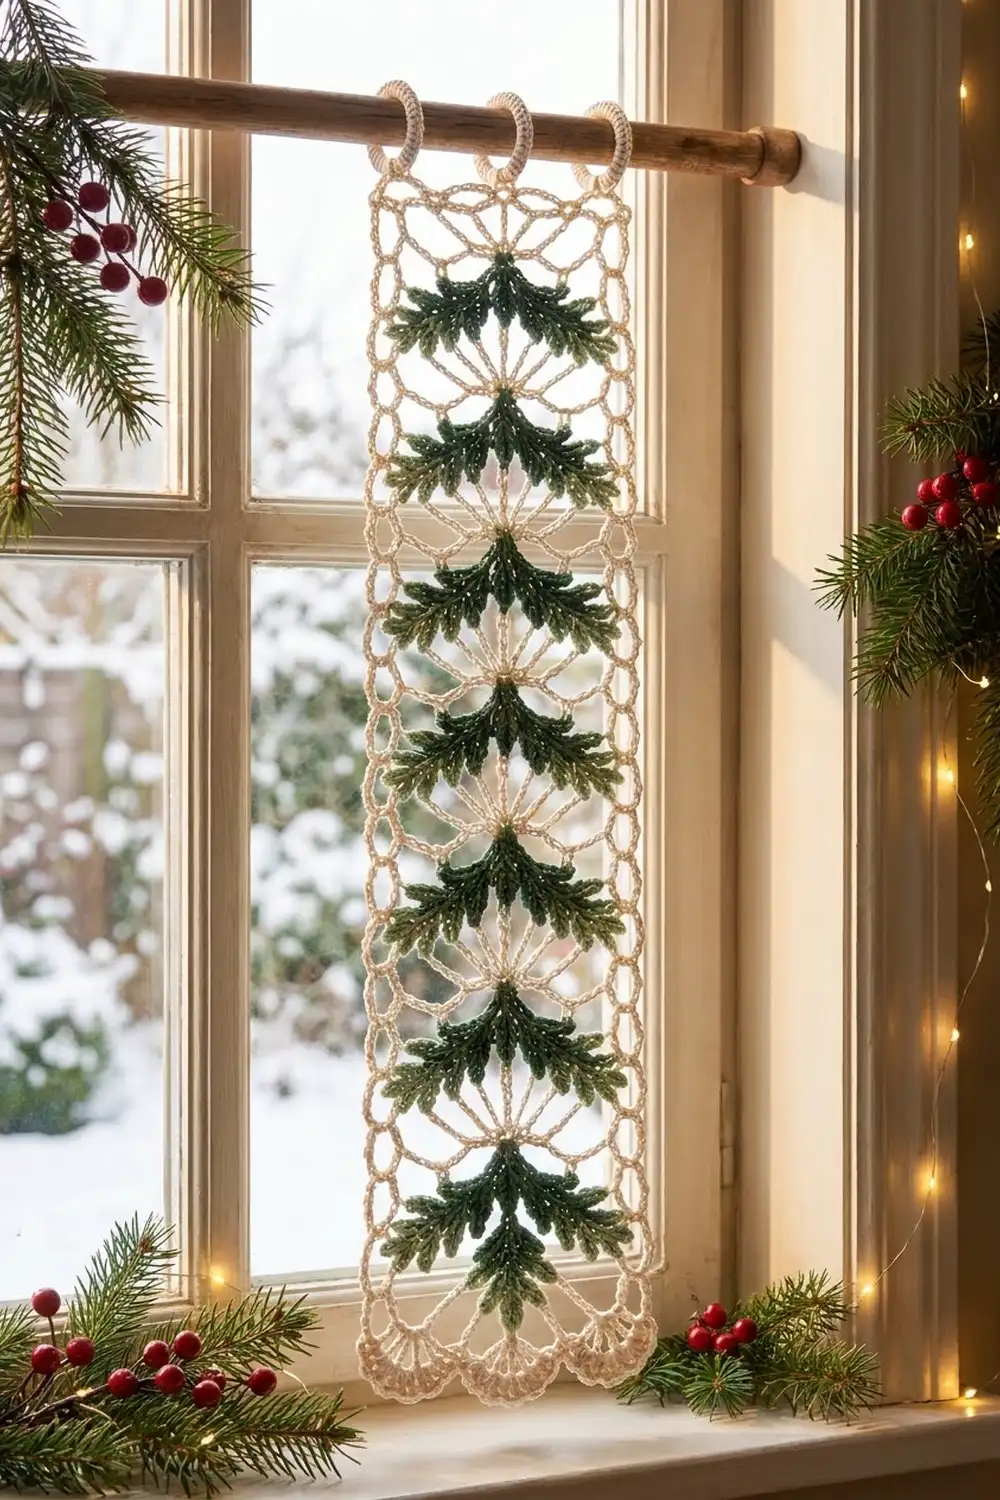
The strip has a calm, vintage holiday style. You can hang one strip in a narrow window or doorway. You can also make several identical strips and hang them side by side from a rod as a lace curtain, each strip hanging on its own. This pattern covers one strip.
The finished strip measures 5.5 in (14.0 cm) wide and 17.25 in (43.8 cm) long. The hanging loops add 1 in (2.5 cm), for a total hanging length of 18.25 in (46.4 cm). All instructions use US crochet terms.
You work the cream lace from the top down in rows: a short top band, five 3-row fan repeats, and a scalloped hem. A chain-loop edging goes up each long side, and three ring loops go across the top. The green boughs are made separately, layered, and sewn on at the end.
Finished Size and Construction
- Finished size: 5.5 in × 17.25 in (14.0 cm × 43.8 cm), or 18.25 in (46.4 cm) with the hanging loops
- Skill level: Intermediate
- Terminology: US
- Yarn weight: DK (#3 light) cotton
- Hook: 3.5 mm (E-4)
- Number of pieces: 1 lace strip plus 10 small appliqué fronds (2 per bough, 5 boughs)
- Layout: one vertical column of 5 fan repeats with 1 bough per fan
- Strip size before border: 5 in × 17.25 in (12.7 cm × 43.8 cm)
- Border depth: about 0.25 in (0.6 cm) per long side, plus 1 in (2.5 cm) of hanging loops at the top
Materials
Use a smooth mercerized or matte DK cotton. Cotton holds the lace shape well, blocks crisply, and doesn’t fuzz in a sunny window. Avoid fluffy or very soft acrylic, because it blurs the spokes.
- Cream (main color): 35 g, about 80 m (87 yd)
- Light sage green: 12 g, about 28 m (31 yd)
- Deep forest green: 10 g, about 23 m (25 yd)
These quantities include a margin of about 15% for a gauge swatch and tails.
Tools:
- 3.5 mm (E-4) crochet hook
- Tapestry needle
- Rust-proof pins
- Blocking mat or folded towel
- Spray bottle
- Scissors
- Measuring tape
Abbreviations (US Terms)
- ch: chain
- sl st: slip stitch
- sc: single crochet
- hdc: half double crochet
- dc: double crochet
- sk: skip
- sp(s): space(s)
- RS: right side
- WS: wrong side
Special stitches
- Fan: (dc, [ch 1, dc] 6 times) all in the same stitch. That is 7 dc and 6 ch-1 sps.
- Shell: worked the same way as a Fan, but in the hem row.
- Leaf: ch 5, sl st in 2nd ch from hook, sc in next ch, hdc in next ch, dc in last ch. This makes one pointed leaf about 0.5 in (1.3 cm) long.
Gauge and Checkpoints
Gauge: 20 sc = 4 in (10.2 cm) with a 3.5 mm hook.
Rows 1–2 of the pattern act as a test swatch. Crochet them first and measure before going on.
Checkpoints:
- After Row 2: 5 in (12.7 cm) wide and 1 in (2.5 cm) tall
- After Row 5 (first fan repeat): 4 in (10.2 cm) total length
- After Row 17: 16 in (40.6 cm) total length
- After Row 19: 17.25 in (43.8 cm) total length
- After the side edging: 5.5 in (14.0 cm) wide
If your Row 1 is wider than 5 in (12.7 cm), go down half a hook size. If it is narrower, go up half a size. Lace relaxes when blocked, so measure gently and don’t stretch it. Each 3-row fan repeat should block to 3 in (7.6 cm). If your repeats are much shorter, loosen up on the chain-5 loops rather than changing hooks.
Lace Strip (Cream)
Row 1 (RS): Ch 26. Sc in the 2nd ch from the hook and in each ch across. Turn. (25 sc)
Row 2: Ch 1, sc in the first sc, [ch 5, sk 3 sc, sc in the next sc] 6 times. Turn. (7 sc, 6 ch-5 loops)
The center sc (the 4th of the 7) is the anchor for every fan.
Fan Repeat (Rows 3–5)
Row 3 (Fan row): Ch 5 (counts as dc + ch 2). Sc in the first ch-5 loop, ch 5, sc in the next ch-5 loop, ch 2. Sk the next ch-5 loop and work a Fan in the center sc. Ch 2, sk the next ch-5 loop, sc in the next ch-5 loop, ch 5, sc in the last ch-5 loop, ch 2, dc in the last sc. Turn.
(9 dc total: 2 edge dc and 7 Fan dc; 4 sc; 2 ch-5 loops; 4 ch-2 sps; 6 ch-1 sps)
Row 4 (Spoke row): Ch 1, sc in the first dc. Ch 5, sk the ch-2 sp, sc in the next ch-5 loop. Ch 5, sc in the first Fan dc, [ch 4, sc in the next Fan dc] 6 times. Ch 5, sc in the next ch-5 loop, ch 5, sc in the 3rd ch of the turning ch. Turn.
(11 sc, 4 ch-5 loops, 6 ch-4 spokes)
The six ch-4 spokes fan out from the center point. This gives the radiating “sunburst” behind each bough.
Row 5 (Gather row): Ch 1, sc in the first sc. Ch 5, sc in the first ch-5 loop. Ch 5, sk the 2nd ch-5 loop and the first ch-4 spoke, then sc in the 2nd ch-4 spoke. Ch 5, sc in the center sc of the spokes (the 4th of the 7 sc worked across the Fan). Ch 5, sc in the 5th ch-4 spoke. Ch 5, sk the 6th spoke and the 3rd ch-5 loop, then sc in the 4th ch-5 loop. Ch 5, sc in the last sc. Turn.
(7 sc, 6 ch-5 loops)
This matches Row 2 exactly, so the next Fan row starts the same way.
Rows 6–17: Repeat Rows 3–5 four more times, for 5 fan repeats in total. Row 17 is a Gather row. (7 sc, 6 ch-5 loops)
Checkpoint: the strip should measure 16 in (40.6 cm) long: 1 in (2.5 cm) of top band plus 5 × 3 in (7.6 cm).
Scalloped Hem
Row 18 (Shell row): Ch 1, sc in the first sc. [Ch 3, sk the ch-5 loop, Shell in the next sc, ch 3, sk the ch-5 loop, sc in the next sc] 3 times. Turn.
(4 sc, 3 Shells = 21 dc, 18 ch-1 sps, 6 ch-3 sps)
The Shells sit in the 2nd, 4th, and 6th sc. The plain sc sit in the 1st, 3rd, 5th, and 7th sc.
Row 19 (Scallop edge): Ch 1, sc in the first sc. [3 sc in the ch-3 sp, sc in the first dc, (sc in the ch-1 sp, sc in the next dc) 6 times, 3 sc in the ch-3 sp, sc in the next sc] 3 times. Fasten off.
(Each scallop: 3 + 1 + 12 + 3 + 1 = 20 sc. Total: 1 + (3 × 20) = 61 sc)
Checkpoint: the strip should measure 17.25 in (43.8 cm) long. The hem adds 1.25 in (3.2 cm).
Pine Bough Appliqués
Make 5 light sage fronds and 5 forest-green fronds. Each frond is a straight chain with Leaves worked along both sides. You fold it into a chevron when you attach it.
Light Sage Frond (Back Layer, Make 5)
Ch 29.
- Side A: Sl st in the 2nd ch from the hook, [Leaf, sl st in each of the next 2 ch] 14 times. You are now at the end of the chain (1 + 28 = 29 ch used).
- Tip: Leaf.
- Side B: Rotate and work in the free loops of the foundation ch. [Sl st in each of the next 2 ch, Leaf] 14 times, then sl st in the last ch. Fasten off and leave a 12 in (30.5 cm) tail.
(29 Leaves: 14 + 1 + 14)
The frond measures about 5 in (12.7 cm) long.
Forest-Green Frond (Front Layer, Make 5)
Ch 21.
- Side A: Sl st in the 2nd ch from the hook, [Leaf, sl st in each of the next 2 ch] 10 times (1 + 20 = 21 ch used).
- Tip: Leaf.
- Side B: [Sl st in each of the next 2 ch, Leaf] 10 times, then sl st in the last ch. Fasten off and leave a tail.
(21 Leaves: 10 + 1 + 10)
The frond measures about 3.5 in (8.9 cm) long.
Shaping and Stacking
- Fold each light frond at its middle chain (the 15th ch) into an upside-down V, with each arm angling about 50° below horizontal. The span should be about 4 in (10.2 cm) from tip to tip.
- Fold each forest-green frond at its 11th ch the same way. Its span should be about 2.75 in (7.0 cm).
- Lay the green chevron on top of the sage chevron, with its fold 0.25 in (0.6 cm) above the sage fold. The pale leaves should frame the dark ones on all sides.
- Tack the two layers together at the fold with a few stitches.
You will sew the boughs onto the strip after blocking.
Border: Side Edging and Hanging Loops
Border gauge: a ch-5 loop lies about 1 in (2.5 cm) long, which is the same as one blocked pattern row.
Side Edging (Work on Each Long Side)
With RS facing, join cream at the end of Row 17. Ch 1, sc in the same row end, [ch 5, sc in the next row end] 14 times (Rows 16 down to 3). Ch 5, sc in the end of Row 1, spanning Row 2. Fasten off.
(Per side: 16 sc, 15 ch-5 loops)
Leave the hem rows (18–19) free so the scallops stay rounded.
Why the math works: 15 loops at about 1 in (2.5 cm) each cover 15 rows that each block to about 1 in (2.5 cm). Rows 1–2 together are also about 1 in (2.5 cm), which is why one loop spans both of them. Because the loop length matches the row height, the edge neither ruffles nor pulls in. The loops add about 0.25 in (0.6 cm) per side, so the width goes from 5 in (12.7 cm) to 5.5 in (14.0 cm).
Hanging Loops (Top Edge)
With RS facing, join cream in the first free loop of the foundation ch of Row 1. Number the 25 stitches from 1 to 25.
- Ch 1, sc in stitches 1–3.
- Ring: ch 10, sl st in the last sc made, work 14 sc into the ch-10 loop, sl st in the same sc.
- Sc in stitches 4–13 and work a Ring after stitch 13.
- Sc in stitches 14–23 and work a Ring after stitch 23.
- Sc in stitches 24–25. Fasten off.
(25 sc, plus 3 Rings of 14 sc each)
The Rings are anchored at stitches 3, 13, and 23, so the center Ring sits exactly in the middle of the strip. Each Ring stands about 1 in (2.5 cm) tall. The opening fits a rod up to 0.5 in (1.3 cm) in diameter.
Final Blocking
- Weave in all cream ends before blocking. Leave the green sewing tails.
- Soak the strip in cool water for 10 minutes, then press out the water in a towel. Don’t wring it.
- Pin it to 5.5 in × 17.25 in (14.0 cm × 43.8 cm).
- Pin each side loop straight. Pin each Fan spoke out into an even sunburst.
- Pin each scallop into a round curve.
- Spray-dampen the fronds and pin them in their chevron shape with the leaves spread out. Let everything dry completely.
- Sew one bough at each Fan point. Center the fold over the Fan base and tack the arms along the spokes, through the back layer only. Weave in the green ends.
Final Quality-Control Checklist
- The strip measures 5.5 in × 17.25 in (14.0 cm × 43.8 cm), or 18.25 in (46.4 cm) with the Rings.
- There are 5 Fans, each with 7 dc and 6 spokes.
- Every Gather row has 7 sc and 6 ch-5 loops.
- There are 3 scallops of 20 sc each, for 61 sc in Row 19.
- There are 15 side loops on each side.
- The 3 Rings are evenly spaced.
- All 5 boughs are centered and angled the same way, with green on top of sage.
- No ends are visible from the RS.
Troubleshooting
- The strip leans or twists: a Gather row is probably off by one. Count 7 sc in that row and recheck the spoke placement.
- The Fan cups instead of lying flat: your ch-4 spokes are too tight. Chain more loosely, or use ch 5 for the spokes.
- The side edges ruffle: make the side loops ch 4 instead of ch 5.
- The side edges pull in: make the side loops ch 6 instead of ch 5.
- The leaves curl: spray-block them flat and tack each leaf tip with one stitch.
- The boughs droop: tack each arm at its midpoint as well as at the fold.
Care
Hand wash in cool water with mild soap, press in a towel, and dry flat, pinning to size if needed. Don’t tumble dry, and don’t hang it while it is wet.
Final Notes
The measurement chain is:
- Row 1 sets the width at 5 in (12.7 cm).
- Each 3-row fan repeat adds 3 in (7.6 cm), so five repeats plus the top band bring the strip to 16 in (40.6 cm).
- The hem brings the length to 17.25 in (43.8 cm).
- The side edging brings the width to 5.5 in (14.0 cm).
- The Rings bring the total hanging length to 18.25 in (46.4 cm).
If your checkpoints match at each stage, the finished strip will hang straight and even. Hang it on its own or with matching strips on a rod.
Happy crocheting!